Cute Axolotl Crochet Ami Doll Free Pattern
Want an Ad-Free PDF Download of this pattern?
This pattern is available in my shops:
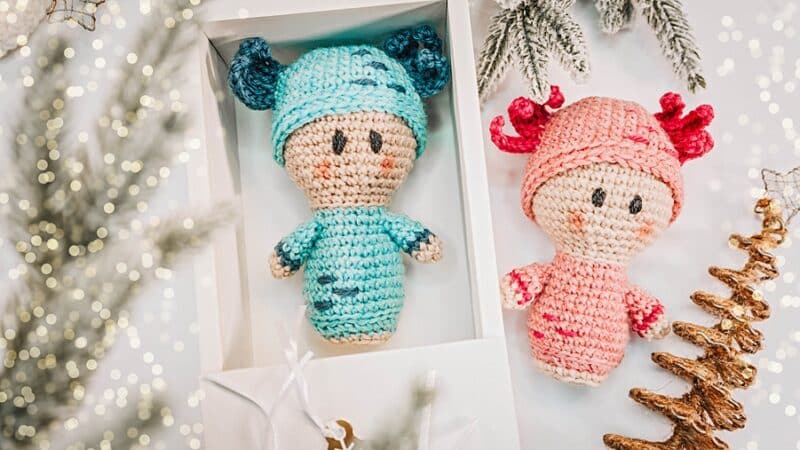
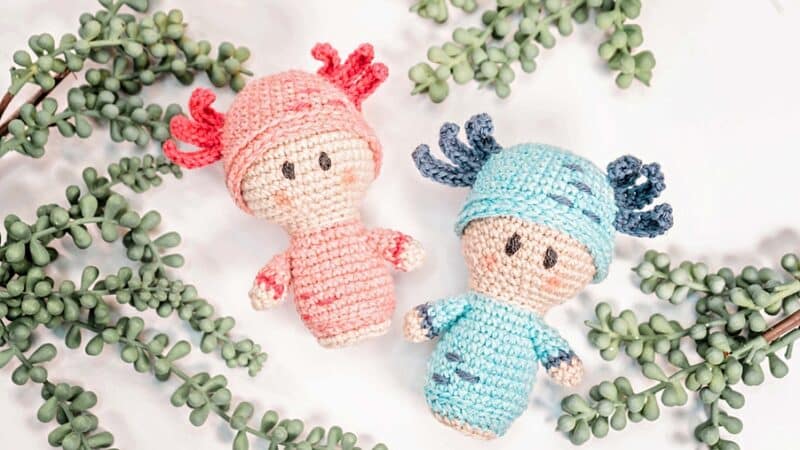
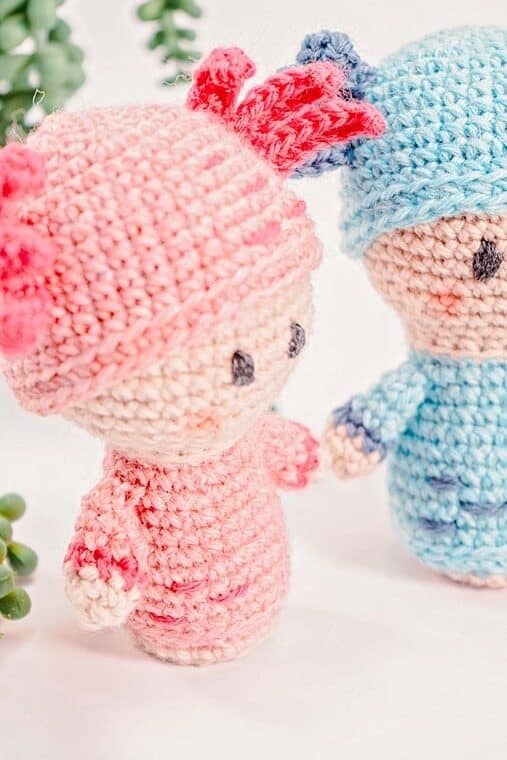
My son has asked for a real axolotl for Christmas, and that's not going to happen, so I know he will settle for this cute crochet Axolotl doll. At least I'm hoping so, but how could he not? So if you like cute amigurumi crochet, come learn how to crochet an axolotl doll.
Continue reading this post for the free crochet pattern, or purchase the ad-free downloadable pdf on RAVELRY or ETSY.
What Is An Axolotl?
An axolotl is a salamander that does not metamorphose naturally. Most amphibians have gills and live under the water when young, losing their gills as they develop lungs. After that, they live on land, like a tadpole to a frog.
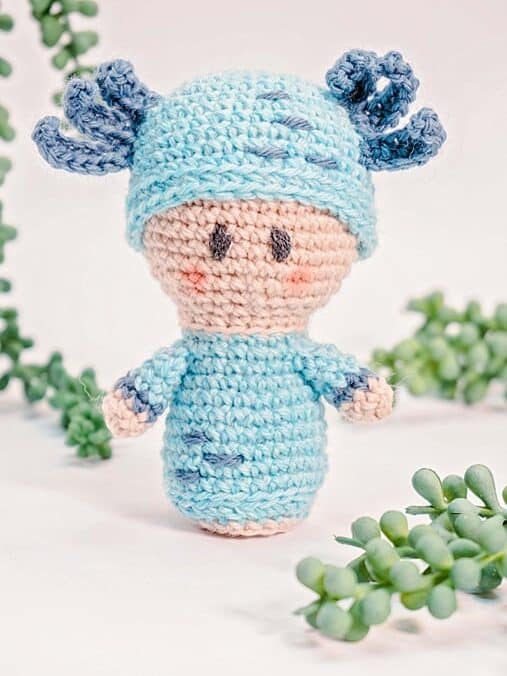
Axolotls keep their gills and continue to live in water as adults. Those cute little whispy things on the side of their heads? Yep, that's the gills. But they also develop lungs, so these little critters keep the best of both worlds. It's kinda like a superpower.
And if you want to own one, you will need a big tank. My son said it would take up his whole desk, so much bigger than his current goldfish. Also, be prepared to feed them worms, insects, and snails. See why I went the route of crocheting an axolotl? Mine is very low maintenance lol.
Why Is An Axolotl Popular?
So why is the Axolotl so popular? Minecraft. Yep, the game I hear my son talk about every day. Minecraft released a cute new axolotl character and kids everywhere wanted one. And they come in more than one color, some rarer than others.
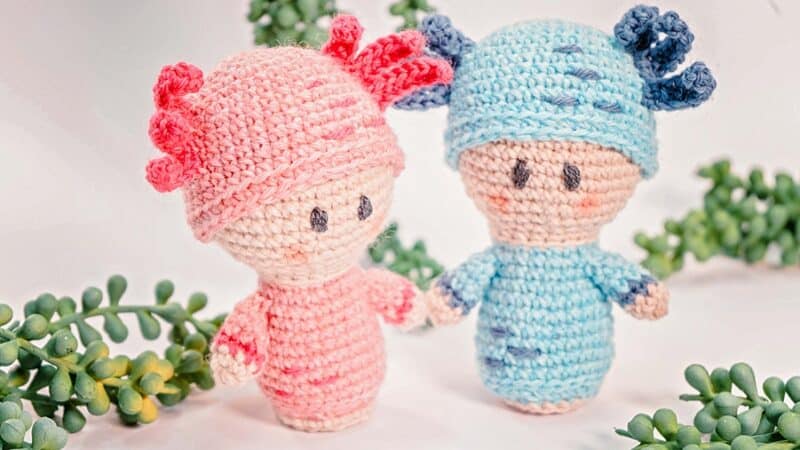
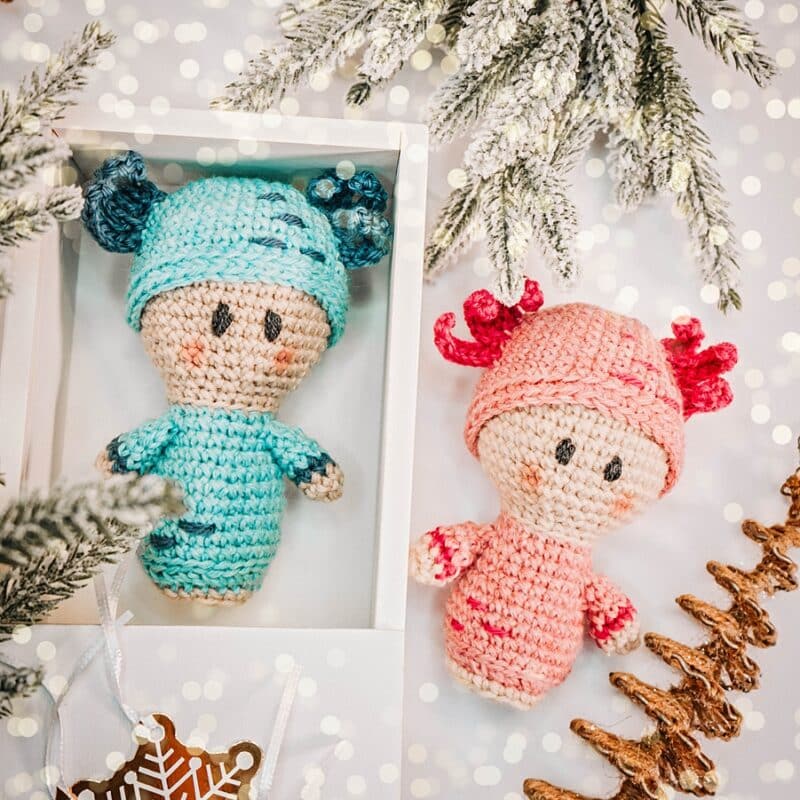
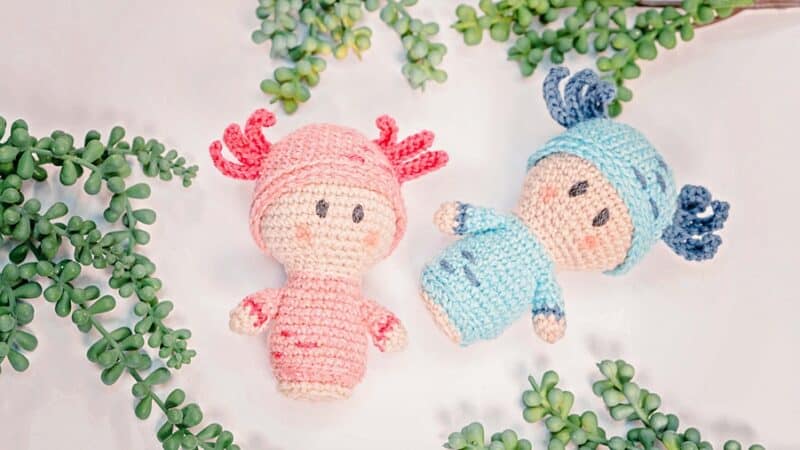
And it's not just kids that love axolotls; I mean, they are too cute and pretty incredible. I love how these crochet amigurumi axolotl dolls turned out, and I hope you and my son enjoy them as well.
I created two patterns that are similar to the Ami Deer; check out the Woodland Crochet Ami Fox and the Amigurumi Crochet Deer Free Pattern.
If you're interested in more Amigurumi Crochet, check out this other patterns Cute Amigurumi Bear Crochet Free Pattern.
What Is Needed To Crochet An Axolotl Doll:


Crochet Hook:
Size E (3.5mm) Hook, or hook to obtain gauge
Notions:
Removable stitch markers if needed
Yarn needle to weave in ends
Scissors
Fiberfill/Stuffing
3-4 Metal Washers (1 inch - 1 ¼ inch) - optional
Yarn & Yardage:
WeCrochet Wool of the Andes Worsted
100% Peruvian Highland Wool, 110 yds/50g
Colorways:
Oyster Heather / Beige (1 skein, 50 yds)
Blossom Heather / Light Pink (1 skein, 50 yds)
Dragonfruit / Dark Pink (1 skein, 30 yds)
WeCrochet Twill Fingering
100% Fine Superwash Merino Wool, Fingering Weight, 183 yds/50g
Colorway: Graphite Heather (1 ball, small amount for eyes). Or embroidery thread.
Abbreviations/Stitches:
blo - back loop only
ch - chain
flo - front loop only
MC - Magic Circle
rnd- round
sc - single crochet
sc2tog - single crochet 2 together, see below for invisible decrease tip.
sl st - slip stitch
st(s) - stitch(es)
Gauge:
18 sts x 20 rows = 4x4 inches in sc
Skill Level:
Easy / Beginner
Size:
Approx 6 inches tall and 3 inches wide
Notes:
Since this is worked continuously, a ch 1 at the beginning of the round is not needed. It is helpful to place a stitch marker on the first stitch of each round.
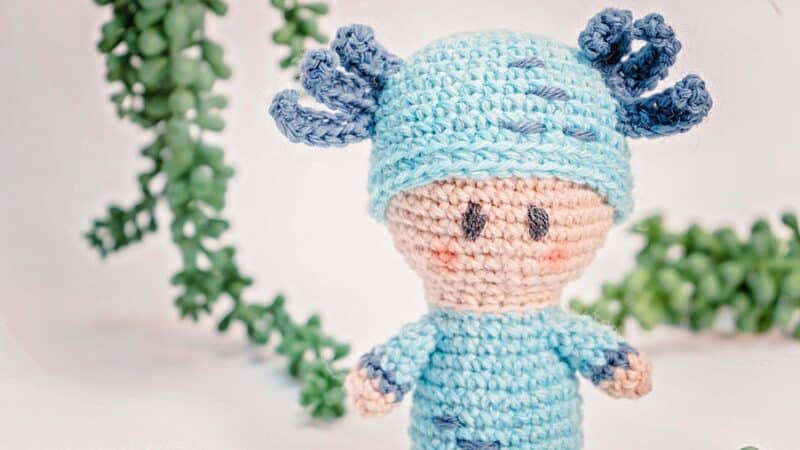
The body of the crochet doll is worked from top-down, with the arms crocheted after and stitched to the body. The hat is made as a separate piece and placed on the doll's head with the gills stitched to each side.
Axolotl Crochet Doll Video Tutorial:
The colorways for this pattern are written as:
Oyster Heather Yarn - Color A
Blossom Heather Yarn - Color B
Dragonfruit Yarn - Color C
Graphite Heather - Color D
Special Crochet Stitches:
Cross stitch single crochet: this variation of a crochet stitch works the stitch tighter and creates an ‘X’ on the front of the stitch. To work a single crochet stitch this way, insert your hook into the stitch, yarn under, pull up a loop, yarn over, pull through both loops on the hook. This way of working the single crochet stitch is used for the hat and the body.
Magic Circle: Start by creating a loop with your yarn. The tail of the working yarn will be over the working end. Insert your hook into the loop from behind. Yarn over and pull through the loop. Ch 1, Work all of your indicated stitches into the loop. Pull the tail end of your yarn to close the loop. Pull firmly to fasten the loop closed, this end will be weaved in and fastened off.
sc2tog invisible decrease: Insert your hook into the flo of the next stitch, insert your hook into the flo of the next stitch, yarn over, pull up a loop, yarn over and complete stitch.
Axolotl Amiguruimi Crochet Doll:
Head of axolotl
| Rnd | Description | St Count |
| 1 | Starting with the MC & with Color A, sc 6, do not join and work continuously. | 6 |
| 2 | 2 sc in each st around. | 12 |
| 3 | *2sc in first, sc in next st*; repeat from * to * around. | 18 |
| 4 | *2sc in first, sc in next 2 sts*; repeat from * to * around. | 24 |
| 5 | *2sc in first, sc in next 3 sts*; repeat from * to * around. | 30 |
| 6 | *2sc in first, sc in next 4 sts*; repeat from * to * around. | 36 |
| 7-14 | sc in each st around. | 36 |
| 15 | *sc2tog, sc in the next 4 sts*; repeat from * to * around. | 30 |
| 16 | *sc2tog, sc in the next 3 sts*; repeat from * to * around. | 24 |
| 17 | *sc2tog, sc in the next 2 sts*; repeat from * to * around. | 18 |
| 18 | sc in each st around, begin stuffing with fiberfill as you go, fasten off Color A. | 18 |
| 19 | With Color B, working in the blo for this rnd, sc in each st around. | 18 |
| 20 | *2sc in first, sc in next 8 sts*; repeat from * to * around. | 20 |
| 21 | sc in each st around. | 20 |
| 22 | *2sc in first, sc in next 4 sts*; repeat from * to * around. | 24 |
| 23 | sc in each st around. | 24 |
| 24 | *2sc in first, sc in next 5 sts*; repeat from * to * around. | 28 |
| 25-28 | sc in each st around. | 28 |
| 29 | Working in the blo for this rnd, sl st in each st around. | 28 |
| 30 | Working in the blo for this round, *sc2tog, sc in next 2 sts*; repeat from * to * around, fasten off Color B. | 21 |
| 31 | With Color A, working in the flo for this rnd, sc in each st around. | 21 |
| 32 | Working in the blo for this rnd, *sc2tog, sc in next*; repeat from * to * around, place washers in the bottom for weight. | 14 |
| 33 | sc2tog around, fasten off leaving a tail, using the tail end weave through the flo of remaining sts and pull closed, weave in end and fasten off. | 7 |
Arms of axolotl (Make 2)
| Rnd | Description | St Count |
| 1 | Starting with the MC & with Color A, sc 6, do not join and work continuously. | 6 |
| 2 | *2sc in first, sc in next 2 sts*; repeat from * to * around, fasten off Color A. | 8 |
| 3 | With Color C, sc in each st around, fasten off Color C. | 8 |
| 4 | With Color B, sc in each st around. | 8 |
| 5 | sc2tog, sc in remaining sts around. | 7 |
| 6 | sc2tog, sc in remaining sts around, fasten off leaving a tail, and sew arms to each side of the body on rnd 20. | 6 |
Axolotl Hat
| Rnd | Description | St Count |
| 1 | Starting with the MC & with Color B, sc 6, do not join and work continuously. | 6 |
| 2 | 2 sc in each st around. | 12 |
| 3 | *2sc in first, sc in next st*; repeat from * to * around. | 18 |
| 4 | *2sc in first, sc in next 2 sts*; repeat from * to * around. | 24 |
| 5 | *2sc in first, sc in next 3 sts*; repeat from * to * around. | 30 |
| 6 | *2sc in first, sc in next 4 sts*; repeat from * to * around. | 36 |
| 7-13 | sc in each st around. | 36 |
| 14 | Working in the blo for this rnd, sc in each st around, fasten off and do an invisible finish, weave in ends. | 36 |
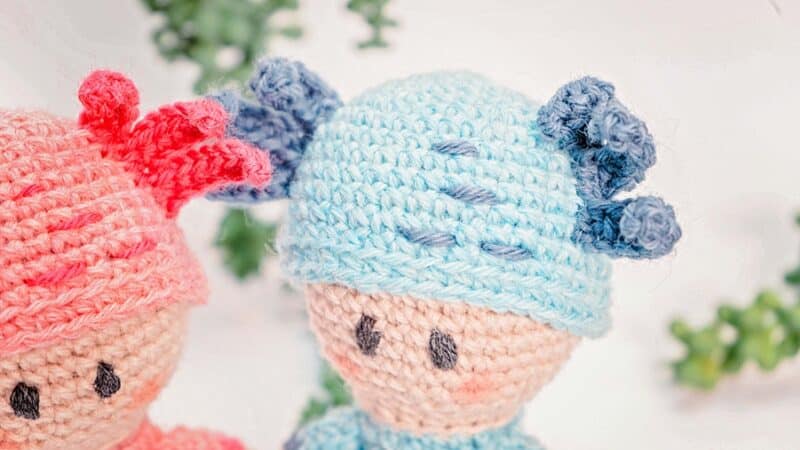
Axolotl Gills (Make 2)
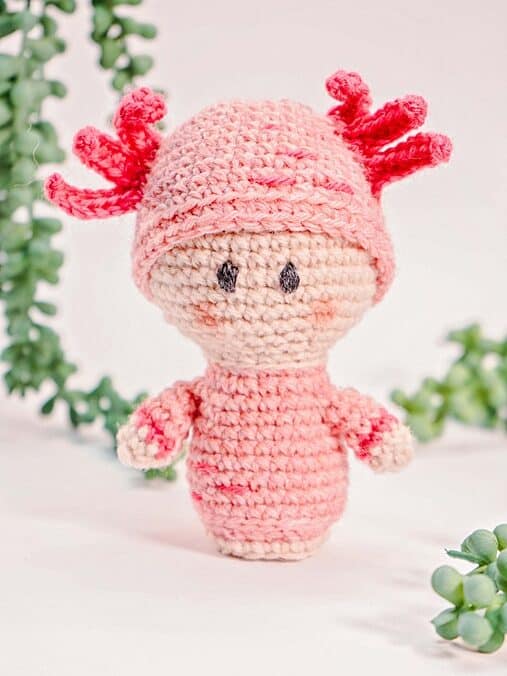
With Color C, *ch 8, sc in 2nd ch from the hook, sc in next, hdc 5*; repeat from * to * two more times, fasten off leaving a tail, stitch the gills to either side of hat.
Finishing & Details
With Color D, stitch eyes on the front of the axolotl doll's face on rnds 11-12. If shading is desired for the cheeks, use either make-up or pastels and a small brush and paint the powder onto the face of the doll. Use darker pink yarn to stitch on lines if desired. Weave in all ends and enjoy.
Thank you for sharing your creations on social media; I love seeing them! Tag #brianakdesigns or @brianakdesigns
Thank you to WeCrochet for sponsoring this post. #WeCCrochetGifts21


CROCHET & TAG
I hope you have enjoyed making the Cute Axolotl Crochet Ami Doll Free Pattern!
If you have made this, please share it on social media. Above all, I love to see the projects created with my patterns and also share your beautiful work.
Please use #brianakdesigns or @brianakdesigns
It is much appreciated and adored!