So you would like to make something for your little one, but maybe you’re nervous to crochet a sweater? This child crochet sweater pattern is the perfect place to start. We’ve made sure it’s super easy to follow with step-by-step instructions and a helpful video tutorial. And the best part? This stylish crochet pullover is specifically designed for beginners, so anyone can create it, it’s only two seams and crocheted flat! If you love easy and flat garments, you might also enjoy the Cuff To Cuff Easy Child Sweater Pattern or the The Cutest Baby Crochet Pants.
We all know children grow fast, it seems I’m always cleaning out the closet to donate clothing they’ve outgrown. This is why you will find this easy crochet pattern in 11 sizes. That way you can create a gorgeous handmade piece for whatever age.
Disclosure: This post contains affiliate links. Please read my disclosure for more info.
What you’ll love about the child pullover pattern.
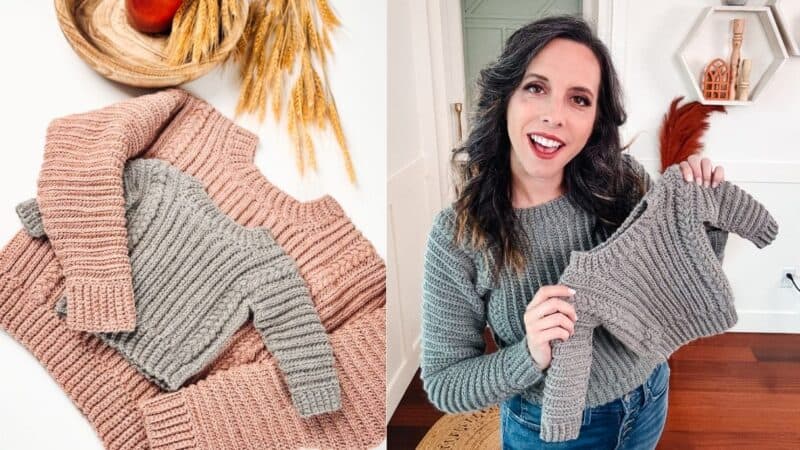
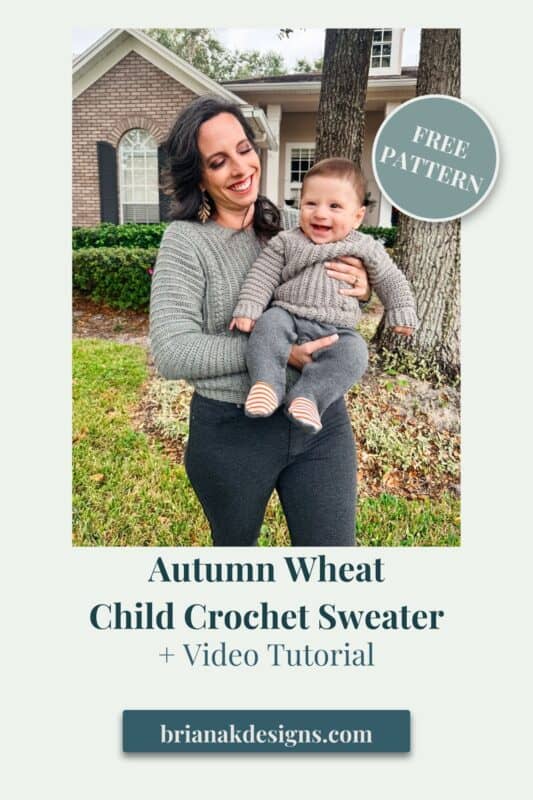
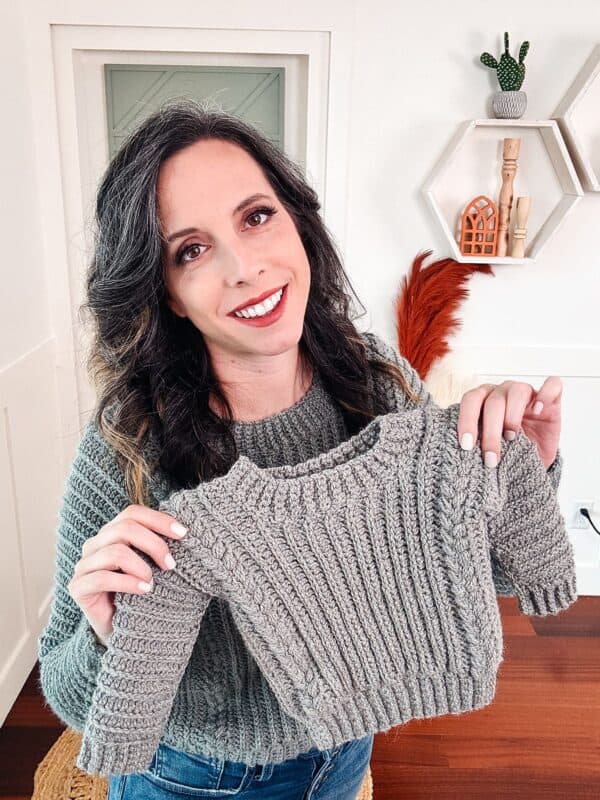
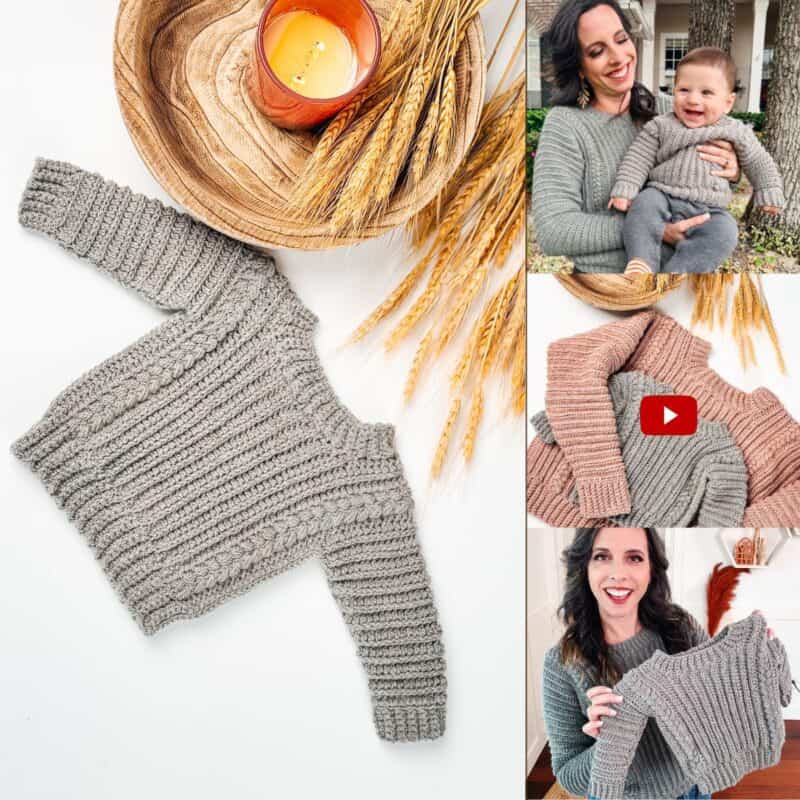
Autumn Wheat Child Sweater – Free Crochet Pattern
Save the Crochet Pattern on Ravelry
Pin this Free Crochet Sweater Pattern for Later.
How is the child sweater constructed?
Get ready to be amazed if you’ve never tried making a sweater using the flat construction technique! This pattern will guide you through crocheting each part in rows, including the ribbing. And the best part? All you need to do is fold the piece, sew two seams, and voila! You’ll have a stunning sweater for your little one to wear.
And what better way to welcome a new baby to the world than with a handmade crochet sweater. This baby sweater will be the hit of any baby shower, you will win the gift giving, wink wink.
Get the Autumn Wheat Pattern Collection
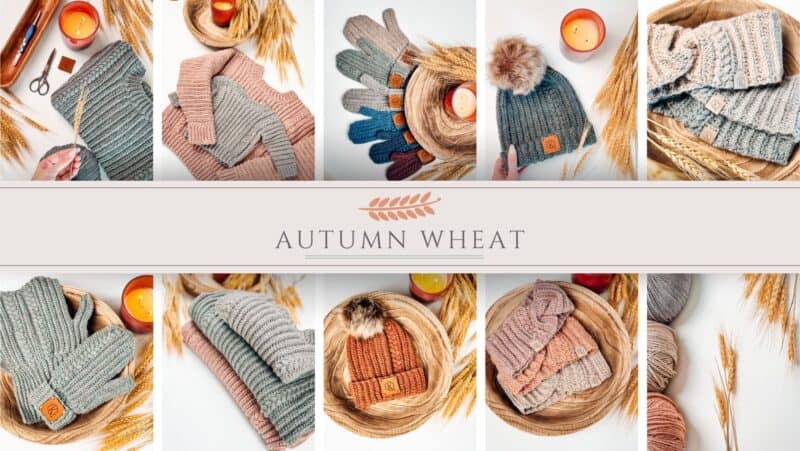
Join in on the crochet along happening now! Either view this pattern right here on the blog, or grab the individual pattern on Ravelry or Etsy. Or you can purchase the entire Autumn Wheat Collection.
What Crafty Crochet Supplies You Will Need
Yarn
WeCrochet Upcycle Worsted
Yarn Weight: Worsted Weight Yarn
33% Alpaca, 34% Wool, 33% Acrylic, 219yds/100g. Colorway Shown: Sage
Yarn Quantities
250 (275, 325, 400, 475) (600, 750, 800, 875, 950) yds
2 (2, 2, 2, 3) (3, 4, 4, 4, 5) balls
A Note On The Yarn & Substitutes
Please note, other weights can work as WeCrochet Upcycle varies per ball and tends to be on the thinner side, be sure to check gauge.
Yarn Substitutions
Heatherly Sport (shown in images) – 80% Acrylic, 20% Merino Wool, 328yds/100g
Brava Worsted – 100% Premium Acrylic, 218yds/100g
Mighty Stitch – 80% Acrylic/20% Superwash Wool, 208yds/100g
Swish DK – 100% Fine Superwash Merino Wool, 110yds/50g
Crochet Hook
Size H (5.0mm) Crochet Hook, or hook to obtain gauge.
Notions
Scissors
Yarn Needle
Removable Stitch Marker
Skill Level
Advanced Beginner
Sizing
0m (3m, 6m, 1y, 2y) (4y, 6y, 8y, 10y, 12y)
To fit chest: 15 (16, 17, 18, 21) (23, 25, 26.5, 28, 30). Actual measurements are in schematic.
Ease: This garment is meant to be worn with a 3-5 inch positive ease.
Abbreviations
ch – chain
blo – back loop only
flo – front loop only
hdc – half double crochet
hdc2tog -half double crochet two together
Puff sts – puff stitch
rem – remaining
RS – right side
sc – single crochet
sl st – slip stitch
st(s) – stitch(es)
WS – wrong side
Special Crochet Stitches
Half Double Crochet In The Third Loop: What’s really cool about half double crochet is that there’s a third loop on the back of your stitch. If you work hdc into the third loop, you get a totally different, knit-like fabric.
For this pattern, we are going to be working in rows, which means we will work on the row below in the third loop on the front of our work. Need a visual? Watch the video tutorial of this stitch.

Puff Stitch: Yarn over and insert your hook into the stitch/space. Yarn over again and pull up a long loop. (Yarn over and insert your hook into the same stitch/space. Yarn over again and pull up a long loop) two more times (7 loops on the hook). Yarn over and pull through the first 6 loops, yarn over and pull through remaining loops.
Gauge
17 sts and 11 rows = 4″ by 4″ in half double crochet worked in the third loop, blocked.
How to Crochet A Gauge Swatch
Working a gauge swatch will let you know if you will have the correct sizing for this pattern. A gauge swatch helps you practice the stitches used in this project and improve your stitch work for a flawless look.
Are you struggling to match gauge? Check out the blog post on What is Crochet Gauge and How To Fix It
Gauge Swatch Instructions:
Row 1: Ch 21, hdc in the 2nd ch from the hook and in the remaining sts across, turn.
Row 2: Ch 1 (does not count as a st), hdc in the third loop in each st across, turn.
Repeat Row 2 until there are 14 rows. Measure your swatch and adjust as needed.
Notes for the
- The yarn suggested in this pattern can vary in thickness depending on the color. It’s very important to keep checking gauge to make sure the sizing is correct.
- A ch 1 at the beginning of a row is not counted as a stitch.
- Using a stitch marker at the beginning of each row is recommended.
- The instructions and stitch counts are given for the smallest size, with the larger sizes in brackets ( ).
- Before you dive into your project, take a moment to identify the stitch and row counts that match the size you’re making. By highlighting or marking them, you’ll save time and effort later on. Trust us, this small step will make a big difference in your crochet journey!
- When brackets are used, [….] repeat the instructions inside the brackets as indicated.
- This Pattern Uses Standard US Terminology

Video Tutorial:
Watch how easy and beginner-friendly it is to work up this baby crochet sweater with a tutorial.

How To Crochet A Baby Sweater
To Unlock Exclusive Subscriber Content click the Box below and join for free! Grow will pop up so you can subscribe to my Blog. Enter your email and create a password. Every time you see Exclusive Content on my Blog, log in to your account!
Autumn Wheat Child Crochet Sweater Written Instructions
First Cuff
Row 1: Ch 5 (5, 5, 7, 7) (7, 9, 9, 9, 9), sc in the 2nd ch from the hook and in each st across, turn. | 4 (4, 4, 6, 6) (6, 8, 8, 8, 8) sts
Row 2: Ch 1 (does not count as a stitch here and throughout pattern), blo sc in each st across, turn.
Rows 3 – 20 (22, 22, 24, 24) (24, 26, 26, 28, 28): Repeat Row 2.
Rotate your work and sl st along the edge of one side of the ribbing, placing one sl st per row, turn. | 20 (22, 22, 24, 24) (24, 26, 26, 28, 28) sts
First Sleeve – Increasing
Row 1: Ch 1, flo hdc across, turn. |20 (22, 22, 24, 24) (24, 26, 26, 28, 28) sts
Row 2 (increasing row): Ch 1, (the hdc sts will be in the third loop for the remaining of the pattern unless indicated otherwise), hdc 2 in the first st, hdc in each st across until the last st, hdc 2 in the last stitch, turn. | 22 (24, 24, 26, 26) (26, 28, 28, 30, 30) sts
How to Work a Non-increasing Row: Ch 1, hdc in each st across, turn.
Increasing Repeats:
0m: Repeat increasing row on every 4th row 2 times, then continue to work non-increasing rows until a total of 14 sleeve rows. | 26 sts
3m: Repeat increasing row on every 4th row 2 times, then continue to work non-increasing rows until a total of 16 sleeve rows. | 28 sts
6m: Repeat increasing row on every 4th row 3 times, then continue to work non-increasing rows until a total of 18 sleeve rows. | 30 sts
1y: Repeat increasing row on every 4th row 3 times, then continue to work non-increasing rows until a total of 20 sleeve rows. | 32 sts
2y: Repeat increasing row on every 4th row 5 times, then continue to work non-increasing rows until a total of 24 sleeve rows. | 36 sts
4y: Repeat increasing row on every 3rd row 7 times, then continue to work non-increasing rows until a total of 28 sleeve rows. | 40 sts
6y: Repeat increasing row on every 4th row 8 times, then continue to work non-increasing rows until a total of 32 sleeve rows. | 42 sts
8y: Repeat increasing row on every 3rd row 9 times, then continue to work non-increasing rows until a total of 34 sleeve rows. | 46 sts
10y: Repeat increasing row on every 3rd row 11 times, then continue to work non-increasing rows until a total of 38 sleeve rows. | 52 sts
12y: Repeat increasing row on every 3rd row 13 times, then continue to work non-increasing rows until a total of 42 sleeve rows. | 56 sts
Join The Kindest Community
Join our vibrant community of crafters on Facebook today. Whether you enjoy crafting with others or simply have burning questions, we’ve got you covered – join us now!
First Sweater Body Section
Quick Tip
Want to more or less room in the bust? Add or remove rows in the First Body Section. Keep a note to do the same in the Second Body Section.
Note: Beg ch determines length of sweater, to alter length work more or fewer chs.
Attach 2nd ball of yarn to the opposite side of the row from the working yarn, ch 26 (28, 30, 32, 34) (34, 36, 36, 38, 40), fasten off.
Row 1: Ch 27 (29, 31, 33, 35) (35, 37, 37, 39, 41), sc in 2nd ch from hook, sc in next 5 (5, 5, 7, 7) (7, 7, 7, 7, 7) chs, hdc in next 20 (22, 24, 24, 26) (26, 28, 28, 30, 32) chs, hdc in next 26 (28, 30, 32, 36) (40, 42, 46, 52, 56) sleeve sts, hdc in next 20 (22, 24, 24, 26) (26, 28, 28, 30, 32) chs, sc in last 6 (6, 6, 8, 8) (8, 8, 8, 8, 8) chs, turn. | 78 (84, 90, 96, 104) (108, 114, 118, 128, 136) sts
Tip: You can use a stitch marker to mark the ribbing stitches so it’s easy to see when those should start and stop.
Reminder: hdc sts are worked in the third loop.
Row 2: Ch 1, blo sc in first 6 (6, 6, 8, 8) (8, 8, 8, 8, 8) sts, hdc across until 6 (6, 6, 8, 8) (8, 8, 8, 8, 8) sts rem, blo sc in the remaining sts, turn.
For sizes 4y, 6y, 8y, 10y, 12y: Repeat Row 2, two more times.
Puff Row: Ch 1, blo sc in first 6 (6, 6, 8, 8) (8, 8, 8, 8, 8) sts, [skip the next st, sc in next, work a puff st into the skipped st] work until the last 6 (6, 6, 8, 8) (8, 8, 8, 8, 8) sts, blo sc in the remaining sts, turn.
All sizes: Repeat Puff Row one more time.
Repeats: Repeat Row 2 for 2 (4, 4, 4 4) (4, 4, 6, 6, 8) more rows.
There will be a total of 6 (8, 8, 8, 8) (10, 10, 12, 12, 14) rows for this section.
Please note the hdc sts will not be worked in the third loop after the Puff Row. Resume working in the third loop after this Row.
Back of Sweater Section
Row 1: Ch 1, blo sc in first 6 (6, 6, 8, 8) (8, 8, 8, 8, 8) sts, hdc in next 26 (29, 31, 32, 35) (37, 39, 41, 45, 49) sts, turn. | 32 (35, 37, 40, 43) (45, 47, 49, 53, 57) sts.
Row 2: Ch 1, hdc in 26 (29, 31, 32, 35) (37, 39, 41, 45, 49) sts, blo sc in last 6 (6, 6, 8, 8) (8, 8, 8, 8, 8) sts, turn.
Rows 3- 12 (12, 14, 14, 16) (16, 18, 18, 20, 20): Repeat Rows 1-2.
Fasten off.

Front Section
Row 1: Sk 14 (14, 16, 16, 18) (18, 20, 20, 22, 22) sts from the last st worked in Row 1 of Back Section, join with a sl st, ch 1, hdc 26 (29, 31, 32, 35) (37, 39, 41, 45, 49) sts, blo sc in the last 6 (6, 6, 8, 8) (8, 8, 8, 8, 8) sts, turn. | 32 (35, 37, 40, 43) (45, 47, 49, 53, 57) sts.
Row 2: Ch 1, blo sc in the first 6 (6, 6, 8, 8) (8, 8, 8, 8, 8) sts, hdc 26 (29, 31, 32, 35) (37, 39, 41, 45, 49) sts, turn.
Row 3: Ch 1, hdc 26 (29, 31, 32, 35) (37, 39, 41, 45, 49) sts, blo sc in the last 6 (6, 6, 8, 8) (8, 8, 8, 8, 8) sts, turn. | 32 (35, 37, 40, 43) (45, 47, 49, 53, 57) sts.
Rows 4- 12 (12, 14, 14, 16) (16, 18, 18, 20, 20): Repeat Rows 2-3.
Before fastening off, ch 14 (14, 16, 16, 18) (18, 20, 20, 22, 22) sts for the neck space, then fasten off.
Quick Tip
Did you know that our tension can vary depending on our mood? To ensure that our garments turn out just right, let’s make sure we maintain consistent sizing. A quick tip is to check the gauge every 10-20 rows and make any necessary adjustments. This way our hard work on the crochet sweater pattern pays off and looks great.
Second Sweater Body Section
Row 1: Attach yarn to the right side of the sweater on the Back Section Row, blo sc in first 6 (6, 6, 8, 8) (8, 8, 8, 8, 8) sts, hdc across (including the ch sts), until 6 (6, 6, 8, 8) (8, 8, 8, 8, 8) sts rem, blo sc in the remaining sts, turn. | 78 (84, 90, 96, 104) (108, 114, 118, 128, 136) sts
Repeats: Repeat Row 1, 1 (3, 3, 3, 3) (3, 3, 5, 5, 7) more times.
Puff Row: Ch 1, blo sc in first 6 (6, 6, 8, 8) (8, 8, 8, 8, 8) sts, [skip the next st, sc in next, work a puff st into the skipped st] work until the last 6 (6, 6, 8, 8) (8, 8, 8, 8, 8) sts, blo sc in the remaining sts, turn.
All sizes: Repeat Puff Row one more time.
Repeats: Repeat Row 1 for 2 (2, 2, 2, 2) (4, 4, 4, 4, 4) more rows, turn and fasten off.
There will be a total of 6 (8, 8, 8, 8) (10, 10, 12, 12, 14) rows for this section.
Second Sleeve – Decreasing
Row 1: Sk 26 (28, 30, 32, 34) (34, 36, 36, 38, 40) sts, join with sl st, ch 1, hdc in the next 26 (28 , 30, 32, 36) (40, 42, 46, 52, 56) sts, leaving rem sts unworked, turn. | 26 (28 , 30, 32, 36) (40, 42, 46, 52, 56) sts
How to work a decreasing row: Ch 1, hdc2tog, hdc until the last 2 sts, hdc2tog, turn. | 24 (26 , 28, 30, 34) (38, 40, 44, 50, 54) sts
How to work a non-decreasing row: Ch 1, hdc in each st across, turn.
Repeats:
0m: Work 3 non-decreasing rows, then work a decreasing row, repeat decreasing row on every 4th row 2 times, then continue to work non-decreasing rows until a total of 14 sleeve rows. | 20 sts
3m: Work 5 non-decreasing rows, then work a decreasing row, repeat decreasing row on every 4th row 2 times, then continue to work non-decreasing rows until a total of 16 sleeve rows. | 22 sts
6m: Work 3 non-decreasing rows, then work a decreasing row, repeat decreasing row on every 4th row 3 times, then continue to work non-decreasing rows until a total of 18 sleeve rows. | 22 sts
1y: Work 5 non-decreasing rows, then work a decreasing row, repeat decreasing row on every 4th row 3 times, then continue to work non-decreasing rows until a total of 20 sleeve rows. | 24 sts
2y: Work 1 non-decreasing row, then work a decreasing row, repeat decreasing row on every 4th row 5 times, then continue to work non-decreasing rows until a total of 24 sleeve rows. | 24 sts
4y: Work 5 non-decreasing rows, then work a decreasing row, repeat decreasing row on every 3rd row 7 times, then continue to work non-decreasing rows until a total of 28 sleeve rows. | 24 sts
6y: Work 1 non-decreasing row, then work a decreasing row, repeat decreasing row on every 4th row 7 times, then continue to work non-decreasing rows until a total of 32 sleeve rows. | 26 sts
8y: Work 4 non-decreasing rows, then work a decreasing row, repeat decreasing row on every 3rd row 9 times, then continue to work non-decreasing rows until a total of 34 sleeve rows. | 26 sts
10y: Work 2 non-decreasing rows, then work a decreasing row, repeat decreasing row on every 3rd row 11 times, then continue to work non-decreasing rows until a total of 38 sleeve rows. | 28 sts
12y: Work 1 decreasing row, then repeat decreasing row on every 3rd row 13 times, then continue to work non-decreasing rows until a total of 42 sleeve rows. | 28 sts
Second Cuff
Row 1: Ch 5 (5, 5, 7, 7) (7, 9, 9, 9, 9), sc in the 2nd ch from the hook and in each st across, sl st into the flo of the next 2 sleeve sts, turn. | 4 (4, 4, 6, 6) (6, 8, 8, 8, 8) sts
Row 2: Skip the 2 sl sts, blo sc 4 (4, 4, 6, 6) (6, 8, 8, 8, 8), turn.
Row 3: Ch 1 (does not count as a st), blo sc 4 (4, 4, 6, 6) (6, 8, 8, 8, 8), sl st into the flo of the next 2 sleeve sts, turn.
Rows 4 – 20 (22, 22, 24, 24) (24, 26, 26, 28, 28): Repeat Rows 2-3 until all sts across the sleeve edge have been worked, fasten off and weave in ends.
How to Seam the Sweater
Wash and block. Fold sweater in half with RS facing out and WS together, align Sleeves and Body.
With yarn needle and preferred seaming method sew side seams beg at bottom hem, working up to Sleeves, then sew across Sleeves in one continuous seam. Rep seam on other side.,
Neck Ribbing
Row 1: Join with sl st in side of Neck, ch 5 (5, 5, 6, 6) (7, 7, 8, 8), sc in the 2nd ch from hook and across back towards neckline, sl st in next 2 sts of Neck, turn. | 4 (4, 4, 5, 5) (6, 6, 7, 7) sts
Row 2: Sk 2 sl sts, blo sc 4 (4, 4, 5, 5) (6, 6, 7, 7), turn.
Row 3: Ch 1, blo sc sc 4 (4, 4, 5, 5) (6, 6, 7, 7), sl st in next 2 sts (1 stitch per edge row around the neckline), turn.
Next Rows: Rep Rows 2-3 for ribbing around Neck.
Join last row to beginning row by slip stitching through blo of first and last row at the same time.
Fasten off.
Finishing the Easy Crochet Sweater Pattern
Weave in any ends and block again if necessary. Wear and enjoy!
How To Care For Your Crochet Sweater
Crocheted sweaters are unique, stylish wardrobe staples that can last for many years if they’re cared for properly. Here are some tips to help you keep your crochet sweater looking and feeling its best:
1. Hand Wash Only Machine washing can damage the fibers of a crocheted fabric, so be sure to always handwash your sweater. Use a mild detergent and cold to lukewarm water.
2. Lay Flat To Dry When you’re ready to dry your sweater, lay it flat on a towel or drying rack away from direct heat or sunlight. This will help the fabric retain its shape and texture.
3. Store Properly Hang your crocheted sweaters in a cool, dry place, such as your closet. If you live in a humid climate, you may want to consider using a cloth garment bag or cedar chest with mothballs for extra protection.
4. Spot Clean When Necessary To remove stains, use only gentle spotting techniques like dabbing and blotting. Avoid rubbing or scrubbing the fabric as it can damage the delicate fibers. For best results, take your sweater to a professional cleaner for more stubborn stains and discolorations.
Following these tips will keep your crocheted sweaters looking fresh and new!
Well, That Was Fun! What’s Next?