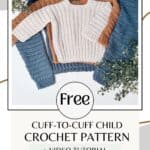

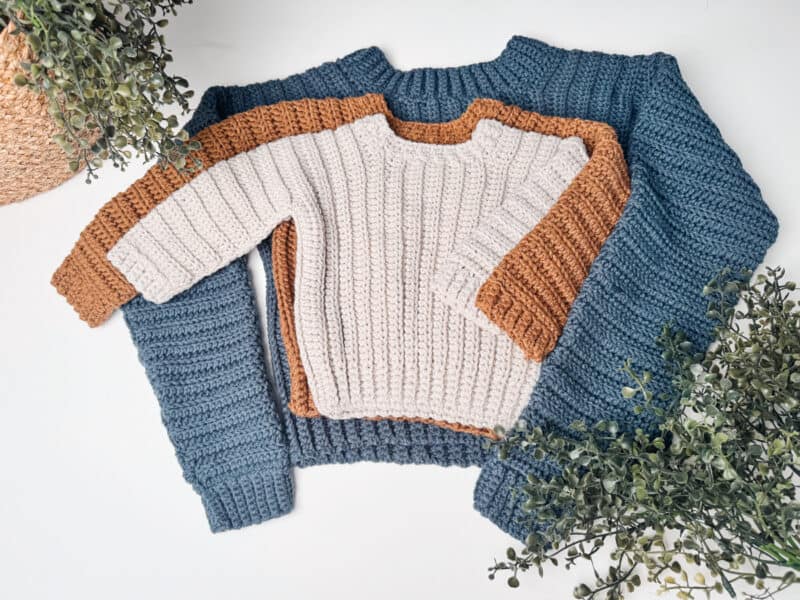
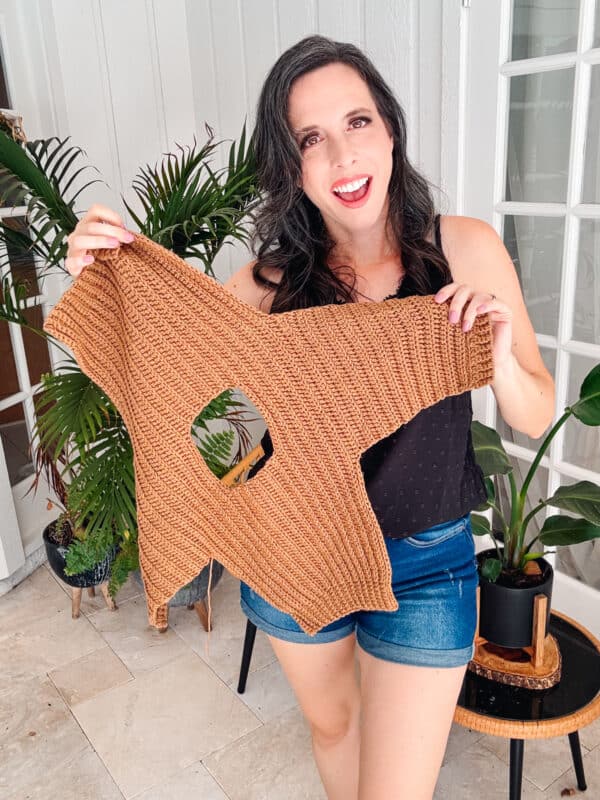
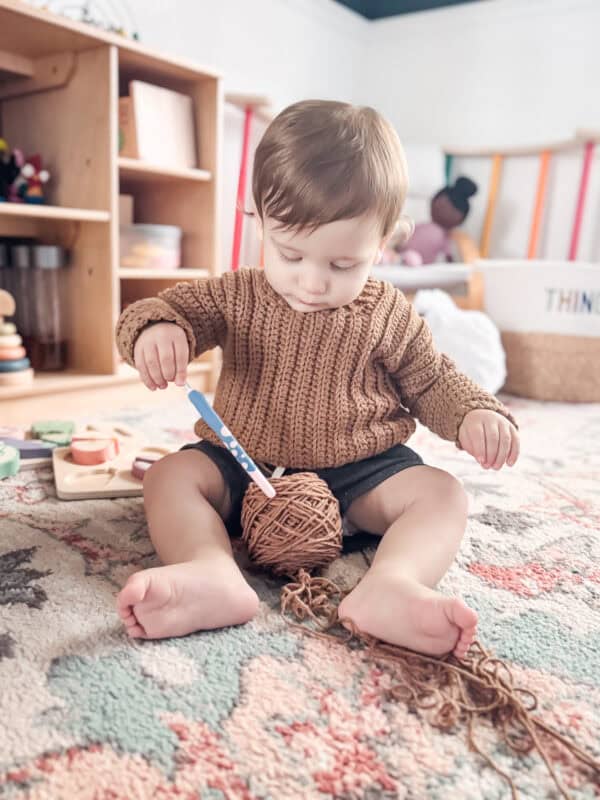
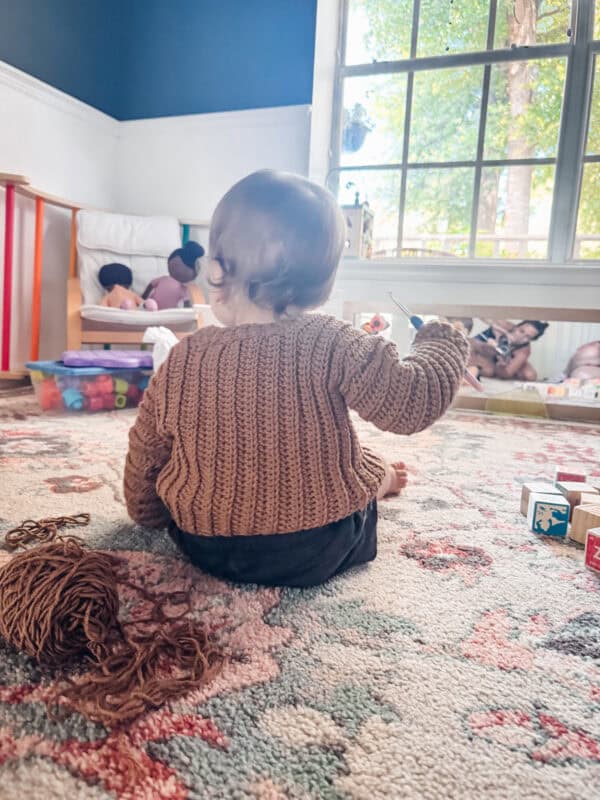
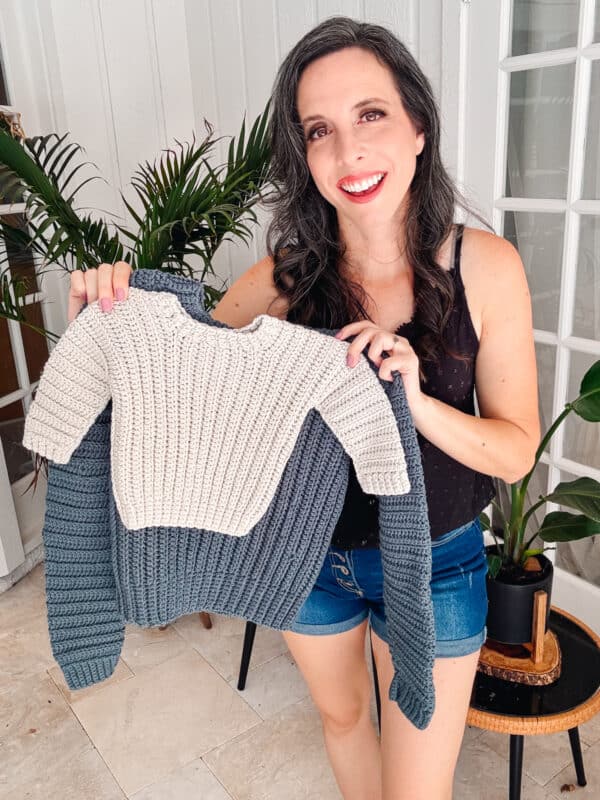
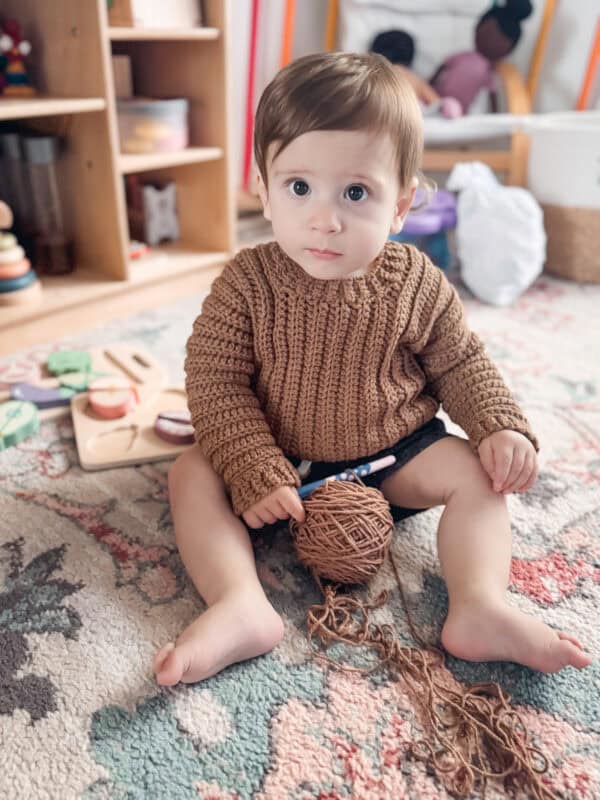
The Cuff to Cuff Easy Child Sweater Pattern is a perfect addition to your pattern library if you’re looking for a simple child-sized sweater that is worked flat and finished with only two seams! This sweater’s squishy, knit-look fabric is created with simple crochet stitches, so it’s a perfect project for any level of crocheter!
Disclosure: This post contains affiliate links. Please read my disclosure for more info.
Looking for more beginner-friendly flat crochet pieces for children? Check out the Cutest Cuffed Crochet Baby Pants and the Easy Child Crochet Sweater!
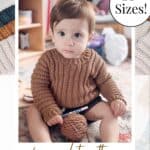
Kids grow so quickly, so you might find yourself making multiple of these sweaters in a variety of colors. And with 10 sizes ranging from Newborn to 12 years, you can make one for every little one you know!
What you’ll love about this child sweater pattern.
- 2 Easy Seams – This crochet sweater is one flat piece with only two seams.
- Fun Stitch Repeat – The texture of this stitch keeps the crochet fabric light, so it can be worn in any season.
- Lots of Sizes – The child-size crochet pattern is available in sizes Newborn to 12 years.
- Adjustable Length – This could be a crop top to a dress; adjusting the length is simple.
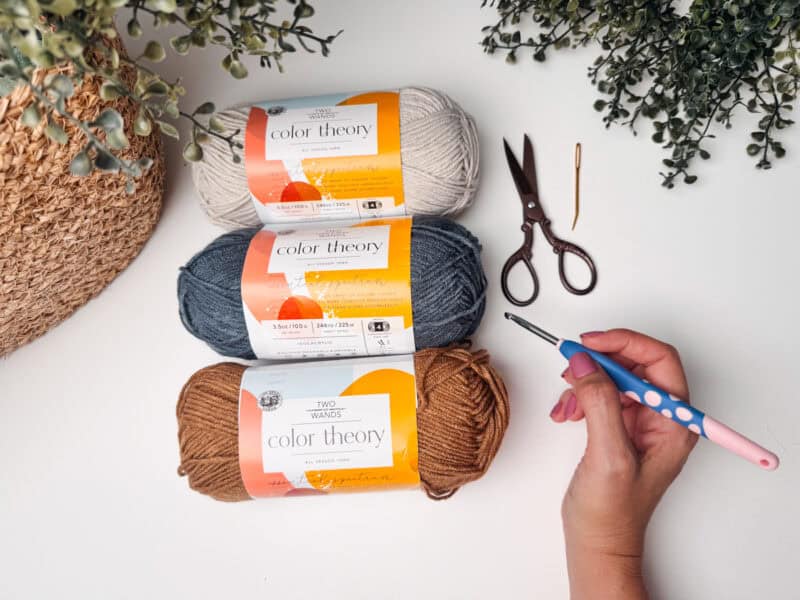
Crochet Supplies
Yarn
Lion Brand Color Theory
100% Acrylic, 246yds/100g
Yarn Quantities
330 (350, 375, 400, 460, 520, 600, 750, 850, 950) yds; 2 (2, 2, 2, 2, 3, 3, 4, 4, 4) skeins
Yarn Substitutions
Wool of the Andes Worsted – 100% Peruvian Highland Wool, 110yds/50g
Brava Worsted – 100% Premium Acrylic, 218yds/100g
Mighty Stitch – 80% Acrylic / 20% Superwash Wool 208yds/100g
Swish Worsted – 100% Fine Superwash Merino Wool 110yds/50g
Heatherly Worsted – 80% Acrylic, 20% Merino Wool, 218yds/100g
Remember always to check the gauge and drape when substituting yarns.
Crochet Hook
Size US H (5.0mm) Crochet Hook or hook to obtain gauge.
Notions
Scissors
Yarn Needle
Removable Stitch Marker
Skill Level
Advanced Beginner
Sizing
0m (3m, 9m, 1y, 2y) (4y, 6y, 8y, 10y, 12y)
To fit chest: 15 (16, 17, 18, 21) (23, 25, 26.5, 28, 30). Actual measurements are in schematic.
Ease: This garment is meant to be worn with a 3-5 inch positive ease.
Abbreviations
ch – chain
blo – back loop only
flo – front loop only
hdc – half double crochet
hdc2tog – half double crochet two together
RS – right side
sc – single crochet
sk – skip
sl st – slip stitch
st(s) – stitch(es)
Gauge
18 sts and 15 rows = 4″ by 4″ working in hdc blo, pre-blocked.
How to Crochet A Gauge Swatch
Working a gauge swatch will let you know if you will have the correct sizing for this pattern. It will also help you practice the stitches used in this project and improve your stitch work for a flawless look.
Are you struggling to match the gauge? Check out the blog post on What is Crochet Gauge and How To Fix It
Gauge Swatch Instructions:
Row 1:
Ch 21, hdc in the 2nd ch from the hook and in the remaining sts across, turn.
Row 2:
Ch 1 (does not count as a st), hdc blo in each st across, turn.
Repeat Row 2 until there are 17 rows. Measure your swatch and adjust as needed.
Construction
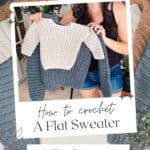
This simple and adorable sweater is crocheted from cuff-to-cuff in one piece, then seamed on each side. That’s right – only two seams! The knit look of this sweater is achieved by working simple stitches – single crochet and half double crochet in the back loop only – making it perfect for beginners looking to make their first sweater.
Love flat crochet as much as I do? You might also enjoy the Autumn Wheat Sweater or the Sparrow Sweater.
Special Stitches
Using a half-double crochet stitch in the back loop only creates a knit-look sweater when crocheted cuff-to-cuff.
Pattern Notes
- A ch 1 at the beginning of a row is not counted as a stitch.
- Using a stitch marker at the beginning of each row is recommended.
- The instructions and stitch counts are given for the smallest size, with the larger sizes in brackets ( ).
- Before you dive into your project, take a moment to identify the stitch and row counts that match the size you’re making. By highlighting or marking them, you’ll save time and effort later on. Trust us, this small step will make a big difference in your crochet journey!
- When brackets are used, [….] repeat the instructions inside the brackets as indicated.
- This Pattern Uses Standard US Terminology
Subscribe & Like
Video Tutorial for the Cuff-to-Cuff Easy Child Sweater
Relax & Crochet
Upgrade to the Printable PDF
Beautifully formatted to print and relax while crocheting. The paid pattern includes:
The Ad-Free PDF can be purchased on Etsy or Ravelry.
Click the box below to unlock this exclusive subscriber content for free. Add your email and create a password. If you are having trouble, reset your password or log in to the Grow Portal.
I’m thrilled to share this amazing crochet pattern with you! Please don’t copy, paste, or distribute this pattern. Prefer an ad-free experience? Purchase a digital PDF file for a small fee from one of my online stores. I appreciate your support and readership. You are why I can keep doing what I love and sharing it with others. Thank you from the bottom of my heart.
Written Child Crochet Sweater Instructions
First Cuff
Row 2 (increasing row):
Ch 1, hdc blo 2 in the first st, hdc blo until the last st, hdc blo 2 in the last stitch, turn. | 24, (26, 26, 28, 30) (30, 32, 32, 34, 36) sts
Row 3 (non-increasing row):
Ch 1, hdc blo in each st across, turn.
Repeats:
Newborn:
Repeat increasing row every 4 rows 2 times, then continue to work non-increasing rows until a total of 14 sleeve rows. | 28 sts
3 Months:
Repeat increasing row every 4 rows 3 times, then continue to work non-increasing rows until a total of 16 sleeve rows. | 30 sts
9 Months:
Repeat increasing row every 4 rows 3 times, then continue to work non-increasing rows until a total of 18 sleeve rows. | 32 sts
1 Year:
Repeat increasing row every 4 rows 3 times, then continue to work non-increasing rows until a total of 20 sleeve rows. | 34 sts
2 Years:
Repeat increasing row every 4 rows 4 times, then continue to work non-increasing rows until a total of 24 sleeve rows. | 38 sts
4 Years:
Repeat increasing row every 3 rows 6 times, then continue to work non-increasing rows until a total of 28 sleeve rows. | 42 sts
6 Years:
Repeat increasing row every 3 rows 7 times, then continue to work non-increasing rows until a total of 30 sleeve rows. | 46 sts
8 Years:
Repeat increasing row every 3 rows 9 times, then continue to work non-increasing rows until a total of 34 sleeve rows. | 50 sts
10 Years:
Repeat increasing row every 3 rows 10 times, then continue to work non-increasing rows until a total of 38 sleeve rows. | 54 sts
12 Years:
Repeat increasing row every 3 rows 11 times, then continue to work non-increasing rows until a total of 40 sleeve rows. | 58 sts
Style Tip
- This is the section where we have the option to adjust the length. For longer or shorter sweater lengths, work fewer or more chs. If the number of chs here are altered, ensure you work the same number of chs, plus 1 additional turning ch, at the beginning of the next row.
First Body Section
Setup:
Turn, attach a 2nd ball of yarn to the left side of the garment and ch 28 (30, 32, 34, 36) (36, 38, 38, 40, 42), fasten off. These chs will be worked into when working across the next row.
Row 1:
Ch 29 (31, 33, 35, 37) (37, 39, 39, 41, 43), starting in the 2nd ch from the hook sc in the first 6 (6, 6, 8, 8) (8, 8, 8, 10, 10) chs, hdc in each ch across to sleeve sts, hdc blo in each st across sleeve, hdc in each ch across until the last 6 (6, 6, 8, 8) (8, 8, 8, 10, 10) chs, sc in the rem 6 (6, 6, 8, 8) (8, 8, 8, 10, 10) chs, turn. | 84 (90, 96, 102, 110) (114, 122, 126, 134, 142) sts
Row 2:
Ch 1, sc blo in the first 6 (6, 6, 8, 8) (8, 8, 8, 10, 10) sts, hdc blo across until the last 6 (6, 6, 8, 8) (8, 8, 8, 10, 10) sts, sc blo in the rem sts, turn.
Repeat Row 2 for a total of 8 (10, 10, 10, 10) (12, 12, 12, 14, 14) rows in this section.
Tip
Want to increase or decrease the chest size? Add or remove rows in this section. Keep a note to do the same in the Second Body Section.
Back Section
Tip:
To keep the neckline edge clean and tight, hdc through both loops for the first/last st in the row that is the neckline edge.
Row 1:
Ch 1, sc blo in the first 6 (6, 6, 8, 8) (8, 8, 8, 10, 10) sts, hdc blo in the next 29 (32, 34, 35, 38) (40, 43, 45, 46, 50) sts, leave the rem sts unworked, turn. | 35 (38, 40, 43, 46) (48, 51, 53, 56, 60) sts
Row 2:
Ch 1, hdc blo in the first 29 (32, 34, 35, 38) (40, 43, 45, 46, 50) sts, sc blo in the last 6 (6, 6, 8, 8) (8, 8, 8, 10, 10) sts, turn.
Repeats:
Repeat Rows 1-2 for a total of 8 (8, 10, 10, 12) (12, 14, 16, 16, 18) rows in this section. Fasten off the yarn.
Join The Kindest Community
Join our vibrant community of crafters on Facebook today. Whether you enjoy crafting with others or simply have burning questions, we’ve got you covered – join us now!
Front Section
Tip:
To keep the neckline edge clean and tight, hdc through both loops for the first/last st in row that is the neckline edge.
Row 1:
Count and sk 14 (14, 16, 16, 18) (18, 20, 20, 22, 22) sts over from Row 1 of the back section and attach yarn, ch 1, Hdc blo in the first 29 (32, 34, 35, 38) (40, 43, 45, 46, 50) sts, Sc blo in the last 6 (6, 6, 8, 8) (8, 8, 8, 10, 10) sts, turn. | 35 (38, 40, 43, 46) (48, 51, 53, 56, 60) sts
Row 2:
Ch 1, Sc blo in the first 6 (6, 6, 8, 8) (8, 8, 8, 10, 10) sts, hdc blo in the next 29 (32, 34, 35, 38) (40, 43, 45, 46, 50) sts, turn.
Repeats:
Repeat Rows 1-2 for a total of 8 (8, 10, 10, 12) (12, 12, 12, 14, 14) rows in this section. Ch 14 (14, 16, 16, 18) (18, 20, 20, 22, 22) and fasten off.
Second Body Section
With the RS facing, attach the yarn to the farthest right st on the back panel.
Row 1:
Ch 1, sc blo in the first 6 (6, 6, 8, 8) (8, 8, 8, 10, 10) sts, hdc blo in the next 29 (32, 34, 35, 38) (40, 43, 45, 46, 50) sts, hdc across chs, hdc blo in the next 29 (32, 34, 35, 38) (40, 43, 45, 46, 50) sts Sc blo in the last 6 (6, 6, 8, 8) (8, 8, 8, 10, 10) sts, turn. | 84 (90, 96, 102, 110) (114, 122, 126, 134, 142)
Row 2:
Ch 1, Sc blo in the first 6 (6, 6, 8, 8) (8, 8, 8, 10, 10) sts, Hdc blo across until the last 6 (6, 6, 8, 8) (8, 8, 8, 10, 10) sts, Sc blo in the rem 6 (6, 6, 8, 8) (8, 8, 8, 10, 10) sts, turn.
Rep: Rep Row 2 for a total of 8 (10, 10, 10, 10) (12, 12, 12, 14, 14) rows in this section. Fasten off the yarn.
Second Sleeve – Decreasing
Row 1:
With the RS facing, sk 28 (30, 32, 34, 36) (36, 38, 38, 40, 42) sts, join with sl st, ch 1, hdc in the next 28 (30, 32, 34, 38) (42, 46, 50, 54, 58) sts, leaving rem sts unworked, turn. | 28 (30, 32, 34, 38) (42, 46, 50, 54, 58) sts.
How to work a non-decreasing row:
Ch 1, hdc in each st across, turn.
How to work a decreasing row:
Ch 1, hdc2tog, hdc blo until the last 2 sts, hdc2tog, turn. | decreases by 2 sts.
Repeats:
Newborn:
Work a decreasing row, then repeat the decreasing row every 4 rows 2 times, then continue to work non-decreasing rows until a total of 14 sleeve rows. | 22 sts
3 Months:
Repeat decreasing row row every 4 rows 4 times, until a total of 16 sleeve rows. | 22 sts
9 Months:
Repeat non-decreasing row for 1 more rows, then repeat decreasing row row every 4 rows 4 times, then continue to work non-decreasing rows until a total of 18 sleeve rows. | 24 sts
1 Year:
Repeat non-decreasing row for 5 more rows, then repeat decreasing row row every 4 rows 3 times, then work one more decrease row, then continue to work non-decreasing rows until a total of 20 sleeve rows. | 26 sts
2 Years:
Repeat non-decreasing row for 2 more rows, then repeat decreasing row row every 4 rows 5 times, then continue to work non-decreasing rows until a total of 24 sleeve rows. | 28 sts
4 Years:
Repeat non-decreasing row for 8 more rows, then repeat decreasing row row every 3 rows 7 times, then continue to work non-decreasing rows until a total of 28 sleeve rows. | 28 sts
6 Years:
Repeat non-decreasing row for 7 more rows, then repeat decreasing row row every 3 rows 8 times, then continue to work non-decreasing rows until a total of 30 sleeve rows. | 30 sts
8 Years:
Repeat non-decreasing row for 5 more rows, then repeat decreasing row row every 3 rows 10 times, then continue to work non-decreasing rows until a total of 34 sleeve rows. | 30 sts
10 Years:
Repeat non-decreasing row for 6 more rows, then repeat decreasing row row every 3 rows 11 times, then continue to work non-decreasing rows until a total of 38 sleeve rows. | 32 sts
12 Years:
Repeat non-decreasing row for 5 more rows, then repeat decreasing row every 3 rows 12 times, then continue to work non-decreasing rows until a total of 40 sleeve rows. | 34 sts
Second Cuff
Row 1:
Ch 4 (4, 5, 5, 6) (6, 7, 8, 8, 8), sc in the 2nd ch from the hook and and in each st across, sl st into the flo of the next 2 sleeve sts, turn. | 3 (3, 4, 4, 5) (5, 6, 7, 7, 7) sts
Row 2:
Skip the 2 sl sts, blo sc in each st across, turn.
Row 3:
Ch 1 (does not count as a st), blo sc in each st across, sl st into the flo of the next 2 sleeve sts, turn.
Rows 4 – 22 (22, 24, 26, 28) (28, 30, 30, 32, 34):
Repeat Rows 2-3 until all sts across the sleeve edge have been worked, fasten off and weave in ends.
Seaming
Wash and block. Fold sweater in half with RS facing out and WS together, align Sleeves and Body.
With yarn needle and preferred seaming method, sew side seams beg at bottom hem working up to Sleeves, then sew across Sleeves in one continuous seam. Rep seam on other side.
Neck Ribbing
Row 1:
Join with sl st in side of Neck, ch 4 (4, 5, 5, 6) (6, 7, 8, 8, 8), sc in the 2nd ch from hook and across back towards neckline, sl st in next 2 sts or space along the neckline, turn. | 3 (3, 4, 4, 5) (5, 6, 7, 7, 7) sts
Row 2:
Sk 2 sl sts, blo sc 3 (3, 4, 4, 5) (5, 6, 7, 7, 7), turn.
Row 3:
Ch 1, blo sc 3 (3, 4, 4, 5) (5, 6, 7, 7, 7), sl st in next 2 sts (1 stitch per edge row around the neckline), turn.
Next Rows:
Rep Rows 2-3 for ribbing around Neck.
Tip:
When working around the ‘corners’ of the neck, skip some sts/spaces, or sl st 2 sts together, this will help shape in those areas and decrease any bulging of the ribbing rows.
Last Row:
Join edges together, with yarn needle seam beg and last rows of ribbing together, or working in blo of st in first and last rnd, sl st both sts together.
Fasten off.
Finishing
Weave in any ends and block again if necessary. Wear and enjoy!
Our little ones grow up in the blink of an eye, their journey from tiny bundles of joy to independent individuals filled with wonder and curiosity unfolding in what feels like a blur. Crocheting garments like this sweater is more than simply crafting.
The love and attention to detail you pour into precious handmade garments like this sweater help create priceless memories for you – and the beautiful human you created this heirloom piece for.
If you’re looking for more perfect and precious pieces to make, check out the Macchiato Sweater (available in child and adult sizes), the Easy Crochet Vest (available in 18 sizes), and the Cascade Child Cardigan (the adult size is also available). Crochet your whole family something incredible!
Cheers, and happy crocheting!
Well, That Was Fun! What’s Next?