Penguin Buddy Knit Pattern
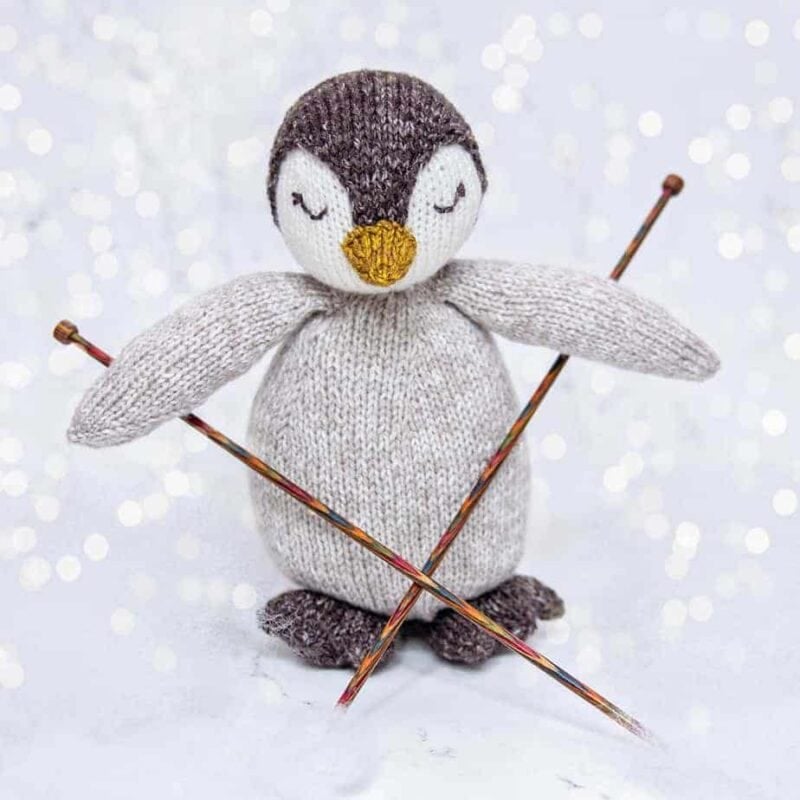
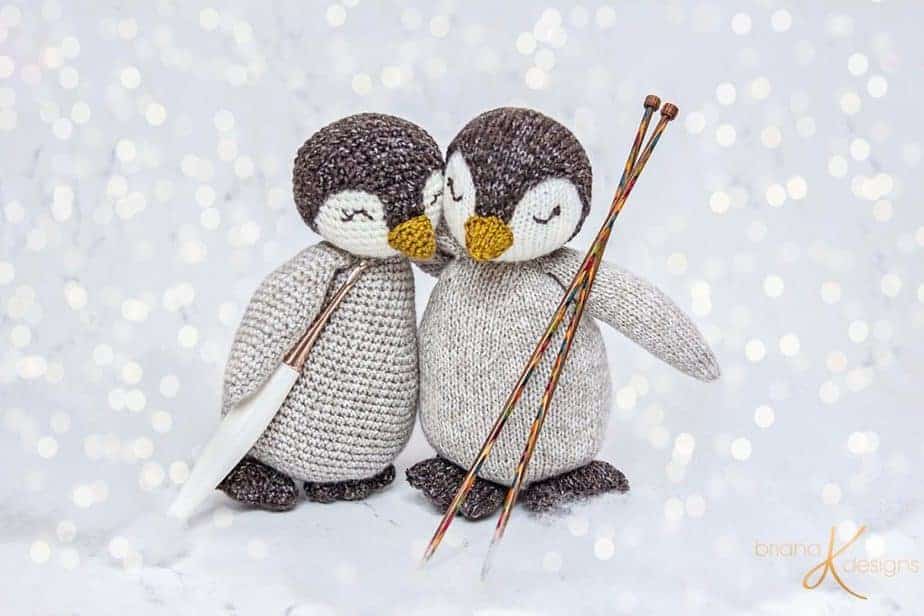
Isn't this little Penguin Buddy Knit Pattern a cute winter companion? My boys have been asking to keep these penguins for themselves ever since I crafted them up. I think they might find them under the tree this year as their gift from mommy. You don't have to be little to enjoy this knit penguin stuffy! He is cute for holiday decor or to just have around. And of course, I think he makes a great gift for all ages.

Supplies for the Penguin Buddy Knit Pattern:
• Size US 3 (3.25 mm) dpn or circular needles
• Removable stitch markers if needed
• Yarn needle to weave in ends
• Fiberfill or stuffing
• Stitch holder or scrap yarn
Yarn:
Yarn Bee Soft & Sleek DK Yarn
in colorways:
Ivory
Cedar
Linen
Dijon
Yarn substitutions (check gauge):
• Bernat Baby Sport
• Paintbox Yarns Baby DK
• Plymouth Yarn Deambaby DK
Skill Level:
• Advanced Beginner
Measurements:
Penguin stands about 7.5” (19 cm) tall
Abbreviations:
• BO- Bind Off
• CO- Cast On
• k- knit
• k2tog – knit two stitches together
• kfb – knit 1 into the front and back of stitch
• M1R- Make 1 Stitch Right
• M1L- Make 1 Stitch Left
• st(s) – stitch(es)
Yardage:
• 125 yards (115 m)
Gauge:
• 26 sts and 36 rows = 4” (10 cm)
in stockinette stitch
Notes for the Penguin Buddy Knit Pattern:
-This buddy is worked in pieces and then hand sewn together.
M1R (Make 1 Right): pick up the bar between the last stitch you knit and the one you’re about to knit, bringing the needle from the back to the front. Then knit into the front of this stitch.
M1L (Make 1 Left): pick up the bar between the stitch you knit and the one you’re about to knit, bringing the needle from front to back. Then knit into the back of the stitch.


Want an Ad-Free PDF Download of this pattern?
This pattern is available in my shops:

Penguin Buddy Knit Pattern Instructions:

Click the box below to unlock this exclusive subscriber content for free. Add your email and create a password. If you are having trouble, reset your password or login to the Grow Portal.
I'm thrilled to share this amazing crochet pattern with you! Please don't copy, paste, or distribute this pattern. Prefer an ad-free experience? Purchase a digital PDF file for a small fee from one of my online stores. I appreciate your support and readership. You are why I can keep doing what I love and sharing it with others. Thank you from the bottom of my heart.
| 33 | *K2tog, k5; repeat * around. | 36 |
| 34 | Knit in each stitch around. | 36 |
| 35 | *K2tog, k4; repeat * around. | 30 |
| 36 | Knit in each stitch around. | 30 |
| 37 | *K2tog, k3; repeat * around. | 24 |
| 38 | Knit in each stitch around. | 24 |
| 39 | *K2tog, k2; repeat * around. | 18 |
| 40 | Knit in each stitch around. | 18 |
| 41 | *K2tog, k1; repeat * around. | 12 |
| 42 | K2tog around. Fasten off and use the tail end to weave through the remaining stitches and close the hole. Weave in ends, set aside until assembly. | 6 |
Penguin Body:
| Round | Description | Stitch Count |
| 1 | With Light Grey yarn CO 24 and work in the round with magic loop or dpn method. | 24 |
| 2 | Knit in each stitch around. | 24 |
| 3 | *kf&b in first stitch, k5; repeat * around. | 28 |
| 4 | Knit in each stitch around. | 28 |
| 5 | *kf&b in first stitch, k6; repeat * around. | 32 |
| 6 | Knit in each stitch around. | 32 |
| 7 | *kf&b in first stitch, k7; repeat * around. | 36 |
| 8 | Knit in each stitch around. | 36 |
| 9 | *kf&b in first stitch, k8; repeat * around. | 40 |
| 10 | Knit in each stitch around. | 40 |
| 11 | *kf&b in first stitch, k9; repeat * around. | 44 |
| 12 | Knit in each stitch around. | 44 |
| 13 | *kf&b in first stitch, k10; repeat * around. | 48 |
| 14 | Knit in each stitch around. | 48 |
| 15 | *kf&b in first stitch, k7; repeat * around. | 54 |
| 16-17 | Knit in each stitch around. Begin to stuff with fiberfill as you go. | 54 |
| 18 | *kf&b in first stitch, k8; repeat * around. | 60 |
| 19-20 | Knit in each stitch around. | 60 |
| 21 | *kf&b in first stitch, k9; repeat * around. | 66 |
| 22-45 | Knit in each stitch around. | 66 |
| 46 | *K2tog, k9; repeat * around. | 60 |
| 47 | *K2tog, k8; repeat * around. | 54 |
| 48 | *K2tog, k7; repeat * around. | 48 |
| 49 | *K2tog, k6; repeat * around. | 42 |
| 50 | *K2tog, k5; repeat * around. | 36 |
| 51 | *K2tog, k4; repeat * around. | 30 |
| 52 | *K2tog, k3; repeat * around. | 24 |
| 53 | *K2tog, k2; repeat * around. | 18 |
| 54 | *K2tog, k1; repeat * around. | 12 |
| 55 | K2tog around. Fasten off and use the tail end to weave through the remaining stitches and close the hole. Weave in ends, set aside until assembly. | 6 |
Penguin Arms (make 2):
| Round | Description | Stitch Count |
| 1 | With Light Grey yarn and leaving a 12 inch tail for sewing to the body, CO 6 and work in the round with magic loop or dpn method. | 6 |
| 2 | Knit in each stitch around. | 6 |
| 3 | Kf&b in each stitch around. | 12 |
| 4 | Knit in each stitch around. | 12 |
| 5 | *Kf&b in first stitch, k5; repeat * around. | 14 |
| 6 | Knit in each stitch around. | 14 |
| 7 | *Kf&b in first stitch, k6; repeat * around. | 16 |
| 8 | Knit in each stitch around. | 16 |
| 9 | *Kf&b in first stitch, k7; repeat * around. | 18 |
| 10 | Knit in each stitch around. | 18 |
| 11 | *Kf&b in first stitch, k8; repeat * around. | 20 |
| 12 | Knit in each stitch around. | 20 |
| 13 | *Kf&b in first stitch, k9; repeat * around. | 22 |
| 14-26 | Knit in each stitch around. | 22 |
| 27 | *K2tog, k9; repeat * around. | 20 |
| 28 | Knit in each stitch around. Begin to stuff with fiberfill as you go. | 20 |
| 29 | *K2tog, k8; repeat * around. | 18 |
| 30 | Knit in each stitch around. | 18 |
| 31 | *K2tog, k7; repeat * around. | 16 |
| 32 | Knit in each stitch around. | 16 |
| 33 | *K2tog, k6; repeat * around. | 14 |
| 34 | Knit in each stitch around. | 14 |
| 35 | K2tog around. Fasten off and use the tail end to weave through the remaining stitches and close the hole. Weave in ends, set aside until assembly. | 7 |
Penguin Head Piece:
| Row | Description | Stitch Count |
| 1 | With Cedar yarn and US 3 (3.25 mm) needles, CO 6. | 6 |
| 2 | Knit in each stitch across. | 6 |
| 3 | Purl in each stitch across. | 6 |
| 4-7 | Repeat rows 2-3 | 6 |
| 8 | K1, M1R, knit until one stitch remains, M1L, k1. | 8 |
| 9 | Purl in each stitch across. | 8 |
| 10-37 | Repeat rows 8-9 until stitch count is 40 | 40 |
| 38 | K40, thumb cast on 5 | 45 |
| Round39 | Working in the round: Knit in each stitch around. | 45 |
| 40 | *k2tog, k7; repeat * around. | 40 |
| 41 | *k2tog, k6; repeat * around. | 35 |
| 42 | *k2tog, k5; repeat * around. | 30 |
| 43 | *k2tog, k4; repeat * around. | 25 |
| 44 | *k2tog, k3; repeat * around. | 20 |
| 45 | *k2tog, k2; repeat * around. | 15 |
| 46 | *k2tog, k1; repeat * around. | 10 |
| 47 | K2tog around. Fasten off and use the tail end to weave through the remaining stitches and close the hole. Weave in ends, set aside until assembly. | 5 |
Penguin Beak:
| Round | Description | Stitch Count |
| 1 | With Yellow yarn CO 6 and work in the round with magic loop or dpn method. | 6 |
| 2 | Knit in each stitch around. | 6 |
| 3 | *Kf&b, k1; repeat * around. | 9 |
| 4 | Knit in each stitch around. | 9 |
| 5 | *Kf&b, k2; repeat * around. | 12 |
| 6 | Knit in each stitch around. | 12 |
| 7 | *Kf&b, k3; repeat * around. | 15 |
| 8 | Knit in each stitch around. Fasten off and use the tail end to weave through the remaining stitches and close the hole. Weave in ends, set aside until assembly | 15 |
Penguin Feet (make 2):
| Round | Description | Stitch Count |
| 1 | With Black yarn, CO 4 and work in the round with magic loop or dpn method. | 4 |
| 2 | Knit in each stitch around. | 4 |
| 3 | Kf&b in each stitch around. | 8 |
| 4 | Knit in each stitch around. | 8 |
| 5 | *Kf&b in first stitch, k1; repeat * around. | 12 |
| 6 | Knit in each stitch around. | 12 |
| 7 | *Kf&b in first stitch, k2; repeat * around. | 16 |
| 8 | Knit in each stitch around. | 16 |
| 9 | *Kf&b in first stitch, k3; repeat * around. | 20 |
| 10-12 | Knit in each stitch around. | 20 |
| 13 | *Kf&b in first stitch, k4; repeat * around. | 24 |
| 14-16 | Knit in each stitch around. | 24 |
| 17 | *Kf&b in first stitch, k5; repeat * around. | 28 |
| 18-20 | Knit in each stitch around. | 28 |
First Toe:
| Round | Description | Stitch Count |
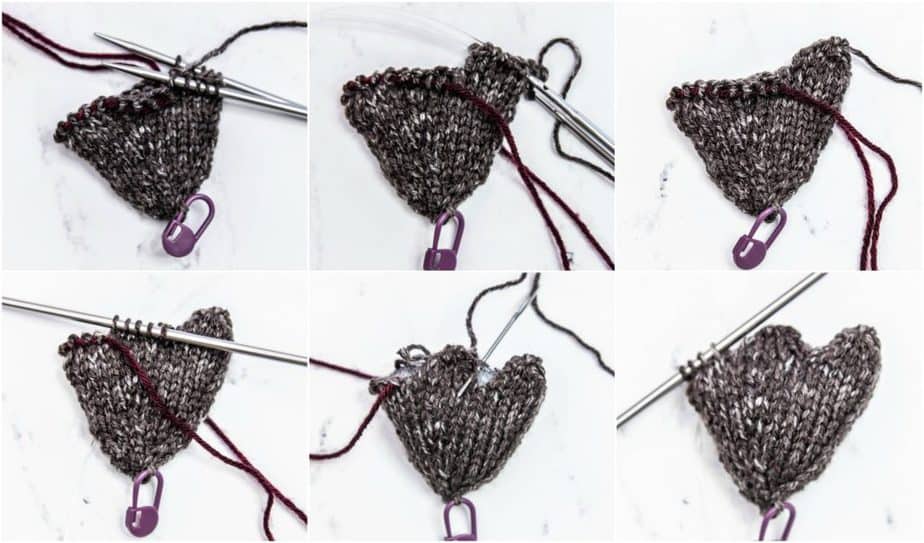
| 1 | This round will create the first toe (see images). K5, place 18 sts on holder, K5 | 10 |
| 2-3 | Knit in each first toe-stitch around. Fasten off leaving a long tail. Bind off by weaving tail through remaining live stitches and pulling the yarn tight to close the opening. Weave in end. | 10 |
Second Toe:
| Round | Description | Stitch Count |
| 1 | This round will create the second toe. Begin to stuff foot with fiberfill. Place next 5 sts back on needless, skip 9 sts, place 4 back on needles. Knit in each stitch around. | 9 |
| 2 | Knit in each first toe-stitch around. Fasten off leaving a long tail. Bind off by weaving tail through remaining live stitches and pulling the yarn tight to close the opening. Sew the opening between the first and second toe closed. Weave in end. | 9 |
Third Toe:
| Round | Description | Stitch Count |
| 1 | This round will create the third toe. Place remaining 9 sts onto needles. Knit in each stitch around. | 9 |
| 2 | Knit in each first toe-stitch around. Fasten off leaving a long tail. Bind off by weaving tail through remaining live stitches and pulling the yarn tight to close the opening. Sew the opening between the second and third toe closed. Weave in ends. Set aside for assembly. | 9 |

Penguin Assembly:
Using a yarn needle and black yarn, sew the headpiece onto the penguin head.
Next, sew the head to the body.
Then attach arms, feet, and beak. Use pins to put in place if helpful.
For the eyes, use black yarn to stitch a U, or upside-down U, and small eyelashes.

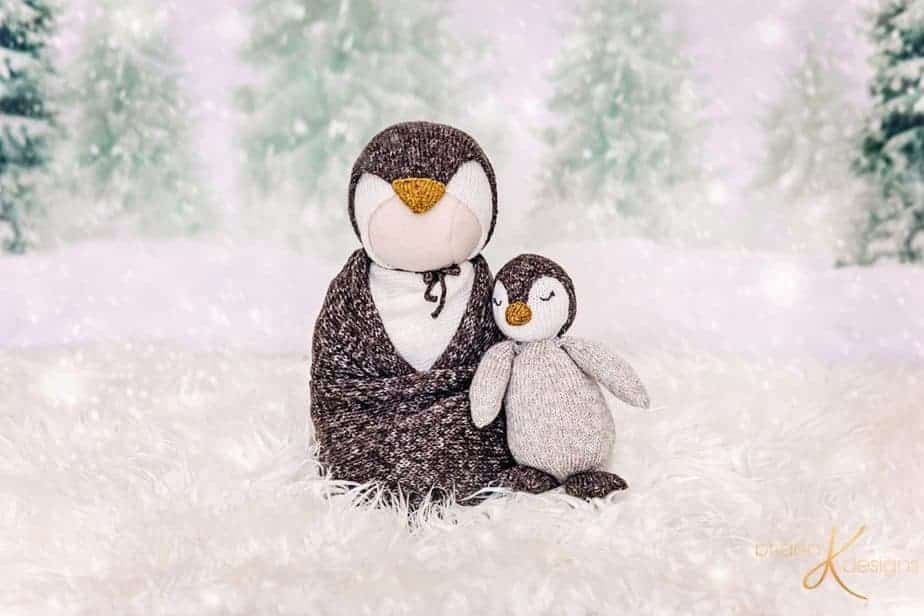
Newborn Penguin Knit Outfit

I got my start as a designer in the photography prop industry. It was soon after I had my first son I was loving anything newborn-related. By the time I had my second son I had such a passion for newborn photography that I became a newborn photographer. While I no longer take photography clients, I still enjoy designing newborn props. It's also nostalgia for when mine were so little. If I could reverse time I would totally put my own boys in this cuddly Newborn Penguin Knit Outfit outfit.
Supplies for the Newborn Penguin Knit Outfit
Size US 3 (3.25 mm) & US 7 (4.5 mm) dnp or circular needles
• Removable stitch markers if needed
• Size US G (4.5 mm) crochet hook for ties
Yarn:
Yarn Bee Soft & Sleek DK Yarn in colorways: Ivory, Cedar, Linen, Dijon
Yarn substitutions (check gauge):
• Bernat Baby Sport
• Paintbox Yarns Baby DK
• Plymouth Yarn Deambaby DK
Skill Level:
• Advanced Beginner
Measurements:
Bonnet Depth 5” (13 cm)
Bonnet Height 5.5” (14 cm)
Wrap Length 60” (152 cm)
Wrap Width 12” (30 cm)
Abbreviations:
• BO- Bind Off
• CO- Cast On
• k- knit
• k2tog – knit two stitches together
• kfb – knit 1 into the front and back of stitch
• M1R- Make 1 Stitch Right
• M1L- Make 1 Stitch Left
• st(s) – stitch(es)
Yardage:
• 125 yards (115 m) for Bonnet
• 450 yards (412 m) for Each Wrap
Gauge:
• 26 sts and 36 rows = 4” (10 cm)
in stockinette stitch
Notes for the Newborn Penguin Knit Outfit:
-This bonnet is worked in pieces and then hand sewn together.
-An alternative to knitting the wraps is to purchase a stretchy knit fabric 12 inches wide and 60 inches long.
M1R (Make 1 Right): pick up the bar between the last stitch you knit and the one you’re about to knit, bringing the needle from the back to the front. Then knit into the front of this stitch.
M1L (Make 1 Left): pick up the bar between the stitch you knit and the one you’re about to knit, bringing the needle from front to back. Then knit into the back of the stitch.
Newborn Penguin Knit Outfit Instructions
Penguin Bonnet Ivory
| Row | Description | Stitch Count |
| 1 | With Ivory yarn and US 3 (3.25 mm) needles, CO 68. | 68 |
| 2-38 | Knit stockinette (purl even rows, knit odd rows) in each stitch across. | 68 |
| Round39 | Working in the round:*k2tog, k15*; repeat from * to * around. | 64 |
| 40 | *k2tog, k6*; repeat from * to * around. | 56 |
| 41 | *k2tog, k5*; repeat from * to * around. | 48 |
| 42 | *k2tog, k4*; repeat from * to * around. | 40 |
| 43 | *k2tog, k3*; repeat from * to * around. | 32 |
| 44 | *k2tog, k2*; repeat from * to * around. | 24 |
| 45 | *k2tog, k1*; repeat from * to * around.Fasten off and use tail end to weave through remaining stitches and close hole. Weave in ends. | 16 |
Penguin Bonnet Cedar Overlay
| Row | Description | StitchCount |
| 1 | With Cedar yarn and US 3 (3.25 mm) needles, CO 14. | 14 |
| 2 | Knit in each stitch across. | 14 |
| 3 | Purl in each stitch across. | 14 |
| 4 | K1, M1R, knit until one stitch remains, M1L, k1. | 16 |
| 5 | Purl in each stitch across. | 16 |
| 6-57 | Repeat rows 4-5 until stitch count is 68. Then bind off knitwise. | 68 |
Attaching Cedar Overlay to Ivory Bonnet
I find it’s easier to sew the ivory and cedar bonnet pieces together by placing them onto a small ball. Line up the back base of bonnets together and pin it into place. Pull the front edges together and pin them in place at the top center. Using a yarn needle and cedar yarn, sew the cedar bonnet headpiece onto the ivory bonnet piece.
Beak
| Round | Description | Stitch Count |
| 1 | With Dijon/Yellow yarn CO 28 and work in the round with magic loop or dpn method. | 28 |
| 2 | Knit in each stitch around. | 28 |
| 3 | *K2tog, k5; repeat * around. | 24 |
| 4 | Knit in each stitch around. | 24 |
| 5 | *K2tog, k4; repeat * around. | 20 |
| 6 | Knit in each stitch around. | 20 |
| 7 | *K2tog, k3; repeat * around. | 16 |
| 8 | Knit in each stitch around. | 16 |
| 9 | *K2tog, k2; repeat * around. | 12 |
| 10 | Knit in each stitch around. | 12 |
| 11 | *K2tog, k1; repeat * around. | 8 |
| 12 | Knit in each stitch around. Fasten off and use tail end to weave through remaining stitches and close holes. Sew the beak to the front to of the bonnet lining it up with the left and right sides of the cedar piece. See the image on the last page. Weave in ends. | 8 |
Penguin Wrap (Make Two- 1 Cedar and 1 Ivory
| Row | Description | Stitch Count |
| 1 | With US 7 (4.5 mm) needles, CO 66. | 66 |
| 2-360 | Knit in each stitch across.Bind off knit-wise, weave in ends. | 66 |
*Note: An alternative to knitting the wraps is to purchase a stretchy knit fabric 12 inches wide and 60 inches long.
Ties
Using G-hook, attach yarn to one side front bottom corner of bonnet. Chain 51, slip stitch in the second chain from hook and across. Fasten off and weave in ends. Repeat on the other side. (A knit I-cord can also be used for ties)
I hope you enjoyed making the knit penguin buddy or the newborn penguin outfit.
Well That Was Fun! What's Next?
📌 PIN THIS POST - Don't lose this project; save it to your Pinterest crochet board so you can quickly come back to it again.
💌 SHARE - Share your yarn choice, in-progress, or finished projects on Facebook or Instagram and use the hashtag #brianakdesigns
🥂 JOIN - Join the kindest crafters in the Briana K Designs Community Group on Facebook. We love yarny friends!
🔗 RAVELRY LINK -Link and share your project on Ravelry. Having inspirational photos can help crafters.