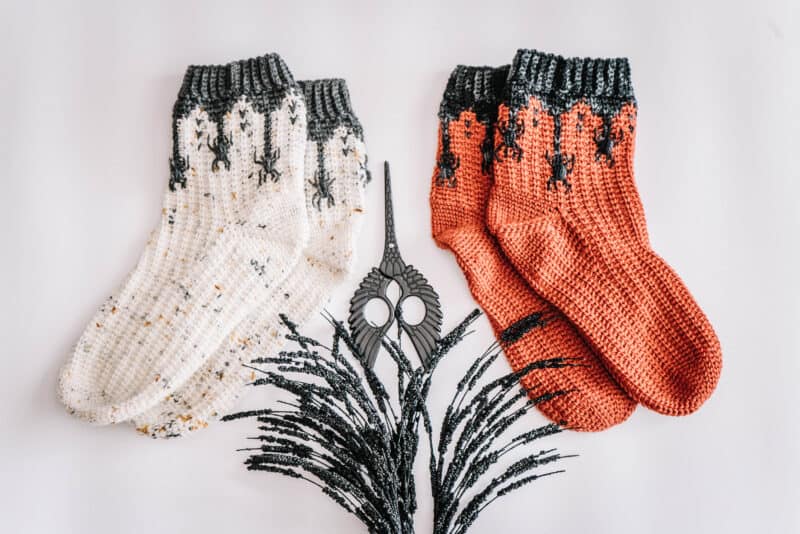
Get Ready for Spooky Season with the Creepy Crawly Spider Sock Crochet Pattern! ?️ Are you excited for Halloween? I’ve been counting down the days since last year! To celebrate my love for all things spooky, I’ve created the Creepy Crawly Spider Sock Pattern—a fun and eerie crochet project perfect for Halloween lovers.
Disclosure: This post contains affiliate links. Please read my disclosure for more info.
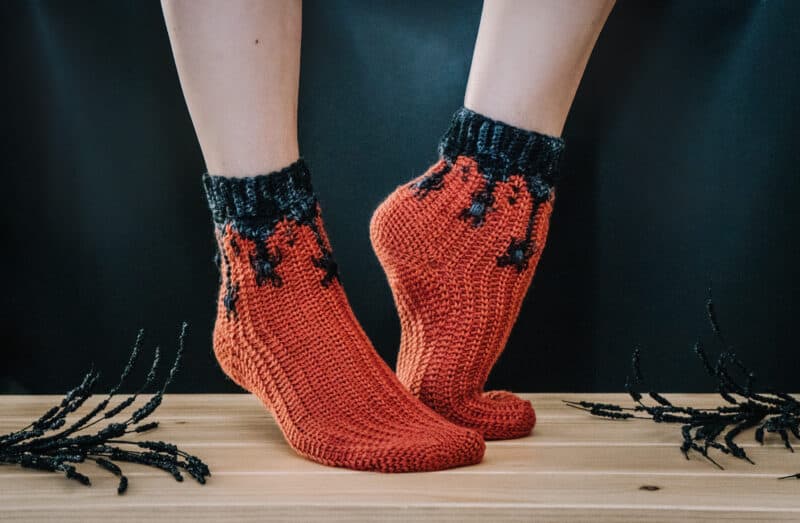
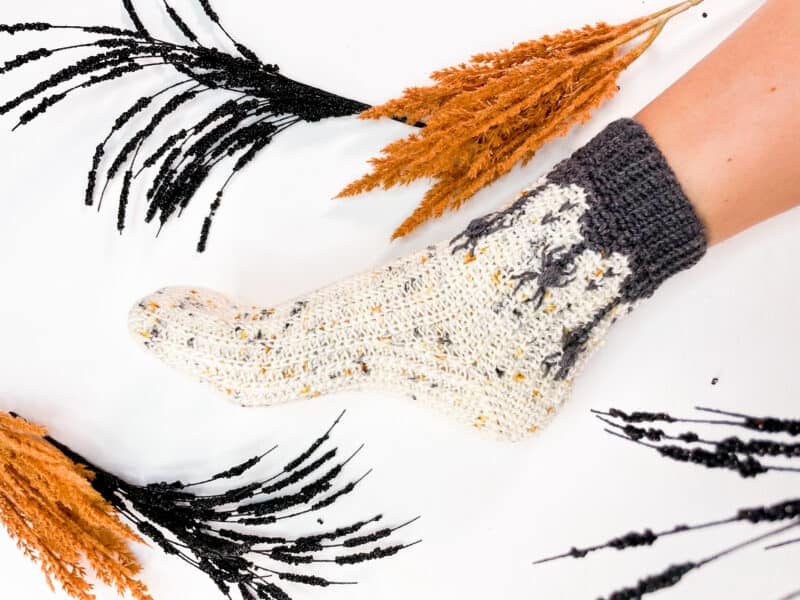
These socks are covered in spooky spider designs, making them not only a blast to crochet but also perfect for getting into the Halloween spirit. Whether you’re crafting them for yourself or as a gift, these creepy socks are sure to make an impression!
Spiders are not my favorite, now I am not scared of them, but the fact they can crawl right on up your leg or where ever they want and you can’t feel them creeps me right out!
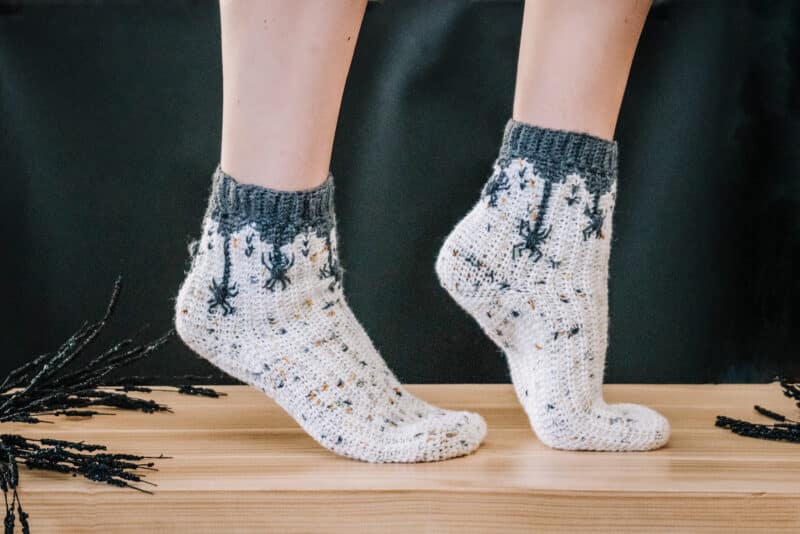
And where I will startle myself more than once if I happen to catch my little spider friend on my Creepy Crawly Spider socks the fact that they are fun and adorable makes it all worth it!
Especially as I begin my Halloween prep. And if you want more spooky things to crochet, check out the Spooky Crochet Pillow Free Pattern or the How To Crochet With Beads Plus Pumpkin Pattern.
Creepy Crawly Crochet Spider Sock Supplies:


Crochet Hook:
Notions:
2 Removable stitch markers if needed
Yarn needle to weave in ends
Scissors
Yarn:
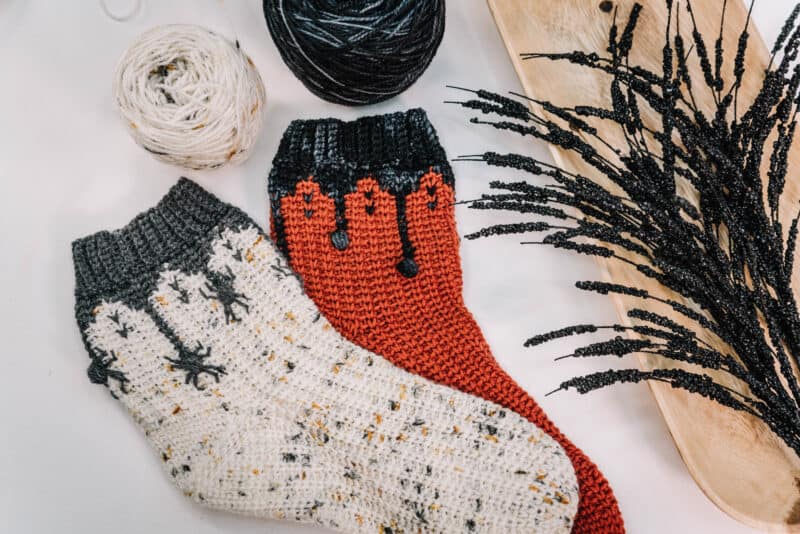
WeCrochet Hawthorne Speckle
80% Fine Superwash Highland Wool, 20%
Nylon, 357yds/100g
Colorways in images: Spark Speckle
WeCrochet Stroll
75% Fine Superwash Merino Wools, 25%
Nylon
Crochet Sock Yardage:
Mid Calf Socks: 290 yds Color A, 85 yards Color B.
Abbreviations/Stitches:
blo – back loop only
ch – chain
est st pat – established stitch pattern
rnd – round
sc – single crochet
ssc – split single crochet
sl st – slip stitch
st(s) – stitch(es)
20 sts x 25 rows = 4×4 inches in established stitch pattern, see notes.
The stitches per inch is 5
Skill Level:
Intermediate
Size & Crochet Sock Notes:
This sock is meant to be crocheted for a custom fit to your foot. This sock can be tried on and adjusted as you go.
Instructions are for adult women’s sizes. The chart below is for referencing sock lengths for different sizes.
The Simple Sock Video Tutorial and the written pattern will follow an example sock for stitch counts. This example sock will fit a foot circumference of 8 inches. This pattern will follow the same instructions as in the video until the spider colorwork portion.
Since this is worked continuously, placing a stitch marker on the first stitch of each row is helpful.
These crochet socks use a fun stitch combination and are worked from toe-up. The heel is an “afterthought heel’ where we create an opening for the heel area and come back to work the heel last.
Special Stitches:
The established stitch pattern (est. st pat) is worked across an even number of stitches as follows: sc 1 in the blo, ssc next; repeat for the number of stitches needed.
Split Single Crochet (ssc): also known as the waistcoat stitch. This stitch is worked as single crochet but where the hook is inserted is the only difference. The hook will
be inserted between the ‘V’ of the stitch.
Insert hook between the legs of the stitch (on the back of work the hook should be under the horizontal bar and between the upside-down ‘V’ shape as well), yarn over, pull up a loop to the height of a single crochet, yarn over, pull through both loops on hook.
Keep your hands loose and comfortable. If your hands start to hurt, then the tension of the stitch is too tight. When entering the stitch, pull up the loop a bit more than you normally would; it will give the ‘V’ more space for the next round and make working the ssc comfortable.
Puff Stitch: Yarn over, insert the hook into the stitch (or space as described in the pattern), yarn over, pull up a loop, (yarn over, insert hook in same stitch or space, yarn over, pull up a loop) 4 times. There will be 11 loops on the hook. Yarn over, and draw the hook through all loops on the hook.
Spider Crochet Socks Video Tutorials:
This sock uses the main body of the Simple and Best Sock Pattern. Then, the top is finished off with the spider sock details. Only work just past the heel and then go to the next section. If you prefer, this can be watched as one video with the Simple And Best Sock Pattern on YouTube.
Main Sock Body Part 1:
Main Sock Body Part 2:
Subscribe & Like
Top of Sock Colorwork & Spiders Video
How to Customize Your Crochet Sock Fit
This sock is meant to be crocheted for a custom fit to your foot. This sock can be tried on and adjusted as you go. If trying on the sock is impossible, or you are making these socks for a friend, measure the foot to determine how many stitches/rows will be needed in each section for the best fit. Each measurement below should be taken while standing, except for C.
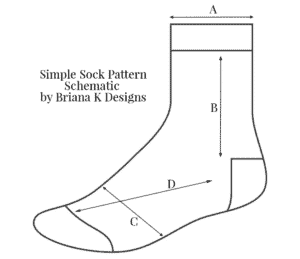
A: Circumference for Leg:
Measure the topmost part of your leg, the thickest part, and where you would like the height of the sock.
B: Height of Leg:
From where you took measurement A to the top of the heel.
C: Circumference of Foot:
Measure where your foot is thickest. The actual measurement of the finished sock will be about 1/2 to 1 inch less than this measurement.
D: Instep:
Measure from the bottom of your toes to about 1 inch before the heel.
For more information visit How to Size Crochet Socks.
Get the ad-free PDF download of the Creepy Crawly Spider Sock Pattern
through Ravelry or Etsy. **
Relax & Crochet
Upgrade to the Printable PDF
Beautifully formatted to print and relax while crocheting. The paid pattern includes:
Creepy Crawly Spider Sock Written Instructions:
Toe of Sock and Instep
Click the box below to unlock this exclusive subscriber content for free. Add your email and create a password. If you are having trouble, reset your password or log in to the Grow Portal.
I’m thrilled to share this amazing crochet pattern with you! Please don’t copy, paste, or distribute this pattern. Prefer an ad-free experience? Purchase a digital PDF file for a small fee from one of my online stores. I appreciate your support and readership. You are why I can keep doing what I love and sharing it with others. Thank you from the bottom of my heart.
Leg of Sock With Spiders Chart

Written Sock Instructions
Rnd 1:
Using 3.5 mm hook, working inside the Magic Ring sc 8, pull ring closed, do not join as this will be worked continuously. Place stitch marker in first stitch and move up each round. 8 sts
Rnd 2:
2 ssc in each st around. 16 sts
Rnd 3:
Ssc in each st around. 16 sts
Rnd 4:
2 ssc in first st, ssc in next, 2 ssc in next, ssc in next; repeat from * to * around. 24 sts
Rnd 5:
Ssc in each st around. If making a baby/child size skip to round 10. 24 sts
Rnd 6:
2 ssc in first st, ssc in next 2 sts, 2 ssc in next, ssc in next 2 sts; repeat from * to *
around. 32 sts
Rnd 7:
Ssc in each st around. For smaller foot circumferences, increasing may stop here, or increase less on the next round. 32 sts
Rnd 8:
2 ssc in first st, ssc in next 3 sts, 2 ssc in next, ssc in next 3 sts; repeat from * to *
around. 40 sts
Rnd 9:
Ssc in each st around. 40 sts
Rnd 10:
Ssc in first, blo sc in next, ssc in next, blo sc in next; repeat from * to * around. This round creates the established stitch pattern. 40 sts
Repeats:
Repeat Round 10 until the sock reaches about 1 1/2” from the heel, it’s best to try it on and add or remove rows if needed. This creates the Instep, measurement D.
Please Note:
This example is for a foot circumference of 8 inches. Remember these will stretch a little as worn so it should be a little snug. For the colorwork the stitch count needs to be in a multiple of 16 for the chart. 40 sts
Join The Kindest Community
Join our vibrant community of crafters on Facebook today. Whether you enjoy crafting with others or simply have burning questions, we’ve got you covered – join us now!
Sock Gusset
Rnd 1:
3 ssc in first, work 19 sts in est st pat; repeat from * to * around. 44 sts
Rnds 2-3:
Work est st pat in each st around. 44 sts
Rnd 4:
3 ssc in first, work 21 sts in est st pat; repeat from * to * around. 48 sts
Rnds 5-6:
Work in the est st pat around. 48 sts
It’s perfectly fine if your stitch count is more or less, it simply needs to be an even number of stitches.
Split for the Heel
Rnd 1:
This round will make space for the heel to work later. Ch 24 (or half the stitch count), skip 24 (or half the stitch count), work the remaining sts in est st pattern. 48 sts
Rnds 2-6:
Continue to work in the established stitch pattern.
Leg of Sock With Spiders
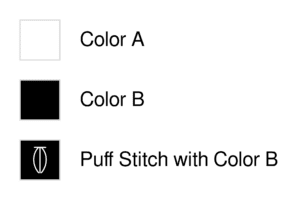
How to read the colorwork instructions:
In the colorwork section, Color A (main color) will be abbreviated as (A), and Color B (accent color) as (B).
Example: Color (B) x 9 = with Color B work the next 9 stitches in the est st pat.
The chart will be worked from right to left for each round and repeated until the end of the round.
Please Note: For the first round across the chain sts, sc sts will be worked. Carry the unworked yarn along the back, catching it every few stitches.
Work all the following colorwork sts in the est st pat.
Rnd 1:
With Color B Puff Stitch, with Color (A) x 15; repeat from * to * around.
Rnds 2-4:
*With Color (B) x 1, with Color (A) x 15; repeat from * to * around.
Rnd 5:
*With Color (B) x 1, with Color (A) x 7, with Color B Puff Stitch, with Color (A) x 7; repeat from * to * around.
Rnds 6-7:
*With Color (B) x 1, with Color (A) x 7; repeat from * to * around.
Rnd 8:
*With Color (B) x 1, with Color (A) x 3; repeat from * to * around.
Rnd 9:
*With Color (B) x 1, with Color (A) x 7; repeat from * to * around.
Rnd 10:
*With Color (B) x 2, with Color (A) x 2, with Color (B) x 1, with Color (A) x 2, with Color B x 1; repeat from * to * around.
Rnd 11:
*With Color (B) x 3, with Color (A) x 3, with Color (B) x 2; repeat from * to * around.
Rnd 12:
*With Color (B) x 4, with Color (A) x 1, with Color (B) x 3; repeat from * to * around.
Rnd 13:
With Color B work in each stitch around.
Sock Ribbing Cuff
Set Up:
For the ribbing go down to the 2.5mm hook and ch 8.
Rnd 1:
Sc in the second ch from the hook, sc BLO in next 2 (9) sts, sl st 2 sts from the top of the sock, turn. (7) sts
Rnd 2:
Skip 2 sl sts from the sock top, sc BLO remaining in row, turn.
Rnd 3:
Ch 1, sc BLO across sts in row, sl st 2 sts from the top of the sock, turn.
Repeats:
Repeat Rows 2-3 all the way around the top of the sock to create the ribbing. Either slip stitch in the blo of the last row to the loops of the first row to join, or fasten off and seam with a tapestry needle.
Sock Heel
Rnd 1:
Using the 3.5 mm crochet hook, attach yarn to one of the corner sts, ssc in first, place marker in this stitch, ssc in each stitch across until next corner (half of the heel sts), rotate and continue working in the top of the heel sts, ssc in first and place st marker. ssc in remaining sts.
Chain + Skipped sts from Heel Split
Rnd 2:
ssc in next, move up the st marker, ssc2tog, ssc until 2 sts before next marker, ssc2tog; repeat from * to * around. Decreased 4 sts
Repeats:
Repeat Rnd 2 until 10-14 sts remain. Fasten off and seam remaining sts together.
Finishing the Spider Crochet Socks
Using your Color B yarn and a yarn needle, stitch the spider legs onto each puff stitch, see video.
Weave in any remaining ends.
If there are gaps by the heel split use tail ends to close the holes.
Block your socks if needed by laying them flat or using a sock blocker.
Are you a fan of working crochet and knit socks from the toe up? if so check out Conquer Toe Up Crochet & Knit Socks With These Terrific Patterns or the Woodland Walker Crochet Socks Free Pattern.
This is the time of year that’s fun to cozy up and create and I can never get enough of the pumpkin decor. If you love fall crochet decor come create the Pumpkin Knit & Crochet Mug Rug Free Patterns or the popular Pumpkin Spice Crochet Stackable Trio.
Well, That Was Fun! What’s Next?