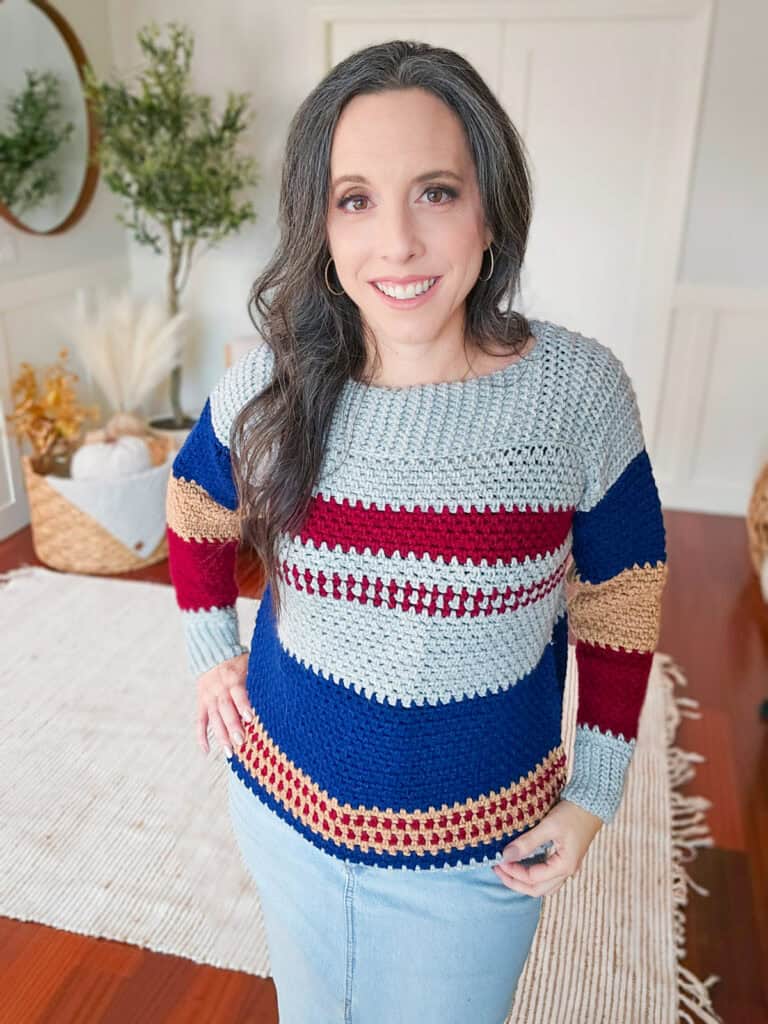


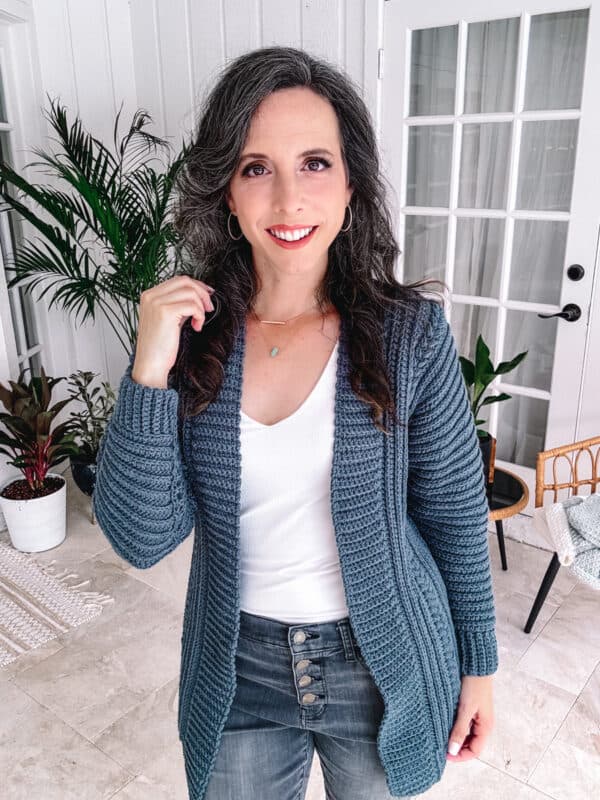
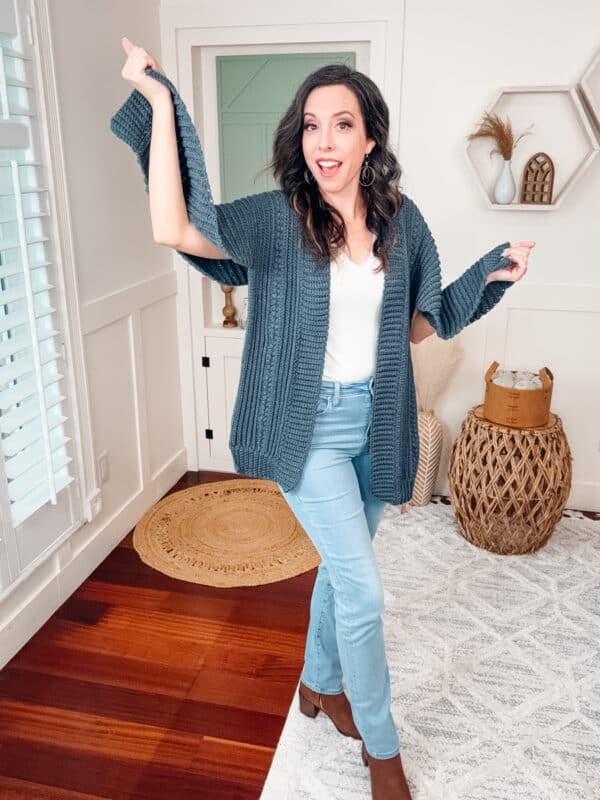
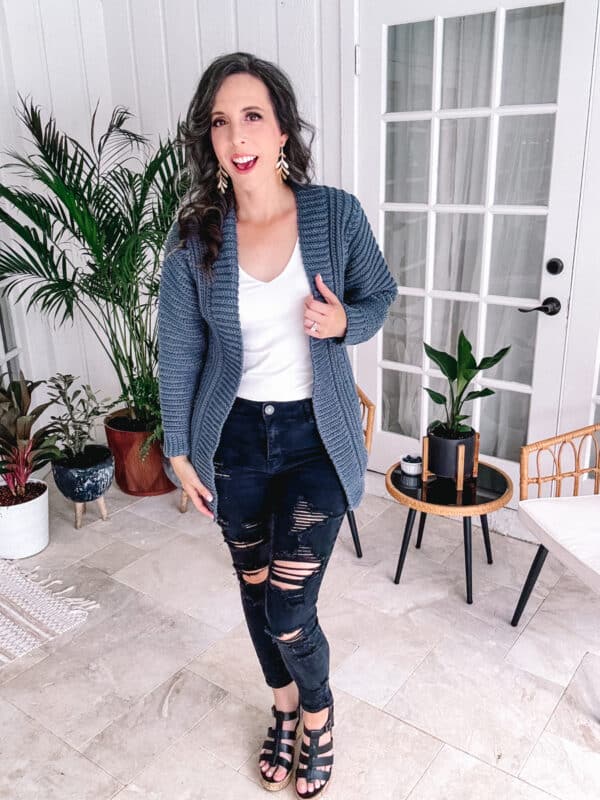
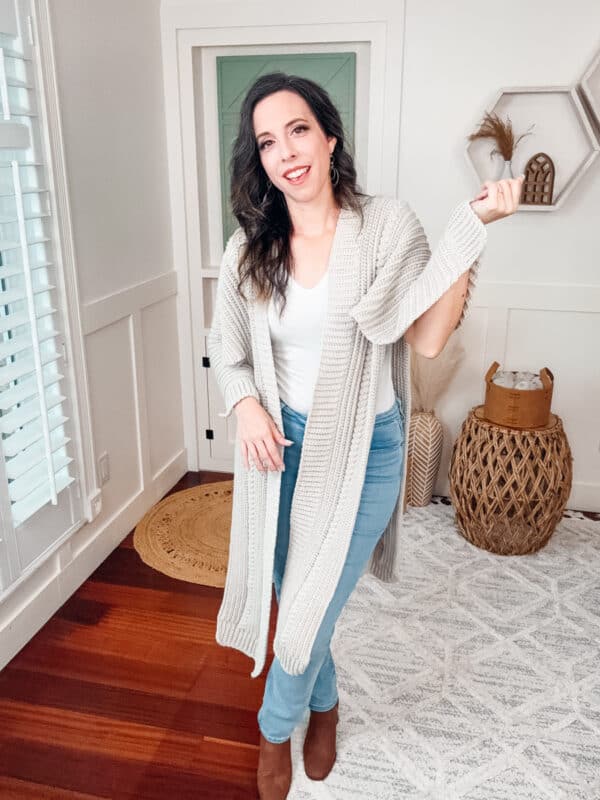
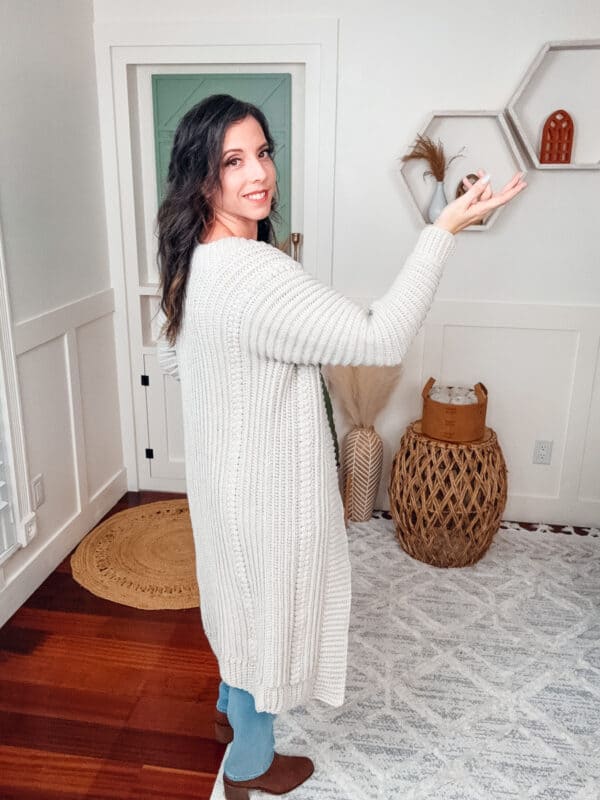
The Autumn Wheat Crochet Cardigan Pattern is the perfect introduction to creating wearables. With clear instructions, helpful tips, and a straightforward construction process, you’ll be amazed at what you can achieve, even as a beginner crocheter. It’s the ideal project to build your confidence and dive into creating handmade garments. And if you love this construction, you might also enjoy crocheting the Autumn Wheat Crochet Sweater or the Autumn Wheat Beanie.
Disclosure: This post contains affiliate links. Please read my disclosure for more info.
What you’ll love about this pattern.
Can the length be adjusted?
Absolutely! This easy adjustment only requires more or fewer chains after working the first sleeve. I’ve included three length options in this pattern for creating a short, medium, or long cardigan. But it’s easy if you want a length custom to your body!
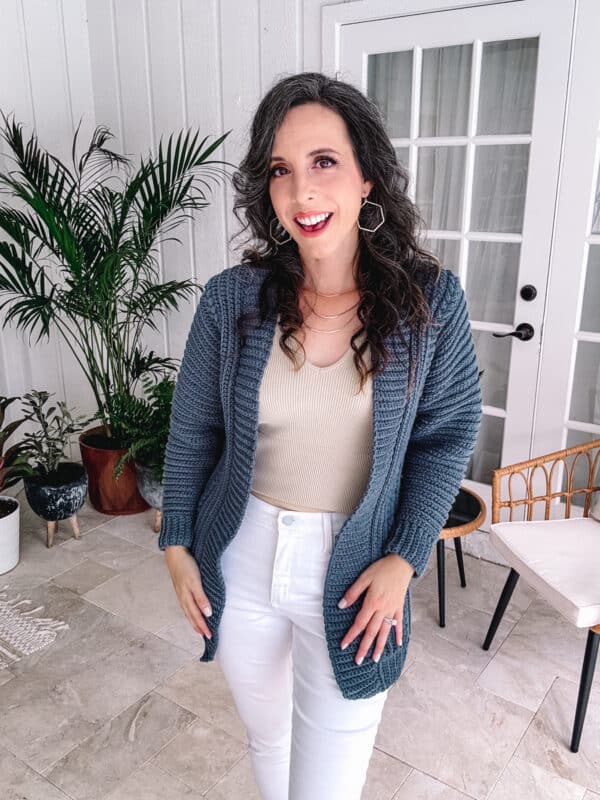
Just so you know, adjusting the length will affect the yarn quantities used. I’ve estimated the exact yardage for the medium-length cardigan, which is shown in the Stonewash blue color. Less yarn will be required for a shorter version. Calculate 25% more yarn for a duster length. Throwing an extra ball into your cart is always a good idea, so we don’t have to worry about playing yarn chicken.
Want to try a v-neck cardigan? Get your hooks out for the Finch V-Neck Crochet Cardi Pattern.

Only Two Seams
The best part about this pattern is that it’s crocheted flat. That’s right, we are not working in the round. This makes it an approachable crochet project because if you can crochet a rectangle, then you can make this cardigan. And if you love this easy style of construction, the
We will be doing some increasing and decreasing for the tapered sleeves, but if you prefer a puff style sleeve without shaping like the Comfy Crochet Cardigan or the Seabird Mosaic Crochet Cardigan, simply omit the increases or decreases and crochet the same amount of rows in the pattern.
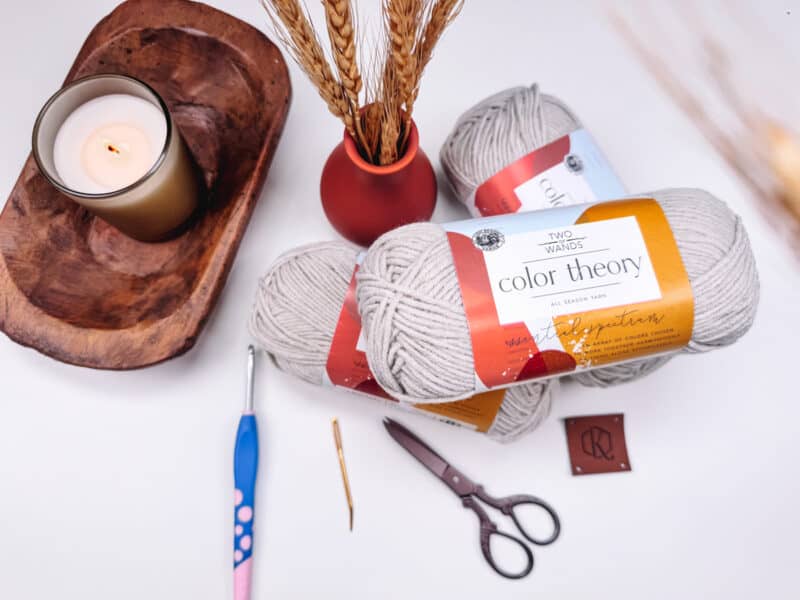
Supplies For The Crochet Cardi
Yarn
Lion Brand Color Theory
100% Acrylic, Worsted Weight Yarn, 246yds/100g
Colorways Shown: Moonbeam and Stonewash
Yarn Quantities
1600 (1675, 1700, 1800, 1900) (2050, 2200, 2350, 2500) yds
7 (7, 8, 8, 8) (9, 9, 10, 11) balls
This is for the medium length cardi. For a crop style one less ball of yarn will be needed.
For a duster length add 25 % more yarn.
Yarn Substitutions
Brava Worsted – 100% Premium Acrylic, 218yds/100g
Mighty Stitch – 80% Acrylic/20% Superwash Wool, 208yds/100g
Swish Worsted – 100% Fine Superwash Merino Wool, 110yds/50g
Heatherly Worsted – 80% Acrylic, 20% Merino Wool, 218yds/100g
Remember to always check gauge and drape when substituting yarns.
Crochet Hook
Size H (5.0mm) Crochet Hook, or hook to obtain gauge.
Notions
Scissors
Yarn Needle
Removable Stitch Marker
Skill Level
Advanced Beginner
Sizing
XS (S, M, L, 1X) (2X, 3X, 4X, 5X)
To fit chest:
32 (34, 38, 42, 46) (50, 54, 58, 62)
Actual measurements are in schematic.
Ease: This garment is meant to be worn with a 3-5 inch positive ease.
Abbreviations
ch – chain
blo – back loop only
flo – front loop only
hdc – half double crochet
hdc2tog – half double crochet two together
Puff st – puff stitch
rem – remaining
RS – right side
sc – single crochet
sl st – slip stitch
st(s) – stitch(es)
WS – wrong side
Gauge
17 sts and 11 rows = 4″ by 4″ in half double
crochet worked in the third loop, blocked.
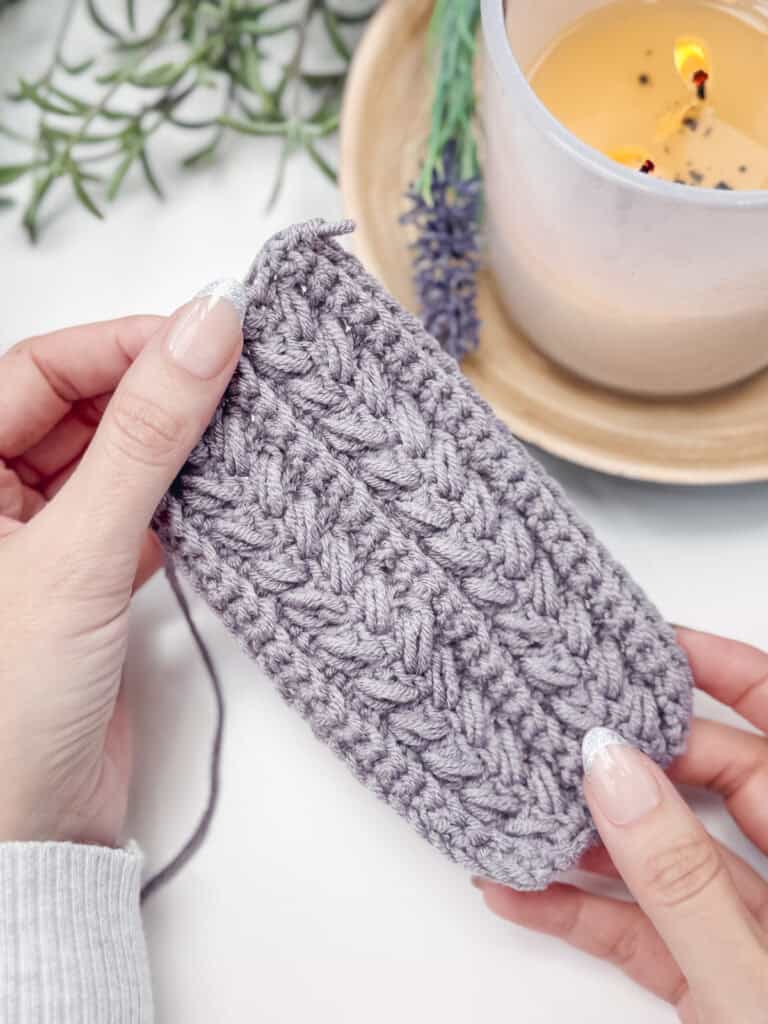
How to Crochet A Gauge Swatch
Working a gauge swatch will let you know if you will have the correct sizing for this pattern. A gauge swatch helps you practice the stitches used in this project and improve your stitch work for a flawless look.
Are you struggling to match gauge? Check out the blog post on What is Crochet Gauge and How To Fix It
Gauge Swatch Instructions:
Row 1: Ch 26, hdc in the 2nd ch from the hook and in remaining sts across, turn.
Row 2: Ch 1 (does not count as a st), hdc in the third loop in each st across, turn.
Repeat Row 2 until there are 14 rows. Measure your swatch and adjust as needed.
Construction
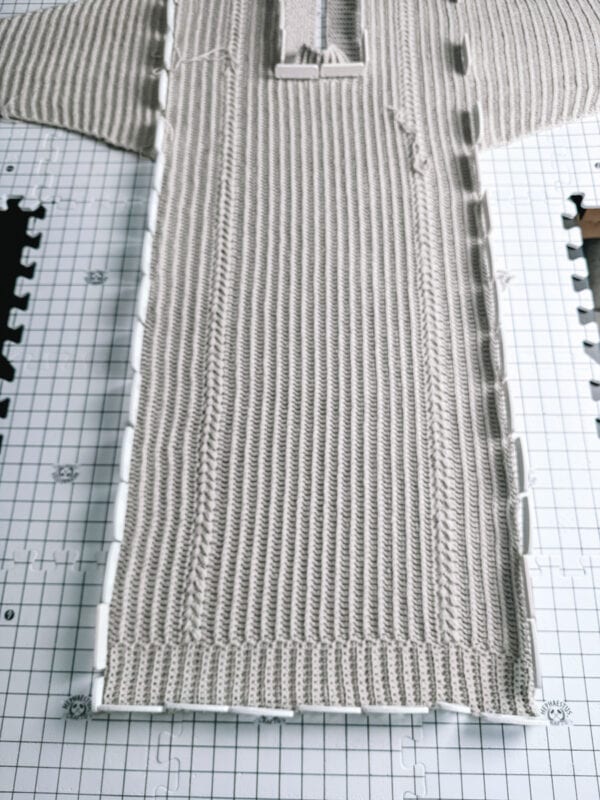
This is a cuff-to-cuff cardigan crocheted flat. We will start with making the ribbing for one cuff, work the sleeve and increase, then crochet the first section of the body, the back section to make room for the neck, the second part of the body, then the second sleeve while decreasing, the final cuff, and then the ribbing around the front opening. This only needs two seams to become a cardigan!
Special Stitches
Third Loop: What’s really cool about half double crochet is that there’s a third loop on the back of your stitch when working in rows. If you work hdc into the third loop, you get a totally different, knit-like fabric.
For this pattern, we are going to be working in rows, which means we will work on the row below through the third loop on the front of our work.
Puff Stitch: Yarn over and insert your hook into the stitch/space. Yarn over again and pull up a long loop. (Yarn over and insert your hook into the same stitch/space. Yarn over again and pull up a long loop) two more times (7 loops on the hook). Yarn over and pull through the first 6 loops, yarn over and pull through remaining loops.
Important Notes
- A ch 1 at the beginning of a row is not counted as a stitch.
- Using a stitch marker at the beginning of each row is recommended. And to also mark the
right side of garment to keep track. - The instructions and stitch counts are given for the smallest size, with the larger sizes in
parentheses ( ). - Before you dive into your project, take a moment to identify the stitch and row counts that
match the size you’re making. By highlighting or marking them, you’ll save time and effort
later on. Trust us, this small step will make a big difference in your crochet journey! - When brackets are used, [….] repeat the instructions inside the brackets as indicated.
This Pattern Uses Standard US Terminology
Video Tutorial:
Watch how easy and beginner friendly it is to work up this crochet piece with a tutorial.

Relax & Crochet
Upgrade to the Printable PDF
Beautifully formatted to print and relax while crocheting. The paid pattern includes:
The Autumn Wheat Crochet Cardigan PDF can be purchased on Etsy or Ravelry.
To Unlock Exclusive Subscriber Content click the Box below and join for free! Grow will pop up so you can subscribe to my Blog. Enter your email and create a password. Every time you see Exclusive Content on my Blog, log in to your account!
How To Crochet An Easy Cardigan
First Cuff
Row 1: Ch 11, sc in the 2nd ch from the hook and in each st across, turn. | (10 sts)
Row 2: Ch 1 (does not count as a stitch here and throughout pattern), blo sc in each st across, turn.
Rows 3 – 32 (34, 34, 36, 36) (38, 38, 40, 40): Repeat Row 2.
Rotate your work and sl st along the edge of one side of the ribbing, placing one sl st per row, turn. | 32, (34, 34, 36, 36) (38, 38, 40, 40) sts
Join The Kindest Community
Join our vibrant community of crafters on Facebook today. Whether you enjoy crafting with others or simply have burning questions, we’ve got you covered – join us now!

First Sleeve – Increasing
Row 1: Ch 1, flo hdc across, turn. | 32, (34, 34, 36, 36) (38, 38, 40, 40) sts
Row 2 (increasing row): Ch 1, (the hdc sts will be in the third loop for the remaining of the pattern unless indicated otherwise), hdc 2 in the first st, hdc in each st across until the last st, hdc 2 in the last stitch, turn. | 34, (36, 36, 38, 38) (40, 40, 42, 42) sts
How to Work a Non-increasing Row: Ch 1, hdc in each st across, turn.
Repeats:
XS: Repeat increasing row on every 2nd row 15 times, then continue to work non-increasing rows until a total of 46 sleeve rows. | 64 sts
S: Repeat increasing row on every 2nd row 16 times, then continue to work non-increasing rows until a total of 46 sleeve rows. | 68 sts
M: Repeat increasing row on every 2nd row 18 times, then continue to work non-increasing rows until a total of 46 sleeve rows. | 72 sts
L: Repeat increasing row on every 2nd row 19 times, then continue to work non-increasing rows until a total of 46 sleeve rows. | 76 sts
1X: Repeat increasing row on every 2nd row 21 times, then continue to work non-increasing rows until a total of 46 sleeve rows. | 80 sts
2X: Repeat increasing row every row 4 times, then repeat increasing row every 2 rows 18 times, then continue to work non-increasing rows until a total of 46 sleeve rows. | 84 sts
3X: Repeat increasing row every row 10 times, then repeat increasing row every 2 rows 16 times, for a total of 46 sleeve rows. | 92 sts
4X: Repeat increasing row every row 12 times, then repeat increasing row every 2 rows 15 times, for a total of 46 sleeve rows. | 96 sts
5X: Repeat increasing row every row 16 times, then repeat increasing row every 2 rows 13 times, for a total of 46 sleeve rows. | 100 sts
First Body Section
Note: Beg ch determines length of sweater, to alter length work more or fewer chs in an even number.
Attach 2nd ball of yarn to the opposite side of the row from the working yarn, ch 52 for short, 80 for medium, 120 for long, fasten off.
Row 1: Ch 53 (81, 121), sc in 2nd ch from hook, sc in next 9 chs, hdc in next 42 (70, 110) chs, hdc in next 64 (68, 72, 76, 80) (84, 92, 96, 100) sleeve sts, hdc in next 42 (70, 110) chs, sc in last 10 chs, turn. | Short: 168 (172, 176, 180, 184) (188, 196, 200, 204) sts; Medium: 224 (228, 232, 236, 240) (244, 252, 256, 260) sts; Long: 304 (308, 312, 316, 320) (324, 332, 336, 340)
Handy Tip
You can use a stitch marker to mark the ribbing stitches so it’s easy to see when those should start and stop.
Reminder: hdc sts will go back to worked in the third loop unless indicated otherwise.
Rows 2-10: Ch 1, blo sc in first 10 sts, hdc in each st across until 10 sts rem, blo sc in last 10 sts, turn.
Rows 11-12: Ch 1, blo sc in first 10 sts, [skip the next st, sc in next, work a puff st into the skipped st] work until the last 10 sts, blo sc in last 10 sts, turn.
Row 13: Ch 1, blo sc in first 10 sts, hdc across without working in the third loop until 10 sts rem, blo sc in last 10 sts, turn.
Rows 14-16 (18, 20, 22, 24) (26, 28, 30, 34): Ch 1, blo sc in first 10 sts, hdc across (working in the third loop) until 10 sts rem, blo sc in last 10 sts, turn.
Back Section
Row 1: Ch 1, blo sc in first 10 sts, hdc in next Short: 62 (64, 66, 68, 70) (72, 76, 78, 80); Medium: 90 (92, 94, 96, 98) (100, 104, 106, 108); Long: 130 (132, 134, 136, 138) (140, 144, 146, 148), turn. | Short: 72 (74, 76, 78, 80) (82, 86, 88, 90) sts; Medium: 100 (102, 104, 106, 108) (110, 114, 116, 118) sts; Long: 140 (142, 144, 146, 148) (150, 154, 156, 158) sts.
Row 2: Ch 1, hdc in first Short: 62 (64, 66, 68, 70) (72, 76, 78, 80) sts; Medium: 90 (92, 94, 96, 98) (100, 104, 106, 108); Long: 130 (132, 134, 136, 138) (140, 144, 146, 148), blo sc in last 10 sts, turn.
Rows 3- 16 (16, 16, 16, 16) (18, 18, 18, 18): Repeat Rows 1-2. Do not fasten off.
Want an easier blocking experience? Get blocking mats and pin combs for getting a clean sharp look.
Second Body Section
Setup: With RS facing, attach yarn to last st on Back Section, ch Short: 96 (98, 100, 102, 104) (106, 110, 112, 114); Medium: 124 (126, 128, 130, 132) (134, 138, 140, 142); Long: 164 (166, 168, 170, 172) (174, 178, 180, 182), and then fasten off the chain.
Row 1: Ch 1, blo sc in first 10 sts, hdc in next Short: 148 (152, 156, 160, 164) (168, 176, 180, 184); Medium: 204 (208, 212, 216, 220) (224, 232, 236, 140); Long: 284 (288, 292, 296, 300) (304, 312, 316, 320), blo sc in last 10 sts, turn. | Short: 168 (172, 176, 180, 184) (188, 196, 200, 204) sts; Medium: 224 (228, 232, 236, 240) (244, 252, 256, 260) sts; Long: 304 (308, 312, 316, 320) (324, 332, 336, 340)
Rows 2- 4 (6, 8, 10, 12) (16, 18, 20, 22): Ch 1, blo sc in first 10 sts, hdc across until 10 sts rem, blo sc in last 10 sts, turn.
Row 5 (7, 9, 11, 13) (17, 19, 21, 23): Ch 1, blo sc in first 10 sts, [skip the next st, sc in next, work a puff st into the skipped st] work until the last 10 sts, blo sc in last 10 sts, turn.
Row 6 (8, 10, 12, 14) (18, 20, 22, 24): Repeat previous puff row, turn.
Row 7 (9, 11, 13, 15) (19, 21, 23, 25): Ch 1, blo sc in first 10 sts, hdc across without working in the third loop until 10 sts rem, blo sc in last 10 sts, turn.
Next 9 Rows: Ch 1, blo sc in first 10 sts, hdc across (working in the third loop) until 10 sts rem, blo sc in last 10 sts, turn and fasten off the last row.
Second Sleeve – Decreasing
Row 1: Sk 52 (80, 120) sts, join to the next st with a sl st, ch 1, hdc in the same and next 63 (67, 71, 75, 79) (83, 91, 95, 99) sts, leaving rem sts unworked, turn. | 64 (68, 72, 76, 80) (84, 92, 96, 100) sts.
How to work a decreasing row: Ch 1, hdc2tog, hdc until the last 2 sts, hdc2tog, turn. | 62 (66, 70, 74, 78) (82, 90, 94, 98) sts.
How to work a non-decreasing row: Ch 1, hdc in each st across, turn.
Repeats:
XS: Work 13 non-decreasing rows, then work a decreasing row, repeat decreasing row on every 2nd row 15 times, then continue to work non-decreasing rows until a total of 46 sleeve rows. | 32 sts
S: Work 11 non-decreasing rows, then work a decreasing row, repeat decreasing row on every 2nd row 16 times, then continue to work non-decreasing rows until a total of 46 sleeve rows. | 34 sts
M: Work 7 non-decreasing rows, then work a decreasing row, repeat decreasing row on every 2nd row 18 times, then continue to work non-decreasing rows until a total of 46 sleeve rows. | 34 sts
L: Work 8 non-decreasing rows, then work a decreasing row, repeat decreasing row on every 2nd row 19 times, then continue to work non-decreasing rows until a total of 46 sleeve rows. | 36 sts
1X: Work 1 non-decreasing row, then repeat decreasing row on every 2nd row 21 times, then continue to work non-decreasing rows until a total of 46 sleeve rows. | 36 sts
2X: Work 3 non-decreasing row, then work a decreasing row, repeat decreasing row on every 2nd row 18 times, then repeat decreasing row every row 4 times, then continue to work non-decreasing rows until a total of 46 sleeve rows. | 38 sts
3X: Repeat decreasing row on every 2nd row 16 times, then repeat decreasing row every row 11 times, then continue to work non-decreasing rows until a total of 46 sleeve rows. | 38 sts
4X: Repeat decreasing row on every 2nd row 15 times, then repeat decreasing row every row 13 times, then continue to work non-decreasing rows until a total of 46 sleeve rows. | 40 sts
5X: Repeat decreasing row on every 2nd row 13 times, then repeat decreasing row every row 17 times, then continue to work non-decreasing rows until a total of 46 sleeve rows. | 40 sts
Second Cuff
Row 1: Ch 11, sc in the 2nd ch from the hook and and in each st across, sl st into the flo of the next 2 sleeve sts, turn. | (10 sts)
Row 2: Skip the 2 sl sts, blo sc in each st across, turn.
Row 3: Ch 1 (does not count as a st), blo sc in each st across, sl st into the flo of the next 2 sleeve sts, turn.
Rows 4 – 32, (34, 34, 36, 36) (38, 38, 40, 40): Repeat Rows 2-3 until all sts across the sleeve edge have been worked, fasten off and weave in ends.
Seaming Your Garment
Wash and block, see example of blocking below. Fold sweater in half with RS facing out and WS together, align Sleeves and Body.
With yarn needle and preferred seaming method sew side seams beginning at bottom hem working up to Sleeves, then sew across Sleeves in one continuous seam. Repeat the seam on other side.

Front and Neck Ribbing
Row 1: With the RS facing, join with sl st to the bottom left corner of the front opening, ch 11, sc in the 2nd ch from hook and across back towards the cardigan body, sl st in next 2 sts, turn. | (10 sts)
Row 2: Sk 2 sl sts, blo sc 10, turn.
Row 3: Ch 1, blo sc 10, sl st in next 2 sts (1 stitch per edge row around the neckline), turn.
Next Rows: Rep Rows 2-3 for ribbing around Neck.
Neck Shaping Tip
On the corners of the neck, skip some edge stitches to reduce the amount of rows so it lays nicely, see video.
Join last row to beginning row by slip stitching through blo of first and last row at the same time.
Fasten off.
Finishing and Caring For Your Crochet Cardigan
Weave in any ends and block again if necessary.
And there you have it – the journey from yarn to your very own Easy Flat Crochet Cardigan is complete! ? As you enjoy the cozy accomplishment of crafting your personalized fashion statement, it’s essential to ensure proper care for your crochet garment. We’ve got some quick care tips to keep your cardigan looking as fabulous as the day you finished it!
? Washing: When it comes to acrylic yarn, simplicity is key. Opt for a gentle machine wash on a cool setting or hand wash with mild detergent. Lay your cardigan flat to dry, avoiding any unnecessary stretching that may compromise its shape.
? Handle with Love: Treat your handmade creation with care to preserve its softness and structure. Avoid wringing or twisting when wet, and if you’re feeling extra cautious, place the cardigan inside a mesh laundry bag before tossing it into the machine.
? Storage Secret: Keep your crochet cardigan looking fresh during those warmer months by storing it in a cool, dry place. A breathable garment bag or a folded shelf in your closet works wonders in preventing unwanted wrinkles and maintaining the garment’s integrity.
The Easy Flat Crochet Cardigan will be a staple in your closet and fashionable for seasons to come. And now that this project is complete, consider adding the Crochet Granny Square Cardigan or the Herringbone Top Down Cardigan to your crochet wish list. And if you want to step up your skills, the Beautiful Lace Sleeve Sweater might be for you. Happy crocheting, and may your hooks always be in your favor!
Well, That Was Fun! What’s Next?