

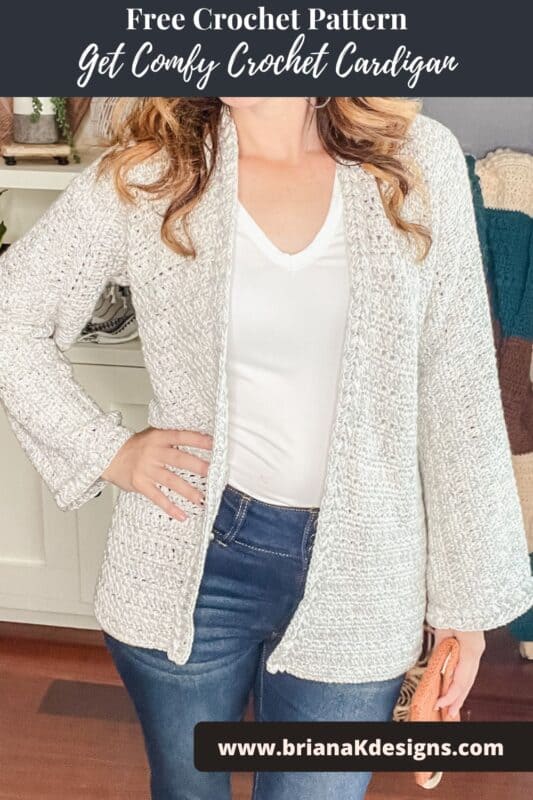
If you’re searching for the perfect beginner-friendly crochet cardigan pattern, this one-piece design checks every box. The Get Comfy Crochet Cardigan is a free pattern that’s cozy, customizable, and made completely flat — no shaping, seaming, or working in the round. Whether you prefer short or long sleeves, ribbed or wide cuffs, this is truly a choose-your-own-adventure style project that’s great for any skill level.
Disclosure: This post contains affiliate links. Please read my disclosure for more info.
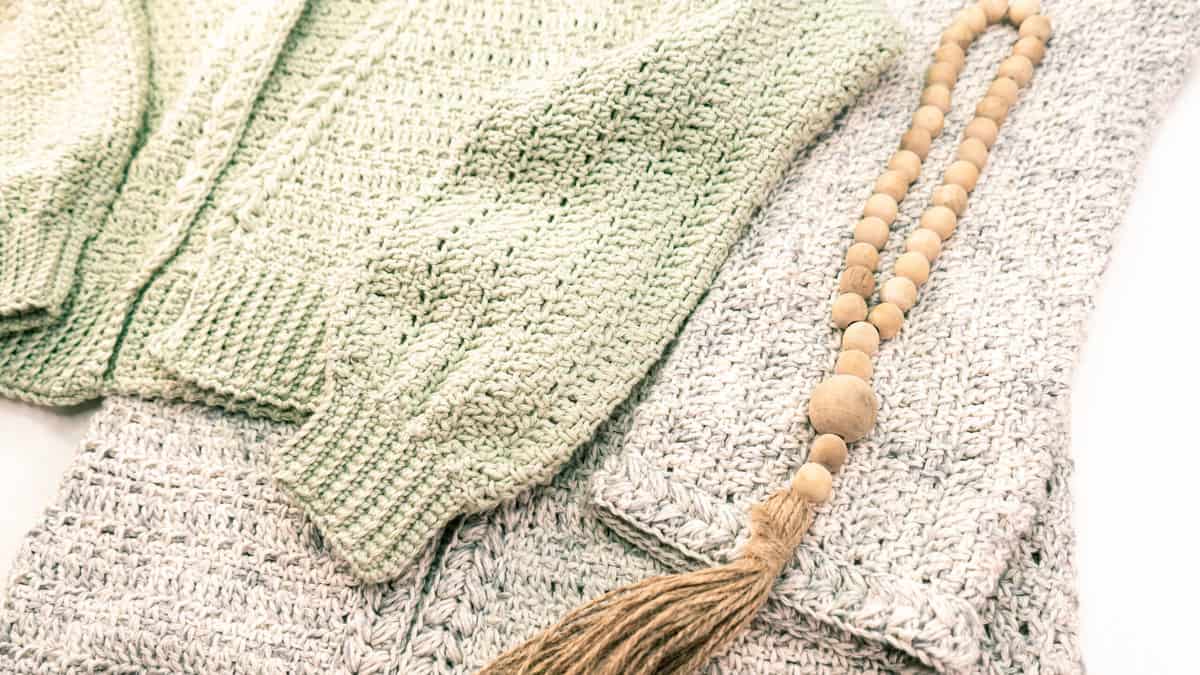
This lightweight layering piece works beautifully in cotton yarn for spring and summer or warmer blends for autumn. With a step-by-step video tutorial and optional sleeve styles, it’s no wonder this is one of our most-loved free crochet cardigan patterns.
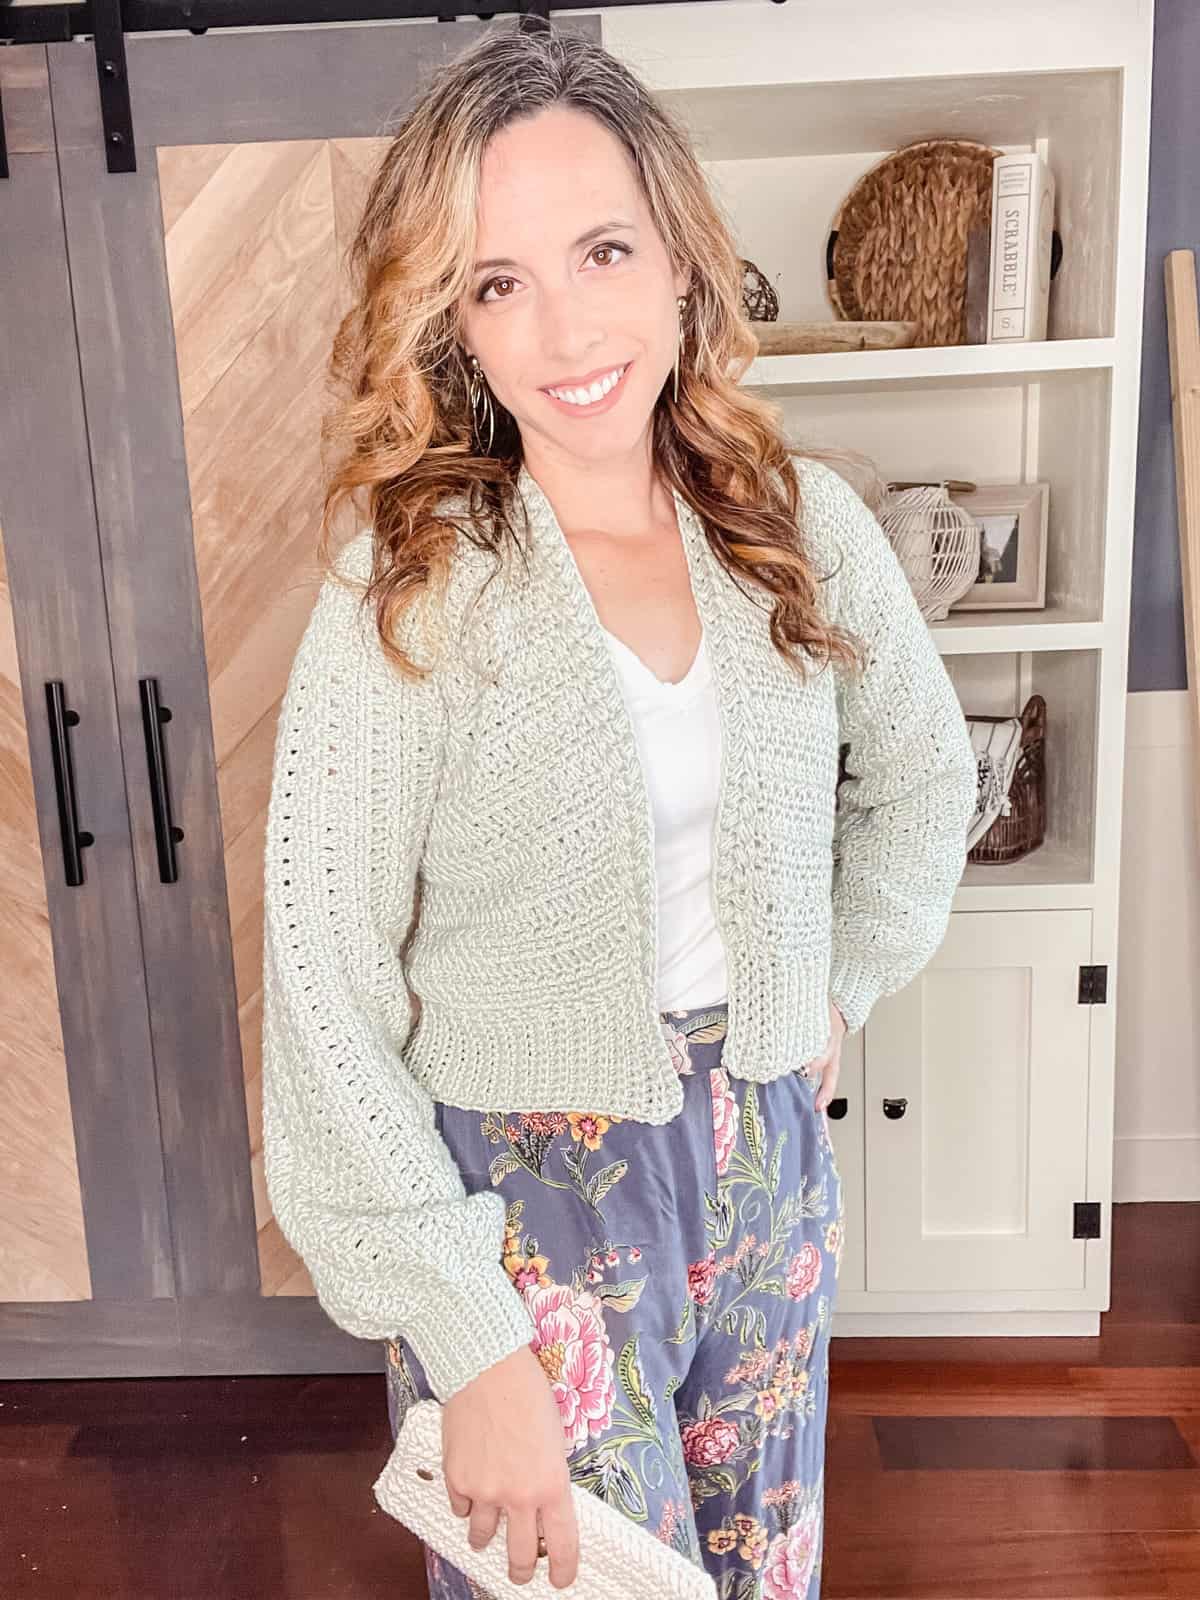
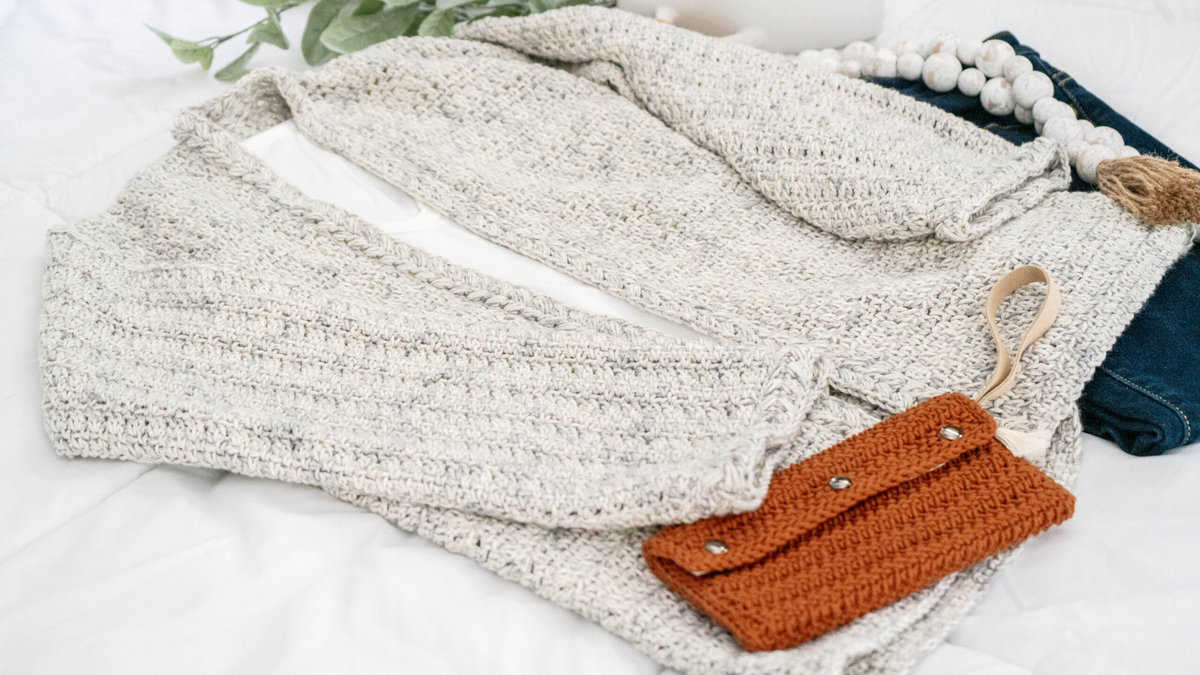
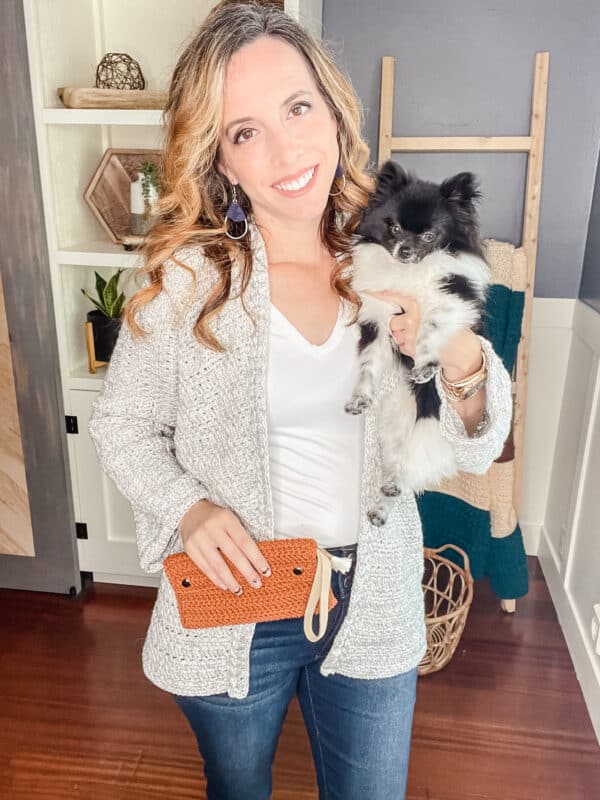
If you love layering pieces, then you will enjoy the Get Comfy Crochet Cardigan Pattern.
What You’ll Love:
- Made in one flat piece — no increasing or decreasing!
- Beginner-friendly construction = stress-free stitching!
- Includes a video tutorial to guide every step!
- Customizable sleeves: choose from ribbed or wide puff!
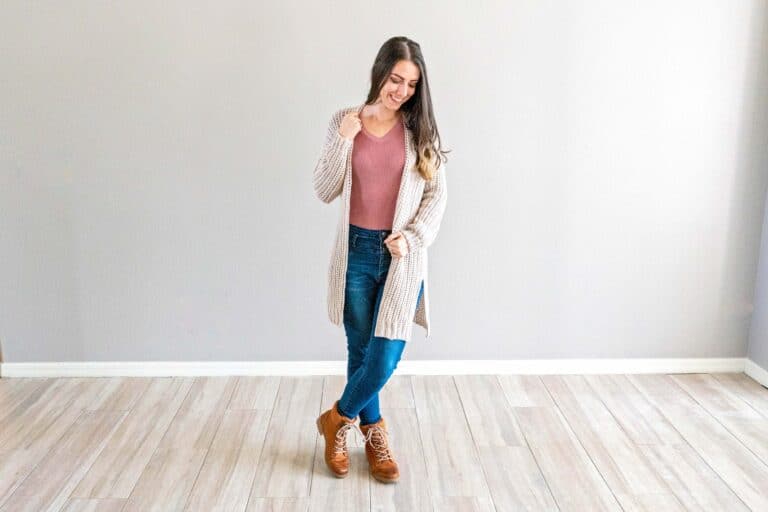
How To Style A Crochet Cardigan:
Crochet cardigans have earned their place in the fashion world and even on the runway. But we all know we aren’t walking the runway ourselves soon, so here is how you might want to style your crochet cardigan.
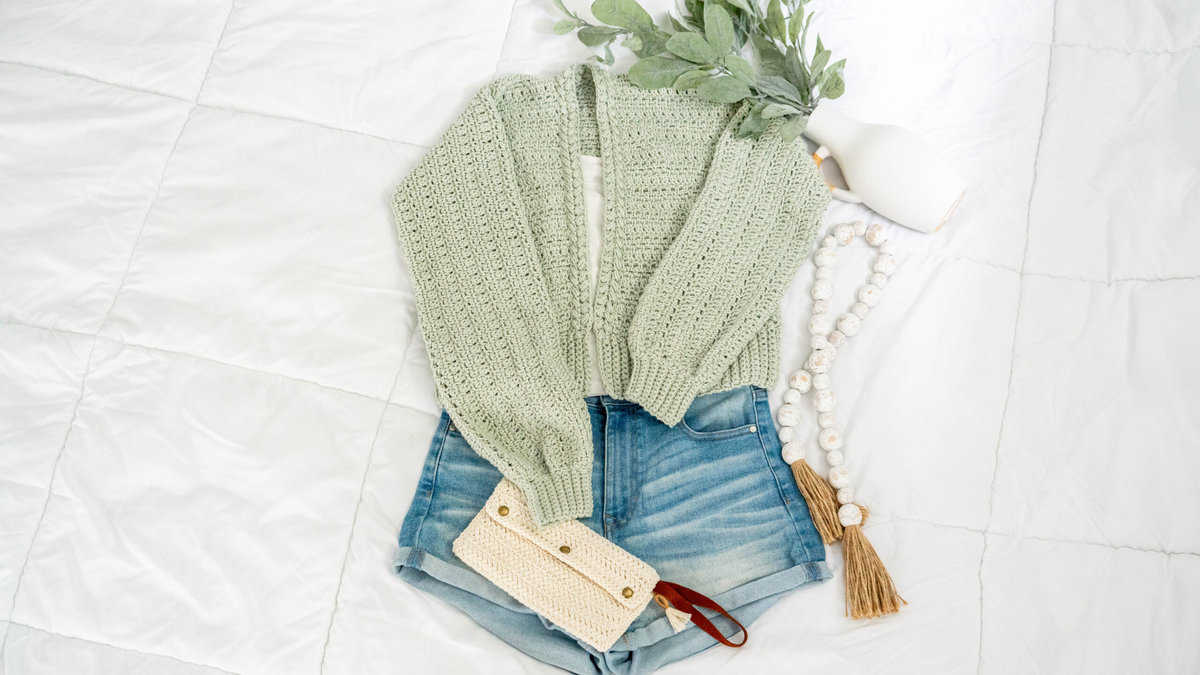
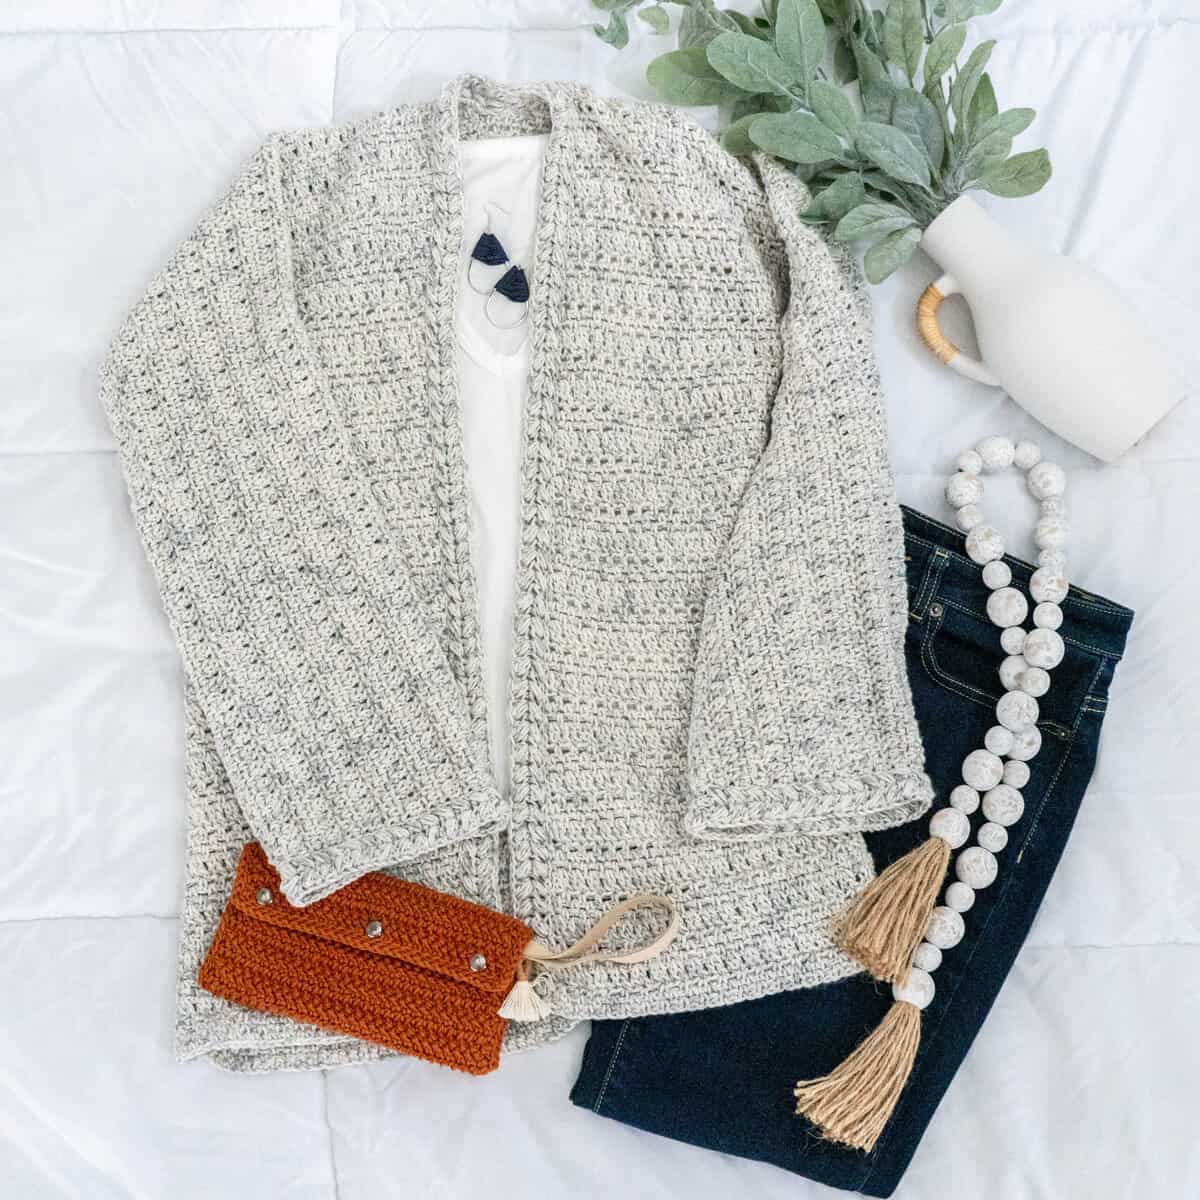
- Throw on a cropped cardigan over a sundress. This is a great way to go for the crop style but not worry about showing any skin if that’s not in your comfort zone. Add the Herringbone Crochet Clutch to top it off with an accessory.
- Let’s talk winter, it’s our favorite for layers, so a longer cardigan with jeans and boots should be a staple in every closet. Need socks for those boots? Try the Simple And Best Crochet Sock – Free Pattern.
- Even in summer, there are moments for a cardi, like when Target is blasting the AC and you want to do some shopping. Shorts, sandals, and cute earrings topped with a cropped cardi are the way to go.
- And of course, we all have that maxi dress in our closet. A long or short cardigan looks great and you will want to have something with you to stay cozy when the sun goes down. Pair with some wedges and you look effortlessly chic. And if you need a bit more than a clutch to carry your important things, the Hygge Infinity Crochet Bag & Clutch is great to grab and go.
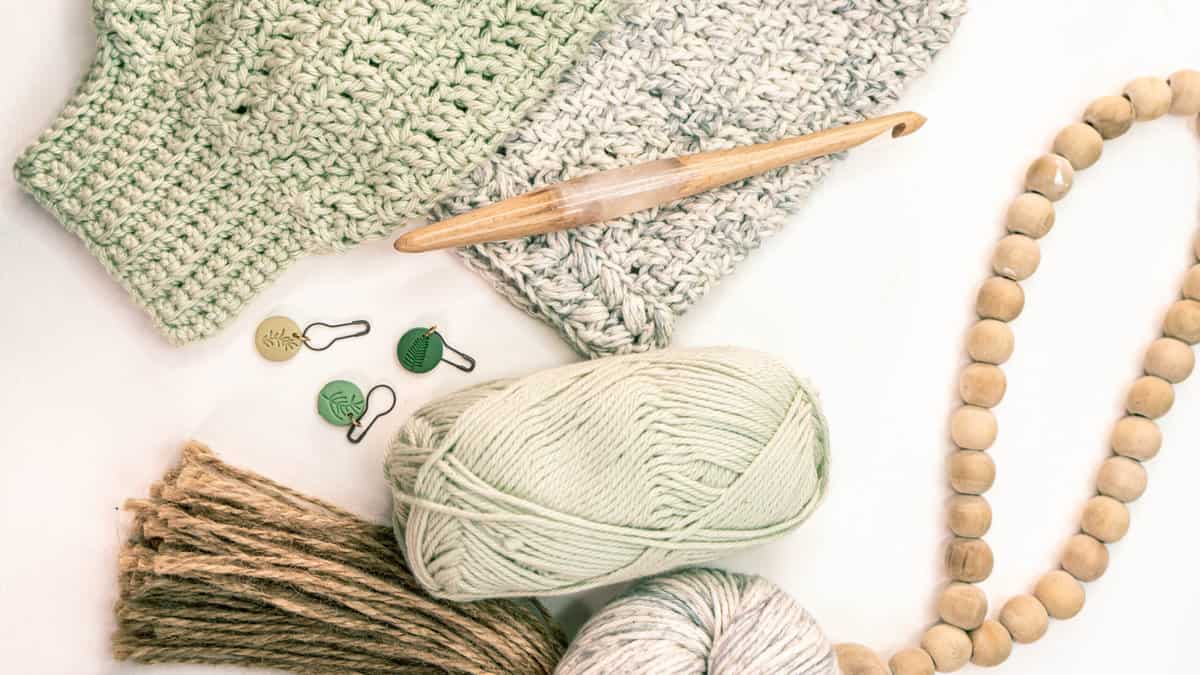
Get Comfy Crochet Cardigan Pattern Supplies:


Crochet Hook:
(5.5mm) & G (4.0mm) Hooks, or hooks to obtain gauge
Notions:
Removable stitch markers if needed
Yarn needle to weave in ends
Scissors
Blocking Mats and Pins (optional)
Yarn:
75% Pima Cotton, 25% Acrylic, 109yds/50g Colorway: Silver Sage
Yardage:
Yardage for Short:
1050, (1200, 1350, 1475) (1550, 1650, 1800, 1925) yds
10, (12, 13, 14) (15, 16, 17, 18) Skeins
Yardage for Long:
1350, (1500, 1700, 1950) (2100, 2250, 2350, 2500) yds
13, (14, 16, 18) (20, 21, 22, 23) skeins
Abbreviations/Stitches:
ch – chain
dc – double crochet
est row rep – established row repeat
flo – front loop only
hdc – half double crochet
lp(s) – loop(s)
rnd- round
rs – right side
sc – single crochet
Stsc – stacked single crochet
st(s) – stitch(es)
ws – wrong side
16 sts x 12 rows = 4×4 inches in Stitch Pattern.
Ch in multiples of two and repeat Rows 2-5 from the Back of One Piece Cardigan for the swatch.
Skill Level:
Easy Beginner
Cardigan Sizes:
Finished Garment Bust (includes 3-4 inches of ease): 34 (38, 40, 44) (50, 54, 58, 62)
See schematic.
Get Comfy Crochet Cardigan Notes:
- Keep on reading this blog post for the free version of the Get Comfy Crochet Cardigan Pattern, or purchase the ad-free downloadable PDF on Ravelry or Etsy.
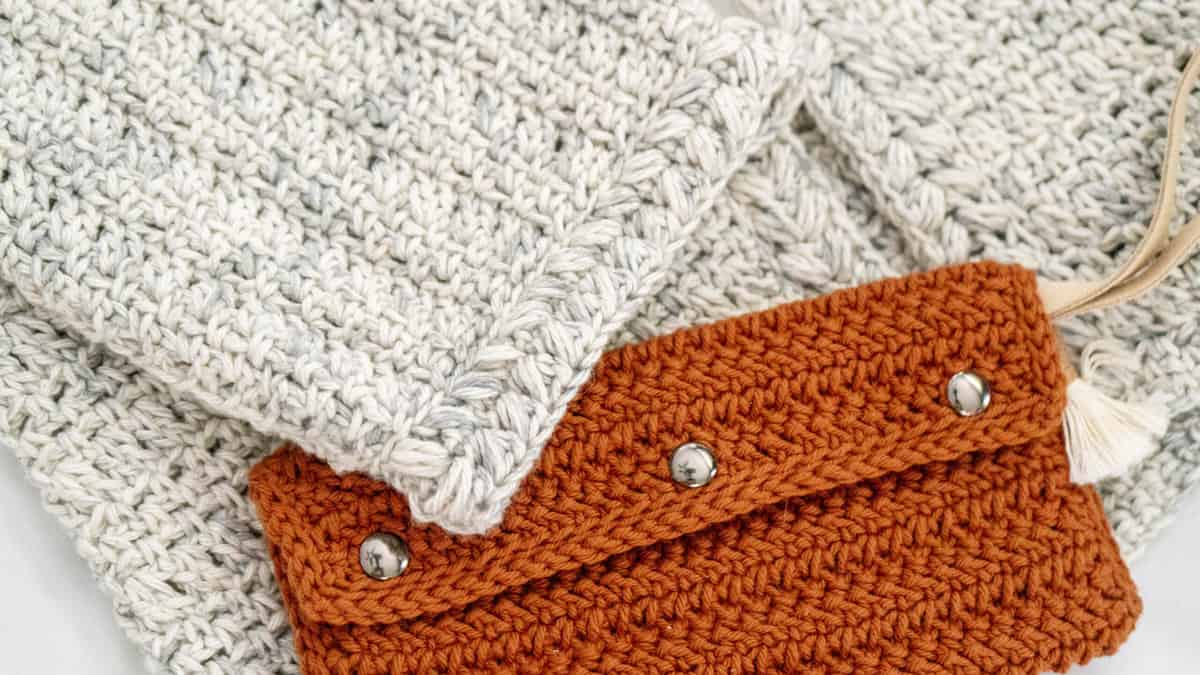
- This cardigan is crocheted flat and then seamed under the arms and down the sides. It has an easy stitch repeat that creates a stylish texture.
- Sizes are written as Small (Medium, Large, 1X) (2X, 3X, 4X, 5X).
- There is 3-4 inches of ease in this for this pattern; the actual bust measurements are 34 (38, 40, 44) (50, 54, 58, 62)”.
- Chains are not used at the beginning of each row.
- The G-hook will only be used for the ribbed sleeve option.
Special Stitches:
Stacked Single Crochet (Stsc): Do NOT chain, insert hook into next stitch, yo, pull up a loop, yo and pull through both loops, insert hook in the vertical bar below, yo, pull up a loop, yo and pull through both loops on hook.
Puff Stitch: YO, insert hook in indicated st, yo, pull lp through st and make lp same height as previous sts in working row, (yo, insert hook in same st, yo, pull lp through st and make lp same height as working row) twice, yo, pull through all 7 lps on hook.
❓ FAQ – Get Comfy Crochet Cardigan Pattern
Q: Is this crochet cardigan really made in one piece?
Yes! The entire body of the cardigan is worked flat with no seaming required. You’ll only need to attach the sleeves.
Q: Is this pattern suitable for beginners?
Absolutely. There’s no shaping, no increasing or decreasing, and the stitches are beginner-friendly. Plus, there’s a full video tutorial included.
Q: Can I make it with different sleeve styles?
Yes! The pattern includes instructions for both ribbed sleeves and wide puff sleeves, so you can choose your favorite.
Get Comfy Crochet Cardigan Tutorial Video:


Click the box below to unlock this exclusive subscriber content for free. Add your email and create a password. If you are having trouble, reset your password or log in to the Grow Portal.
I’m thrilled to share this amazing crochet pattern with you! Please don’t copy, paste, or distribute this pattern. Prefer an ad-free experience? Purchase a digital PDF file for a small fee from one of my online stores. I appreciate your support and readership. You are why I can keep doing what I love and sharing it with others. Thank you from the bottom of my heart.
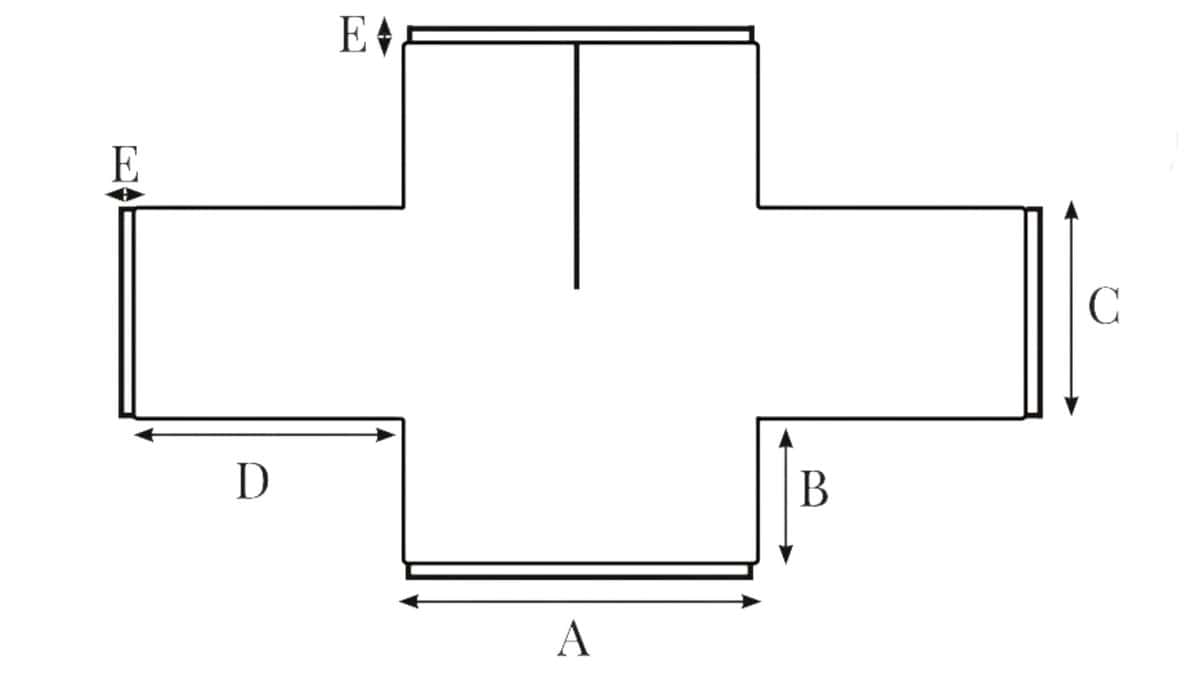
One Piece Cardigan Schematic
Measurements are in Inches:
A: 17 (19, 20, 22) (25, 27, 29, 31)”
B: 7.5″ for crop & 15″ for long, for all sizes. Please note the ribbing will add 2” to the cardigan length.
C: 15 (16, 16, 17) (19, 20, 20, 21)”
D: 17″ for all sizes. Please note the ribbing will add 2.5” to sleeve length.
E: 2.5″, optional and can be omitted based on style choice.
Get Comfy Crochet Cardigan Written Pattern
1. Back of One Piece Cardigan
With I-hook ch 68 (76, 80, 88) (100, 108, 116, 124)
Row 1 (RS):
In the first ch from the hook sc, sc in remaining across, turn. 68 (76, 80, 88) (100, 108, 116, 124) sts
Row 2:
Sc in first 2 sts, *ch 1, skip 1, sc in next*; repeat from * to * across, turn.
Row 3-4:
Sc in first 2 sts, *ch 1, skip 1, sc in next ch space*; repeat from * to * across, turn.
Row 5:
Stsc in first, 2dc sts in next ch space, *skip 1, 2dc sts in next ch space*; repeat from * to * until the last 2 sts, skip 1, dc in last, turn.
Rows 2-5 are the row repeats for the est row rep.
Repeats:
For a cropped cardigan, repeat the established row 5 more times; this will be a total of 20 more rows. For a longer cardigan, repeat the established row repeat 14 more times; this will be a total of 56 more rows. Do not fasten off.
Note on length:
To customize the length, add fewer or more rows in increments of the Row Repeat. The 2.5” ribbing on the bottom of this piece is optional. Ribbing was added to the crop version in images, and can be added for length on the longer version, or omitted. It’s a personal styling choice.
2. Adding the Arms
Note on sleeve length:
The sleeves will add 17 inches to each side. For longer or shorter sleeves, chain fewer or more sts in increments of 2.
Row 1 (WS):
Set the working yarn aside. Using a second ball of yarn, attach to the opposite side of the cardigan, and ch 68, fasten off.
Pick up the working yarn again and ch 68, turn. Starting in the first chain from the hook, repeat row 2. This will be worked across these 68 chains, across the back body sts, and across the chained sts on the opposite side. 204 (212, 216, 224) (236, 244, 252, 260)sts
Row 2 – 21 (23, 23, 25) (27, 29, 29, 31):
Work in the row repeats for the stitch pattern.
3. Crochet Cardigan Right Panel
Row 22 (24, 24, 26) (28, 30, 30, 32) (RS):
Continue to work in est row, rep for 102 (106, 108, 112) (118, 122, 126, 130) sts, turn, leaving the remaining sts unworked. 102 (106, 108, 112) (118, 122, 126, 130) sts
Repeats:
Work in pattern for 21 (23, 23, 25) (27, 29, 29, 31) more rows, turn, and fasten off.
Right Panel- Front
Skip 68 sts, attach yarn, Work the next 34 (38, 40, 44) (50, 54, 58, 62) in the established row pattern.
For a cropped cardigan, repeat the established row repeat 6 more times; this will be a total of 24 more rows. For a longer cardigan, repeat the established row repeat 15 more times; this will be a total of 60 more rows.
Last Row: Sc in each stitch across, fasten off.
Note on length: If the length was customized on the Back of the Cardigan, match the total length here.
4. Crochet Cardigan Left Panel
Row 22 (24, 24, 26) (28, 30, 30, 32) (RS):
With the RS facing, join yarn to one stitch left of the first panel, work in est row rep until the end of the row, turn. 102 (106, 108, 112) (118, 122, 126, 130) sts
Repeats:
Work est row rep for 21 (23, 23, 25) (27, 29, 29, 31) more rows, turn and do not fasten off.
Left Panel Front
Work the next 34 (38, 40, 44) (50, 54, 58, 62) in the est row rep, leaving the last 68 sts unworked.
For a cropped cardigan, repeat the established row repeat 6 more times; this will be a total of 24 more rows. For a longer cardigan, repeat the est row rep 15 more times; this will be a total of 48 more rows.
Last Row: Sc in each stitch across, fasten off.
Note on length:
If the length was customized on the Back of the Cardigan, match the total length here.
5. Front of the Crochet Cardigan Trim
Row 1 (RS):
With the RS facing, join yarn to the bottom left corner of the front of the cardigan, sl st 1 sts per sc row, and 2 sts per dc row, around the opening, turn.
Row 2:
Ch 1 (does not count as a stitch), *skip the first sl st, flo hdc in the next, work a puff st in the flo of the skipped st*; repeat from * to * across, turn. Please note: if you have an odd number of stitches along the front it’s fine, simply work a hdc into the last st, then work a Stsc as the first stitch of the next row.
Row 3:
Repeat Row 2, working through both loops. Fasten off and weave in ends.
6. Seaming the Crochet Cardigan
Blocking is recommended before seaming due to the lean of this stitch.
Fold the garment in half with the RS facing out, use your yarn needle and yarn to seam from the side of the cardigan to under the arms. Weave in ends.
7. Sleeve Trim Options
Wide Sleeve Trim Option
Rnd 1 (RS):
With the RS facing, join yarn at the seam of the sleeve, sl st 1 sts per sc row, and 2 sts per dc row, around the opening, join and turn.
Row 2:
Ch 1 (does not count as a stitch), *skip the first sl st, flo hdc in the next, work a puff st in the flo of the skipped st*; repeat from * to * aross, join and turn.
Row 3:
Repeat Row 2, Fasten off and weave in ends.
Ribbed Sleeve Option
Please Note: In order to make the sleeves tighter the slip stitches from the arm edge will be worked as 3 sl sts per every 4 rows.
Row 1:
With G-hook ch 12, sc in second chain from hook and across to arm, sl st 2 sts along the arm edge (remember to work these as 3 sts per every 4 rows, these do not count as sts), turn. 11 sts
Row 2:
Skip the two sts from the arm edge, in blo sc in each st across until the last st, sc in both loops of the last st, turn. 11 sts
Row 3:
Ch 1 (does not count as a stitch), sc through both loops of the first st, blo sc in each st across, sl st 2 sts along the arm edge, turn.
Repeats:
Repeat Rows 2-3 around the bottom of the arm. Join last row to beginning row by slip stitching through blo of first and last row at the same time with the WS facing.
8. Ribbed Bottom Option
Row 1:
With I-hook, join yarn to the bottom left edge of the cardigan and ch 12, sc in the second chain from hook and across to the bottom body edge, sl st 2 sts along the bottom body edge (these do not count as sts), turn. 11 sts
Row 2:
Skip the two sts from the bottom body edge, in blo sc in each st across until the last st, sc in both loops of the last st, turn.
Row 3:
Ch 1 (does not count as a stitch), sc through both loops of the first st, blo sc in each st across, sl st 2 sts along the bottom body edge, turn.
Repeats:
Repeat Rows 2-3 across the bottom body edge of the cardigan, fasten off.
9. Finishing
Weave in any ends, wear, and enjoy!
The Get Comfy Crochet Cardigan Pattern is one of the easiest and most flexible free cardigan crochet patterns you’ll find. Whether you’re brand new to garment-making or looking for a quick win project, this cardigan has the comfort, fit, and style you’ll love.
With the ability to customize the length, sleeve style, and yarn type, this design can adapt to any season or occasion. Try it in cotton for warm months or chunky yarn for a cozy winter vibe.
And if you love relaxing, wearable crochet projects like this one, be sure to explore the Hummingbird Cardi, the Shortbread Duster, and the Autumn Wheat Beginner Cardigan.
Well, That Was Fun! What’s Next?