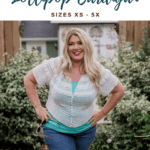
Lollipop Lightweight Summer Cardigan Pattern


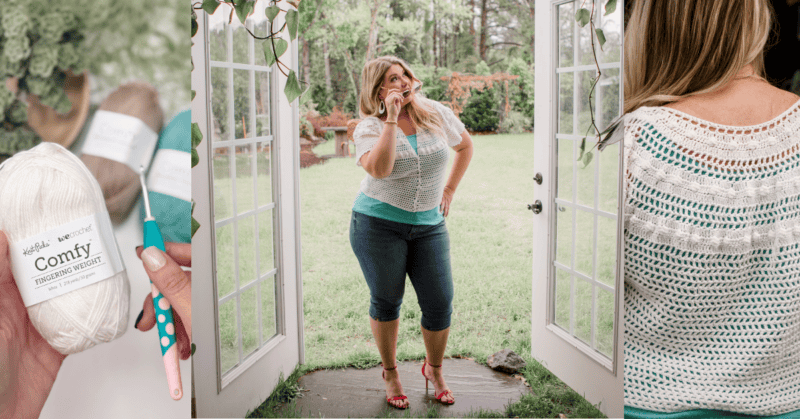
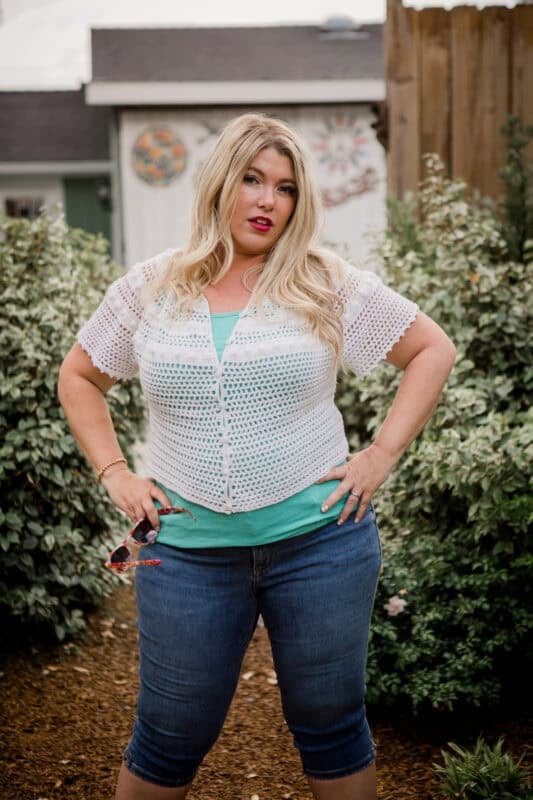
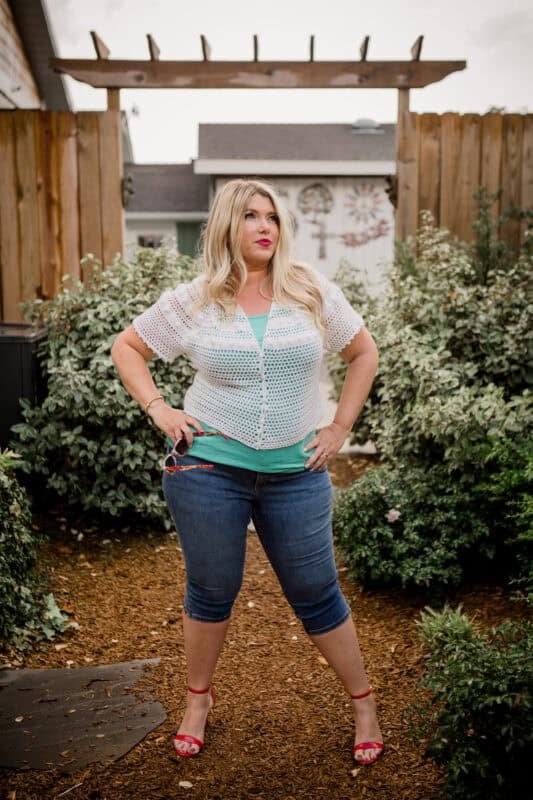
The Lollipop Summer Cardigan is all about embracing the playful spirit of summer! Inspired by the bright, swirling colors of a classic lollipop, this lightweight, size-inclusive cardigan features fun circular detailing around the yoke and cheerful bobble stitches that add just the right amount of texture. Worked top-down and all in one piece, it’s as breezy to make as it is to wear.
Disclosure: This post contains affiliate links. Please read my disclosure for more info.
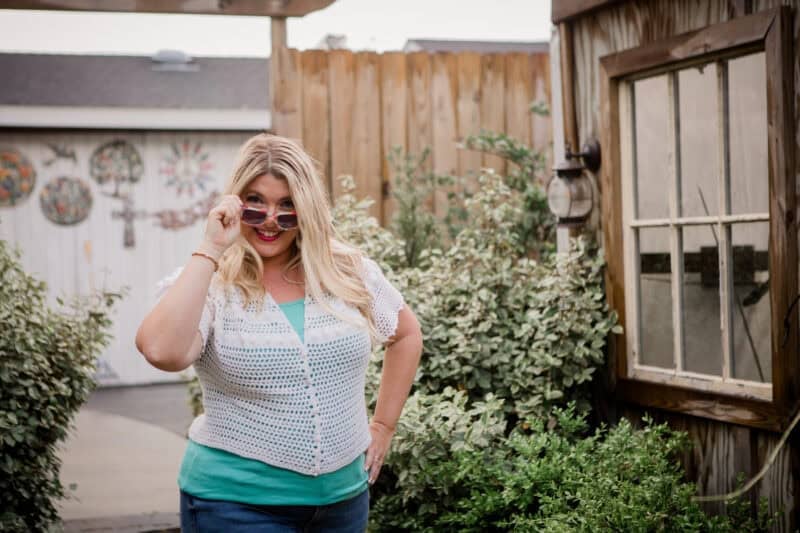
Whether you keep it crisp in white or add pops of color with rainbow buttons or a vibrant tank underneath, it’s perfect for everything from strolls at the farmer’s market to evenings at the fair. If you like simple summery tops, then you’ll love the Braided Wheat Easy Summer Top and the Summer House Tank Top!
Crochet Supplies
Yarn
WeCrochet Comfy Fingering
75% Pima Cotton, 25% Acrylic; 218yds/50g
Yarn Quantities
690 (750, 810, 870, 930) (1000, 1100, 1175, 1225)yds
Shown in White
4 (4, 4, 4, 5) (5, 6, 6, 6) balls
Yarn Substitutions
Hobbii Twister Solid – 55% Cotton, 45% Acrylic, 437yds/100g
WeCrochet Stroll – 75% Fine Superwash Merino Wool, 25% Nylon, 231yds/50g
WeCrochet Lindy Chain – 70% Linen, 30% Pima Cotton; 180yds/50g
Remember always to check the gauge and drape when substituting yarns.
Crochet Hook
Size US F (3.75mm) Crochet Hook or hook to obtain gauge.
Notions
Scissors
Yarn Needle
Removable Stitch Markers
8 Buttons
Sewing Thread and Needle
Skill Level
Intermediate
What you’ll love about this pattern.
🩶 One-piece, top-down construction – No seaming required! It’s a smooth and satisfying make from start to finish.
🩶 Lightweight & breezy – Perfect for warm-weather wear, it layers beautifully over tanks and sundresses.
🩶 Customizable with color – Keep it classic in white or add a pop of personality with bright buttons or a bold undershirt.
Sizes
XS (S, M, L, 1X) (2X, 3X, 4X, 5X)
Finished Bust with a 4-inch ease: 32 (36, 40, 44, 48) (52, 56, 60, 64)
Abbreviations
bo – bobble stitch
ch – chain
dc – double crochet
RS – right side
sc – single crochet
sl st – slip stitch
st(s) – stitch(es)
Stsc – stacked single crochet
WS – wrong side
Gauge
21 sts and 10 rows = 4″ by 4″ in double crochet
How to Crochet A Gauge Swatch
Working a gauge swatch will let you know if you will have the correct sizing for this pattern. It will also help you practice the stitches used in this project and improve your stitch work for a flawless look.
Are you struggling to match the gauge? Check out the blog post on What is Crochet Gauge and How To Fix It
Construction
This light and lacy cardigan is worked from the top down in one piece. We’ll start with the yoke and work in rows, dividing for sleeves. The body of the top will also be worked flat in rows to the desired length. We will then create a button band by attaching a new piece of yarn to the edge of the cardigan and spacing buttons as desired. Next, we will work the sleeves in the round and finish by adding a gorgeous edging.
Check out the Sagebrush Lindy Chain Crochet Sweater and the Easy Summer Crochet Top for more elegant and airy garments perfect for dressing up or down!
Special Stitches
Bobble Stitch (bo): Yo, insert hook into stitch, yo and pull up a loop, yo and pull through 2 loops on the hook; repeat from * to * 4 more times, yo and pull through all 7 loops on the hook.
Stacked Single Crochet (Stsc)– Insert hook into next stitch, yo, pull up a loop, yo and pull through both loops, insert hook in the vertical bar below, yo, pull up a loop, yo and pull through both loops on hook.
Picot: Ch 3, insert your hook into the third chain from the hook. Yarn over (yo) and draw the yarn through the stitch and through the loop on the hook.
Pattern Notes
- Stacked single crochet is used at the beginning of the rows, making beginning or row chains unnecessary.
- Sizes are written as: XS (S, M, L, 1X) (2X, 3X, 4X, 5X). The instructions and stitch counts are given for the smallest size, with the larger sizes in parentheses ( ).
- Before you dive into your project, take a moment to identify the stitch and row counts that match the size you’re making. By highlighting or marking them, you’ll save time and effort later on. Trust us, this small step will make a big difference in your crochet journey!
- This Pattern Uses Standard US Terminology.
Subscribe & Like
Video Tutorial for the Lollipop Summer Cardigan
Relax & Crochet
Upgrade to the Printable PDF
Beautifully formatted to print and relax while crocheting. The paid pattern includes:
The Ad-Free PDF can be purchased on Etsy or Ravelry.
Click the box below to unlock this exclusive subscriber content for free. Add your email and create a password. If you are having trouble, reset your password or login to the Grow Portal.
I’m thrilled to share this amazing crochet pattern with you! Please don’t copy, paste, or distribute this pattern. Prefer an ad-free experience? Purchase a digital PDF file for a small fee from one of my online stores. I appreciate your support and readership. You are why I can keep doing what I love and sharing it with others. Thank you from the bottom of my heart.
Written Crochet Pattern Instructions
Yoke
Ch 105 (105, 109, 115, 115) (121, 121, 127, 127).
Row 1 (RS):
Row 5:
Stsc, dc into the same as stsc, dc 2, * 2dc into the next, dc 2 *; repeat from * to * across, turn. 208 (208, 216, 228, 228) (240, 240, 252, 252) sts
Rows 6-8:
Repeat Row 2.
Row 9:
Stsc, dc 2, 2dc into the next, * dc 3, 2dc into the next *; repeat from * to * across, turn. 260 (260, 270, 285, 285) (300, 300, 315, 315) sts
Row 10:
Sizs XS, S: Stsc, dc 1, * bo, dc 5 *; repeat from * to * across, turn.
Sizes M, 2X, 3X: Stsc, dc 2, * bo, dc * 5; repeat from * to * until the last 3 sts, bo, dc 2, turn.
Sizes L, 1X, 4X, 5X: Stsc, * bo, dc 5 *; repeat from * to * until the last 2 sts, bo, dc in the last, turn.
Row 11:
Stsc, dc into the same as stsc, dc 4, * 2dc into the next, dc 4 *; repeat from * to * across, turn. 312 (312, 324, 342, 342) (360, 360, 378, 378) sts
Rows 12-14:
Repeat Row 2.
Row 15:
Size XS: Stsc, dc in each stitch across, turn.
Size S: Stsc, dc 18, (2dc into the next, dc 39) 7 times, 2dc into the next, dc 19, turn.
Size M: Stsc, dc 7, (2dc into the next, dc 16) 2 times, (2dc into the next, k15) 15 times, (2dc into
the next, dc 16) 2 times, 2dc into the next, dc 7, turn.
Size L: Stsc, dc 5, (2dc into the next, dc 10) 9 times, (2dc into the next, dc 11) 11 times, (2dc
into the next, dc 10) 9 times, 2dc into the next, dc 5, turn.
Size 1X: Stsc, dc 2, (2dc into the next, dc 6) 21 times, (2dc into the next, dc 5) 7 times (2dc into
the next, dc 6) 21 times, 2dc into the next, dc 2, turn.
Sizes 2X, 3X, 4X, 5X: Stsc, dc 4, 2dc into the next, * dc 5, 2dc into the next *; repeat from * to *
across, turn.
312 (320, 344, 372, 392) (420, 420, 441, 441) sts
Row 16:
Sizes XS, L, 2X, 3X: Stsc, dc 2, * bo, dc 5 *; repeat from * to * until the last 3 sts, bo, dc 2, turn.
Sizes S, M, 1X: Stsc, dc 1, * bo, dc * 5; repeat from * to * across, turn.
Sizes 4X, 5X: Stsc, * bo, dc 5 *; repeat from * to * until the last 2 sts, bo, dc in last, turn.
Row 17:
Sizes XS, S, M, L, 1X: Stsc, dc in each stitch across, turn.
Size 2X: Stsc, dc 25, (2dc into the next, dc 52) 2 times, (2dc into the next, dc 51) 3 times, (2dc into the next, dc 52) 2 times, 2dc into the next, dc 25, turn.
Size 3X: Stsc, dc 3, (2dc into the next, dc 8) 18 times, (2dc into the next, dc 7) 11 times, (2dc into the next, dc 8) 18 times, 2dc into the next, dc 3, turn.
Size 4X: Stsc, dc 3, (2dc into the next, dc 7) 9 times, (2dc into the next, dc 8) 32 times, (2dc into the next, dc 7) 9 times, 2dc into the next, dc 4, turn.
Size 5X: Stsc, dc into the same as stsc, dc 6, 2dc into the next, dc 6; repeat from * to * across,
turn.
312 (320, 344, 372, 392) (428, 468, 492, 504) sts
Repeats:
Repeat Row 2 for 3 (3, 3, 5, 5) (6, 6, 7, 7) more rows.
Join The Kindest Community
Join our vibrant community of crafters on Facebook today. Whether you enjoy crafting with others or simply have burning questions, we’ve got you covered – join us now!
Divide for Arms & Sleeves
Row 1:
Stsc, dc in next, * ch 1, skip 1, dc 1 *; repeat from * to * for a total of 44 (46, 50, 54, 58) (64, 70, 74, 78) sts from the starting edge, ch 4 (6, 6, 10, 8) (12, 8, 10, 12) sts, skip 68 (68, 72, 78, 80) (86, 94, 96, 96) sts, repeat from * to * for a total of 88 (92, 100, 108, 116) (128, 140, 148, 156) sts, ch 4 (6, 6, 10, 8) (12, 8, 10, 12) sts, skip 68 (68, 72, 78, 80) (86, 94, 96, 96) sts, repeat from * to * for a total of 44 (46, 50, 54, 58) (64, 70, 74, 78) remaining sts, turn.
188 (196, 212, 236, 248) (280, 296, 316, 336) sts
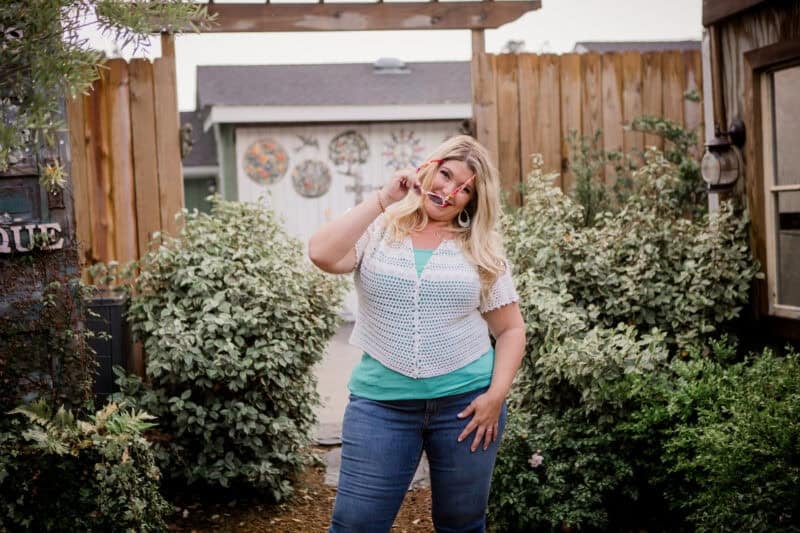
Style
The Lollipop Summer Cardigan is a fantastic addition to any wardrobe, and it’s super easy to style! Layer over a bright tank top and add a super cute clutch (like the Granny Stitch Clutch) for a pop of color. Pair with a sundress and a fabulous shawl (like the Picot Shawl) for a breezy look. Go sporty with sneakers, joggers, and an adorable crossbody bag (like the Summer House Bag) for a cute, comfy weekend outfit.
Body
This portion will work around the body stitches only, we will come back later to work the sleeves.
Row 1:
Stsc, dc in next, * ch 1, skip 1, dc 1 *; repeat from * to * across, turn. 188 (196, 212, 236, 248) (280, 296, 316, 336) sts
Repeats:
Repeat Row 1 for a total of 26 (26, 26, 26, 26) (28, 28, 28, 28) rows, or desired length before edging, fasten off.
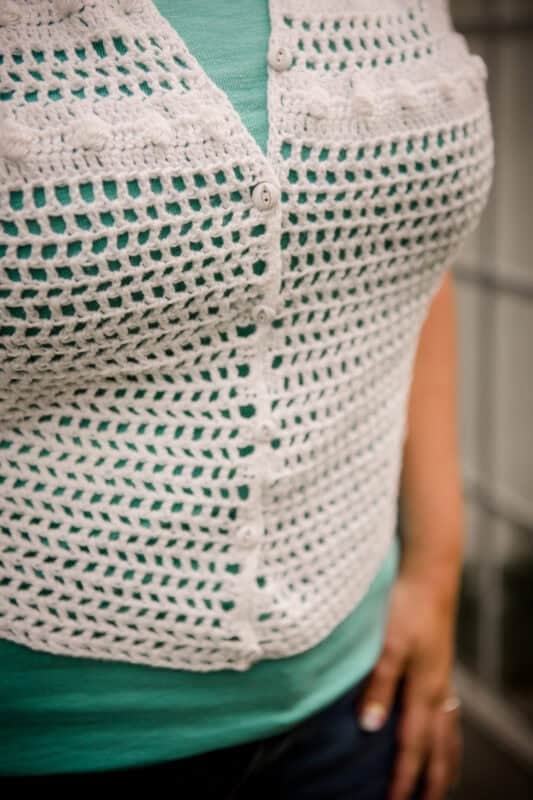
Button Band
When placing the buttons, it’s best to lay the 8 buttons out on top of the garment to determine the proper spacing. With the right side facing, ch 1 (or attach yarn to the bottom left corner of the cardigan), sc 2 stitches along each dc edge while also chaining 2 and skipping a dc edge to create the button hole. The first and last buttons are placed at the top and the bottom of the cardigan, with about 5 rows between each button.
For the opposite side (right side facing), attach yarn to the top corner and ch 1, sc 2 stitches along each dc edge until the bottom of the cardigan. Fasten off and weave in all ends.
Match up each buttonhole row with the corresponding row on the opposite front side of the cardigan and sew each button in place.
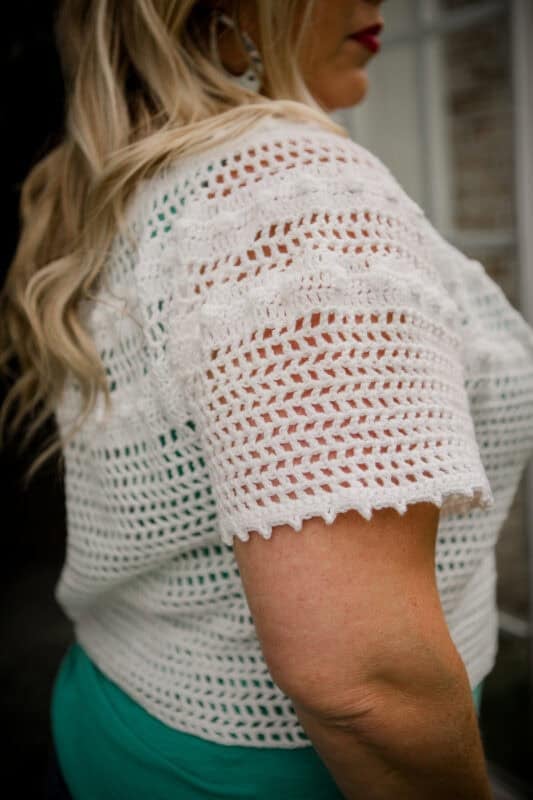
Sleeves
Rnd 1:
Attach the yarn to a chain space at bottom of arm opening. Stsc, dc in next ch-sp, * ch 1, skip 1, dc 1 *; repeat from * to * around placing (ch 1, skip 1, dc 1) in the corner spaces where the underarm chains and the body meet, join and turn. 80 (82, 86, 90, 98) (106, 110, 114, 116) sts
Rnd 2:
Ch 1, Stsc in first chain space, dc in next, * ch 1, skip 1, dc 1 *; repeat from * to * around, join.
Repeats:
Repeat Rnd 2 6 times for all sizes. If you want your sleeve shorter or longer, omit or increase repeats.
Sleeve Edging
Do not turn, with the right side facing * sc 4, picot *; repeat from * to * around, join.
This edging is done in a 4-st repeat, though some of the sizes will not have an even repeat number. Omit or place an extra picot under the arm; the minor spacing will not be noticeable, fasten off.
Subscribe to my youtube channel
Finishing
Weave in all ends and block.
Crochet garments are truly something special. They have a way of flattering everybody with their softness, texture, and effortless drape.
Whether it’s a lightweight cardigan like the Hummingbird Cardi or a cozy sweater like the Dove Pullover, handmade pieces add beautiful dimension and flair to any wardrobe. They’re not just stylish—they’re full of personality, made with care, and totally unique to you.
Best of all, crochet garments celebrate individuality, offering endless ways to customize colors, fits, and details so you can feel confident and comfortable whenever you wear them. There’s nothing like the joy of wearing something you made with your own two hands!
Cheers, and happy crocheting!
Well That Was Fun! What’s Next?
📌 PIN THIS POST – Don’t lose this project; save it to your Pinterest crochet board so you can quickly come back to it again.
💌 SHARE – Share your yarn choice, in-progress, or finished projects on Facebook or Instagram and use the hashtag #brianakdesigns
🥂 JOIN – Join the kindest crafters in the Briana K Designs Community Group on Facebook. We love yarny friends!
🔗 RAVELRY LINK -Link and share your project on Ravelry. Having inspirational photos can help crafters.