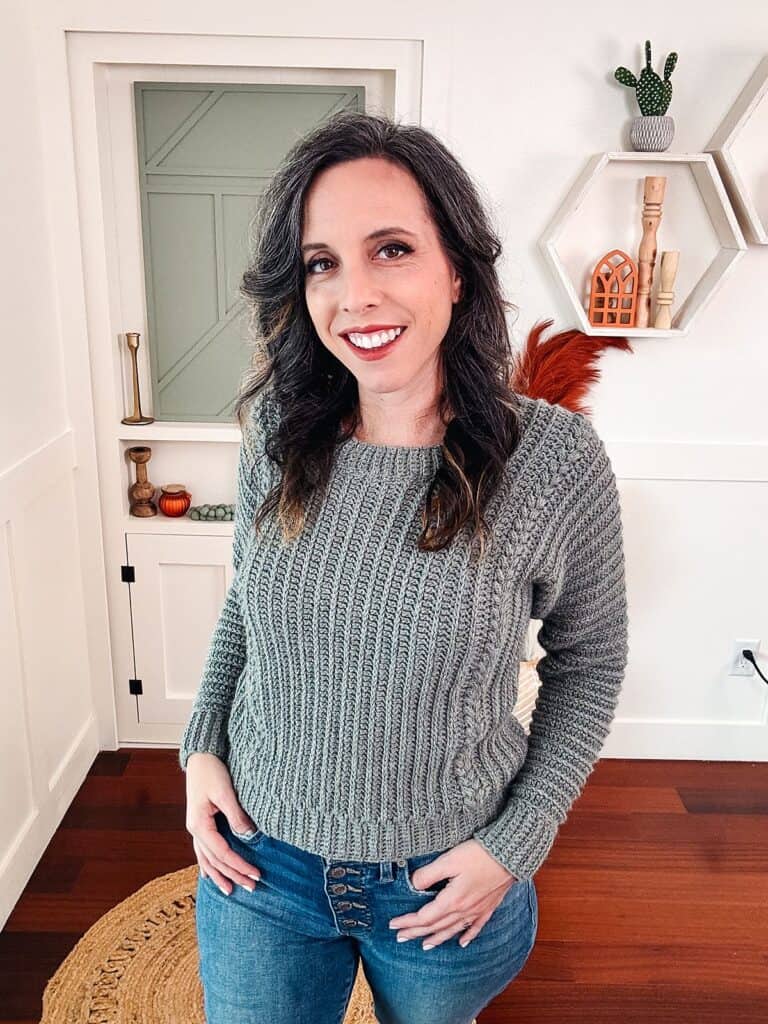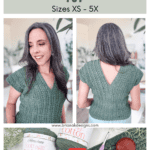
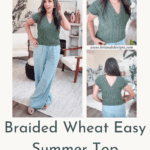


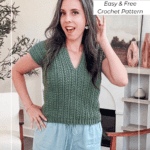

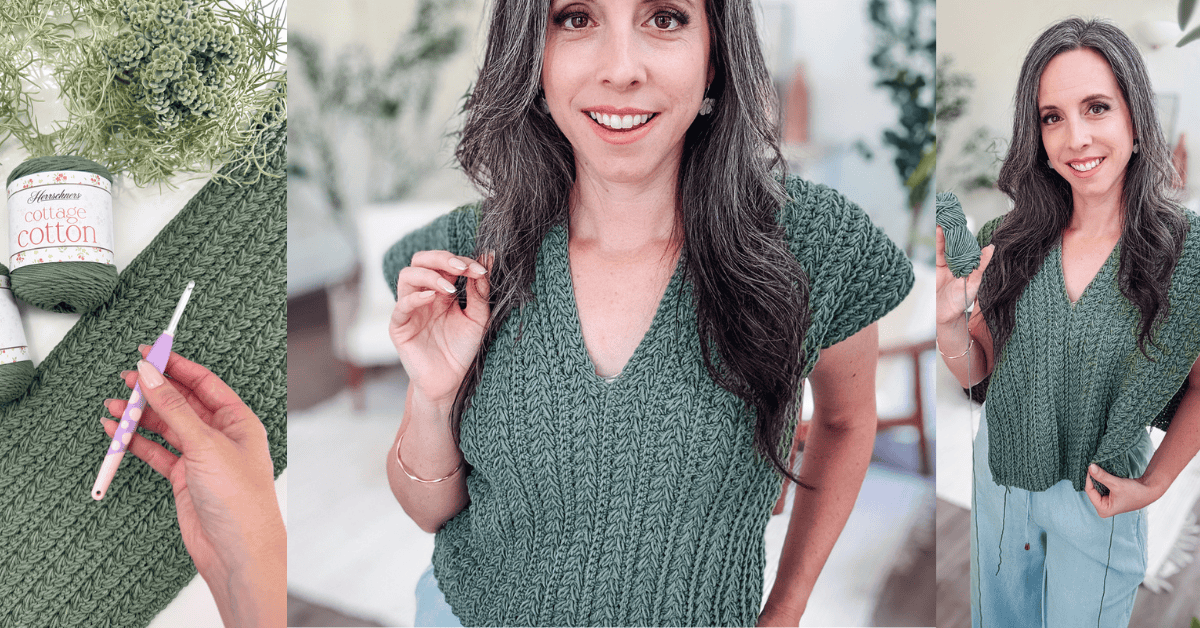
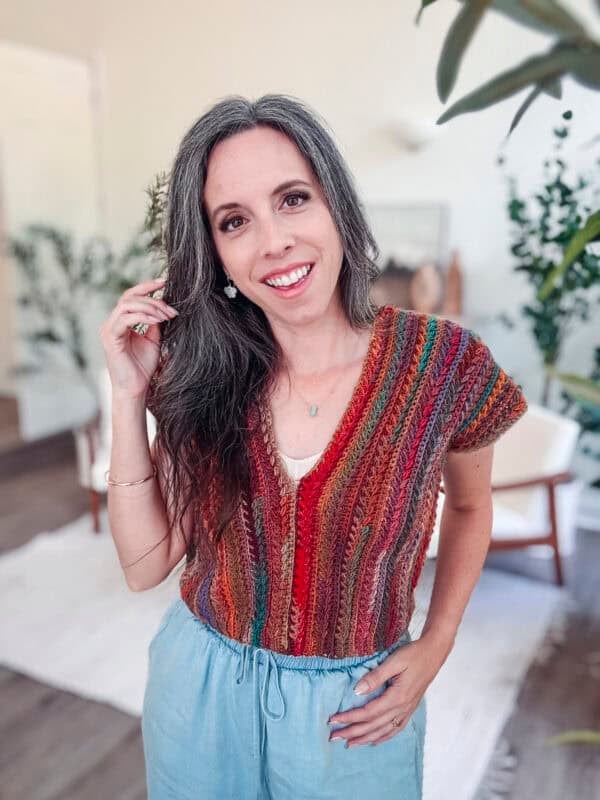
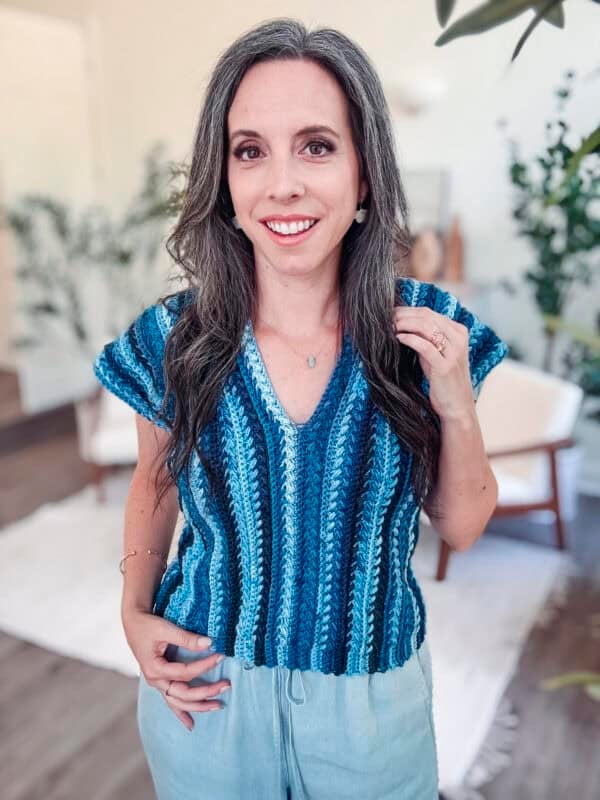
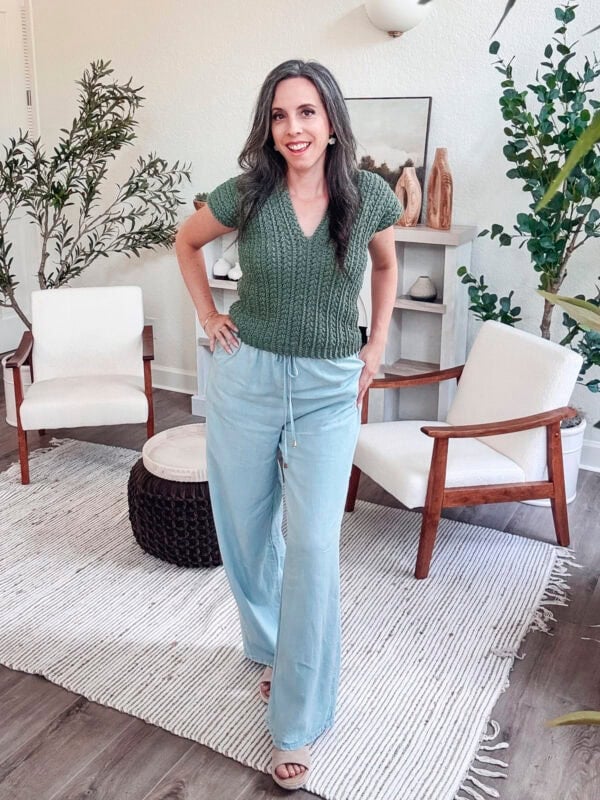
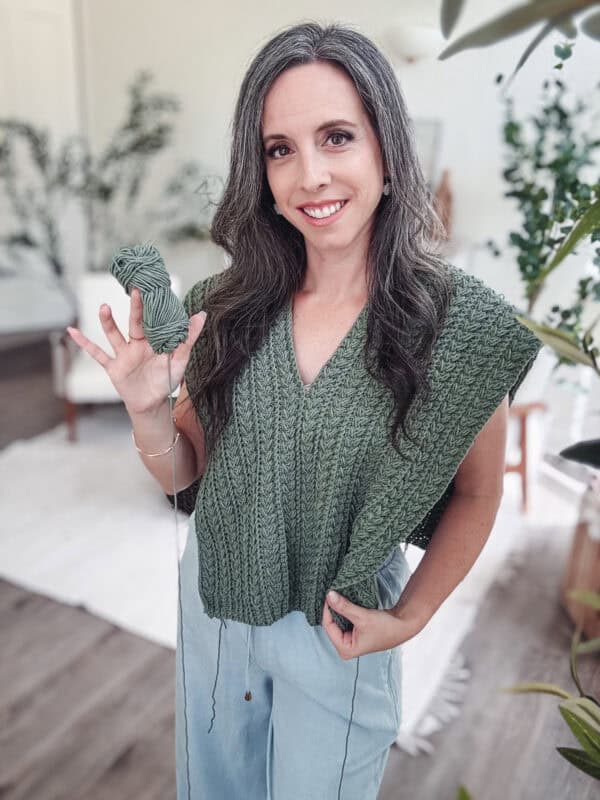
I’ve lost count of how many times I’ve made a crochet top only to realize mid-project that I’d accidentally turned it into a rectangle with good intentions. So when I designed the Braided Wheat Summer Top, I was deliberately stubborn about keeping the construction as no-drama as possible — one piece, side-to-side, two seams, done. The Wheat Stitch does all the talking, and all you have to do is show up. It comes in nine sizes (XS through 5X) and four length options, which means whether you’re 5’2″ or 5’10”, you’re not guessing at the math. (The sample in the photos is size Small at 17 inches in length — just so you have a reference point!)
Disclosure: This post contains affiliate links. Please read my disclosure for more info.
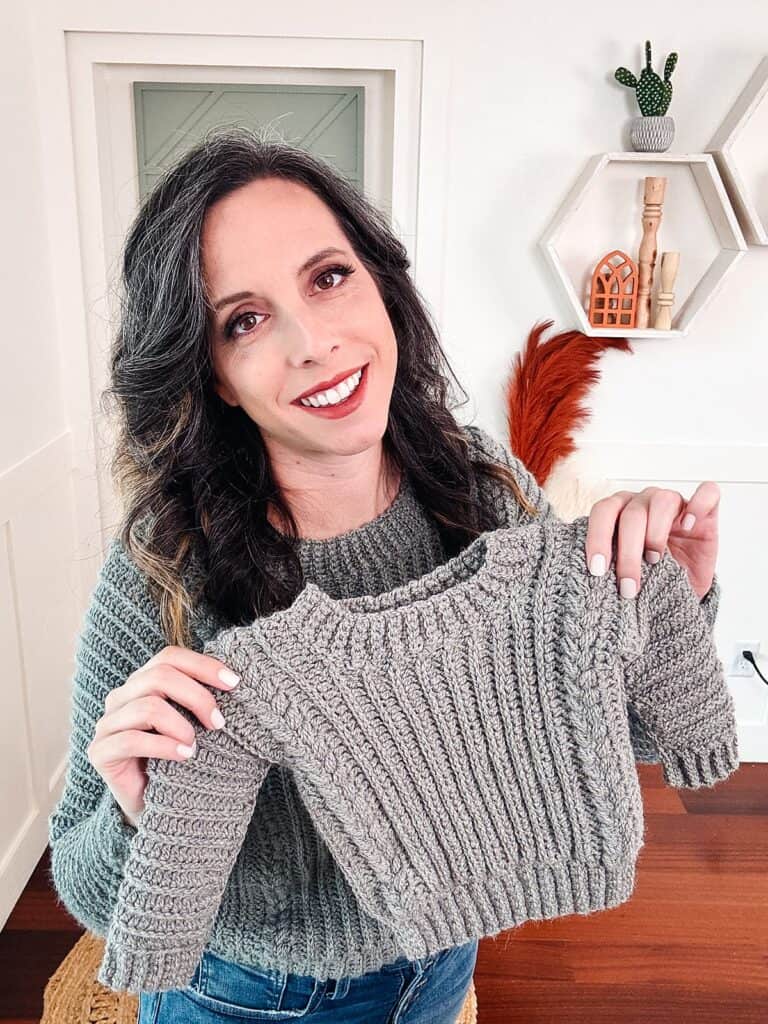
This beautifully textured piece features the Wheat Stitch — one of my signature stitches. You can grab the full step-by-step Wheat Stitch tutorial here if you’re new to it, or head straight into the pattern below if you’ve already got it down.
Whether you’re expanding your handmade summer wardrobe or just love an easy, breezy crochet piece, this top is a perfect pick. The Summer House Tank Top and the Granny Summer Top are also simple and fun pieces! You can also make yourself a gorgeous coordinating Wheat Stitch Rectangle Bag!
Crochet Summer Top Supplies (What You’ll Need)
Yarn
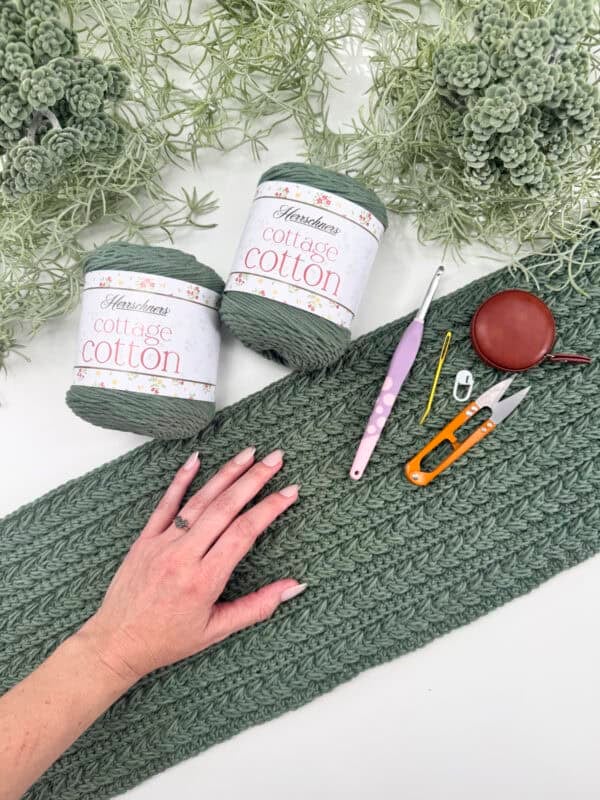
Herrschners Cottage Cotton
60% Cotton, 40% Acrylic Blend; 207yds/100g
Yarn Quantities
The image sample is size Small & 17 inches in length
17″ Length:
789 (919, 1048, 1184, 1184) (1313, 1443, 1579, 1708)
19″ Length:
882 (1027, 1172, 1323, 1323) (1468, 1613, 1764, 1909)
21″ Length:
975 (1135, 1295, 1463, 1463) (1623, 1782, 1950, 2110)
23″ Length:
1068 (1243, 1418, 1602, 1602) (1777, 1952, 2137, 2311)
Yarn Substitutions
WeCrochet Shine – 60% Pima Cotton, 40% Modal, 75yds/50g
Lion Brand Color Theory – 100% Acrylic, 246yds/100g
Premier Anti-Pilling Everyday Worsted – 100% Acrylic, 180yds/100g
Lion Brand Made With Love: The Cottony One – 60% Cotton, 40% Acrylic, 185yds/100g
Remember always to check the gauge and drape when substituting yarns.
Best Yarn for a Crochet Summer Top (And Why It Matters)
Not all yarn is created equal when it comes to warm-weather wearables, and the fiber content you choose can make the difference between a top you reach for constantly and one that sits folded in a drawer. For a crochet summer top, you want something with breathability and drape, which is why I chose Herrschners Cottage Cotton (60% Cotton, 40% Acrylic) for this pattern. The cotton content keeps it breathable and light, while the acrylic adds just enough structure to help the wheat stitch pop without getting stiff or heavy.
Pure 100% cotton yarns are a great option for summer tops because they’re naturally breathable and get softer with every wash. The trade-off is that they can be heavier and lose their shape more easily over time, especially in looser stitch patterns. A cotton-acrylic blend like Cottage Cotton gives you most of the breathability benefits while holding its shape better through repeated wear and washing — a win for a garment you’re going to actually live in.
If you’re substituting yarn, the most important things to check are fiber content (aim for at least 50% natural fiber for summer), weight (this pattern is written for worsted/aran weight — don’t go heavier), and drape (hold a skein loosely and see if it flows or if it clumps). The substitution options listed in the supplies section all meet these criteria, but always swatch first — especially with cotton blends, gauge can shift more than you’d expect between brands.
Crochet Hook
Size US I (5.5mm) Crochet Hook or hook to obtain gauge.
Notions
Scissors
Yarn Needle
Removable Stitch Marker
Tape Measure
Skill Level
Why You’ll Love This Free Crochet Summer Top Pattern
♥️ Long or Short – This top has 4 length options for a perfect fit!
♥️ Size-Inclusive – Sizes XS-5X are included in the pattern.
♥️ Amazing texture – The wheat stitch adds just enough dimension without being overpowering (or heavy).
♥️ Beginner-friendly construction – No shaping, increasing, or decreasing required – and all you need are two seams to finish!
Sizes
XS (S, M, L, 1X) (2X, 3X, 4X, 5X)
Finished Bust Measurements:
32 (37.25, 42.5, 48, 48) (53.25, 58.5, 64, 69.25)”
How to Get the Right Fit (Ease, Sizing, and Customization)
Choosing the right size for a crochet garment is a little different from picking a clothing size at a store, and it’s one of the most common places crocheters get tripped up. The key concept here is “positive ease”—the difference between your actual body measurement and the finished garment measurement. This top is designed with positive ease built in, which means the finished measurement is intentionally larger than your body measurement. That’s what gives it a relaxed, comfortable fit rather than a skin-tight one.
To choose your size, measure around the fullest part of your chest and compare that number to the finished bust measurements in the pattern. You’re looking for the finished measurement that’s 2 to 4 inches larger than your actual chest measurement for a standard relaxed fit. If you prefer a slightly more fitted look, you can go down one size. If you love a really oversized, flowy drape, go up a size. There’s no wrong answer here — it’s entirely about how you want the top to sit on your body.
The four length options (17″, 19″, 21″, and 23″) are measured from the top of the shoulder down. If you’re shorter or petite, the 17″ or 19″ length will likely hit at a flattering spot. If you’re taller or prefer more coverage, the 21″ or 23″ length gives you that extra room. I’d recommend trying on the piece before seaming the sides if you can — it’s much easier to adjust the length before everything is sewn up than after.
The neckline depth is also customizable. The pattern notes that you can chain and skip more or fewer stitches when creating the neck split — if you want a higher neckline for more coverage, add fewer chains. If you love a deeper V, add a few more. Try it on mid-project and see what feels right for your style.
Abbreviations
blo – back loop only
ch – chain
RS – right side
sc – single crochet
sl st – slip stitch
st(s) – stitch(es)
WS – wrong side
Gauge
16 sts by 12 rows = 4×4 inches in stitch pattern.
How to Crochet A Gauge Swatch
Working a gauge swatch will let you know if you will have the correct sizing for this pattern. It will also help you practice the stitches used in this project and improve your stitch work for a flawless look.
Are you struggling to match the gauge? Check out the blog post on What is Crochet Gauge and How To Fix It
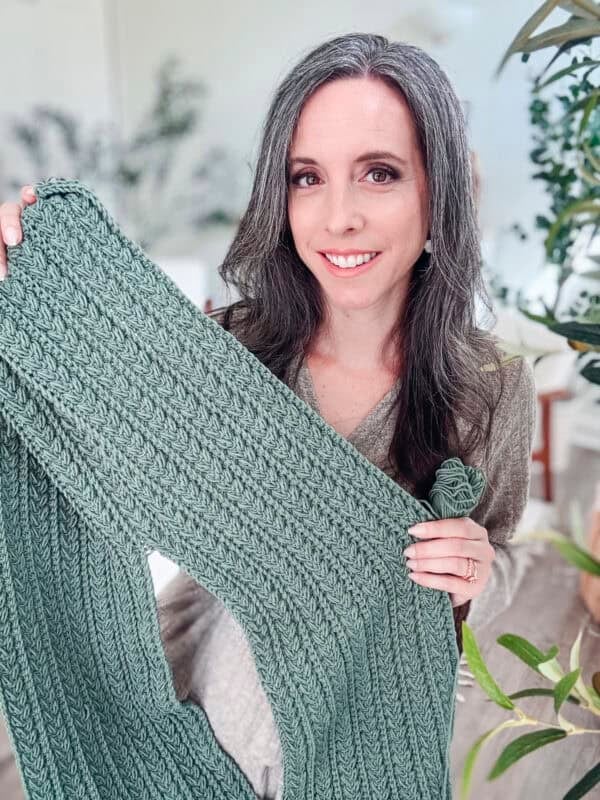
Construction
This crochet garment is worked side to side in one piece. We’ll begin with the first section, then shape the opening for the neckxt, and finally complete the second section. To finish, simply seam both sides, and it’s ready to wear!
Love two-seam construction? Try the Hummingbird Cardi and the Sparrow Sweater!
Special Stitches
Puff Stitch: Yarn over and insert your hook into the stitch/space. Yarn over again and pull up a long loop. Yarn over and insert your hook into the same stitch/space. Yarn over again and pull up a long loop (5 loops on the hook). Yarn over and pull through the first 4 loops, yarn over and pull through remaining loops.
Wheat Stitch: To see a step-by-step tutorial of how to make this stitch, visit How To Crochet The Wheat Stitch.
Foundation Single Crochet: Learn How to Easily Foundation Single Crochet, includes a video tutorial.
Pattern Notes
- The chain 1 at the beginning of the row does not count as a stitch.
- The instructions and stitch counts are given for the smallest size, with the larger sizes in parentheses ( ).
- Using a stitch marker at the beginning (and end) of the row is recommended.
- Work the first row of scs in the back humps of the starting chain.
- Before you dive into your project, take a moment to identify the stitch and row counts that match the size you’re making. By highlighting or marking them, you’ll save time and effort later on. Trust us, this small step will make a big difference in your knitting or crochet journey!
- This Pattern Uses Standard US Terminology.
Braided Wheat Summer Top FAQs
🧶 Is worsted-weight yarn too heavy for a summer top?
Worsted-weight yarn can absolutely work for summer tops — it really comes down to fiber content and stitch structure more than to weight alone. A cotton or cotton-blend worsted-weight yarn, like Herrschners Cottage Cotton, is much lighter and more breathable than an all-acrylic worsted-weight yarn, so the finished top wears surprisingly comfortably in warm weather. The wheat stitch also works in your favor here: the open puff structure creates small air pockets in the fabric rather than a dense, solid layer, which helps with airflow. If you’re in a very hot and humid climate, you can try the pattern in a DK-weight cotton for an even lighter result — the 4-in-1 eBook version of this pattern includes instructions for other yarn weights.
🧶 What is the best yarn for a crochet summer top?
The best yarn for a crochet summer top is a lightweight cotton or cotton blend in worsted-weight or DK weight. Cotton is naturally breathable and gets softer with every wash, making it ideal for a garment that’ll see a lot of wear. Cotton-acrylic blends (like the 60/40 Cottage Cotton used in this pattern) are a great middle ground — they’re lighter and more breathable than 100% acrylic, but they hold their shape better and are easier to care for than 100% cotton. If you’re substituting, aim for at least 50% natural fiber content, check that the yardage per gram is similar to the recommended yarn, and always swatch first to confirm gauge before starting.
🧶 How do I know what size to make?
To find your size, measure around the fullest part of your chest and compare it to the finished bust measurements listed in the pattern. The finished measurement is intentionally larger than your body measurement — this is called positive ease, and it’s what gives the top its relaxed, comfortable fit. Look for a finished measurement that’s 2 to 4 inches bigger than your actual chest measurement for a standard fit, or go up a size if you love a flowy, oversized drape. If you’re between sizes, I’d recommend swatching first and then comparing to the measurements — sometimes how the stitch pattern behaves in your specific yarn will make the size decision obvious.
🧶 Can I make this top longer or shorter than the listed lengths?
Yes! The length of this top is determined by the number of chains in your foundation row. The pattern gives you four length options (17″, 19″, 21″, and 23″), but you can adjust outside those ranges too. To shorten the top, use fewer chains in the setup. To make it longer, use more — add or subtract in increments that keep your stitch pattern repeating cleanly. A good rule of thumb: stand in front of a mirror and measure from your shoulder to where you’d like the hem to hit, then use that measurement as your starting point. You can also check the length mid-project before seaming, since the piece is worked side-to-side.
🧶 Do I need to seam the sides, or can I work this in the round?
This pattern is specifically designed to be worked flat and then seamed — the side-to-side construction means the two panels come together with just one seam on each side, which is much less seaming than most garments require. The pattern is not written for working in the round, and converting it would require significant changes to the stitch repeat and row structure. If you’re nervous about seaming, the video tutorial covers tips for getting a tight, clean seam on both sides, and the slip stitch seam method used here is genuinely one of the easiest finishing methods in crochet. I promise it’s simpler than it sounds!
4-in-1 eBook includes instructions for other weight yarns. Check out the beautiful options.

Heavenly Cotton
Sandscapes
Colorfusion DK
Subscribe & Like
Video Tutorial: Free Crochet Summer Top Pattern Step-by-Step
Relax & Crochet
Upgrade to the Printable PDF
Beautifully formatted to print and relax while crocheting. The paid pattern includes:
The Ad-Free PDF can be purchased on Etsy or Ravelry.
Click the box below to unlock this exclusive subscriber content for free. Add your email and create a password. If you are having trouble, reset your password or log in to the Grow Portal.
I’m thrilled to share this amazing crochet pattern with you! Please don’t copy, paste, or distribute this pattern. Prefer an ad-free experience? Purchase a digital PDF file for a small fee from one of my online stores. I appreciate your support and readership. You are why I can keep doing what I love and sharing it with others. Thank you from the bottom of my heart.
Written Crochet Pattern Instructions
Gauge & Swatch Instructions
Gauge: 16 sts by 12 rows = 4×4 inches in stitch pattern.
Swatch Instructions:
Row 1 (WS):
Ch 19, sc in the 2nd ch from the hook and in each ch across, turn. | 18 sts
Row 2 (RS):
Ch 1 (turning ch does not count as a st throughout), blo sc in each st across, turn.
Rows 3-4:
Ch 1, [skip the next st, sc in next, work a puff st into the skipped st] work across, turn.
Rows 5-6:
Ch 1, blo sc in each st across, turn.
Repeat Rows 3-6 until you have at least 14 rows in total, then measure your gauge. Your swatch should always be larger than the measured area to ensure accuracy. Gauge is best checked in the center, away from the edges.
Join The Kindest Community
Join our vibrant community of crafters on Facebook today. Whether you enjoy crafting with others or simply have burning questions, we’ve got you covered – join us now!
Get the Ebook
4 Yarn Weights + Guide!

First Section
This free crochet pattern on the blog features the worsted-weight version.
Rows 2-3:
Ch 1 (turning ch does not count as a st throughout) blo sc 5, [skip the next st, sc in next, work a puff st into the skipped st] work across until the last 5 sts, blo sc 5, turn. | 136 (152, 168, 184) sts; the number of puff sts in this row is 63 (71, 79, 87)
Row 4:
Ch 1, blo sc in each st across, turn.
Row 5:
Ch 1, blo sc in each st across, turn.
Rows 6-7:
Ch 1, blo sc 5, [skip the next st, sc in next, work a puff st into the skipped st] work across until the last 5 sts, blo sc 5, turn.
Row 8:
Ch 1, blo sc in each st across, turn.
Repeats: Repeat Rows 5-8 (the stitch pattern repeats) until there are a total of 24 (28, 32, 36, 36) (40, 44, 48, 52) Rows.
This will be 6 (7, 8, 9, 9) (10, 11, 12, 13) total stitch pattern repeats.
Style
The Braided Wheat Easy Summer Top is a perfect addition to any wardrobe!
Dressed-Up Summer Nights: Tuck it into a satin midi skirt or tailored shorts and add strappy sandals or block heels. Layer with gold jewelry and a small bag, such as the Summer House Crossbody Bag or the Granny Stitch Clutch, for an elevated look.
Trendy & Street Style: Style with wide-leg pants or culottes, layering a fitted tank or bralette underneath. Complete the look with chunky sneakers, oversized sunglasses, and a mini backpack or a small, round hobo-style bag like the Seven Hexi Bag.
Casual & Everyday: Pair it with high-waisted denim shorts or jeans and simple sandals or sneakers. Layer with a kimono or denim jacket, and add a woven tote or a neutral Granny Square Flower Bag, plus dainty jewelry for a relaxed vibe.
Beach & Vacation: Style it with a flowy skirt or linen pants, espadrilles, your Journey Under the Sea Bag, and a straw hat for a breezy, beachy feel. Don’t forget the sunscreen!
Split for Neck
Written as 17 (19, 21, 23) inches in garment length.
Ch 1, blo sc 41 (46, 50, 56), Fsc 54 (60, 68, 72), blo sc 41 (46, 50, 56), turn. | 170 (190, 210, 230) sts
Please note that the depth of the neck can be adjusted by chaining and skipping more or fewer stitches. Try it on and see how you like the neckline.
Repeat Rows 6-8, then go to Second Section.
Second Section
Repeats: Repeat Rows 5-8 until there are a total of 24 (28, 32, 36, 36) (40, 44, 48, 52) Rows in the Second Section, including the Split for Neck row. This will be the same number of rows as the First Section.
How to Block a Crochet Top (And Why It Makes a Big Difference)
Blocking your finished top before seaming is one of those steps that feels optional until you skip it and immediately wish you hadn’t. For a garment like this one — where the fit depends on precise finished measurements — blocking is what takes it from “I made a thing” to “I made something that fits.”
For a cotton-acrylic blend like Herrschners Cottage Cotton, wet blocking is the most effective method. Here’s how: soak your finished panel(s) in cool water for 10 to 15 minutes until fully saturated, gently squeeze out the excess water without wringing, then lay flat on your blocking mat and pin to the finished measurements listed in the pattern for your size. Let dry completely before removing pins or seaming — this usually takes a few hours to overnight, depending on your environment.
Steam blocking is a faster option if you have a garment steamer or a steam iron. Hold the steamer a few inches above the fabric (don’t press down — hover) and work across the surface. The heat relaxes the fibers and sets the shape. This works well for a quick touch-up after seaming too.
The most important thing: block BEFORE seaming the sides. Flat panels are infinitely easier to pin to measurements than a finished top with seams already done. Take the extra 10 minutes to pin them out — you’ll be glad you did.
(Looking for hints and tips about blocking your crochet? Here’s my full guide: How to Block Crochet: Wet, Steam & Spray Methods for Any Yarn.)
Seaming the Sides
Blocking to dimensions is a good idea, and much easier to do before seaming.
Next, we will make a seam down each side, leaving an opening for the arms.
With the wrong side facing out, insert your hook through the blo of the first stitch closest to you, and then in the blo of the coordinating stitch farthest from you. Yarn over and sl st to join. Work up the side of the garment, leaving the last 7 (7.5, 8, 8.5, 9) (9.5, 10, 10.5, 11) inches of the folded garment unworked for the armhole. Fasten off.
Join the yarn at the bottom of the opposite side and repeat. See video for tips on a tighter seam for this side.
Fit Tip
Try the garment on and adjust the armhole depth by adding or removing sl sts to fit your body shape and style.
Subscribe to my youtube channel
Finishing
Fasten off and weave in all ends. Enjoy an easy summer look all season long!
Crochet garments are a fantastic choice for warm weather, offering style and breathability. Natural fibers like cotton, linen, and bamboo can help keep things light, cool, and comfortable, making them a great alternative to manmade materials. However, don’t shy away from acrylic or blended yarns.
Even synthetic fibers can create airy tops, breezy wraps, and lightweight layers perfect for summer with the right stitch choices. The beauty of crochet is its versatility, so feel free to experiment with different yarns and weights to craft pieces that match your personal style and comfort. Whether you prefer crisp cotton or soft acrylic, your handmade wardrobe can be as unique as you are!
More Free Crochet Summer Patterns You’ll Love
If you loved making this top, here are a few more summer crochet patterns that deserve a spot in your warm-weather wardrobe:
Wheat Stitch Tank Top — This one uses the same signature wheat stitch in a sleeveless tank silhouette. It’s worked side-to-side too, so if you just got comfortable with this construction, you’ll feel right at home.
Shine Bright Like a Diamond Tank Top — A lighter-weight tank with a fun textured stitch pattern. Great option if you want something with a bit more open-work for really warm days.
Wheat Stitch Water Bottle Holder — The same signature wheat stitch as this top, worked into a hands-free bottle holder in two sizes — because a coordinating set is always the right answer.
Muse Crochet Summer Top — A fingering-weight summer top with beautiful drape and a beginner-friendly construction — if you love the idea of a lighter-weight version of this top, the Muse is calling your name.
Willow Mesh Stitch Shawl — A breezy, lacy wrap worked in a simple two-row repeat — throw it over this top on a cool evening and you’ve got a full summer outfit handled.
Easy Granny Square Swim Cover — Made from airy granny squares with built-in ventilation, this cover-up goes straight from the beach towel to a boardwalk stroll without missing a beat.
Cheers, and happy crocheting!
Well, That Was Fun! What’s Next?