Crochet Colorwork with the Pine Sweater Pattern
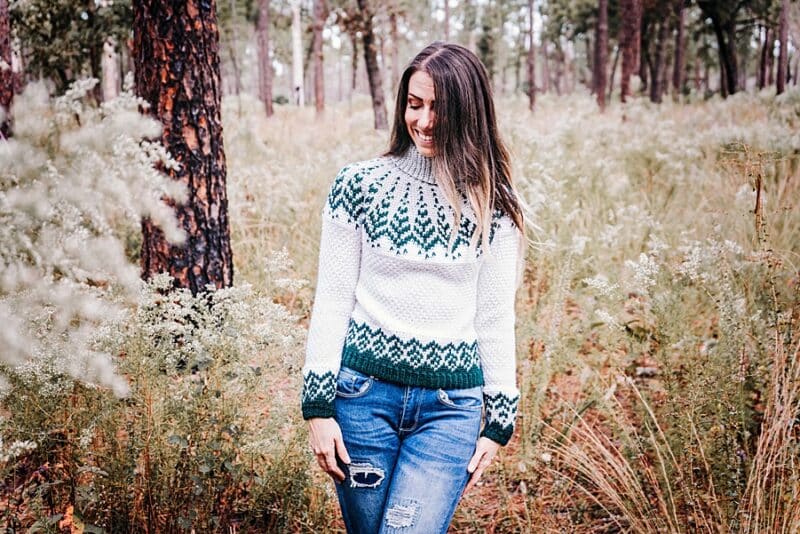
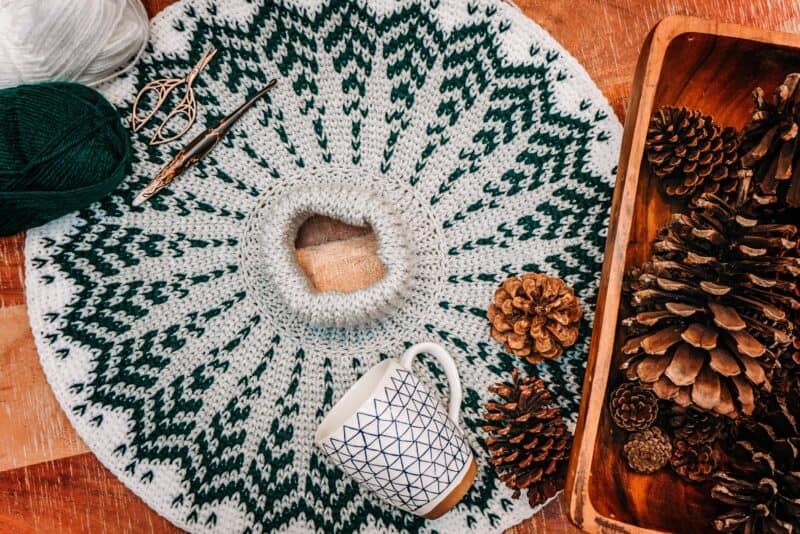
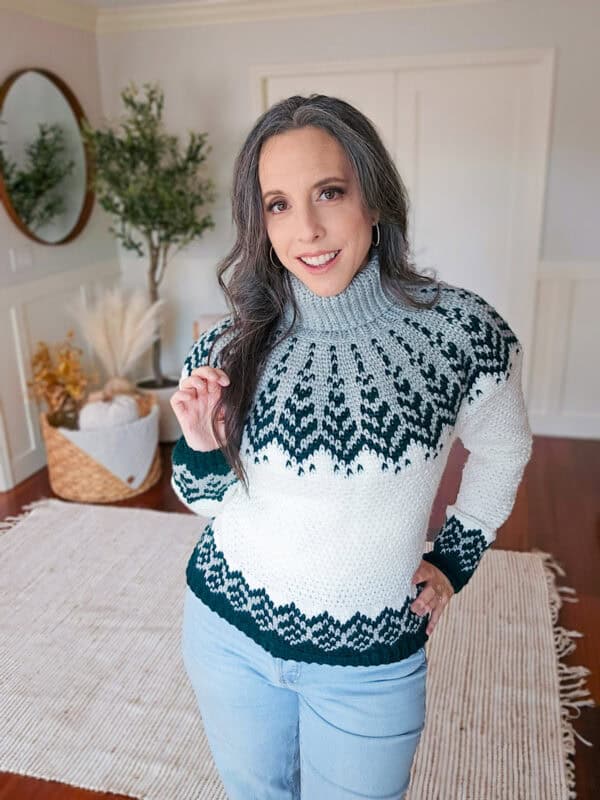
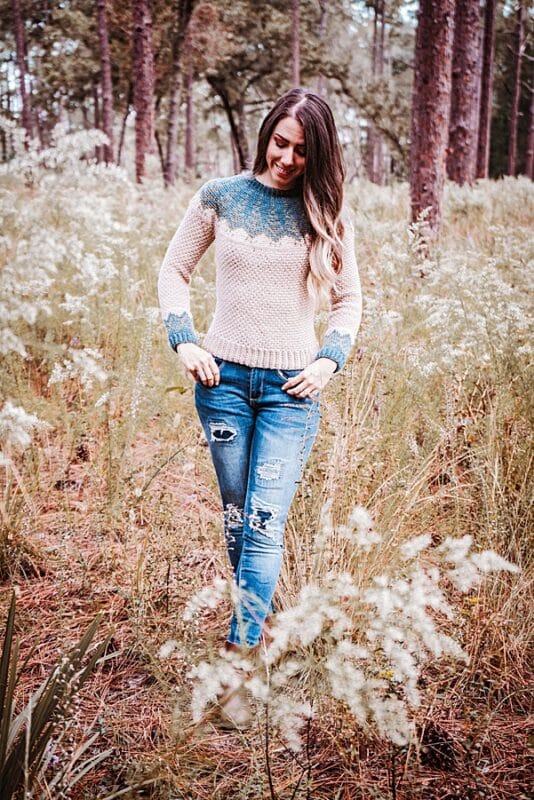
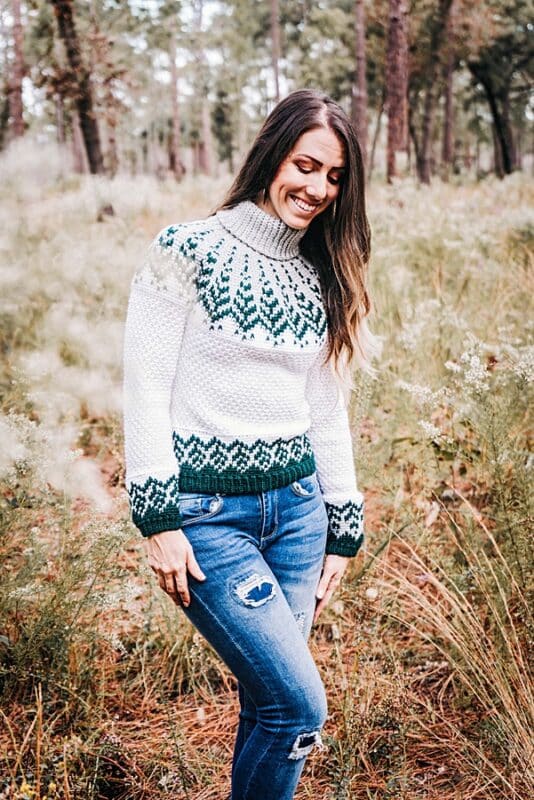
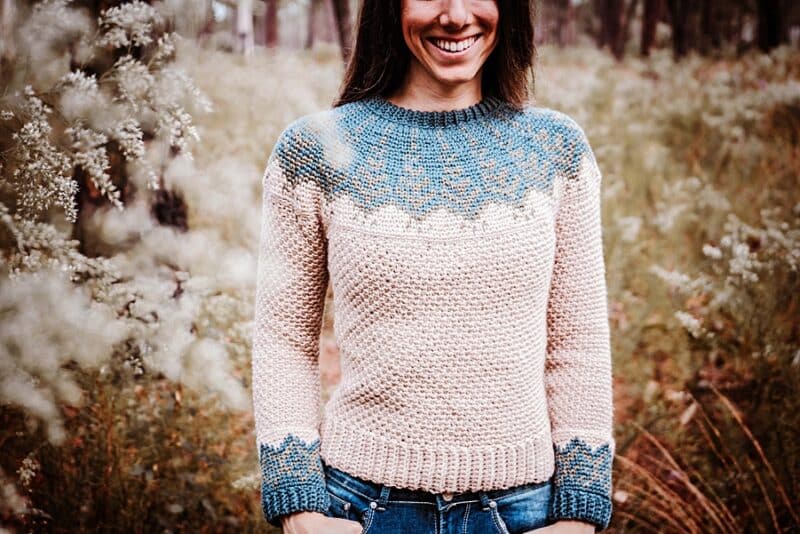
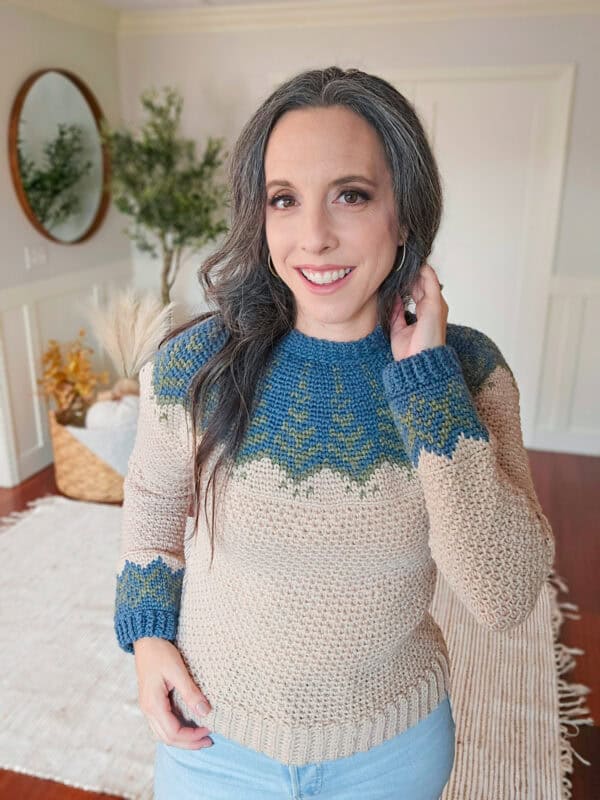
Did you think this was a knit sweater pattern? The Pine Crochet Sweater Pattern is worked entirely with crochet stitches. This top-down, try it on as you go, crochet sweater is entertaining to work up and wear. The modern crochet stitches create a wardrobe piece you will want to wear in fall and winter.
This pattern includes a video tutorial to guide you through the important steps of the Pine Crochet Sweater Pattern. And if you love crochet colorwork, you may also enjoy the Traveler Crochet Sweater or the Arizona Crochet Sweater Dress.
More on Yarn & Substitutes:
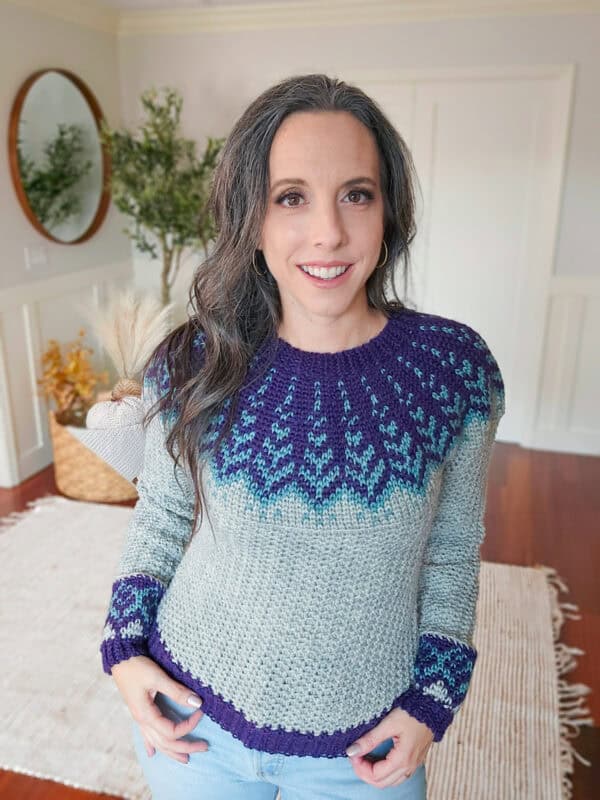
For the most part, wool is always my first choice for crochet colorwork. Fair Isle crochet takes some time to work up, so I want the best outcome possible. When using wool, it has a memory to each stitch and holds best. It’s like getting that really sharp look to each pixel of an image.
For the sweater in the YouTube video, I used Wool of the Andes Superwash. It’s a fantastic wool yarn for colorwork at a great price. And with a large variety of color choices, it’s easy to create your wardrobe palette.
I was a bit shocked at how well Brava Worsted, and acrylic yarn, also worked for this pattern. the colors I chose really popped.
About the Techniques Used:
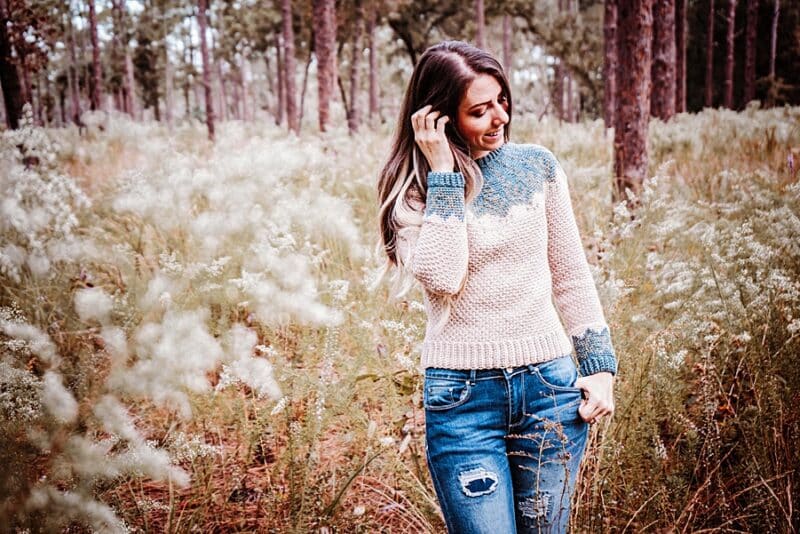
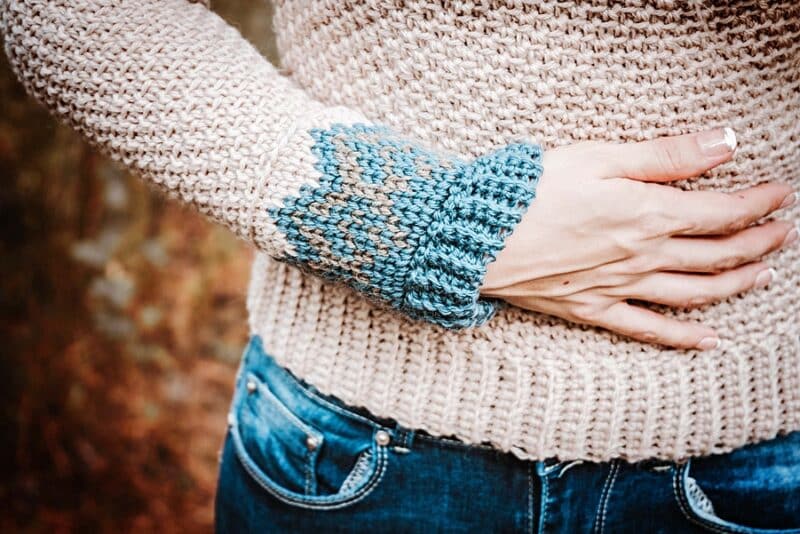
For this sweater, a crocheter will need to know how to work in the round. The stitches used in this pattern are variations of the single crochet stitch. The bottom texture of this sweater is switching between the back loop only and the front loop only crochet stitches.
The knit-look stitch is the Split Single Crochet Stitch. When working this stitch it’s important to pull up the second loop on your hook higher than you would with regular single crochet. Getting the front ‘V’ some space helps when working it on the next round.
Matching Hat!
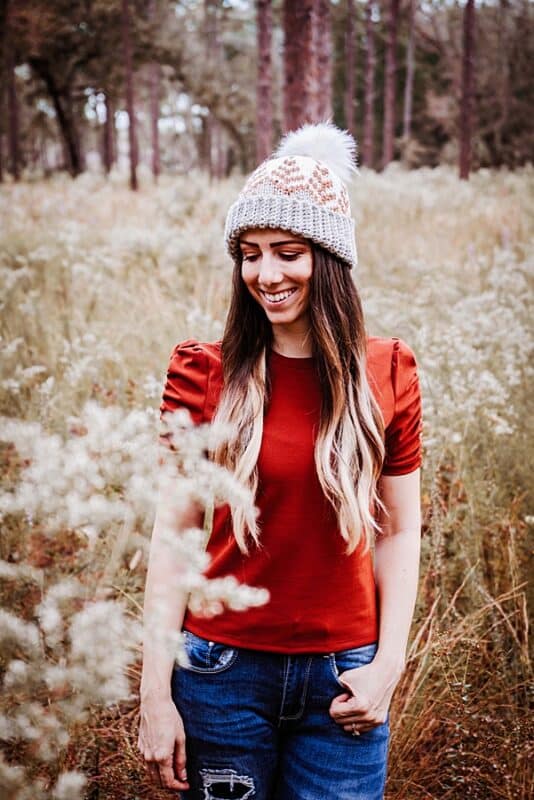
The colorwork pattern on this sweater is just so gorgeous I felt it needed a matching hat!
If you love this crochet sweater pattern, then the Pine Crochet Hat Pattern is the perfect accessory to go along with it.
Pine Crochet Sweater Pattern Supplies:
Crochet Hook:
H (5.0 mm) Crochet Hook, I (5.5mm) for Slip Stitch Ribbing
Notions:
Removable stitch markers if needed
Yarn needle to weave in ends
Scissors
Yarn:
WeCrochet Wool of the Andes Superwash Worsted Weight, 100% Peruvian Highland Wool, 110 yds/50g in Colorways:
Cadet (Color A)
2 (2, 2, 2, 3) (3, 3, 3, 3) Balls
Pampas Heather (Color B)
2 (2, 2, 2, 3) (3, 3, 3, 3) Balls
Oyster Heather (Color C)
7 (7, 8, 9, 11) (13, 15, 16, 17) Balls
Suggested Substitute: Brava Worsted
Image with Dark Green Colorwork are: Hunter, White, & Dove Heather
Yardage:
Extra Small: 1,250 yds (1,143m)
Small: 1,300 yds (1,188m)
Medium: 1,375 yds (1,257m)
Large: 1,450 yds (1,325m)
1X: 1,525 yds (1,395m)
2X: 1,650 yds (1,509m)
3X: 1,800 yds (1,646m)
4X: 1,950 yds (1,783m)
5X: 2,200 yds (2,011m)
Abbreviations/Stitches:
blo – back loop only
ch – chain
est st pat – established stitch pattern
flo – front loop only
sc – single crochet
sc3tog – single crochet three sts together
ssc – split single crochet
st(s) – stitch(es)
14 sts by 16 rows = 4×4” in ssc sts
14 sts by 15 rows = 4×4” in est st pat
Skill Level:
Intermediate
Size/Measurements:
Finished Bust Sizes
Extra Small: 32” (81 cm)
Small: 36” (91 cm)
Medium: 40” (102 cm)
Large: 44” (112 cm)
1X: 48” (122 cm)
2X: 52” (132 cm)
3X: 56” (142 cm)
*This garment has approx. 4” (10 cm) of ease.
Pine Crochet Sweater Pattern Notes
Sizes are written as: xs (s, m, l, 1x) (2x, 3x, 4x, 5x) and measurements include 4 inches of ease. There are two types of colorwork charts to work from, one with sample colors and the others with letters so you can fill in your colors of choice with pencils or crayons.
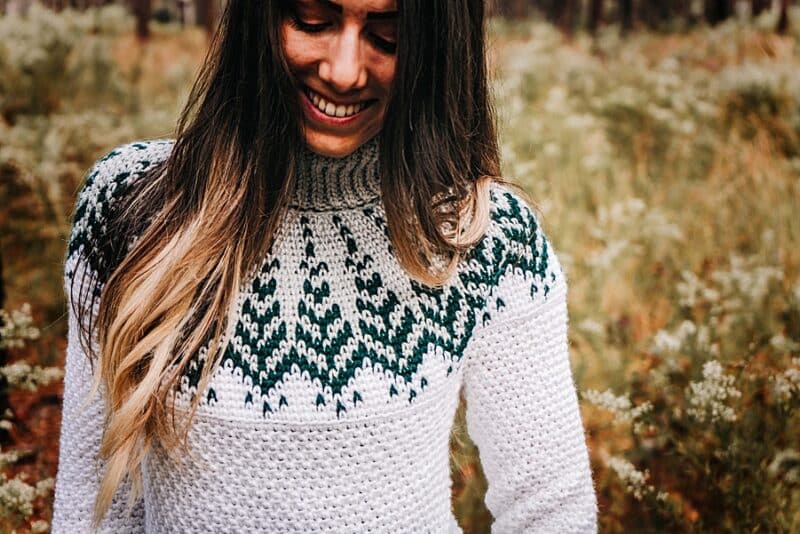
This sweater is worked in a top-down seamless yoke style with fair isle colorwork. The body of the sweater is worked continuously without joining. It is important to place a stitch marker at the beginning of the round to keep track of rounds.
When doing the colorwork the yarn will be carried along the back in the fair isle style. Try to not carry a color for more than 3 stitches so your floats aren’t too long. You can catch/trap the yarn behind a stitch to keep the floats consistent. Head on over to read more about crochet colorwork.
Special Stitches:
Split Single Crochet (ssc), also known as the waistcoat stitch: Insert hook between the legs of the stitch (on the back of work the hook should be under the horizontal bar and between the upside-down ‘V’ shape as well), yarn over, pull up a loop to the height of a single crochet, yarn over, pull through both loops on hook. Tip: Keep a loose tension so the stitches are easily worked.
Increasing Colorwork Part of Yoke: When the pattern says to ‘increase Color’, place 2 ssc into the next stitch. The chart is read from bottom-up and each round from right to left.
Increasing Body: When the pattern says to increase x-amount of stitches around, increase by two stitches at once by placing 3 sc sts into a stitch in the blo or flo stitch pattern (blo sc 1, flo sc 1, blo sc) into one stitch. This will help keep the stitch pattern consistent.
Decreasing to Shape: If a fitted sweater is desired, decrease around the waist area by sc3tog on each side in the flo or blo stitch pattern. Invisible sc3tog: insert hook into the front loop of the next 3 sts, yo and pull a loop through all three front loops, yo and pull through final two loops.
Pine Crochet Sweater Pattern Video:
Subscribe & Like
Relax & Crochet
Upgrade to the Printable PDF
Beautifully formatted to print and relax while crocheting. The paid pattern includes:
Ad-Free PDF on Etsy or Ravelry.
Pine Sweater Written Instructions

Click the box below to unlock this exclusive subscriber content for free. Add your email and create a password. If you are having trouble, reset your password or login to the Grow Portal.
I’m thrilled to share this amazing crochet pattern with you! Please don’t copy, paste, or distribute this pattern. Prefer an ad-free experience? Purchase a digital PDF file for a small fee from one of my online stores. I appreciate your support and readership. You are why I can keep doing what I love and sharing it with others. Thank you from the bottom of my heart.
Collar Ribbing
Row 1
Rnd 2:
All remaining rounds on chart (through Round 28) will be worked in ssc sts.
*A2, B1, A1*; repeat from * to * around.
Rnd 3:
*A3, (Inc. A) x 1*; repeat from * to * around. | 90 (90, 95, 95, 100) (105, 110, 110, 110) sts
Rnd 4:
*A2, B1, A2*; repeat from * to * around.
Rnd 5:
With Color A ssc in each sts around.
Rnd 6:
*A2, B1, A2*; repeat from * to * around.
Rnd 7:
Rep Rnd 6.
Rnd 8:
*A4, (Inc A) x 1*; repeat from * to * around. | 108 (108, 114, 114, 120) (126, 132, 132, 132) sts
Rnd 9:
*A1, B1, A1, B1, A2*; repeat from * to * around.
Rnd 10:
*A2, B1, A3*; repeat from * to * around.
Rnd 11:
Rep Rnd 5.
Rnd 12:
*A1, B1, A1, B1, A2*; repeat from * to * around.
Rnd 13:
*(Inc A) x 1, B3, A2*; repeat from * to * around. | 126 (126, 133, 133, 140) (147, 154, 154, 154) sts
Rnd 14:
*A3, B1, A3*; repeat from * to * around.
Rnd 15:
*A1, B1, A3, B1, A1*; repeat from * to * around.
Rnd 16:
*A1, B2, A1, B2, A1*; repeat from * to * around.
Rnd 17:
*(Inc A) x 1, A1, B3, A2*; repeat from * to * around. | 144 (144, 152, 152, 160) (168, 176, 176, 176) sts
Rnd 18:
*A1, B1, A2, B1, A2, B1*; repeat from * to * around.
Rnd 19:
*A1, B2, A1, B1, A1, B2*; repeat from * to * around.
Rnd 20:
*A2, B2, A1, B2, A1*; repeat from * to * around.
Rnd 21:
*B1, A2, B3, A2*; repeat from * to * around.
Rnd 22:
*B2, A2, B1, A2, B1*; repeat from * to * around.
Rnd 23:
*(Inc C) x 1, B2, A1, B1, A1, B2*; repeat from * to * around. | 162 (162, 171, 171, 180) (189, 198, 198, 198) sts
Rnd 24:
*C3, B2, A1, B2, C1*; repeat from * to * around.
Rnd 25:
*C4, B3, C2*; repeat from * to * around.
Rnd 26:
*(Inc C) x 1, C4, B1, C3*; repeat from * to * around. | 180 (180, 190, 190, 200) (210, 220, 220, 220)
Rnd 27:
*C4, B1, C3, B1, C1*; repeat from * to * around.
Rnd 28:
*C6, B1, C3*; repeat from * to * around.
Rnd 29:
*(Inc C) x 1, C9*; repeat from * to * around. 198 (198, 209, 209, 220)(231, 242, 242, 242) sts
The yoke will have a bit of a lean at this point. For the best results pause and aggressively wet block this part of the yoke to lessen the lean.
Yoke Continued
Rnd 30:
Blo sc in each st around. For sizes M, L, and 2X increase by 1 st.
Rnd 31:
*Flo sc 1, blo sc 1*; repeat from * to * around.
For size xs go to Separating Body & Sleeves.
Rnd 32:
*Blo sc 1, flo sc 1*; repeat from * to * around for all sizes.
For size small go to Separating Body & Sleeves. | na (198, 210, 210, 220) (232, 242, 242, 242) sts
Rnd 33:
For sizes na (na, na, L, 1X) (2x, 3x, 4x, 5x) increase na (na, na, 6, 12) (16, 20, 22, 30) sts evenly. *flo sc 1, blo sc 1*; repeat from * to * around.
For size medium go to Separating Body & Sleeves. | na (na, na, 216, 232) (248, 262, 264, 272) sts
Rnd 34:
*Blo sc 1, flo sc 1*; repeat from * to * around
For size large and 1x go to Separating Body & Sleeves. | na (na, na, 216, 232) (248, 262, 264, 272) sts
Rnd 35:
For sizes (2x, 3x, 4x, 5x) increase (16, 18, 16, 20) sts evenly *flo sc 1, blo sc 1*; repeat from * to * around. | na (na, na, na, na) (264, 280, 280, 292) sts
Rnd 36:
*Blo sc 1, flo sc 1*; repeat from * to * around
For size 2x and 3x go to Separating Body & Sleeves. | na (na, na, na, na) (264, 280, 280, 292) sts
Rnd 37:
For sizes (4x, 5x) increase (16, 20) sts evenly *flo sc 1, blo sc 1*; repeat from * to * around. | na (na, na, na, na) (na, na, 296, 312) sts
Rnd 38:
*Blo sc 1, flo sc 1*; repeat from * to * around. | na (na, na, na, na) (na, na, 296, 312) sts
Fitting Tip
If you would like more stitches to customize fit, work fewer stitches on the back body (section before doing first set of sleeve sts) in increments of two, and that will add to the stitches on the front of the sweater. Just make sure sleeve st counts and chains remain the same.
Separating Body & Sleeves
Rnd 1:
[Ch 4 (8, 10, 10, 12) (12, 12, 12, 14), skip 40 (40, 42, 42, 44) (52, 54, 56, 58) sleeve sts, *flo sc 1, blo sc 1*; repeat from * to * for 59 (59, 63, 66, 72) (80, 86, 92, 98) sts], repeat within brackets one more time. | 126 (134, 146, 152, 168) (184, 196, 208, 224) Body sts.
Body
Rnd 1:
*Blo sc 1, flo sc 1*; repeat from * to * around. 126 (134, 146, 152, 168) (184, 196, 208, 224) Body sts.
Rnd 2:
*Flo sc 1, blo sc 1*; repeat from * to * around. Note: If preferred, you can decrease or increase by one st and then work in est st pat, this will prevent two like stitches from being next to each other.
Repeats
Repeat Rnds 1-2, which is the est st pat, Until the desired length before colorwork and ribbing.
For Bottom Ribbing Only: work in the est st pat until 2.5 inches from the total desired length.
For Bottom With Colorwork: work in the est st pat until 5 inches from the total desired length. Set up for bottom colorwork: xs (s, m, l, 1x) (2x, 3x, 4s, 5x) increase by 0 (2, 4, 4, 0) (2, 2, 2, 4) sts before continuing onto the bottom body colorwork. OR have a st count in multiples of 6.
Join The Kindest Community
Join our vibrant community of crafters on Facebook today. Whether you enjoy crafting with others or simply have burning questions, we’ve got you covered – join us now!
Body Bottom Rib Only (no Colorwork)
Row 1:
With Color B ch 11, in blo sl st in second chain from hook and across to body, sl st 2 sts on the body (these do not count as sts), turn. (10 sts) Note: The Sl stitches can be substituted with Single Crochet Stitches if preferred.
Row 2:
Skip the two sts from the body, in blo sl st in each st across, turn.
Row 3:
Ch 1, in blo sl st in each st across, sl st 2 sts on the body, turn.
Repeats:
Repeat Rows 2-3 around the bottom of the sweater body. Join last row to beginning row by sl sting through blo of first and last row at the same time with the WS facing.
Body Bottom Ribbing (After the Colorwork)
Row 1:
If completing the colorwork for the bottom body, use the same chart and instructions as the Sleeve (below). Then complete these ribbing steps.
With Color B ch 8, in blo sl st in second chain from hook and across to body, sl st 2 sts on the body (these do not count as sts), turn. (7 sts) Note: The Sl stitches can be substituted with Single Crochet Stitches if preferred.
Row 2:
Skip the two sts from the body, in blo sl st in each st across, turn.
Row 3:
Ch 1, in blo sl st in each st across, sl st 2 sts on the body, turn.
Sleeve
Rnd 1:
Attach yarn to the center st under the arm, this will be worked in the round continuous without joining. Work in est st pat 44 (48, 52, 52, 56) (64, 66, 68, 72) sleeve stitches around. The stitches worked into the chains will be regular single crochet for this round.
Repeats:
Continue working in est st pat for a total of 42 (44, 44, 46, 46) (48, 48, 50, 50) sleeve rnds while ALSO sc3tog every 6 (7, 5, 5, 4) (4, 4, 3, 3) rounds, until sts count is 30 (36, 36, 36, 36) (42, 42, 42, 42) sts. This section will complete the arm stitches before the 3-inch colorwork and 1-inch cuff. If more length is desired, repeat rows in est st pat.
Sleeve & Body Colorwork
Setup:
Working with Color C blo sc in each st around.
Sleeve st count for this section: 30 (36, 36, 36, 36) (42, 42, 42, 42)
Body st count for this section: 126 (136, 150, 156, 168) (186, 198, 210, 228)
Rnd 1:
All remaining rounds on sleeve chart (through Round 10) will be worked in ssc sts. *C2, A1, C3*; repeat from * to * around.
Rnd 2:
*C1, A3, C2*; repeat from * to * around.
Rnd 3:
*A2, B1, A2, C1*; repeat from * to * around.
Rnd 4:
*A1, B1, A1, B1, A2*; repeat from * to * around.
Rnd 5:
*B2, A1, B2, A1*; repeat from * to * around.
Rnd 6:
*B1, A3, B2*; repeat from * to * around.
Rnd 7:
*A2, B1, A2, B1*; repeat from * to * around.
Rnd 8:
*A1, B1, A1, B1, A1, B1*; repeat from * to * around.
Rnd 9:
*B1, A3, B2*; repeat from * to * around.
Rnd 10:
*B1, A1, B1, A1, B1, A1*; repeat from * to * around.
Rnd 11:
*A1, B1, A1, B1, A2*; repeat from * to * around.
Rnd 12:
*A2, B1, A3*; repeat from * to * around.
Rnd 13:
Working with Color A, sc in each st around.
Sleeve & Body Cuff
Rnd 1:
With color B ch 6, in blo sl st in second chain from hook and in each across to Sleeve, sl st 2 sts on the Sleeve (these do not count as sts), turn. (5 sts) Note: The Sl stitches can be substituted with Single Crochet Stitches if preferred.
Row 2:
Skip the two st from the Sleeve, in blo sl st in each st across, turn.
Row 3:
Ch 1, in blo sl st in each st across, sl st 2 sts on the Sleeve, turn.
Repeats:
Repeat Rows 2-3 around the bottom edge of the Sleeve or Body. Join ends together with sl st, by inserting hook through blo of first and last row at the same time with the WS facing.
Finishing
Fasten off and weave in all ends. Use yarn and needle to close any holes/gaps under the arm. Block and wear.
To ensure your colorwork crochet sweater lasts, follow these care instructions:
Hand wash in cold water using a gentle detergent to preserve the colors and prevent stretching.
Avoid wringing or twisting the sweater. Gently press out excess water with a clean towel.
Lay flat to dry on a clean, dry towel, reshaping as needed to maintain the sweater’s form.
Store flat instead of hanging to prevent stretching or distortion, especially in colorwork sections.
Optional: If needed, use a warm iron with a pressing cloth to lightly press the sweater, avoiding direct heat on the crochet fabric.
By following these steps, your beautiful sweater will maintain its shape and vibrant colors for many seasons. Have you fallen love with crochet colorwork? Check out the Bee Fingerless Mittens or the Fair Isle Crochet Hat.
Well That Was Fun! What’s Next?
📌 PIN THIS POST – Don’t lose this project; save it to your Pinterest crochet board so you can quickly come back to it again.
💌 SHARE – Share your yarn choice, in-progress, or finished projects on Facebook or Instagram and use the hashtag #brianakdesigns
🥂 JOIN – Join the kindest crafters in the Briana K Designs Community Group on Facebook. We love yarny friends!
🔗 RAVELRY LINK -Link and share your project on Ravelry. Having inspirational photos can help crafters.


