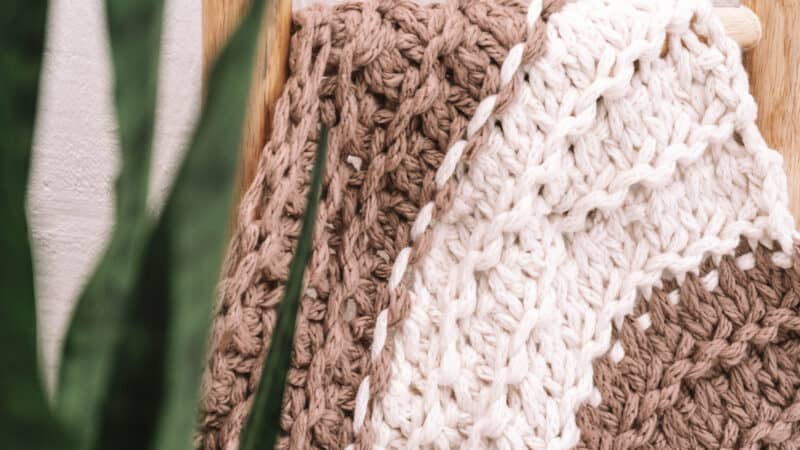
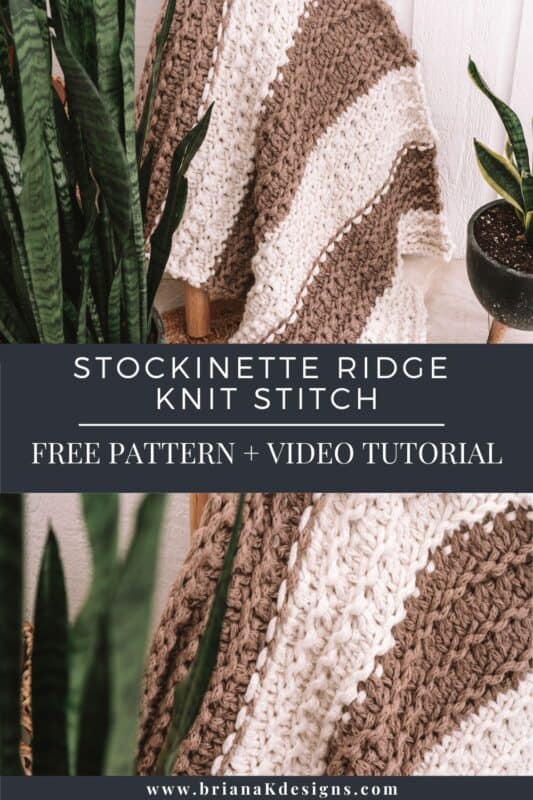
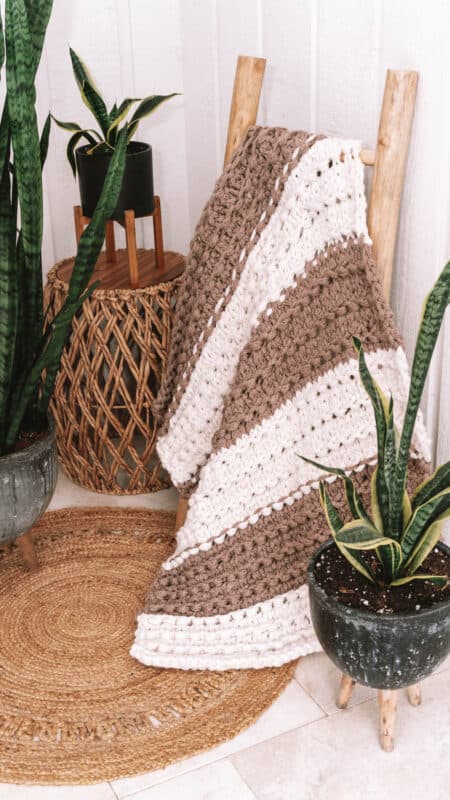
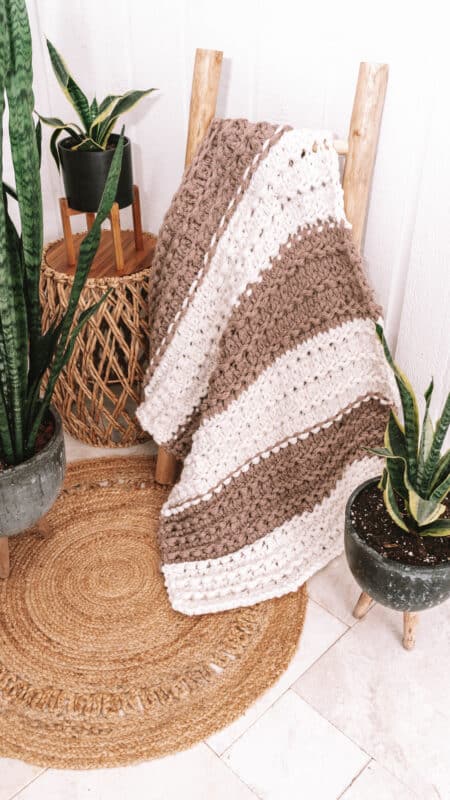
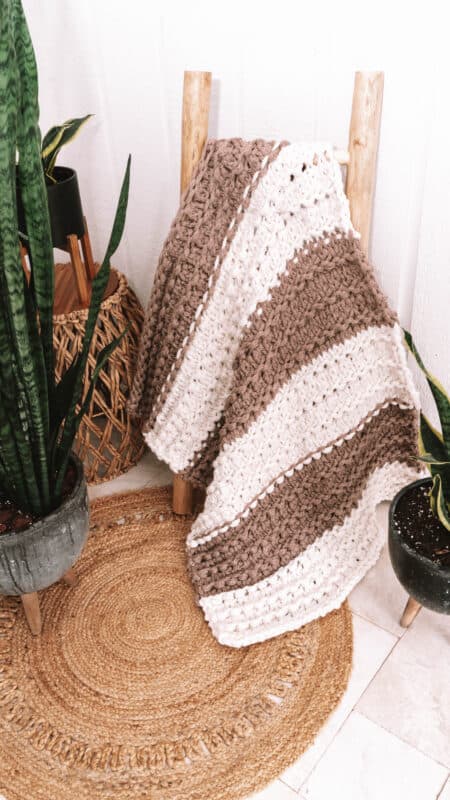
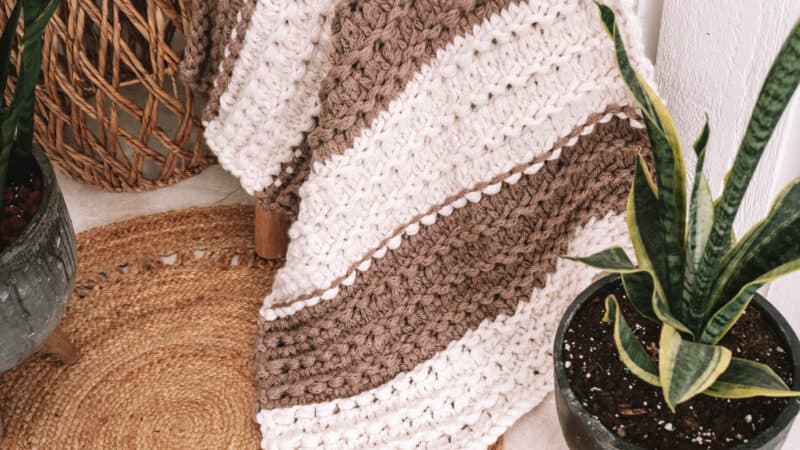
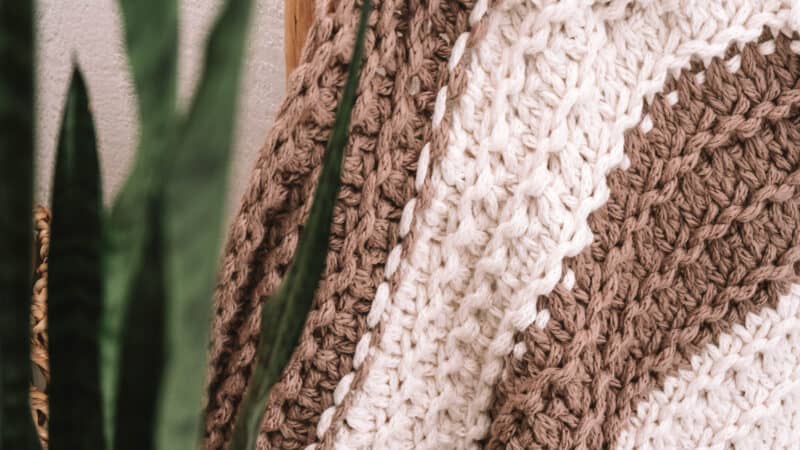
Looking for an easy and fun stitch to add texture to your fabric? Look no further! Our four-row repeat stocking stitch ridge is just what you need.
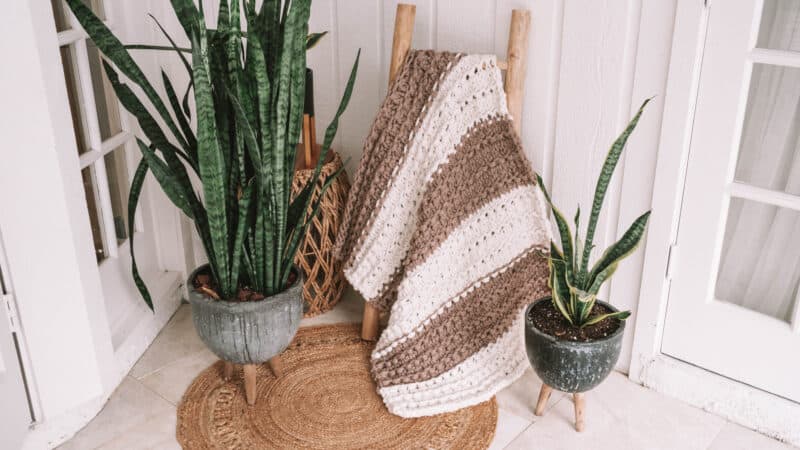
Combining knit decreases, increases, and purl rows, this stitch creates a delightful texture with lines crossing the fabric. And the best part? The decreased stitches also create a slight eyelet effect. Let’s get knitting!
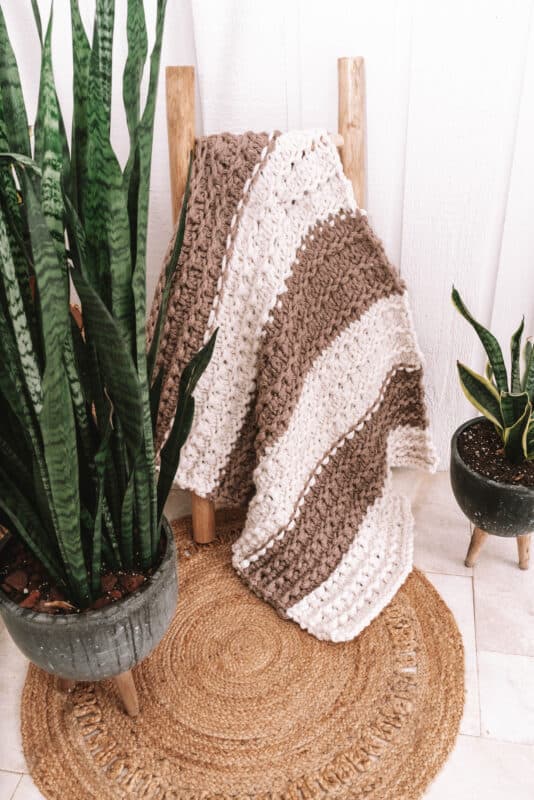
The stockinette ridge stitch is a beginner-level knit stitch with a simple texture and versatility. It is often used for borders, cuffs, and hems but can also be used to create chevron patterns and other fun designs.
To create this stitch, you will need two straight knitting needles and some yarn. If you are creating a large knit project, cabled knitting needles are best.
Disclosure: This post contains affiliate links. Please read my disclosure for more info.
What is stockinette ridge stitch?
Stockinette ridge stitch is a beginner-level knit stitch with a simple texture and versatility. It is created by alternating between a row of knit decreases and a row of knit increases, while and then some plain stockinette rows.
This stitch can be used for borders, cuffs, blankets, and more! Additionally, it can be used to create chevron patterns and other exciting designs.
Pin this on Pinterest for Later!
What Type Of Items Can You Make With The Stockinette Ridge Stitch?
Blankets, sweaters, hats, scarves, and much more. You can also use it to make smaller items such as coasters or pot holders. With some creativity, you can come up with some wonderful ideas!
The stockinette ridge stitch is an easy stitch that looks great when worked in blocks of color. It’s a great way to add texture and design to any project. So give it a try and see what you can create! You won’t be disappointed.
How to Stop Stockinette from Curling.
Stockinette stitch tends to curl due to its uneven tension. To stop it from curling, you must block the finished product by wetting or steaming it and then pinning it into shape.
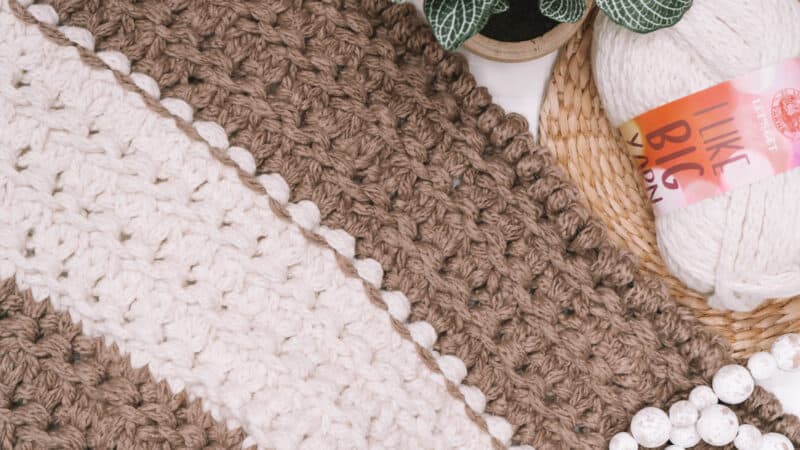
Blocking helps to even out the tension of the stitches and will help the fabric lay flat. Additionally, adding borders such as ribbed or garter stitches can help to keep the fabric from curling. Finally, using a heavier yarn can also help since it will be less likely to curl due to weight. This is why this free knit pattern used the Lion Brand Yarn.
What Makes A Beginner Knitting Pattern?
Are you a knitting newbie? Don’t worry; we all started somewhere. So, what exactly makes a beginner knitting pattern?
First, it should feature basic stitches such as knit and purl so that you can get used to the motions. Additionally, a beginner pattern shouldn’t be too complicated or contain a lot of different techniques.
It typically involves simple stitches, minimal shaping, and clear instructions to determine what makes a pattern beginner-friendly. And if you are lucky, like with this beginner knit pattern, a video tutorial!
Instead, it should be easy to follow and have clear instructions. Look for patterns with helpful tips and tricks on getting through the tricky parts.
And don’t forget to choose a pattern that you’re excited to knit, think scarfs, blankets, newborn bonnets, or even dishcloths – it’ll make the whole process much more enjoyable.
Happy knitting is the best kind of knitting!
Don’t Love Ads? You Have Options.
This pattern is available in my shops:
Why A Textured Blanket Will Up Your Home Decor Game
If you want to ramp up your home decor game, a textured blanket is the way to go. Adding texture to a space can make it feel cozy and inviting, and what’s more inviting than snuggling up under a cozy blanket?
A stockinette ridge stitch is an excellent option for achieving that sought-after texture. Its distinctive raised ridges and soft, plush texture makes it the perfect way to add interest and depth to your blanket. Plus, depending on the yarn and color you choose, you can create a wide range of looks, from rustic and earthy to bright and modern.
Plus, a DIY project like this lets you get crafty and show your skills to guests. So next time you want to elevate your home decor, consider adding a textured blanket with a stockinette ridge stitch to your space.
Want to create a quick and easy baby blanket with the Stockinette Ridge Stitch? Check out the Stockinette Stitch Ridge Newborn Bonnet as part of the Set One – Simple Newborn Bonnet Free Knit Patterns Collection.
Interested in some of my other knit patterns? Check them out below!
Knitting Bulky Yarn from 1 Lightweight Skein
Knit Beach Scarf Free Pattern
Quilted Lattice Knit Stitch
How to Increase Knitting with m1r and m1l
How to Knit Cable Stitches
Video Tutorial for the Stockinette Ridge Stitch Knit Blanket

Recommended Supplies For Your Free Easy Knit Blanket Pattern:
Knitting Needles:
15 mm Circular Knitting Needles
Notions:
Yarn needle to weave in ends
Scissors
Yarn:
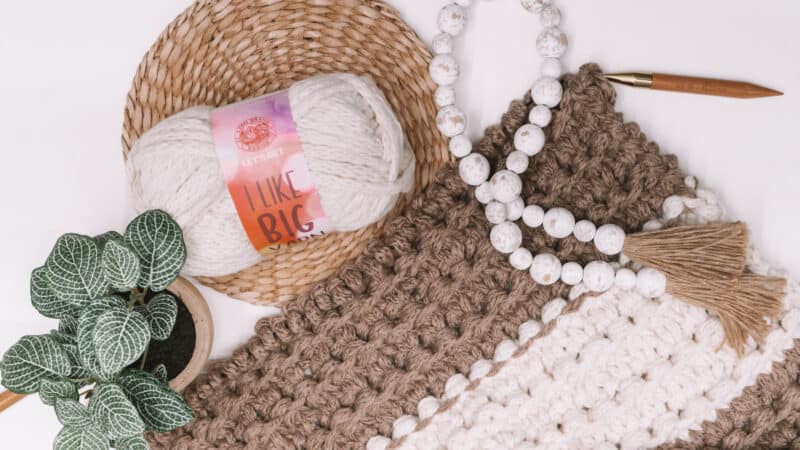
Lion Brand I Like Big Yarn (discontinued)
100% Acrylic, 33yds/250g – Jumbo Bulky Weight Yarn
Yardage for the Knit Blanket:
Shown in Colorways Stucco and
Coconut Milk (3 Skeins each color)
Abbreviations/Stitches:
k- knit
kf&b- knit front and back of the stitch
k2tog- knit two stitches together
p- purl
s(ts) – stitch(es)
Gauge:
2.5 sts and 7 rows = approx 4×4 inches
Measurements/Sizes:
32 inches wide by 41 inches tall
Skill Level:
Easy, beginner knitter.
Notes for the Chunky Knit Blanket Pattern
Looking for an easy and fun stitch to add texture to your fabric? Look no further! Our four-row repeat stocking stitch ridge is just what you need.
Combining knit decreases, increases, and purl rows, this stitch creates a delightful texture with lines crossing the fabric. And the best part? The decreased stitches also create a slight eyelet effect. Let’s get knitting!
Special Stitches For The Knit Pattern
Knit 2 Together (k2tog):
With the working yarn in back, insert the right needle into the second, then the first stitches
on the left needle (from left to right). Wrap the yarn under and then over the right needle. Pull a loop through the 2 stitches. Drop the 2 stitches from the left needle. This completes the k2tog decrease.
Notes On Adjusting the Sizing of This Knit Blanket or Stitch:
This Stockinette Ridge Stitch Blanket can be created with any weight of yarn. Simply cast-on the first row in an even amount of stitches to your desired width. Then, work the 4 row repeat, changing colors as often as you want! Get ready to snuggle up under this cozy creation.
Stockinette Ridge Stitch Blanket – Written Instructions
Click the box below to unlock this exclusive subscriber content for free. Add your email and create a password. If you are having trouble, reset your password or log in to the Grow Portal.
I’m thrilled to share this amazing crochet pattern with you! Please don’t copy, paste, or distribute this pattern. Prefer an ad-free experience? Purchase a digital PDF file for a small fee from one of my online stores. I appreciate your support and readership. You are why I can keep doing what I love and sharing it with others. Thank you from the bottom of my heart.
Bind off in stockinette pattern, weave in ends.
Well, That Was Fun! What’s Next?