Honey Bee Fingerless Mittens Free Crochet Pattern
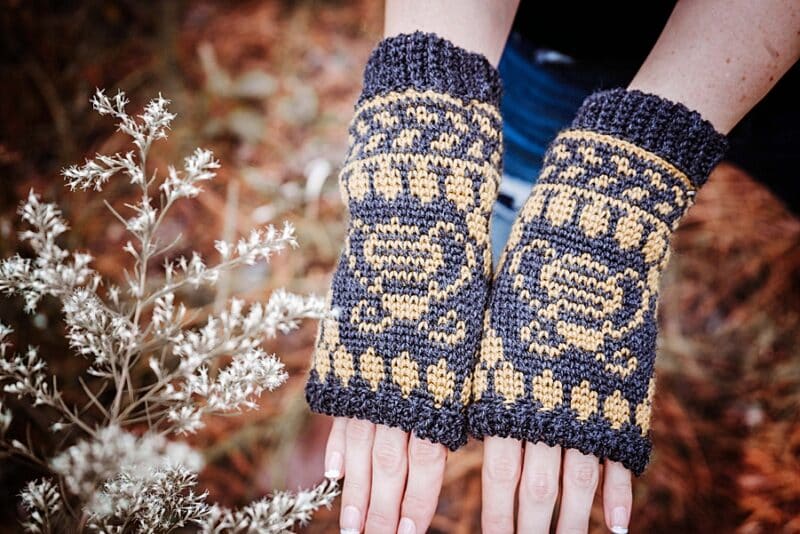
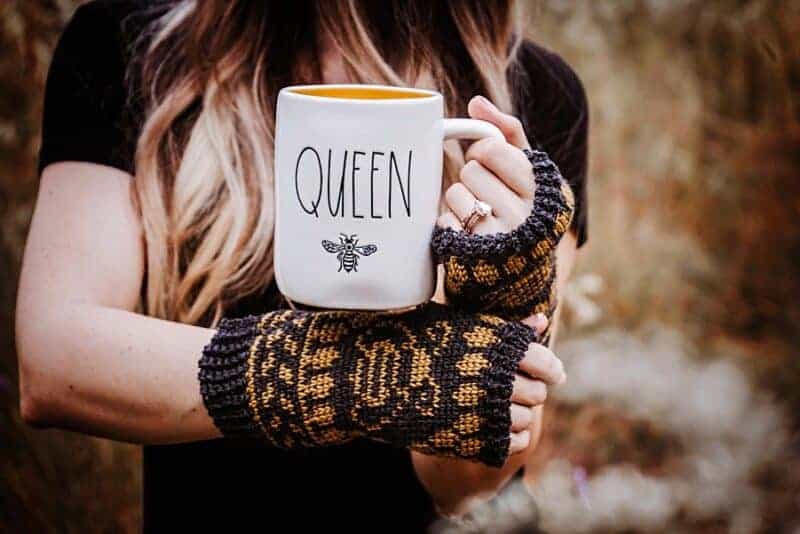
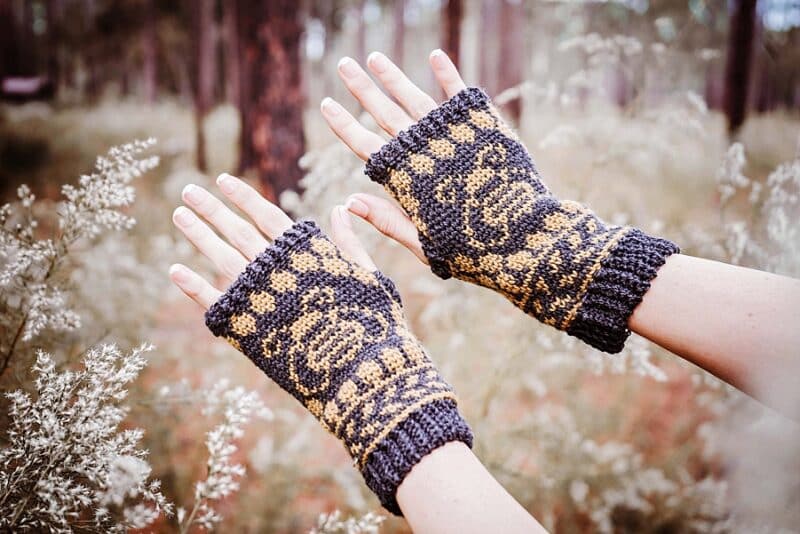
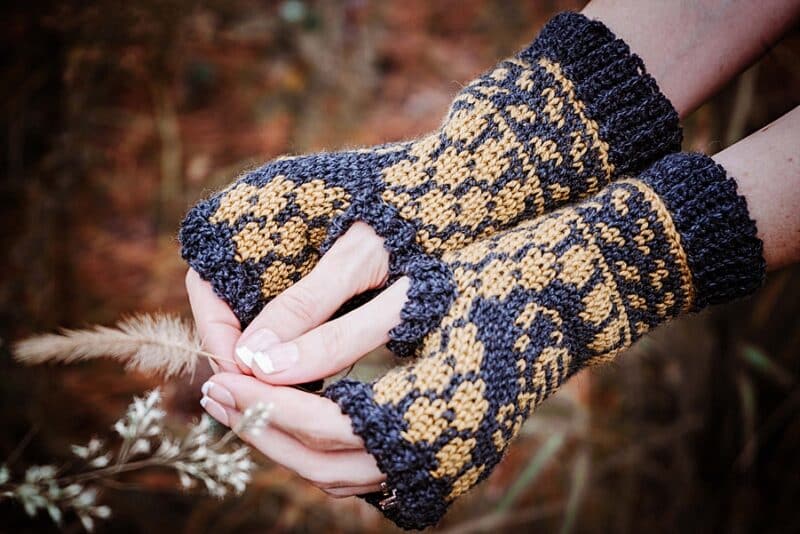
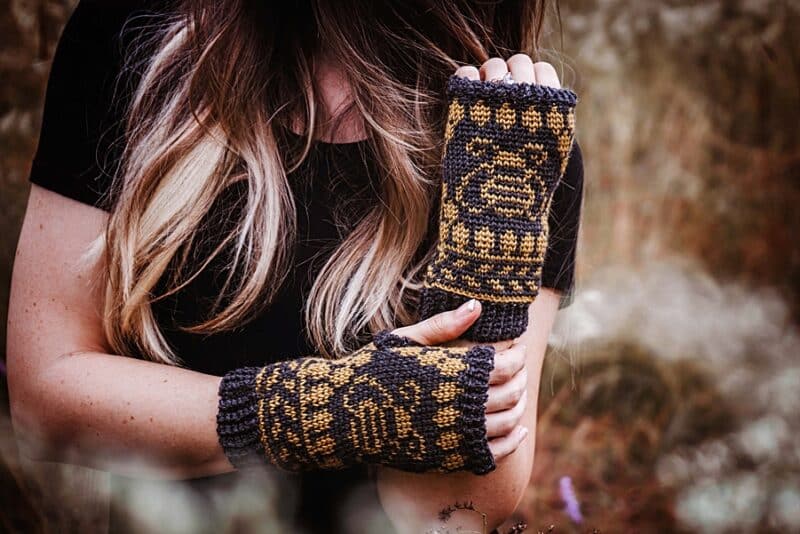
If you love bees and crochet, combine those passions with the Bee Fingerless Crochet Mittens. It’s sweeter than honey and fun to work up. If you would like this pattern to print and go, then get all the Honey Bee Ad-Free PDF.
Disclosure: This post contains affiliate links. Please read my disclosure for more info.
About the Bee Fingerless Crochet Mittens – a colorwork pattern
Have you been eyeing crochet colorwork from the sidelines? Once you try it out, I just know the addiction will begin. It’s extremely rewarding to watch an image come to life with yarn.
Each stitch represents one pixel of an image. This is why working on each crochet stitch is so rewarding.
Using Fair Isle Crochet
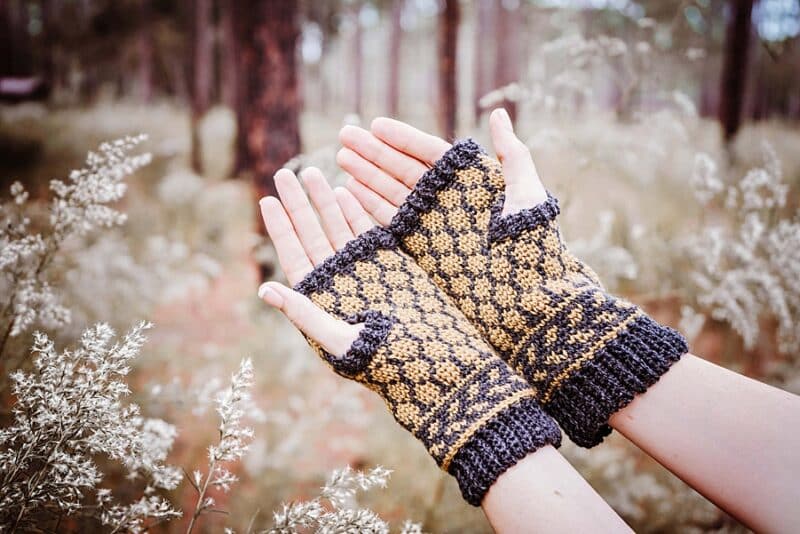
This type of colorwork used in this pattern is fair isle crochet. What this means is the yarn is carried on the back of the work. Instead of being worked over like tapestry.
By working in the fair isle method, it gives an amazing drape to the fabric with less bulk. It also doesn’t allow those extra colors to pop through if we were crocheting over them. This will make a sharper result in the crocheted image.
The Bee Fingerless Crochet Mittens Yarn
When doing colorwork, the choice of yarn is very important. It can really affect the final crochet piece and often wool is the first choice. But if you are allergic to wool, no worries, there are substitutes that will work just fine.
For the Bee Fingerless Crochet Mittens, I chose Twill Fingering by WeCrochet. Since this yarn is created from 100% Fine Superwash Merino Wool it’s very flexible and soft. Don’t think about scratchy wool with this yarn, it’s nothing but soft.
The Split Single Crochet
In order to get that beautiful knit-look stitch for these bee mittens, we will be using the split single crochet stitch. This is also known as the waistcoat stitch. Instead of working a regular single crochet stitch, we will enter through the front of the ‘V’.
The key to working this stitch is the magic loop or the second loop on the hook. After pulling up a loop through the center V, we really want to give this stitch some space, this way it’s not too tight. If it’s not easy to get through the front V of your stitch, then the tension of the stitch is too tight. We fix this by pulling up that second loop much higher than we normally would.
It takes a little practice so don’t feel frustrated if it takes time to learn this new tension. And watch the Bee Fingerless Mittens Video Tutorial for some tips and visuals.
And if you love bees and flowers check out the 26 Beautiful Knit & Crochet Flower Patterns Bouquet Inspiration.
Want an Ad-Free PDF Download of this pattern?
This pattern is available in my shops:
Check out some of my other patterns!
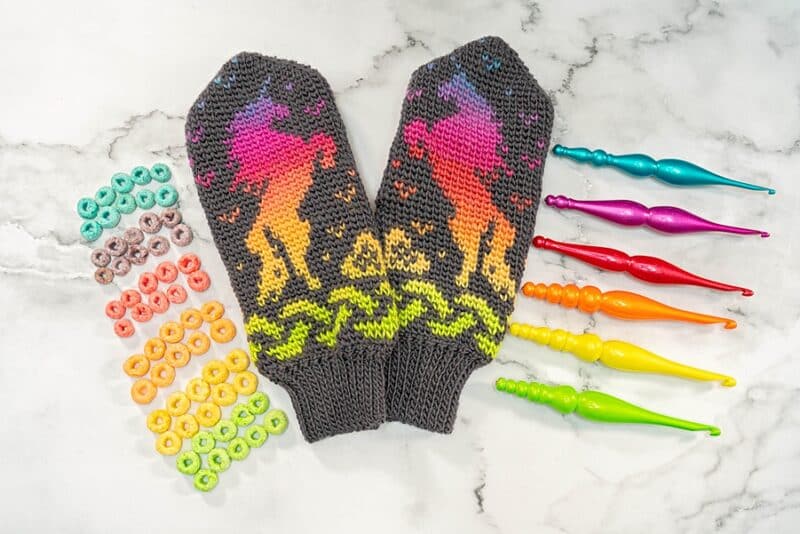
How to Crochet One Piece Mittens Free Pattern
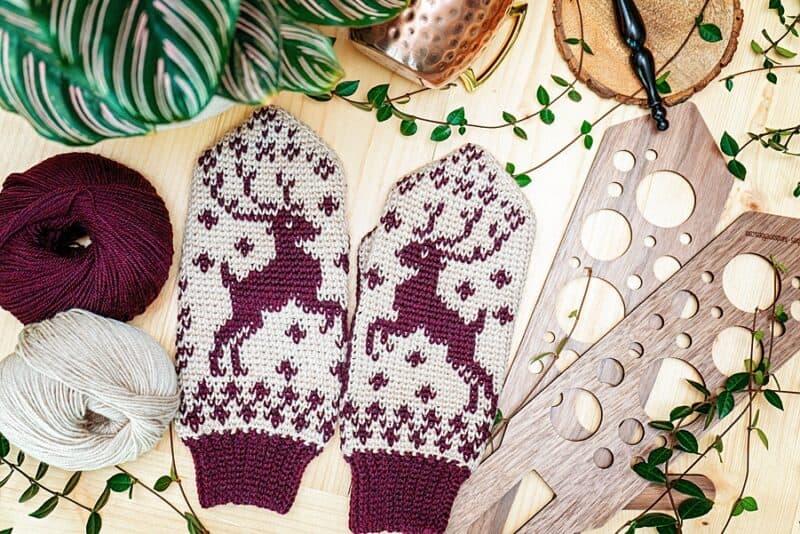
Deer Fair Isle Crochet Mitten Pattern
Crochet Boho Grocery Bag
How to Half Double Crochet
Bee Fingerless Crochet Mittens Supplies:
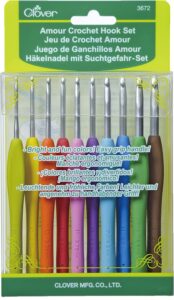
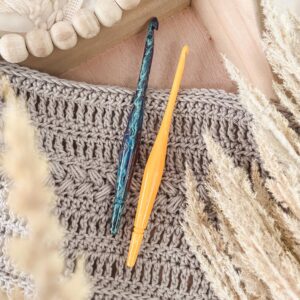
Crochet Hook:
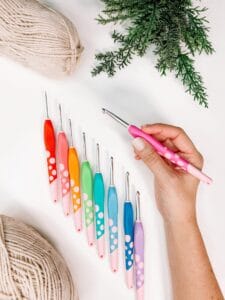
3.75mm (F hook), or hook to obtain gauge
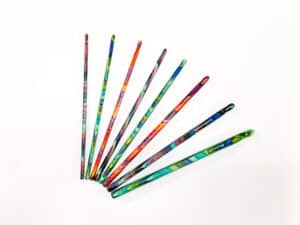
For the video tutorial, I used the Ebony Alpha Hook by Furls Crochet
Notions:
Removable stitch markers if needed
Yarn needle to weave in ends
Scissors
Yarn:
Twill Fingering by WeCrochet
100% Fine Superwash Merino Wool
183yds/50g
Color A: Serpent Heather
Color B: Graphite Heather
Yardage:
410 yds per mitten pair (1 ball or approx 205 yds of each color)
Abbreviations/Stitches:
Ch – chain
Blo – back loop only
Rnd – round
sl st – slip stitch
ssc – split single crochet
St(s) -stitch(es)
Gauge:
21 sts by 25 rows = 4 inches square, worked in the round and in split single crochet
Skill Level:
Intermediate/Advanced Colorwork
Size:
One Size Adult
Width: 4 inches
Length including ribbing: 7.25 inches
Notes:
The Bee Fingerless Mittens are worked in the round continuously (without joining). The mittens start at the first round of the colorwork and then work towards the fingers, leaving space for the thumb. The cuff will be worked last.
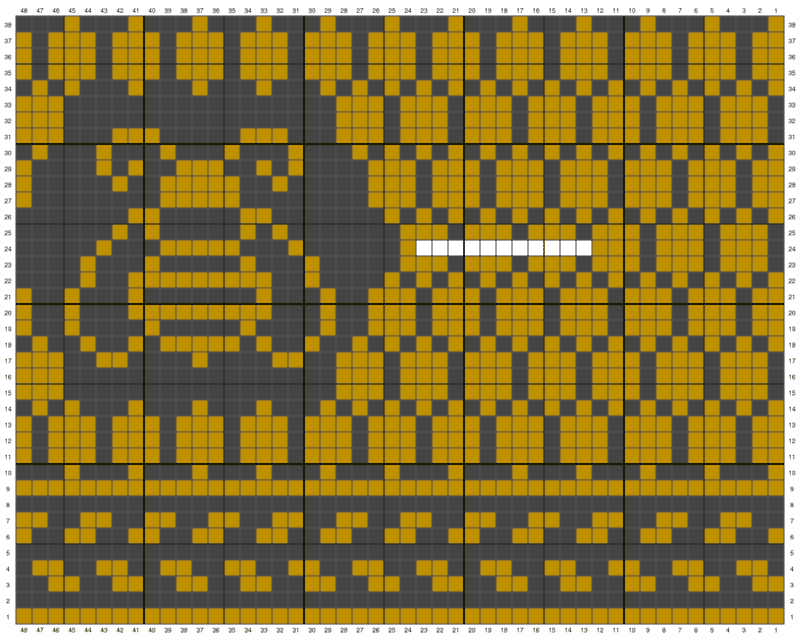
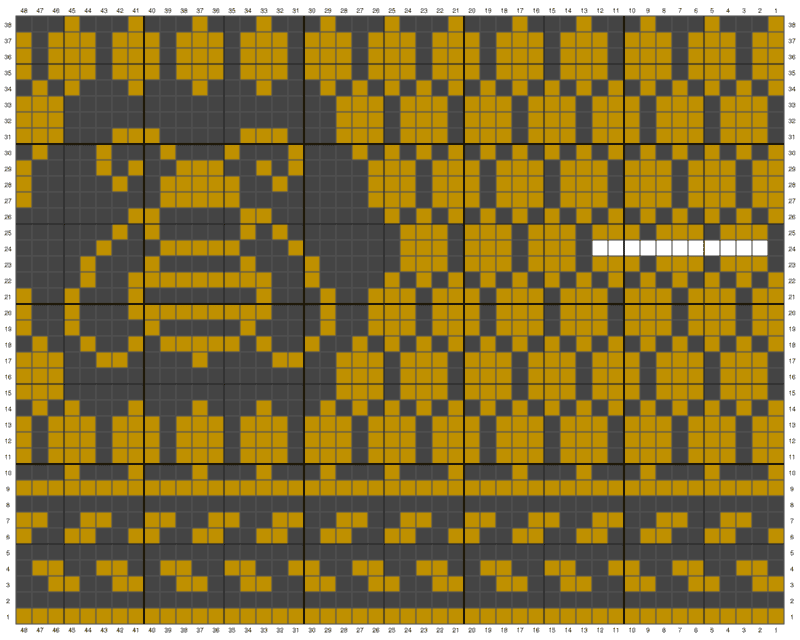
When reading the colorwork chart, each round is read from right to left.
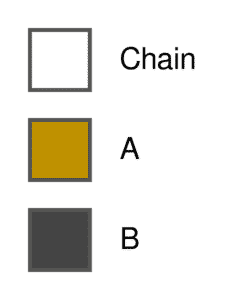
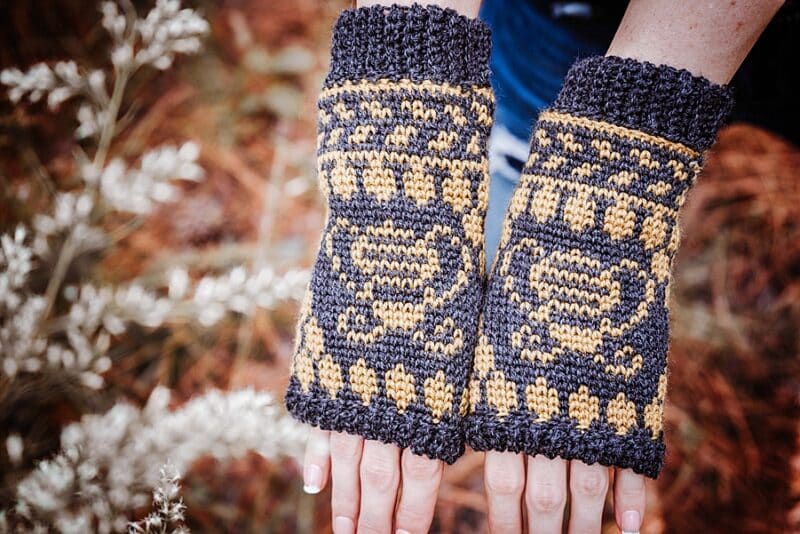
For the colorwork section, Color A (Serpent Heather/Yellow) will be abbreviated as (A), and color B (Graphite Heather/Black) as (B).
Example: (B) x 3 = with Color B crochet the next 3 stitches
Special Stitches:
Split Stitch (ssc): This stitch is also known as the waistcoat stitch. All the stitches for this mitten other than the first single crochet round and the first thumb round stitches will be worked in the split stitch.
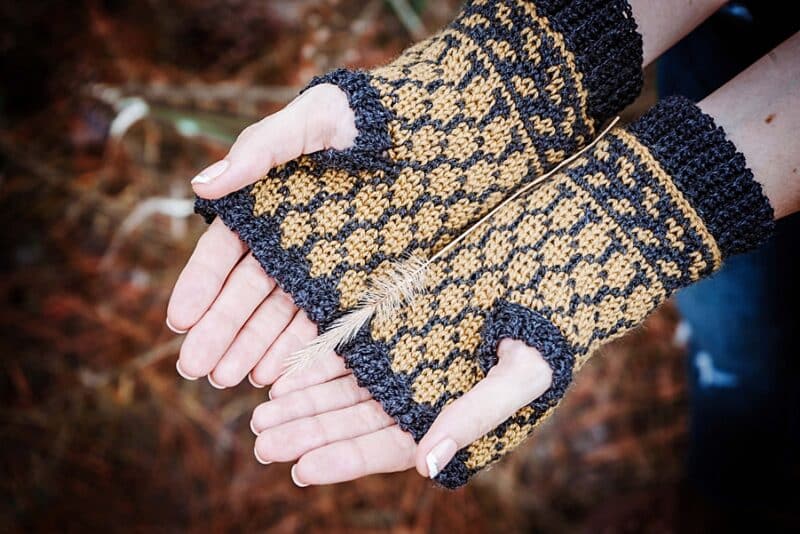
Use a stitch marker to keep track of rounds. The white boxes on the mitten chart indicate the thumb hole.
Bee Fingerless Crochet Mittens Video:
Bee Fingerless Crochet Mittens Written Instructions

Click the box below to unlock this exclusive subscriber content for free. Add your email and create a password. If you are having trouble, reset your password or login to the Grow Portal.
I’m thrilled to share this amazing crochet pattern with you! Please don’t copy, paste, or distribute this pattern. Prefer an ad-free experience? Purchase a digital PDF file for a small fee from one of my online stores. I appreciate your support and readership. You are why I can keep doing what I love and sharing it with others. Thank you from the bottom of my heart.
Color Chart Color Key
Make One Right & One Left Mitten
Rnd 1: With Color A chain 48 and join. Sc in each stitch around. (A) x 48
The rest of the stitches for the colorwork portion will be worked as SSC
Rnd 2: (B) x 48
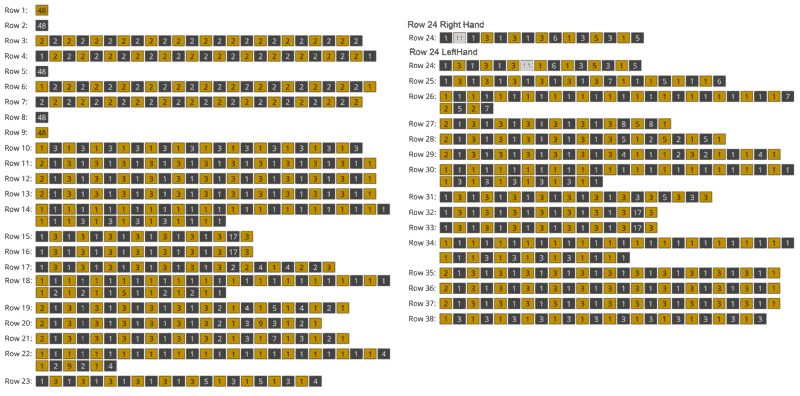
Rnd 3: (A) x 2, (B) x 2, (A) x 2, (B) x 2, (A) x 2, (B) x 2, (A) x 2, (B) x 2, (A) x 2, (B) x 2, (A) x 2, (B) x 2, (A) x 2, (B) x 2, (A) x 2, (B) x 2, (A) x 2, (B) x 2, (A) x 2, (B) x 2, (A) x 2, (B) x 2, (A) x 2, (B) x 2
Rnd 4: (B) x 1, (A) x 2, (B) x 2, (A) x 2, (B) x 2, (A) x 2, (B) x 2, (A) x 2, (B) x 2, (A) x 2, (B) x 2, (A) x 2, (B) x 2, (A) x 2, (B) x 2, (A) x 2, (B) x 2, (A) x 2, (B) x 2, (A) x 2, (B) x 2, (A) x 2, (B) x 2, (A) x 2, (B) x 1 Rnd 5: (B) x 48
Rnd 6: (A) x 1, (B) x 2, (A) x 2, (B) x 2, (A) x 2, (B) x 2, (A) x 2, (B) x 2, (A) x 2, (B) x 2, (A) x 2, (B) x 2, (A) x 2, (B) x 2, (A) x 2, (B) x 2, (A) x 2, (B) x 2, (A) x 2, (B) x 2, (A) x 2, (B) x 2, (A) x 2, (B) x 2, (A) x 1
Rnd 7: (B) x 2, (A) x 2, (B) x 2, (A) x 2, (B) x 2, (A) x 2, (B) x 2, (A) x 2, (B) x 2, (A) x 2, (B) x 2, (A) x 2, (B) x 2, (A) x 2, (B) x 2, (A) x 2, (B) x 2, (A) x 2, (B) x 2, (A) x 2, (B) x 2, (A) x 2, (B) x 2, (A) x 2
Rnd 8: (B) x 48
Rnd 9: (A) x 48
Rnd 10: (A) x 1, (B) x 3, (A) x 1, (B) x 3, (A) x 1, (B) x 3, (A) x 1, (B) x 3, (A) x 1, (B) x 3, (A) x 1, (B) x 3, (A) x 1, (B) x 3, (A) x 1, (B) x 3, (A) x 1, (B) x 3, (A) x 1, (B) x 3, (A) x 1, (B) x 3, (A) x 1, (B) x 3
Rnd 11: (A) x 2, (B) x 1, (A) x 3, (B) x 1, (A) x 3, (B) x 1, (A) x 3, (B) x 1, (A) x 3, (B) x 1, (A) x 3, (B) x 1, (A) x 3, (B) x 1, (A) x 3, (B) x 1, (A) x 3, (B) x 1, (A) x 3, (B) x 1, (A) x 3, (B) x 1, (A) x 3, (B) x 1, (A) x 1
Rnd 12: (A) x 2, (B) x 1, (A) x 3, (B) x 1, (A) x 3, (B) x 1, (A) x 3, (B) x 1, (A) x 3, (B) x 1, (A) x 3, (B) x 1, (A) x 3, (B) x 1, (A) x 3, (B) x 1, (A) x 3, (B) x 1, (A) x 3, (B) x 1, (A) x 3, (B) x 1, (A) x 3, (B) x 1, (A) x 1
Rnd 13: (A) x 2, (B) x 1, (A) x 3, (B) x 1, (A) x 3, (B) x 1, (A) x 3, (B) x 1, (A) x 3, (B) x 1, (A) x 3, (B) x 1, (A) x 3, (B) x 1, (A) x 3, (B) x 1, (A) x 3, (B) x 1, (A) x 3, (B) x 1, (A) x 3, (B) x 1, (A) x 3, (B) x 1, (A) x 1
Rnd 14: (A) x 1, (B) x 1, (A) x 1, (B) x 1, (A) x 1, (B) x 1, (A) x 1, (B) x 1, (A) x 1, (B) x 1, (A) x 1, (B) x 1, (A) x 1, (B) x 1, (A) x 1, (B) x 1, (A) x 1, (B) x 1, (A) x 1, (B) x 1, (A) x 1, (B) x 1, (A) x 1, (B) x 1, (A) x 1, (B) x 1, (A) x 1, (B) x 1, (A) x 1, (B) x 3, (A) x 1, (B) x 3, (A) x 1, (B) x 3, (A) x 1, (B) x 3, (A) x 1, (B) x 1, (A) x 1, (B) x 1
Rnd 15: (B) x 1, (A) x 3, (B) x 1, (A) x 3, (B) x 1, (A) x 3, (B) x 1, (A) x 3, (B) x 1, (A) x 3, (B) x 1, (A) x 3, (B) x 1, (A) x 3, (B) x 17, (A) x 3
Rnd 16: (B) x 1, (A) x 3, (B) x 1, (A) x 3, (B) x 1, (A) x 3, (B) x 1, (A) x 3, (B) x 1, (A) x 3, (B) x 1, (A) x 3, (B) x 1, (A) x 3, (B) x 17, (A) x 3
Rnd 17: (B) x 1, (A) x 3, (B) x 1, (A) x 3, (B) x 1, (A) x 3, (B) x 1, (A) x 3, (B) x 1, (A) x 3, (B) x 1, (A) x 3, (B) x 1, (A) x 3, (B) x 2, (A) x 2, (B) x 4, (A) x 1, (B) x 4, (A) x 2, (B) x 2, (A) x 3
Rnd 18: (A) x 1, (B) x 1, (A) x 1, (B) x 1, (A) x 1, (B) x 1, (A) x 1, (B) x 1, (A) x 1, (B) x 1, (A) x 1, (B) x 1, (A) x 1, (B) x 1, (A) x 1, (B) x 1, (A) x 1, (B) x 1, (A) x 1, (B) x 1, (A) x 1, (B) x 1, (A) x 1, (B) x 1, (A) x 1, (B) x 1, (A) x 1, (B) x 2, (A) x 1, (B) x 2, (A) x 1, (B) x 1, (A) x 5, (B) x 1, (A) x 1, (B) x 2, (A) x 1, (B) x 2, (A) x 1, (B) x 1
Rnd 19: (A) x 2, (B) x 1, (A) x 3, (B) x 1, (A) x 3, (B) x 1, (A) x 3, (B) x 1, (A) x 3, (B) x 1, (A) x 3, (B) x 1, (A) x 3, (B) x 2, (A) x 1, (B) x 4, (A) x 1, (B) x 5, (A) x 1, (B) x 4, (A) x 1, (B) x 2, (A) x 1
Rnd 20: (A) x 2, (B) x 1, (A) x 3, (B) x 1, (A) x 3, (B) x 1, (A) x 3, (B) x 1, (A) x 3, (B) x 1, (A) x 3, (B) x 1, (A) x 3, (B) x 2, (A) x 1, (B) x 3, (A) x 9, (B) x 3, (A) x 1, (B) x 2, (A) x 1
Rnd 21: (A) x 2, (B) x 1, (A) x 3, (B) x 1, (A) x 3, (B) x 1, (A) x 3, (B) x 1, (A) x 3, (B) x 1, (A) x 3, (B) x 1, (A) x 3, (B) x 2, (A) x 1, (B) x 3, (A) x 1, (B) x 7, (A) x 1, (B) x 3, (A) x 1, (B) x 2, (A) x 1
Rnd 22: (A) x 1, (B) x 1, (A) x 1, (B) x 1, (A) x 1, (B) x 1, (A) x 1, (B) x 1, (A) x 1, (B) x 1, (A) x 1, (B) x 1, (A) x 1, (B) x 1, (A) x 1, (B) x 1, (A) x 1, (B) x 1, (A) x 1, (B) x 1, (A) x 1, (B) x 1, (A) x 1, (B) x 1, (A) x 1, (B) x 4, (A) x 1, (B) x 2, (A) x 9, (B) x 2, (A) x 1, (B) x 4
Rnd 23: (B) x 1, (A) x 3, (B) x 1, (A) x 3, (B) x 1, (A) x 3, (B) x 1, (A) x 3, (B) x 1, (A) x 3, (B) x 1, (A) x 3, (B) x 5, (A) x 1, (B) x 3, (A) x 1, (B) x 5, (A) x 1, (B) x 3, (A) x 1, (B) x 4
Thumb Space for Round 24
Right Hand:
Rnd 24: (B) x 1, (Chain) x 11, Skip 11, (B) x 1, (A) x 3, (B) x 1, (A) x 3, (B) x 1, (A) x 3, (B) x 6, (A) x 1, (B) x 3, (A) x 5, (B) x 3, (A) x 1, (B) x 5
Left Hand:
Row 24: (B) x 1, (A) x 3, (B) x 1, (A) x 3, (B) x 1, (A) x 3, (Chain) x 11, Skip 11, (A) x 1, (B) x 6, (A) x 1, (B) x 3, (A) x 5, (B) x 3, (A) x 1, (B) x 5
Rnd 25: (B) x 1, (A) x 3, (B) x 1, (A) x 3, (B) x 1, (A) x 3, (B) x 1, (A) x 3, (B) x 1, (A) x 3, (B) x 1, (A) x 3, (B) x 7, (A) x 1, (B) x 1, (A) x 1, (B) x 5, (A) x 1, (B) x 1, (A) x 1, (B) x 6
Rnd 26: (A) x 1, (B) x 1, (A) x 1, (B) x 1, (A) x 1, (B) x 1, (A) x 1, (B) x 1, (A) x 1, (B) x 1, (A) x 1, (B) x 1, (A) x 1, (B) x 1, (A) x 1, (B) x 1, (A) x 1, (B) x 1, (A) x 1, (B) x 1, (A) x 1, (B) x 1, (A) x 1, (B) x 1, (A) x 1, (B) x 7, (A) x 2, (B) x 5, (A) x 2, (B) x 7
Rnd 27: (A) x 2, (B) x 1, (A) x 3, (B) x 1, (A) x 3, (B) x 1, (A) x 3, (B) x 1, (A) x 3, (B) x 1, (A) x 3, (B) x 1, (A) x 3, (B) x 8, (A) x 5, (B) x 8, (A) x 1
Rnd 28: (A) x 2, (B) x 1, (A) x 3, (B) x 1, (A) x 3, (B) x 1, (A) x 3, (B) x 1, (A) x 3, (B) x 1, (A) x 3, (B) x 1, (A) x 3, (B) x 5, (A) x 1, (B) x 2, (A) x 5, (B) x 2, (A) x 1, (B) x 5, (A) x 1
Rnd 29: (A) x 2, (B) x 1, (A) x 3, (B) x 1, (A) x 3, (B) x 1, (A) x 3, (B) x 1, (A) x 3, (B) x 1, (A) x 3, (B) x 1, (A) x 3, (B) x 4, (A) x 1, (B) x 1, (A) x 1, (B) x 2, (A) x 3, (B) x 2, (A) x 1, (B) x 1, (A) x 1, (B) x 4, (A) x 1
Rnd 30: (A) x 1, (B) x 1, (A) x 1, (B) x 1, (A) x 1, (B) x 1, (A) x 1, (B) x 1, (A) x 1, (B) x 1, (A) x 1, (B) x 1, (A) x 1, (B) x 1, (A) x 1, (B) x 1, (A) x 1, (B) x 1, (A) x 1, (B) x 1, (A) x 1, (B) x 1, (A) x 1, (B) x 1, (A) x 1, (B) x 1, (A) x 1, (B) x 3, (A) x 1, (B) x 3, (A) x 1, (B) x 3, (A) x 1, (B) x 3, (A) x 1, (B) x 3, (A) x 1, (B) x 1
Rnd 31: (B) x 1, (A) x 3, (B) x 1, (A) x 3, (B) x 1, (A) x 3, (B) x 1, (A) x 3, (B) x 1, (A) x 3, (B) x 1, (A) x 3, (B) x 1, (A) x 3, (B) x 3, (A) x 3, (B) x 5, (A) x 3, (B) x 3, (A) x 3
Rnd 32: (B) x 1, (A) x 3, (B) x 1, (A) x 3, (B) x 1, (A) x 3, (B) x 1, (A) x 3, (B) x 1, (A) x 3, (B) x 1, (A) x 3, (B) x 1, (A) x 3, (B) x 17, (A) x 3
Rnd 33: (B) x 1, (A) x 3, (B) x 1, (A) x 3, (B) x 1, (A) x 3, (B) x 1, (A) x 3, (B) x 1, (A) x 3, (B) x 1, (A) x 3, (B) x 1, (A) x 3, (B) x 17, (A) x 3
Rnd 34: (A) x 1, (B) x 1, (A) x 1, (B) x 1, (A) x 1, (B) x 1, (A) x 1, (B) x 1, (A) x 1, (B) x 1, (A) x 1, (B) x 1, (A) x 1, (B) x 1, (A) x 1, (B) x 1, (A) x 1, (B) x 1, (A) x 1, (B) x 1, (A) x 1, (B) x 1, (A) x 1, (B) x 1, (A) x 1, (B) x 1, (A) x 1, (B) x 1, (A) x 1, (B) x 3, (A) x 1, (B) x 3, (A) x 1, (B) x 3, (A) x 1, (B) x 3, (A) x 1, (B) x 1, (A) x 1, (B) x 1
Rnd 35: (A) x 2, (B) x 1, (A) x 3, (B) x 1, (A) x 3, (B) x 1, (A) x 3, (B) x 1, (A) x 3, (B) x 1, (A) x 3, (B) x 1, (A) x 3, (B) x 1, (A) x 3, (B) x 1, (A) x 3, (B) x 1, (A) x 3, (B) x 1, (A) x 3, (B) x 1, (A) x 3, (B) x 1, (A) x 1
Rnd 36: (A) x 2, (B) x 1, (A) x 3, (B) x 1, (A) x 3, (B) x 1, (A) x 3, (B) x 1, (A) x 3, (B) x 1, (A) x 3, (B) x 1, (A) x 3, (B) x 1, (A) x 3, (B) x 1, (A) x 3, (B) x 1, (A) x 3, (B) x 1, (A) x 3, (B) x 1, (A) x 3, (B) x 1, (A) x 1
Rnd 37: (A) x 2, (B) x 1, (A) x 3, (B) x 1, (A) x 3, (B) x 1, (A) x 3, (B) x 1, (A) x 3, (B) x 1, (A) x 3, (B) x 1, (A) x 3, (B) x 1, (A) x 3, (B) x 1, (A) x 3, (B) x 1, (A) x 3, (B) x 1, (A) x 3, (B) x 1, (A) x 3, (B) x 1, (A) x 1
Rnd 38: (A) x 1, (B) x 3, (A) x 1, (B) x 3, (A) x 1, (B) x 3, (A) x 1, (B) x 3, (A) x 1, (B) x 3, (A) x 1, (B) x 3, (A) x 1, (B) x 3, (A) x 1, (B) x 3, (A) x 1, (B) x 3, (A) x 1, (B) x 3, (A) x 1, (B) x 3, (A) x 1, (B) x 3
Mitten Top Ribbing:
Row 1: Ch 4, sc in the second chain from hook and across, slip stitch two stitches on the mitten top edge, turn. (3 sts)
Row 2: Skip the 2 mitten top edge slip sts, in blo sc 3, turn.
Row 3: Ch 1, in blo sc 3, sl st into the next two stitches from mitten top edge, turn.
Repeat Rows 2-3 ribbing around the mitten top edge. To join the two edges together, fasten off and seam the beginning edge to the ending edge with (A) tapestry needle. Or, if preferred, slip stitch through the blo from the ending edge and the stitch from the beginning edge at the same time.
Mitten Thumb Ribbing:
Attach Color B to the opening of the thumb hole. Repeat instructions from the Top Ribbing for the Thumb Ribbing working around the opening.
Mitten Cuff:
Set-Up Rnd: Attach yarn to the bottom of the mitten at the seam.
Row 1: Ch 8, sc in the second chain from hook and across, slip stitch two stitches on the mitten bottom edge, turn. (7 sts)
Row 2: Skip the 2 mitten bottom edge slip sts, in blo sc 7, turn.
Row 3: Ch 1, in blo sc 7, sl st into the next two stitches from mitten bottom edge, turn.
Repeat Rows 2-3 ribbing around the mitten bottom edge. To join the two edges together, fasten off and seam the beginning edge to the ending edge with (A) tapestry needle. Or, if preferred, slip stitch through the blo from the ending edge and the stitch from the beginning edge at the same time.
Mitten Finishing:
Fasten off and weave in all ends. Block, wear & enjoy.

CROCHET & TAG
I hope you have enjoyed making the Bee Fingerless Crochet Mittens Supplies: Pattern!
If you have made this, please share it on social media. Above all, I love to see the projects created with my patterns and also share your beautiful work.
Please use #brianakdesigns or @brianakdesigns
It is much appreciated and adored!

