How to Knit Cast On
Often we find a cast on method we prefer and we may stick with it for years. For me that was the Long Tail Cast On. But as I grow as a knitter I love exploring different types of Cast On Methods and how each one can be used with different types of projects. Keep reading for How to Knit Cast On and you might find a new style you enjoy!
Below each written cast-on instructions there is a video to visually assist you to ensure success with these methods.
Cast On Methods In This Post:
- Thumb Cast On (Backward Loop Cast On)
- Long Tail Cast On
- Cable Cast On
- Alternating Cast On 1x1 Ribbing
- Provisional Cast On
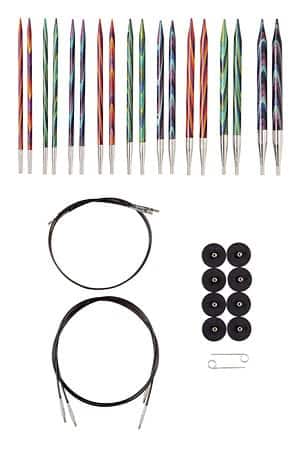
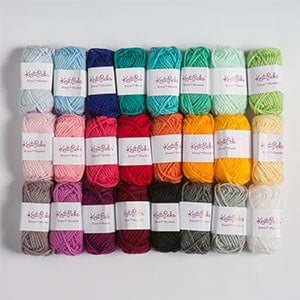
How to Knit Cast On Supplies:
Thumb Cast On (Backward Loop Cast On)
This will possibly be the very first type of cast on you will learn. It's the simplest and best for new knitters to try out. While it may not produce the most attractive edge, it gets the job done with easy instructions.
Step 1:
Make a slip knot, leaving a 4 inch tail, and place it on a needle.
Step 2:
Grab the strand yarn that goes to the yarn ball (working yarn) with your bottom fingers when you make the 'thumbs up' sign with your left hand. Swing your thumb under the working yarn so that the yarn wraps around the back of your thumb and to the needle.
Step 3:
Insert the needle tip under the loop of yarn on the outside of your thumb.
Step 4:
Let the loop slide off of your thumb and gently tighten. The yarn should still slide easily on your needle.
Step 5:
Repeat steps 2 & 3 for the desired number of cast-on stitches.
Long Tail Cast On
Long Tail Cast On is one of my favorite go-to cast-on. It's also known as the Continental, Double, Two-Strand, or Slingshot Cast-On. It has an attractive edge with some stretch. This can really work for any stitch pattern and project.
Step 1:
Measure out the tail of your yarn for how many stitches you need. One way to do this is to wrap the yarn around the needle once for each stitch, and then add an additional 6 inches. Make a slip knot and place it on your needle.
Step 2:
Hold the needle in your right hand. Create a slingshot with the tail end of the yarn over your thumb and the working yarn over your index finger.
Step 3:
Using the needle, reach under the yarn on the thumb and into the loop.
Step 4:
Now place the needle over the yarn on your left index finger and bring that yarn through the thumb loop.
Step 5:
Drop the yarn off of your left thumb and gently tighten the loop on the needle.
Step 6:
Repeat steps 3-6 for the desired number of stitches.
This first cast on row creates a row of knitting, so when starting to work the next row it would be a wrong side row in stockinette stitch.
Cable Cast On
This cast in is very pretty and neat. It doesn't have much stretch and can be useful in adding stitches mid-project or at the end of the row. Be sure to work your stitches loosely.
Step 1:
Make a slip knot, leaving a 4 inch tail, and place it on a needle in the left hand.
Step 2:
Knit into the slip knot, leaving the slip knot on the left-hand needle.
Step 3:
Slip the new stitch back to the left-hand needle knitwise.
Step 4:
Insert the needle between the 2 stitches on the left-hand needle and wrap yarn around.
Step 5:
Pull a new stitch through.
Step 6:
Slip this new stitch to the left-hand needle knitwise.
Step 7:
Continue casting on, reaching between the top 2 stitches on the left-hand needle to pull through the new stitch. Always slipping the new stitch to the left hand needle knitwise.
Alternating Cable Cast On 1x1 Ribbing
This is a variation of the Cable Cast on, but includes the purl stitch cast on for ribbed edges. This can also be done as a 2x2 ribbed cast on. This edge is also neat and firm for edges that don't require a lot of give.
Step 1:
Make a slip knot, leaving a 4 inch tail, and place it on a needle in the left hand.
Step 2:
Knit into the slip knot, leaving the slip knot on the left-hand needle.
Step 3:
Slip the new stitch back to the left-hand needle knitwise.
Step 4:
Bring the yarn around the front. Reaching behind the left-hand needle, insert the right-hand needle between the 2 stitches, warp the yarn around as if to purl and pull the stitch through.
Step 5:
Slip this new purl stitch to the left-hand needle knitwise.
Step 6:
Bring the yarn to the back. From the front, insert the right-hand needle between the end most 2 stitches, wrap the yarn around, and pull the new stitch through. Slip this new knit stitch to the left-hand needle knitwise.
Step 7:
Repeat steps 4-6, alternating between knit and purl stitches until the desired amount of cast-on stitches. The new stitch will always be made by going between the 2 stitches closest to the tip of the left-hand needle.
Quick Provisional Cast On
This is a cast on to add to your skills because it will open up new doors for how you begin your knitting. This method does a cast on around a scrap yarn which allows you to have live stitches once the scrap yarn is removed.
A nice tip: If you have an extra cable of a circular needle cast on around that cable. This way when you are ready to work from this end it's already set up and ready to go. Simply skip steps 1 & 2 and instead of making a slip knot with the working yarn and sliding it onto the cable needle, use your right index finger and hold the knot in place. Hold the yarn over your left index finger and the cable of the needle between your thumb and middle finger.
Step 1:
Knot the working yarn together with the scrap yarn. Hold the knot and needle in your right hand, using the index finger to hold the knot against the needle.
Step 2:
Hold the waste yarn over your left thumb, and the working yarn over your index finger (slingshot position).
Step 3:
Reach under the scrap yarn, over the top of the working yarn, and bring the working yarn under and in front of the scrap yarn. This is 1 stitch.
Step 4:
Reach over the top of the waste yarn and behind the working yarn, pulling it forward (like doing a yarn over). This is the 2nd stitch.
Step 5:
Repeat steps 3 & 4 until you have the desired number of stitches cast on. If you need to cast on an even number of stitches, start with step 4. All of the stitches from the working yarn are ready to knit, and none of the scrap yarn has been knit.
When you are ready to pick up the live stitches, pull the scrap yarn out as you place the live stitches onto a needle.

I hope you enjoyed learning a few different was of How to Knit Cast On. Check out my other knit tutorials for even more knit tips and methods.

