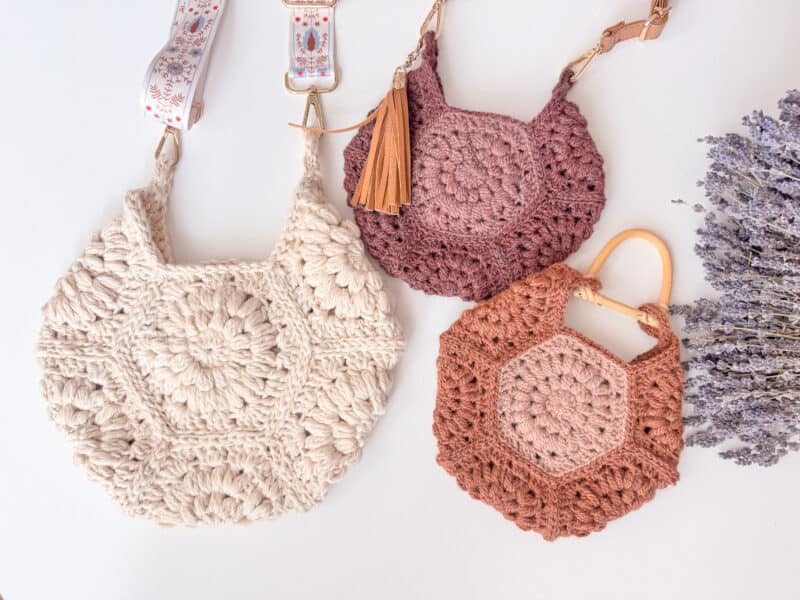
Hexagon Granny Square Bag Pattern
Are you ready to turn seven hexagon granny squares into a bag? It’s so quick and simple and you can customize the color choices and sizes. We will be using some puff stitches in the crochet hexagon to add a little pop of texture.
Disclosure: This post contains affiliate links. Please read my disclosure for more info.
This crochet bag pattern is free on this blog and can be made with yarn in your stash. What I really love about it is being able to change out the straps and add little embellishments such as tassels. Check out how I styled this bag in a couple of ways on Instagram.
Love Granny Squares? You will also love the Granny Square Snowflake Blanket or the Easy Granny Square Swim Cover,
Join the Crochet Along
I’ve teamed up with two of my favorite crochet designers, Hannah from HanJan Crochet & Michelle from MJ’s Off the Hook Designs, to bring you an incredible crochet experience. Come join our community groups and post your projects.
I love collaborating with yarn friends! Check out the other designs in the collection such as the Flower Square Market Bag Pattern from HanJan Crochet and the River Stone Granny Bag Pattern from MJ’s Off The Hook Designs.
Why you’ll love this free hexagon granny square tote bag.
- GREAT FOR GIFTS – With only 7 crochet hexagon granny squares, it’s a quick make!
- ON-THE-GO – Because we work one crochet hexagon at a time, it’s perfect for any place outside the house, small and easy to transport with you.
- EASY SIZING – You can use ANY weight of yarn to make this bag. Simply adjust your crochet hook size to fit the yarn weight and follow the instructions.
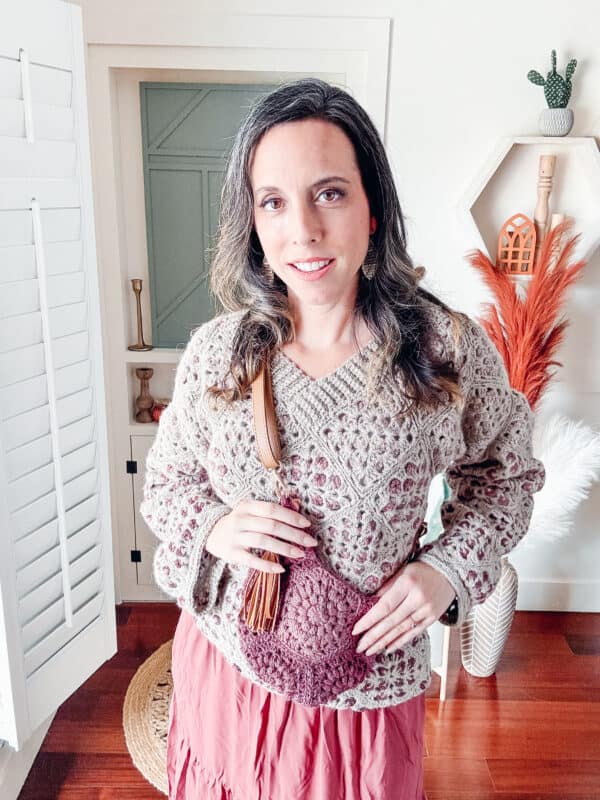
If you are looking at the image above and wondering where to find that granny square sweater, it’s only a click away. The best part is the Hexagon Granny Square Bag can also be made into a cardigan.
And if you happen to love granny squares, and just can’t get enough, you might like the Granny Square Blanket that seams together in a unique way to create a quilted snowflake look.
Supplies to Make the Crochet Tote Bag
Yarn
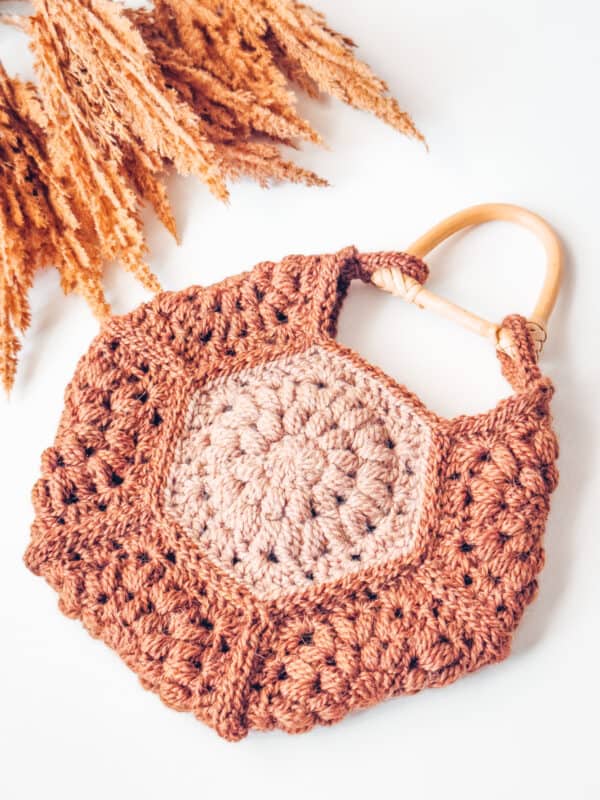
Smaller Bag Shown:
Upcycle Alpaca Blend Worsted, 33% Alpaca, 34% Wool, 33% Acrylic, 219yds/100g
Colorways shown: Topaz with Fawn or Garnet with Fruit Punch
Larger Bag Shown in Neutral Blow:
WeCrochet Billow Bulky Weight, 100% Pima Cotton, 120yds/100g
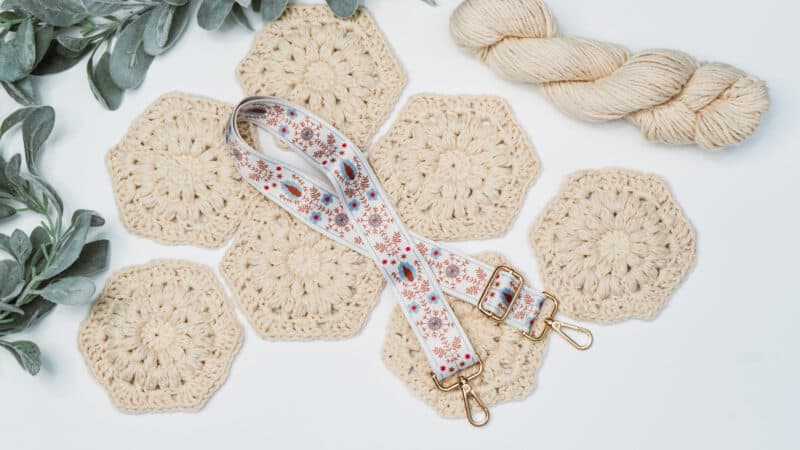
Yarn Quantities
Smaller Bag in Worsted Yarn:
1 Ball Each Color (total 140 yds)
Larger Bag in Bulky Yarn:
2 Hanks (total 195 yds)
Yarn Substitutions
Brava Sport
100% Premium Acrylic, 340yds/100g (gauges similar to Upcycle)
Dishie Worsted 100% Cotton, 190yds/100g
Crochet Hook
Smaller Bag in Worsted Yarn:
Size 4.0mm Crochet Hook with Worsted Weight Yarn
Larger Bag in Bulky Yarn:
Size 5.5mm Hook with Bulky Weight Yarn
Notions
Scissors
Yarn Needle
Removable Stitch Marker
Brown Strap (optional)
Ivory Strap (optional)
Wood Blocking Board
Crochet Bag Sizing
2 sizes available by changing the yarn and hook weight. Changing the size of each granny hexagon will change the size of the bag.
Small Bag:
Approx 8.5″ across and 7.5″ tall
Large Bag:
Approx 12″ across and 11″ tall.
Bag Construction
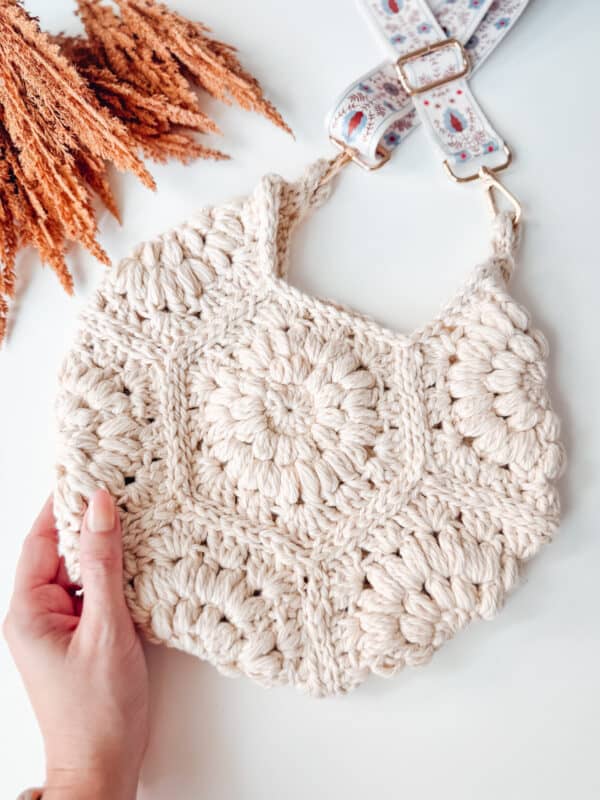
7 hexagon crochet pieces will be created and then joined together to create a bag. Then i-cord rings can attach to each side of the bag where a store-purchased (or crochet handle) can be attached.
Skill Level
Advanced Beginner/Intermediate
Abbreviations
ch – chain
dc – double crochet
Ps – puff stitch
rnd- round
Stsc – stacked single crochet stitch
sl st – slip stitch
Gauge
There are two sizes of granny squares for this bag, use the one for your yarn weight and work up one granny square.
After blocking, your granny square should measure 4.5″ on all sides for worsted weight yarn. And measures 5.75″ on all sides for bulky weight yarn.
Gauge Swatch
Working a gauge swatch will let you know if you will have the correct sizing for this pattern.
A gauge swatch is a fantastic way to familiarize yourself with the stitches used in this project and the perfect opportunity to perfect your stitch work and make it look flawless.
If you are struggling to match the gauge, visit a post on What Is Crochet Gauge and How To Fix It.

Special Stitches
Puff Stitch: Yarn over and insert your hook into the stitch/space. Yarn over again and pull up a long loop. (Yarn over and insert your hook into the same stitch/space. Yarn over again and pull up a long loop) two more times (7 loops on the hook). Yarn over and pull through the first 6 loops, yarn over and pull through remaining loops.
Stacked Single Crochet (Stsc): Do NOT chain, insert hook into next stitch, yo, pull up a loop, yo and pull through both loops, insert hook in the vertical bar below, yo, pull up a loop, yo and pull through both loop on hook.
Stacked Single Puff (Stsc Ps): Insert the hook into the next stitch, yo, pull up a loop, yo and pull through both loops, insert hook in the vertical bar below, yo, pull up a loop (2 loops on the hook), Yo again, insert the hook into the same stitch and pull up a loop (4 loops on the hook), Yo again, insert the hook into the same stitch and pull up a loop (6 loops on the hook), Yarn over and pull through the first 5 loops, yarn over and pull through remaining loops.
Magic Circle (MC): Start by creating a loop with your yarn. The tail of the working yarn will be over the working end. Insert your hook into the loop from behind. Yarn over and pull through the loop. Work the stitches as instructed into the loop.
Notes
- Chains at the beginning of the rounds are substituted with a Stsc, use a stitch marker to keep track of the first stitch of the round is recommended.
- Before you dive into your project, take a moment to identify the stitches and read through the pattern. Trust me, this small step will make a big difference in your crochet journey!
- There is a video tutorial for this crochet bag.
A Helpful Video Tutorial
How to Crochet A Granny Hexagon Bag

Click the box below to unlock this exclusive subscriber content for free. Add your email and create a password. If you are having trouble, reset your password or login to the Grow Portal.
I’m thrilled to share this amazing crochet pattern with you! Please don’t copy, paste, or distribute this pattern. Prefer an ad-free experience? Purchase a digital PDF file for a small fee from one of my online stores. I appreciate your support and readership. You are why I can keep doing what I love and sharing it with others. Thank you from the bottom of my heart.
Rnd 4:
In the first ch 1-space (Stsc 1, 2 dc, ch 1, 3 dc), *in the next ch 1-space dc 3, in the next ch 1-space (dc 3, ch 1, dc 3); repeat from * until the last ch 1-space, dc 3 in last ch 1- space, either sl st to join and fasten off or fasten off yarn and create a sl st join. | 54 dc sts and 6 ch sts
Make 7 Hexagons. You can mix up the colors as you like.
Join The Kindest Community
Join our vibrant community of crafters on Facebook today. Whether you enjoy crafting with others or simply have burning questions, we’ve got you covered – join us now!
Joining The Crochet Hexagons
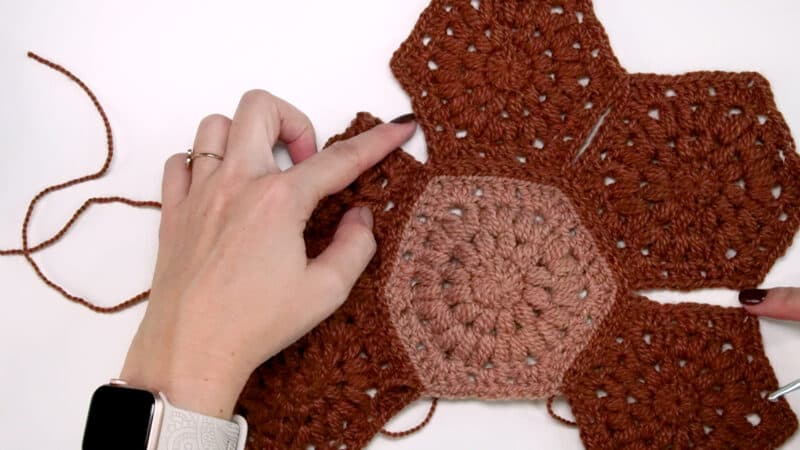
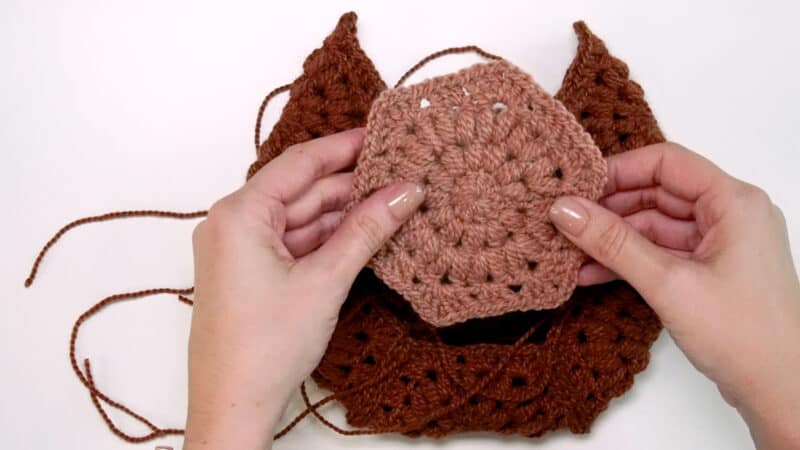
When it comes to joining the hexagons, you can use your preferred method. One of my favorites is the flat slip stitch and I show this process in the video tutorial.
Top Edge of the Hexagon Bag
To finish the top open edge of the bag, sl st in each back loop around the opening, fasten off and weave in end.
I-cord Loops to Attach the Bag Straps
There is a full tutorial of how to make an i-cord strap on my blog with video and image tutorials:
Follow the steps below to create a tab approximately 2.5 (3.5) inches long. Or you could create a longer i-cord to use as the strap of your bag.
Step 1:
To begin, place a slip knot on your hook and chain 3.
For this example, we are only working with 3 stitches. If you would like to work with more stitches chain the same number of stitches desired for the I-cord.
Step 2:
Insert your hook into the second chain from the hook, yarn over and pull up a loop (2 loops are on the hook).
Step 3:
Insert your hook into the next chain, yarn over and pull up a loop (3 loops on your hook).
Step 4:
Here is where the nifty trick comes in! This can be worked without an extra tool, but if you are like me, I like to have a safety net when it comes to loose stitches. You can even use a chopstick from your kitchen if you do not have a double-pointed knitting needle. Place the left 2 stitches on the hook onto your knitting needle or holder.
Step 5:
Yarn over and chain one for the stitch on the hook.
Step 6:
Repeat step 5 for the remaining stitches on the holder.
Step 7:
Once you have chained all of the stitches from the holder, repeat steps 4-6 until the i-cord is the desired length.
Step 8:
To finish off the i-cord, yarn over and pull through all three loops on the hook. Cut yarn leaving a tail to weave it into the center of the i-cord. And that’s it! You did it and can now crochet all the i-cords to your heart’s desire.
It can be helpful to insert your hook into the stitch before taking it off the holder so it doesn’t drop and come undone.
Place the left 2 stitches on the hook onto your knitting needle or holder.
For this example we are only working with 3 stitches, repeat this step for remaining chains if you are working with more than 3 stitches.
I-cord not your jam?
You can also chain the desired length for the strap loop, and then sc in each st across. Create a loop iwth the i-cord and stitch to each side of the bag at the top opening points, fasten off.
Finishing the Hexagon Tote
Weave in any ends and block the bag again if desired. Put the bag strap hardware through the i-cord loops on the bag, add a tassle if desired, and wear!
If you would like a bag that has a liner, I suggest a No-Sew Bag Liner. Simply cut it into the shape of a hexagon and follow the instructions from the tutorial.
Washing and Drying
The best methods for washing your crochet tote bag include using a machine without a central agitator on a delicate cycle with cold water if you’ve used a cotton yarn, or hand-washing delicate items in cold water with a mild detergent.
Gently agitate the bag in the water, being sure not to scrub or wring it to maintain its shape and appearance. Rinse your tote bag thoroughly under cool water to remove any detergent residue.
When it comes to drying your crochet tote bag, air drying is the best way to maintain its shape and appearance.
Lay the bag flat on a clean, dry surface or hang it up to dry, avoiding the use of a dryer as the heat can cause the bag to lose its shape. This careful drying process will ensure that your tote bag remains in pristine condition.
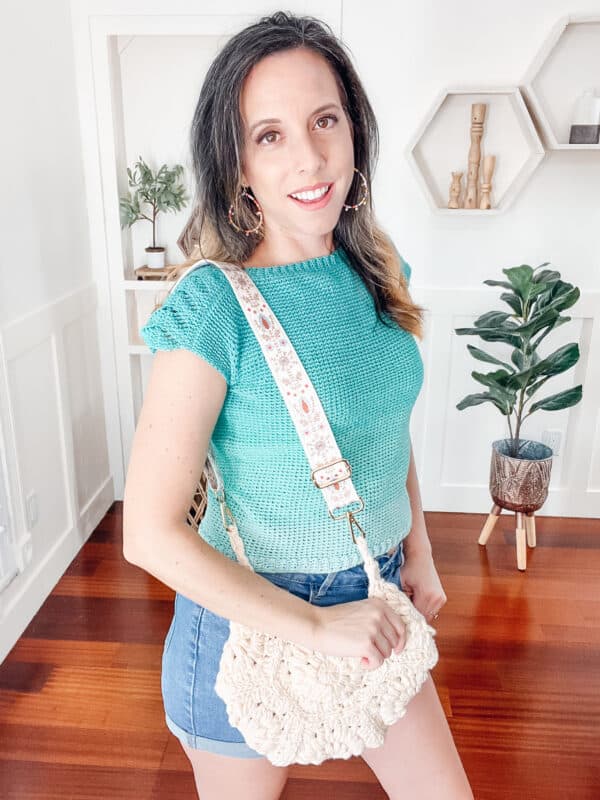
Creating a hexagon granny square tote bag is an exciting and rewarding crochet project that allows you to explore your creativity and showcase your skills.
Don’t forget to experiment with different color combinations and embellishments to make your tote bag truly unique.
With proper care and maintenance, your handmade crochet tote bag will be a cherished accessory for years to come. Happy crocheting!
Well That Was Fun! What’s Next?
📌 PIN THIS POST – Don’t lose this project; save it to your Pinterest crochet board so you can quickly come back to it again.
💌 SHARE – Share your yarn choice, in-progress, or finished projects on Facebook or Instagram and use the hashtag #brianakdesigns
🥂 JOIN – Join the kindest crafters in the Briana K Designs Community Group on Facebook. We love yarny friends!
🔗 RAVELRY LINK -Link and share your project on Ravelry. Having inspirational photos can help crafters.
