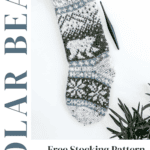
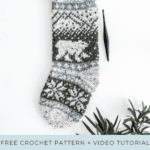
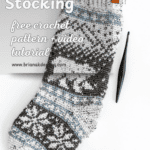
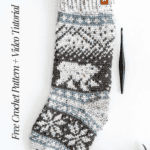
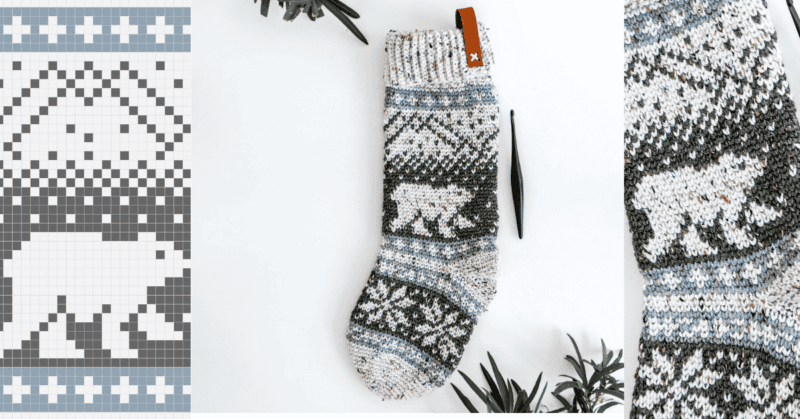
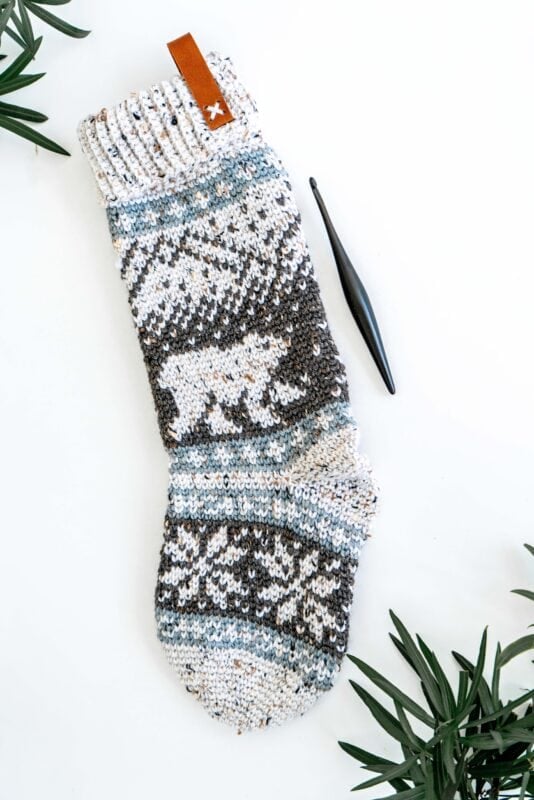
Polar Bear Stroll Holiday Stocking
Looking to add a touch of cozy charm to your holiday decor? The Polar Bear Stroll Holiday Stocking is the perfect festive addition! With its classic colorwork design and knit-look stitches, this stocking combines timeless style with a modern twist. Whether hanging by the fireplace or adorning a cozy nook, it brings warmth and holiday cheer to any space.
Disclosure: This post contains affiliate links. Please read my disclosure for more info.
This stocking is perfect for those who love to play with colors. You’ll be delighted as you stitch along and watch the beautiful colorwork come to life. Try making the Prancing Deer Stocking or the White Spruce Stocking to add even more joy to your decorating!
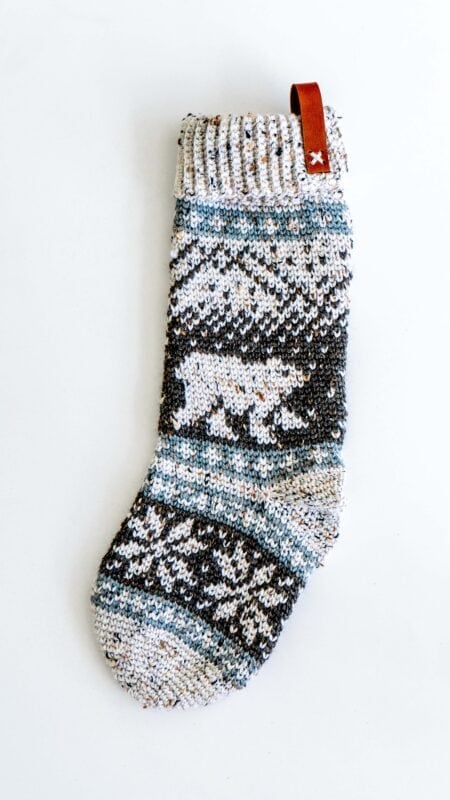
Crochet Supplies
Yarn
WeCrochet City Tweed DK Weight
55% Merino Wool, 25% Superfine Alpaca, 20% Donegal Tweed, 123 yds/50g
Yarn Quantities
450 yards
Colorways:
Snowbank (2 balls, 180 yds)
Coastal (1 ball, 90 yds)
Orca (2 balls, 180 yds)
Yarn Substitutions
WeCrochet Brava Recycle DK – 100% Recycled Acrylic, 306yds/100g
Swish DK – 100% Fine Superwash Merino Wool, 123yds/50g
Premier Anti-Pilling DK – 100% Anti-Pilling Acrylic, 273yds/100g
Remember always to check the gauge and drape when substituting yarns.
Crochet Hook
Size US G (4.0mm) Crochet Hook or hook to obtain gauge.
Notions
Scissors
Yarn Needle
Removable Stitch Marker
Skill Level
Intermediate
What you’ll love about this pattern.
🩶 Gorgeous Colorwork – This stocking looks much harder than it is. We’re using the ssc to create the fair isle look, so if you can make a single crochet, you can do this project!
🩶 Simple Construction – We’ll start with the toe, work the foot and body, add the cuff, and then finish the stocking by adding the heel!
🩶 POLAR BEARS! – How can you not love the adorable polar bear?!
One Size
19″ from folded cuff to toe, 11″ circumference
Abbreviations
ch – chain
rnd – round
sc – single crochet
sc2tog – single crochet 2 together
ssc – split single crochet
sl st – slip stitch
st(s) – stitch(es)
Gauge
17 sts and 21 rows = 4″ by 4″ in ssc
How to Crochet A Gauge Swatch
Working a gauge swatch will let you know if you will have the correct sizing for this pattern. It will also help you practice the stitches used in this project and improve your stitch work for a flawless look.
Are you struggling to match the gauge? Check out the blog post on What is Crochet Gauge and How To Fix It
Construction
This beautiful crochet stocking is worked from the toe up, leaving space for the heel to be added later. We will then work the stocking cuff in ribbed rows, finishing up with the heel in the round. The colorwork sections of this stocking are crocheted with the split single crochet (ssc), also known as the waistcoat stitch. We’ll learn more about that later!
If you love the knit-look of ssc colorwork, check out the Holiday Fair Isle Rug and the Pine Christmas Tree Skirt!
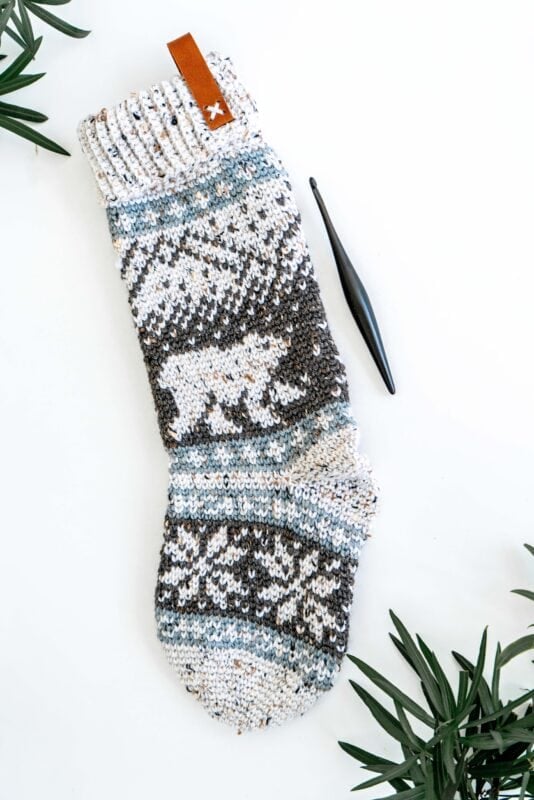
Special Stitches
Split Single Crochet (ssc): Insert hook between the legs of the stitch (on the back of work the hook
should be under the horizontal bar and between the upside-down ‘V’ shape as well), yarn over, pull up a
loop to the height of a single crochet, yarn over, pull through both loops on hook. Tip: Keep a loose tension so the stitches are easily worked.
Magic Circle: Start by creating a loop with your yarn. The tail of the working yarn will be over the working end. Insert your hook into the loop from behind. Yarn over and pull through the loop. Work the
stitches as instructed into the loop.
Pattern Notes
- Since this is worked continuously, a ch 1 at the beginning of the round is not needed. It is helpful to place a stitch marker on the first stitch of each row.
- This crochet stocking will be worked toe-up, leaving space for the heel to be worked last. The colorwork in this pattern will use the split single crochet (ssc), also known as the waistcoat stitch.
How to read the colorwork instructions:
In the colorwork section, Color A will be abbreviated as (A) and Color B as (B).
Example: (B) x 9 = with Color B ssc the next 9 stitches.
The chart will be worked from right to left for each round and repeated until the end of the round.
Color A: Snowbank (white)
Color B: Coastal (blue)
Color C: Orca (dark grey)
Subscribe & Like
Video Tutorial for the Polar Bear Stocking Part 1
The video tutorial for this stocking is the Prancing Deer Stocking Tutorial. Both Stockings have the same stitch counts and use the same concepts.
Relax & Crochet
Upgrade to the Printable PDF
Beautifully formatted to print and relax while crocheting. The paid pattern includes:
The Ad-Free PDF can be purchased on Etsy or Ravelry.
A knit version is also available on Etsy or Ravelry.

Click the box below to unlock this exclusive subscriber content for free. Add your email and create a password. If you are having trouble, reset your password or login to the Grow Portal.
I’m thrilled to share this amazing crochet pattern with you! Please don’t copy, paste, or distribute this pattern. Prefer an ad-free experience? Purchase a digital PDF file for a small fee from one of my online stores. I appreciate your support and readership. You are why I can keep doing what I love and sharing it with others. Thank you from the bottom of my heart.
Written Crochet Pattern Instructions
Rnd 13:
Rep Rnd 3. (56)sts
Join The Kindest Community
Join our vibrant community of crafters on Facebook today. Whether you enjoy crafting with others or simply have burning questions, we’ve got you covered – join us now!
Video Tutorial for the Polar Bear Stocking Part 2
Foot of Stocking – Colorwork
All the stitches for the foot will be worked as ssc. Repeat each round instructions 4 times for one round. The stitch count will remain 56 sts.
Don’t forget!
My Number One Tip for working the SSC:
Keep your hands loose and comfortable! If your hands are starting to hurt, then the tension of the stitch is too tight. So relax, breathe, unclench your jaw, and drop your shoulders back down to their normal position!
Rnd 1: (B) x 14
Rnd 2: [(B) x 1, (A) x 1] x 3, [(A) x 1, (B) x 1] x 3, (A) x 2
Rnd 3: (A) x 5, (B) x 2, (A) x 5, (B) x 2
Rnd 4: [(B) x 1, (A) x 1] x 3, [(A) x 1, (B) x 1] x 3, (A) x 2
Rnd 5: (B) x 14
Rnd 6: (C) x 14
Rnd 7: [(C) x 1, (A) x 1, (C) x 1] x 4, (C) x 1, (A) x 1
Rnd 8: (C) x 1, [(C) x 1, (A) x 1] x 2, (A) x 1, (C) x 3, (A) x 1, [(A) x 1, (C) x 1] x 2
Rnd 9: (C) x 4, [(A) x 3, (C) x 1] x 2, (C) x 2
Rnd 10: (C) x 1, (A) x 1, [(A) x 2, (C) x 1] x 3, (A) x 3
Rnd 11: (C) x 2, (A) x 2, [(A) x 1, (C) x 1] x 3, (A) x 3, (C) x 1
Rnd 12: (C) x 3, (A) x 2, [(A) x 1, (C) x 1] x 2, (A) x 3, (C) x 2
Rnd 13: (A) x 1, (C) x 5, (A) x 3, (C) x 5
Rnd 14: (C) x 3, (A) x 2, [(A) x 1, (C) x 1] x 2, (A) x 3, (C) x 2
Rnd 15: (C) x 2, (A) x 2, [(A) x 1, (C) x 1] x 3, (A) x 3, (C) x 1
Rnd 16: (C) x 1, (A) x 1, [(A) x 2, (C) x 1] x 3, (A) x 3
Rnd 17: (C) x 4, [(A) x 3, (C) x 1] x 2, (C) x 2
Rnd 18: (C) x 1, [(C) x 1, (A) x 1] x 2, (A) x 1, (C) x 3, (A) x 1, [(A) x 1, (C) x 1] x 2
Rnd 19: [(C) x 1, (A) x 1, (C) x 1] x 4, (C) x 1, (A) x 1
Rnd 20: (C) x 14
Rnd 21: (B) x 14
Rnd 22: [(B) x 1, (A) x 1] x 3, [(A) x 1, (B) x 1] x 3, (A) x 2
Rnd 23: (A) x 5, (B) x 2, (A) x 5, (B) x 2
Rnd 24: [(B) x 1, (A) x 1] x 3, [(A) x 1, (B) x 1] x 3, (A) x 2
Rnd 25: (B) x 14
Rnd 26: With A ssc 17, ch 22, skip 22, ssc 17. (This creates the heel.)
Leg of Stocking – Colorwork
All the stitches for the foot will be worked as ssc. Repeat each round instructions 2 times for one
round. The stitch count will remain 56 sts.
Rnd 26: (A) x 28
Rnd 27: (B) x 28
Rnd 28: (B) x 2, (A) x 1, (B) x 3, (A) x 1, (B) x 3, (A) x 1, (B) x 3, (A) x 1, (B) x 3, (A) x 1, (B) x 3, (A) x 1, (B)
x 3, (A) x 1, (B) x 1
Rnd 29: (B) x 1, (A) x 3, (B) x 1, (A) x 3, (B) x 1, (A) x 3, (B) x 1, (A) x 3, (B) x 1, (A) x 3, (B) x 1, (A) x 3, (B)
x 1, (A) x 3
Rnd 30: (B) x 2, (A) x 1, (B) x 3, (A) x 1, (B) x 3, (A) x 1, (B) x 3, (A) x 1, (B) x 3, (A) x 1, (B) x 3, (A) x 1, (B)
x 3, (A) x 1, (B) x 1
Rnd 31: (B) x 28
Rnd 32: (C) x 28
Rnd 33: (A) x 1, (C) x 8, (A) x 3, (C) x 3, (A) x 5, (C) x 4, (A) x 1, (C) x 3
Rnd 34: (C) x 10, (A) x 3, (C) x 3, (A) x 4, (C) x 2, (A) x 3, (C) x 2, (A) x 1
Rnd 35: (C) x 4, (A) x 4, (C) x 2, (A) x 3, (C) x 4, (A) x 3, (C) x 1, (A) x 4, (C) x 3
Rnd 36: (C) x 5, (A) x 4, (C) x 2, (A) x 2, (C) x 4, (A) x 2, (C) x 1, (A) x 4, (C) x 4
Rnd 37: (C) x 3, (A) x 1, (C) x 2, (A) x 3, (C) x 1, (A) x 3, (C) x 1, (A) x 2, (C) x 1, (A) x 1, (C) x 1, (A) x 4, (C)
x 3, (A) x 1, (C) x 1
Rnd 38: (C) x 7, (A) x 1, (C) x 1, (A) x 3, (C) x 1, (A) x 4, (C) x 1, (A) x 5, (C) x 5
Rnd 39: (C) x 8, (A) x 9, (C) x 1, (A) x 5, (C) x 5
Rnd 40: (A) x 1, (C) x 7, (A) x 15, (C) x 5
Rnd 41: (C) x 6, (A) x 17, (C) x 5
Rnd 42: (C) x 4, (A) x 20, (C) x 4
Rnd 43: (C) x 3, (A) x 21, (C) x 2, (A) x 1, (C) x 1
Rnd 44: (C) x 4, (A) x 2, (C) x 1, (A) x 16, (C) x 5
Rnd 45: (C) x 2, (A) x 1, (C) x 2, (A) x 17, (C) x 6
Rnd 46: (C) x 7, (A) x 2, (C) x 4, (A) x 8, (C) x 7
Rnd 47: (C) x 28
Rnd 48: (A) x 1, (C) x 3, (A) x 1, (C) x 3, (A) x 1, (C) x 3, (A) x 1, (C) x 3, (A) x 1, (C) x 3, (A) x 1, (C) x 3, (A)
x 1, (C) x 3
Rnd 49: (C) x 28
Rnd 50: (C) x 2, (A) x 1, (C) x 3, (A) x 1, (C) x 3, (A) x 1, (C) x 3, (A) x 1, (C) x 3, (A) x 1, (C) x 3, (A) x 1, (C)
x 3, (A) x 1, (C) x 1
Rnd 51: (A) x 1, (C) x 3, (A) x 1, (C) x 3, (A) x 1, (C) x 3, (A) x 1, (C) x 3, (A) x 1, (C) x 3, (A) x 1, (C) x 3, (A) x
1, (C) x 3
Rnd 52: (C) x 1, (A) x 1, (C) x 1, (A) x 1, (C) x 1, (A) x 1, (C) x 1, (A) x 1, (C) x 1, (A) x 1, (C) x 1, (A) x 1, (C) x
1, (A) x 1, (C) x 1, (A) x 1, (C) x 1, (A) x 1, (C) x 1, (A) x 1, (C) x 1, (A) x 1, (C) x 1, (A) x 1, (C) x 1, (A) x 1, (C)
x 1, (A) x 1
Rnd 53: (A) x 1, (C) x 1, (A) x 1, (C) x 1, (A) x 1, (C) x 1, (A) x 1, (C) x 1, (A) x 1, (C) x 1, (A) x 1, (C) x 1, (A) x
1, (C) x 1, (A) x 1, (C) x 1, (A) x 1, (C) x 1, (A) x 1, (C) x 1, (A) x 1, (C) x 1, (A) x 1, (C) x 1, (A) x 1, (C) x 1, (A)
x 1, (C) x 1
Rnd 54: (C) x 1, (A) x 3, (C) x 1, (A) x 3, (C) x 1, (A) x 3, (C) x 1, (A) x 3, (C) x 1, (A) x 3, (C) x 1, (A) x 3, (C)
x 1, (A) x 3
Rnd 55: (C) x 1, (A) x 1, (C) x 1, (A) x 3, (C) x 1, (A) x 3, (C) x 1, (A) x 3, (C) x 1, (A) x 3, (C) x 1, (A) x 3, (C)
x 1, (A) x 3, (C) x 1, (A) x 1
Rnd 56: (A) x 1, (C) x 1, (A) x 3, (C) x 1, (A) x 17, (C) x 1, (A) x 3, (C) x 1
Rnd 57: (A) x 2, (C) x 1, (A) x 1, (C) x 1, (A) x 1, (C) x 1, (A) x 7, (C) x 1, (A) x 7, (C) x 1, (A) x 3, (C) x 1, (A) x 1
Rnd 58: (A) x 3, (C) x 1, (A) x 3, (C) x 1, (A) x 2, (C) x 1, (A) x 5, (C) x 1, (A) x 4, (C) x 1, (A) x 3, (C) x 1, (A) x 2
Rnd 59: (C) x 1, (A) x 3, (C) x 1, (A) x 3, (C) x 1, (A) x 11, (C) x 1, (A) x 3, (C) x 1, (A) x 2, (C) x 1
Rnd 60: (A) x 5, (C) x 1, (A) x 3, (C) x 1, (A) x 9, (C) x 1, (A) x 3, (C) x 1, (A) x 4
Rnd 61: (A) x 6, (C) x 1, (A) x 3, (C) x 1, (A) x 3, (C) x 1, (A) x 3, (C) x 1, (A) x 3, (C) x 1, (A) x 5
Rnd 62: (A) x 1, (C) x 1, (A) x 5, (C) x 1, (A) x 3, (C) x 1, (A) x 1, (C) x 1, (A) x 1, (C) x 1, (A) x 1, (C) x 1, (A) x
3, (C) x 1, (A) x 5, (C) x 1
Rnd 63: (A) x 4, (C) x 1, (A) x 3, (C) x 1, (A) x 3, (C) x 1, (A) x 3, (C) x 1, (A) x 3, (C) x 1, (A) x 3, (C) x 1, (A)
x 3
Rnd 64: (A) x 9, (C) x 1, (A) x 1, (C) x 1, (A) x 1, (C) x 1, (A) x 1, (C) x 1, (A) x 1, (C) x 1, (A) x 1, (C) x 1, (A)
x 8
Rnd 65: (A) x 1, (C) x 1, (A) x 4, (C) x 1, (A) x 3, (C) x 1, (A) x 3, (C) x 1, (A) x 3, (C) x 1, (A) x 3, (C) x 1, (A)
x 5
Rnd 66: (A) x 28
Rnd 67: (B) x 28
Rnd 68: (B) x 2, (A) x 1, (B) x 3, (A) x 1, (B) x 3, (A) x 1, (B) x 3, (A) x 1, (B) x 3, (A) x 1, (B) x 3, (A) x 1, (B)
x 3, (A) x 1, (B) x 1
Rnd 69: (B) x 1, (A) x 3, (B) x 1, (A) x 3, (B) x 1, (A) x 3, (B) x 1, (A) x 3, (B) x 1, (A) x 3, (B) x 1, (A) x 3, (B)
x 1, (A) x 3
Rnd 70: (B) x 2, (A) x 1, (B) x 3, (A) x 1, (B) x 3, (A) x 1, (B) x 3, (A) x 1, (B) x 3, (A) x 1, (B) x 3, (A) x 1, (B)
x 3, (A) x 1, (B) x 1
Rnd 71: (B) x 28
Rnd 72: (A) x 28
Stocking Cuff
Row 1:
With Color B, ch 17 (or 25 for a taller cuff), in blo sc in second chain from hook and across
to body, sl st 2 sts on the body (these do not count as sts), turn. (16 or 24)sts
Row 2:
Skip the two sl sts from the body, in blo sc in each st across, turn. (16 or 24)sts
Row 3:
Ch 1, in blo sc in each st across, sl st 2 sts on the body, turn.
Repeats:
Repeat Rows 2-3 around the top of the stocking body. Join last row to beginning row
by slip stitching through blo of first and last row at the same time with the WS facing.
Stocking Heel
Rnd 1:
With Color A, join yarn at the corner of the heel opening. Sc around the heel opening, do
not join.
*Optional Tip: To reduce holes, sc2tog at the corners. (44)sts
Rnd 2:
*Sc2tog, sc in the next 9*; repeat from * to * around. (40)sts
Rnd 3:
*Sc2tog, sc in the next 8*; repeat from * to * around. (36)sts
Rnd 4:
*Sc2tog, sc in the next 7*; repeat from * to * around. (32)sts
Rnd 5:
*Sc2tog, sc in the next 6*; repeat from * to * around. (28)sts
Rnd 6:
*Sc2tog, sc in the next 5*; repeat from * to * around. (24)sts
Rnd 7:
*Sc2tog, sc in the next 4*; repeat from * to * around. (20)sts
Rnd 8:
Sc2tog around. (10)sts
Fasten off leaving a tail, weave tail through the front loops of each stitch around then pull
closed. Weave in ends.
Finishing
Subscribe to my youtube channel
Weave in all ends. Use a strip of leather and a leather punch to create a strap and stitch to the top of the stocking, or create an i-cord for hanging your stocking. Feel free to add beads, tassels, or any other festive embellishment for extra holiday flair!
There’s nothing quite like the joy of hanging and stuffing stockings to bring everyone together during the holidays. Whether you’re filling them with sweet treats, heartfelt surprises, or little treasures, it’s a festive tradition that adds warmth and excitement to the season.
As you gather with family and friends, let these simple moments of togetherness remind you of what the holidays are truly about—spreading love, sharing joy, and making memories that will last a lifetime.
Having small, handmade pieces on hand to gift to guests is a wonderful idea, too – the Snowy Wheat Bauble, Macchiato Wreath Coaster, and the Gift Card Stockings all work up quickly with leftover yarn scraps. So, hang those stockings with care, savor the laughter, and enjoy every magical moment this holiday season!
Cheers, and happy crocheting!
Well That Was Fun! What’s Next?
📌 PIN THIS POST – Don’t lose this project; save it to your Pinterest crochet board so you can quickly come back to it again.
💌 SHARE – Share your yarn choice, in-progress, or finished projects on Facebook or Instagram and use the hashtag #brianakdesigns
🥂 JOIN – Join the kindest crafters in the Briana K Designs Community Group on Facebook. We love yarny friends!
🔗 RAVELRY LINK -Link and share your project on Ravelry. Having inspirational photos can help crafters.
