Snowman Amigurumi Doll Free Pattern
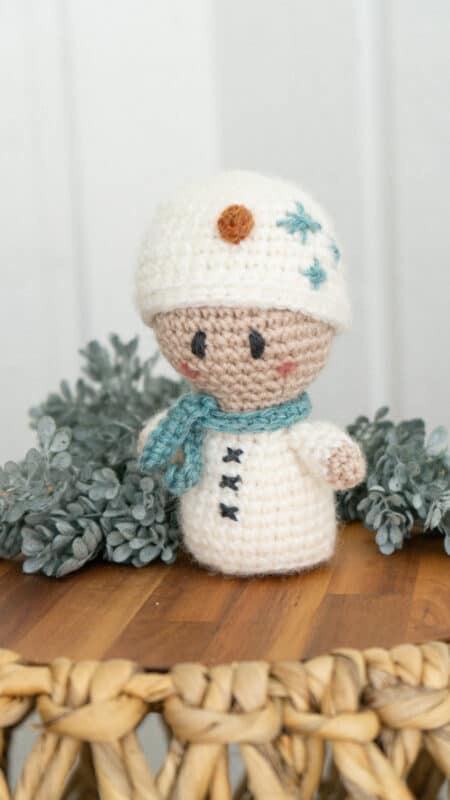
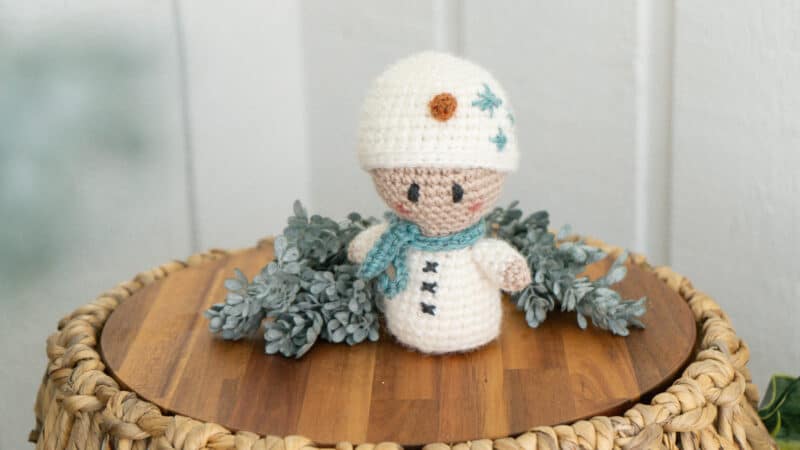
Creating a crochet snowman amigurumi brings a touch of whimsy to the winter season. These cute, squishy snowmen are not just decorative pieces; they become cherished companions and delightful decorations that spread joy throughout the home. With a crochet hook, a ball of yarn, and a dash of creativity, you can fashion these lovable snowmen, each with their own personality and charm. And if you love this little crochet doll, then you might also love the Woodland Crochet Fox Amigurumi Doll or the Cute Amigurumi Bear Crochet Free Pattern.

Disclosure: This post contains affiliate links. Please read my disclosure for more info.
What you’ll love about this pattern.
Can this crochet snowman be customized?
One of the most enjoyable aspects of crocheting snowmen is the endless possibilities for customization. You can experiment with different yarn colors, textures, and sizes to create unique variations. Additionally, personalizing their accessories, such as adding buttons, ribbons, or embroidery, allows for creative expression.
Whether you’re gifting them to loved ones, using them as charming decor pieces, or simply enjoying the meditative process of crocheting, this crochet snowman pattern will surely ignite your creativity and warm your heart during the frosty winter days ahead.
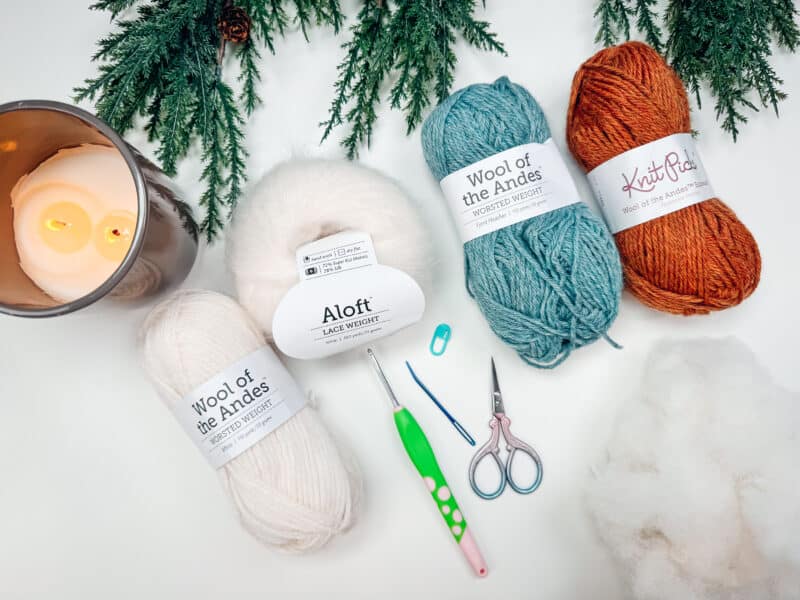
What Crafty Supplies You Will Need

Yarn & Quantities
Worsted Weight Yarn
WeCrochet Wool of the Andes Worsted
100% Peruvian Highland Wool, 110 yds/50g
Colorways:
Oyster Heather / Beige (1 skein, 50 yds)
White (1 skein, 75 yds)
Fjord Heather / Blue (1 skein, 5 yds)
Persimmon Heather / Orange (1 skein, 1 yd)
WeCrochet Twill Fingering
100% Fine Superwash Merino Wool, Fingering Weight, 183 yds/50g
Colorway: Graphite Heather (1 ball, small amount for eyes). Or embroidery thread.
WeCrochet Aloft
72% Superkid Mohair, 28% Silk, 260 yds/25g, Lace Weight
Colorway: White, this is optional to add a bit of fuzz.
Yarn Substitutions
Brava Worsted
100% Premium Acrylic, 218yds/100g
Any worsted weight yarn will work as a substitution. Changing the brand might change the size, but where this is not a fitted item that’s okay.
Crochet Hook
Size G (3.5mm) Crochet Hook, or hook to obtain gauge.
Notions
Scissors
Yarn Needle
Removable Stitch Marker
Fiberfill/Stuffing
3-4 Metal Washers (1 inch – 1 1/4 inch) – optional, this is to weigh down the bottom of the amigurumi doll.
Skill Level
Advanced Beginner, working in the round with some increasing and decreasing.
Sizing
Approx 6 inches tall and 3 inches wide
Abbreviations
blo – back loop only
ch – chain
flo – front loop only
MC – Magic Circle
rnd- round
sc – single crochet
sc2tog – single crochet 2 together, see below for invisible decrease tip.
sl st – slip stitch
st(s) – stitch(es)
Gauge
18 sts x 20 rows = 4×4 inches in sc
Not critical for this pattern.
Construction
The body of the crochet doll is worked from top-down, with the arms crocheted after and stitched to the body. The hat is made as a separate piece and placed on the doll’s head. Using Wool of the Andes Yarn and Aloft together creates a nice soft fuzz to the snowman.
Notes for the Crochet Snowman Pattern
Since this is worked continuously, a ch 1 at the beginning of the round is not needed. It is helpful to place a stitch marker on the first stitch of each round.
The colorways for this pattern are written as:
Oyster Heather or Camel Heather Yarn – Color A
White Yarn held together with Aloft lace white yarn – Color B
Persimmon Heather / Orange- Color C
Graphite Heather – Color D
Special Stitches:
Cross stitch single crochet: this variation of a crochet stitch works the stitch tighter and creates an ‘X’ on the front of the stitch. To work a single crochet stitch this way, insert your hook into the stitch, yarn under, pull up a loop, yarn over, pull through both loops on the hook. This way of working the single crochet stitch is used for the hat and the body.
Magic Circle: Start by creating a loop with your yarn. The tail of the working yarn will be over the working end. Insert your hook into the loop from behind. Yarn over and pull through the loop. Ch 1, Work all of your indicated stitches into the loop. Pull the tail end of your yarn to close the loop. Pull firmly to fasten the loop closed, this end will be weaved in and fastened off.
sc2tog invisible decrease: Insert your hook into the flo of the next stitch, insert your hook into the flo of the next stitch, yarn over, pull up a loop, yarn over and complete stitch.
This Pattern Uses Standard US Terminology
The Snowman Amigurumi Pattern can also be purchased on Ravelry.
Similar Video Tutorial
Watch how easy and beginner friendly it is to work up this crochet piece with a tutorial of a similar crochet amigurumi, the Cute Axolotl Doll.
Do You Want To Make A Snowman?

Click the box below to unlock this exclusive subscriber content for free. Add your email and create a password. If you are having trouble, reset your password or login to the Grow Portal.
I’m thrilled to share this amazing crochet pattern with you! Please don’t copy, paste, or distribute this pattern. Prefer an ad-free experience? Purchase a digital PDF file for a small fee from one of my online stores. I appreciate your support and readership. You are why I can keep doing what I love and sharing it with others. Thank you from the bottom of my heart.
Head & Body Of The Crochet Snowman
Join The Kindest Community
Join our vibrant community of crafters on Facebook today. Whether you enjoy crafting with others or simply have burning questions, we’ve got you covered – join us now!
Arms of Snowman (Make 2)
Rnd 1: Starting with the MC & with Color A, sc 6, do not join and work continuously. 6 sts
Rnd 2: 2sc in first, sc in next 2 sts; repeat from * to * around, fasten off Color A. 8 sts
Rnds 3-4: With Color B, sc in each st around. 8 sts
Rnd 5: sc2tog, sc in remaining sts around. 7 sts
Rnd 6: sc2tog, sc in remaining sts around, fasten off leaving a tail, and sew arms to each side of the body on rnd 20. 6 sts

Snowman Hat
Rnd 1: Starting with the MC & with Color B, sc 6, do not join and work continuously. 6 st
Rnd 2: 2 sc in each st around. 12 sts
Rnd 3: 2sc in first, sc in next st; repeat from * to * around. 18 sts
Rnd 4: 2sc in first, sc in next 2 sts; repeat from * to * around. 24 sts
Rnd 5: 2sc in first, sc in next 3 sts; repeat from * to * around. 30 sts
Rnd 6: 2sc in first, sc in next 4 sts; repeat from * to * around. 36 sts
Rnds 7-13: sc in each st around. 36 sts
Rnd 14: Working in the blo for this rnd, sc in each st around, fasten off and do an invisible finish, weave in ends. 36 sts
Handy Customization Tip
If you don’t want the hat to be removable, simple stitch it in place.
Nose of the Snowman
Row 1 (RS): Inside
Rnd 1: Starting with the MC & with Color B, sc 3, do not join and work continuously. 3 sts
Rnd 2: 2 sc in each st around. 6 sts
Rnd 3: sc in each st around, fasten off leaving a long tail, stitch the nose to the top of the hat on rnds 9-10. 6 sts

The Snowman’s Crochet Scarf
With Garnet Heather, ch 36, starting in the second ch from the hook sc 36, fasten off and weave in ends, tie around the neck of the snowman.
Finishing & Details
With Color D, stitch eyes on the front of the Bear doll’s face on rnds 11-12. If shading is desired for the cheeks, use either make-up or pastels and a small brush and paint the powder onto the face of the doll. Use Color C to stitch criss-cross lines on hat if desired. Weave in all ends and enjoy.
Want to make this amigurumi doll bigger?
The beautiful thing about amigurumi is it can be made in any size. Here is how you would change the size of this crochet snowman.
Start by increasing or decreasing the size of your hook. This will affect the tension of your stitches, so when making larger items, use a bigger hook size, and for smaller items use a smaller one. Experiment until you get the right size and tension that works for you!
Choose a thicker yarn for larger projects and thinner for smaller ones. These snuggly snowmen can be made in any color scheme, so have fun playing around with different colors to make them unique! With these tips in mind, it’s easy to create amigurumi pieces that are perfect for your project.
Crocheting an amigurumi snowman is a delightful and fulfilling creative pursuit that embodies the joy, magic, and warmth of the winter season.
Well That Was Fun! What’s Next?
📌 PIN THIS POST – Don’t lose this project; save it to your Pinterest crochet board so you can quickly come back to it again.
💌 SHARE – Share your yarn choice, in-progress, or finished projects on Facebook or Instagram and use the hashtag #brianakdesigns
🥂 JOIN – Join the kindest crafters in the Briana K Designs Community Group on Facebook. We love yarny friends!
🔗 RAVELRY LINK -Link and share your project on Ravelry. Having inspirational photos can help crafters.
