


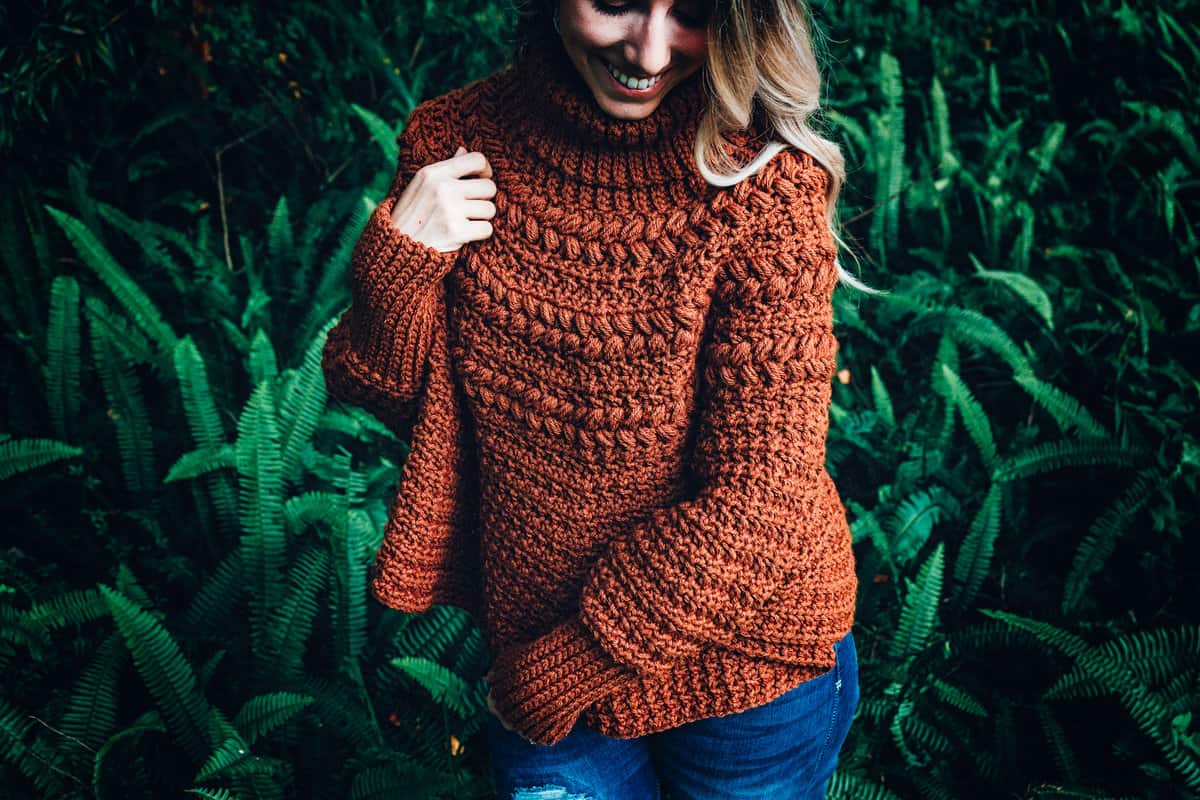
The Macchiato Crochet Poncho is the cozy layering piece your handmade wardrobe has been missing. With a soft drape, customizable sizing from baby to adult, and a relaxing stitch rhythm, this free crochet poncho pattern is as wearable as it is beginner-friendly. Whether you’re crocheting your first garment or looking for a fast and stylish gift, this project hits all the right notes.
Warmth, Style, and Simplicity—All in One Free Crochet Poncho Pattern!
And if you’re a fan of easy construction and texture-rich stitches, don’t miss the Macchiato Sweater Pattern and Macchiato Beanie—designed to coordinate perfectly with this poncho!
Disclosure: This post contains affiliate links. Please read my disclosure for more info.
What You’ll Love About This Poncho Pattern.
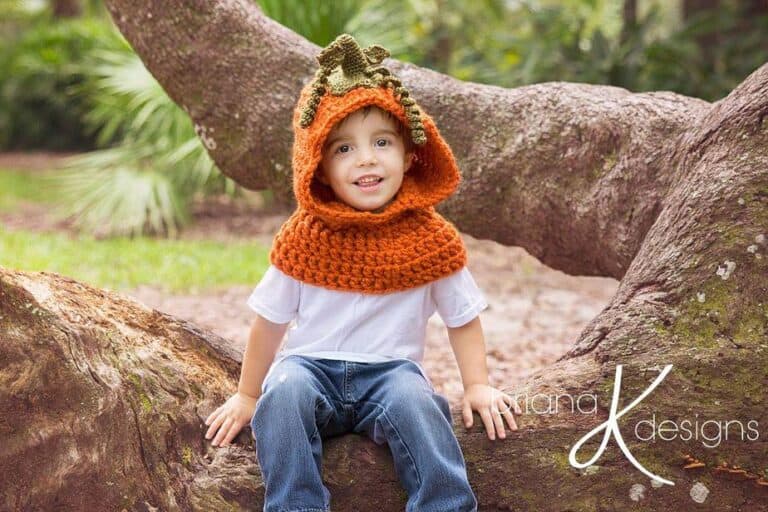
This free poncho pattern isn’t just for adults – sizes for babies, toddlers, and children are included. I walk you through the steps of the pattern in the video below for the baby size. And if you love making cute things for your little one, also check out the Macchiato Child Crochet Sweater Free Pattern. If you aren’t ready to jump into a larger project just yet, try your hand at the Crochet Wreath Ornament and Coaster, which can work for any time of year.
How To Style A Crochet Poncho
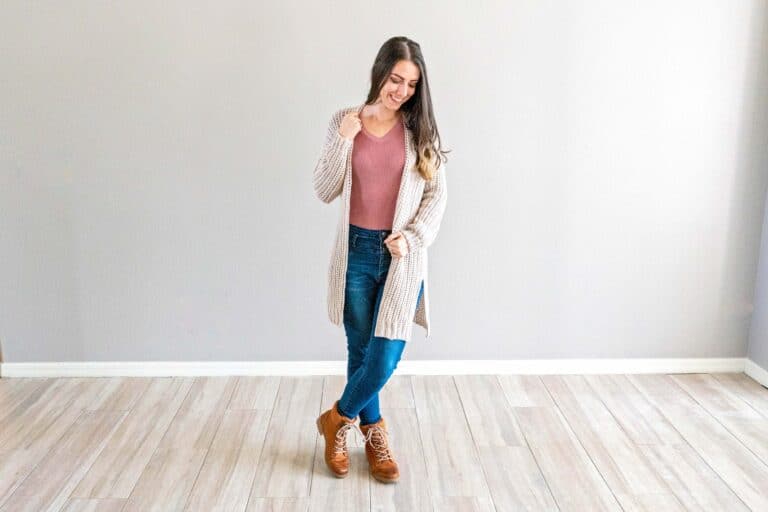
- Effortless Elegance with Denim: Throw your poncho over a long-sleeve tee and denim jeans. The oversized, relaxed shape pairs beautifully with ankle boots or sneakers for a cozy fall or winter outfit. The Enchanted Poncho looks amazing with jeans, too!
- Boho-Inspired Layers: Layer the Macchiato Poncho over a flowy dress, add chunky jewelry and boots, and top it off with a wide-brimmed hat and a Circle Leaf Market Bag for a festival-ready look.
- Office Chic with Tailored Pieces: Belt your crochet poncho over a blouse and tailored trousers or a pencil skirt. This transforms it from a weekend staple to office-appropriate elegance. Whip up an Easy Envelope Clutch as a polished accessory.
Macchiato Crochet Poncho Supplies
Crochet Hook:
6.0 mm (J) hook, or hook size to meet gauge.


Notions:
Stitch Marker
Yarn Needle
Scissors
Yarn:
WeCrochet Brava Bulky – 100% Premium Acrylic, 136yds/100g
Shown in Brindle for Adult
Shown in Dove Heather for Baby
Yarn Substitutes:
WeCrochet Wonderfluff Bulky: 70% Baby Alpaca, 23% Nylon, 7% Merino Wool; 142 yds/50g.
Swish Bulky: 100% Fine Superwash Merino Wool 137yds/100g
Remember to always check gauge and drape when substituting yarns.
Yardage:
Baby: 360 yds (329m) 3 balls
Toddler: 600 yds (549m) 5 balls
Child: 900 yds (823m) 7 balls
Adult: 1,350 yds (1,234m) 10 balls
1x-3x: 1,550 yds (1,417m) 12 balls
Abbreviations:
Alt –Alternatively
BLO -back loop only
Ch -chain
FLO -front loop only
Hdc -half double crochet
Inc. – increase
Lp(s) -loop(s)
St(s) -stitch(es)
Gauge:
13 sts by 8.5 rows = 4” square
Working a gauge swatch will let you know if you will have the correct sizing for this pattern. A gauge swatch is a fantastic way to familiarize yourself with the stitches used in this project and the perfect opportunity to perfect your stitch work and make it look flawless. If you are struggling to match the gauge, visit What Is Gauge and How To Fix It.
Gauge Swatch Instructions
Stitch pattern for gauge swatch: Ch 17, in second chain from hook hdc 1 in blo, hdc 1 in flo; repeat from * to * across, turn. Repeat these steps to make the gauge swatch with a ch 1 at the beginning of the row.
Measurements/Sizes:
Baby, Toddler, Child, Adult, 1X-3X
Schematic in the pattern.
Skill Level:
Easy/Advanced Beginner
Construction
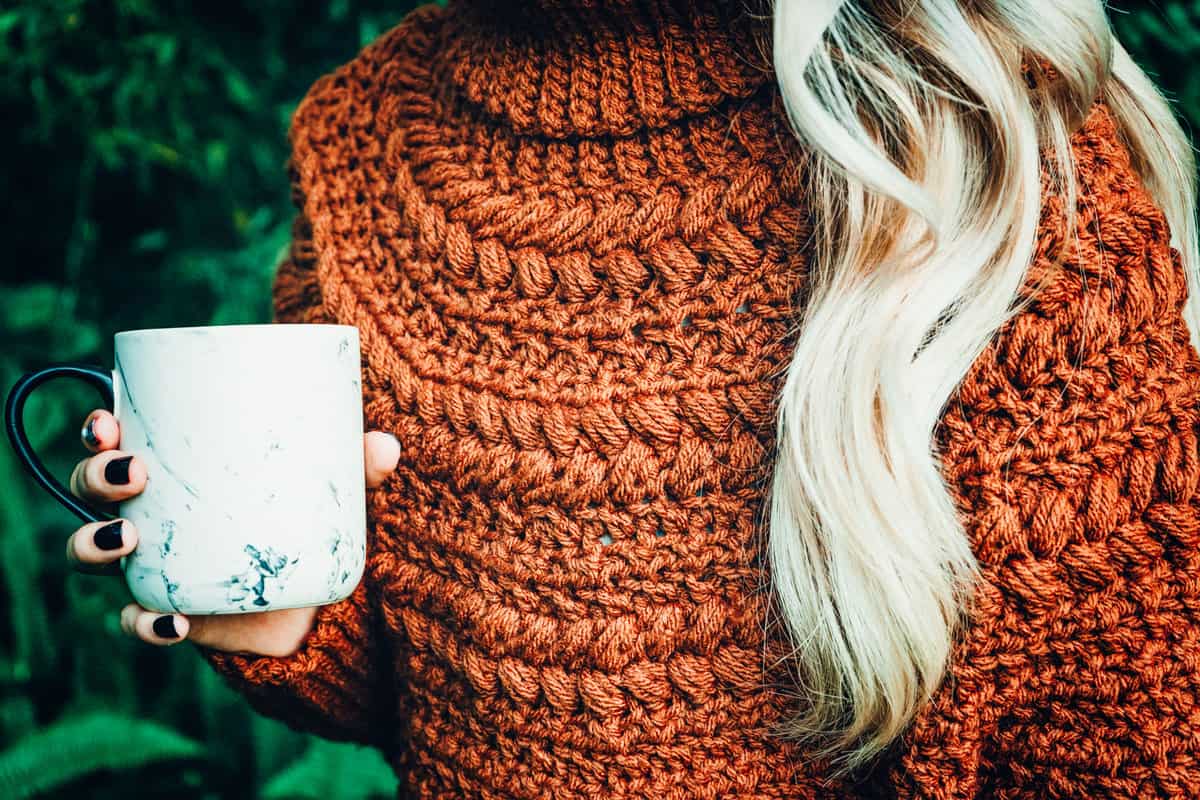
This is a top-down poncho. We will start with the neck ribbing, then work the yoke (shoulders) while evenly increasing on rounds. During this section, we will add the beautiful puff details. Next, we will continue to add length. Last, we will work the cuff ribbing.
Special Stitches:
Puff Stitch: Yarn over and insert your hook into the stitch/space. Yarn over again and pull up a long loop. (Yarn over and insert your hook into the same stitch/space. Yarn over again and pull up a long loop) two more times (7 loops on the hook). Yarn over and pull through the first 6 loops, yarn over and pull through remaining loops.
Established stitch pattern (est st pattern): *hdc 1 in blo, hdc 1 in flo*; repeat from * to * around increasing by placing two stitches in indicated stitch.
Notes for Success
- A ch 1 at the beginning of a row is not counted as a stitch. Using a stitch marker at the beginning of each round is recommended.
- Sizes are written as: Baby (Toddler, Child, Adult, 1-3X).
- This poncho is worked in a top-down seamless yoke style. To make it longer after all increases have been made, simply continue to work more rounds in st pattern without increasing.
- This poncho is worked in the round turning at the beginning of each new round, place a stitch marker in the last stitch of the round to help keep track of first and last stitches. When increasing for sizes with two numbers (i.e., 7/8), increase in the 7th stitch and then crochet 8, and also increase in the 8th stitch. For sizes Toddler & Adult there will be extra stitches at the end of the round after completing 12 increases, finish those extra stitches in pattern.
Join The Kindest Community
Join our vibrant community of crafters on Facebook today. Whether you enjoy crafting with others or simply have burning questions, we’ve got you covered – join us now!
❓ Frequently Asked Questions (FAQ) for the Macchiato Poncho
Q: What skill level is this crochet poncho pattern?
This is a beginner-friendly pattern. If you can single and double crochet, you’re good to go!
Q: Does this pattern include multiple sizes?
Yes! The free pattern includes sizes for baby, toddler, child, and adult. It’s a great project to make matching ponchos for the whole family.
Q: Do I need to know how to shape garments?
Not at all! This poncho is worked flat in one piece, with no shaping required. The construction is simple and perfect for beginners.
Q: Is there a video tutorial?
Yes! A step-by-step video tutorial is included, especially helpful for beginners or anyone making the baby size for the first time.
Crochet Poncho Video Tutorial

Relax & Crochet
Upgrade to the Printable PDF
Beautifully formatted to print and relax while crocheting. The paid pattern includes:
Macchiato Crochet Pattern Written Instructions
Click the box below to unlock this exclusive subscriber content for free. Add your email and create a password. If you are having trouble, reset your password or log in to the Grow Portal.
I’m thrilled to share this amazing crochet pattern with you! Please don’t copy, paste, or distribute this pattern. Prefer an ad-free experience? Purchase a digital PDF file for a small fee from one of my online stores. I appreciate your support and readership. You are why I can keep doing what I love and sharing it with others. Thank you from the bottom of my heart.
Macchiato Poncho Collar Ribbing
This neck is worked in slip stitches, if you prefer sc sts can be substituted by going down a hook size.
Row 1:
Ch 19 (21, 27, 31, 31) in blo slip st in second chain from hook and across sts, turn. | 18 (20, 26, 30, 30,) sts
Neck Customization Tip
Please note, this is a fold over neck, if you would like a regular neck similar to a sweater start with: Ch 9 in blo slip st in second chain from hook and across sts, turn. | 8 sts
Row 2:
Ch 1, in blo slip st in each stitch across, turn.
Repeats: Repeat Row 2 until there are a total of 60 (66, 72, 78, 84) rows.
Join last row to beginning row by slip stitching through blo of first and last row at the same time. Flip collar ribbing so seam is on the inside and no longer facing.
Macchiato Poncho Yoke
Set Up Rnd: Ch 1, sl st around one edge of the collar ribbing placing one stitch per row, join. | 60 (66, 72, 78, 84) sts
Rnd 1 (RS):
Ch 1, * hdc 1 in blo, hdc 1 in flo *; repeat from * to * around, join.
Rnd 2 (WS):
Turn and ch 1, * skip the first hdc st, hdc in the next, work a puff st into the skipped st *; repeat from * to * around, join.
Rnd 3:
Repeat Rnd 2 (Puff Round).
Rnd 4:
Turn and ch 1, work in established stitch pattern increasing every 5 (5, 6, 6, 7)th sts alt., join. | 72 (78, 84, 90, 96) sts
Remember for size Toddler & Adult to only increase 12 times and work the extra stitches in established stitch pattern for the rest of the pattern.
Rnd 5:
Turn and ch 1, work in established stitch pattern increasing every 6 (6, 7, 7, 8)th sts alt., join. | 84 (90, 96, 102, 108) sts
Rnd 6:
Turn and ch 1, work in established stitch pattern increasing every 7 (7, 8, 8, 9)th sts alt., join. | 96 (102, 108, 114, 120) sts.
Rnds 7-8:
Repeat Rnd 2 (Puff Round).
Rnd 9:
Turn and ch 1, work in established stitch pattern increasing every 8 (8, 9, 9, 10)th sts alt., join. | 108, (114, 120, 126, 132) sts
Rnd 10:
Turn and ch 1, work in established stitch pattern increasing every 9 (9, 10, 10, 11)th sts alt., join. | 120 (126, 132, 138, 144) sts
Rnd 11:
Turn and ch 1, work in established stitch pattern increasing every 10 (10, 11, 11, 12)th sts alt., join. | 132 (138, 144, 150, 156) sts
Rnds 12-13:
Repeat Rnd 2 (Puff Round).
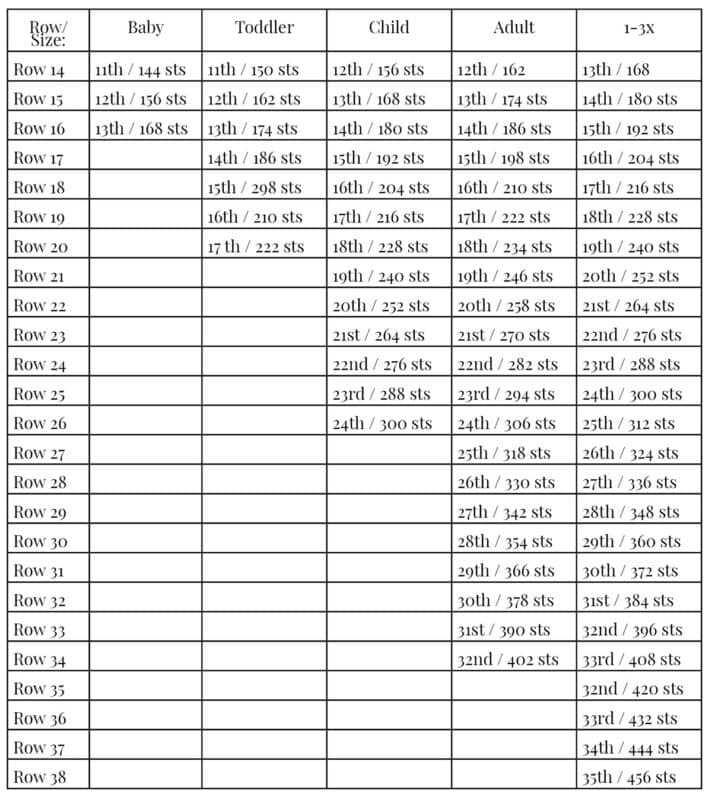
Repeats: Following the chart below, continue to increase and work in the round:
Turn and ch 1, work in established stitch pattern increasing every __ sts alt., join.

First Arm Ribbing
Row 1:
Ch 11 (15, 19, 23, 25) in blo slip st in second chain from hook and across to body, sl st 2 sts on the body (these do not count as sts), turn. | 10 (14, 18, 22, 24)
Row 2:
Skip the two sts from the body, in blo sl st in each st across, turn.
Row 3:
Ch 1, in blo sl st in each st across, sl st 2 sts on the body, turn.
Repeats: Repeat Rows 2-3 for 20 (24, 30, 36, 38) total rows/sts from body of poncho.
Join last row to beginning row by slip stitching through blo of first and last row at the same time with the WS facing.
Second Arm Ribbing
Row 1:
Skip 64 (87, 120, 165, 190) sts and attach yarn.
Ch 11 (15, 19, 23, 25) in blo slip st in second chain from hook and across to body, sl st 2 sts on the body (these do not count as sts), turn. | 10 (14, 18, 22, 24) sts
Row 2:
Follow the same instructions as row 2-3 & Repeats for First Arm Ribbing.
Finishing the Macchiato Poncho
Fasten off and weave in all ends. Lightly block and wear.
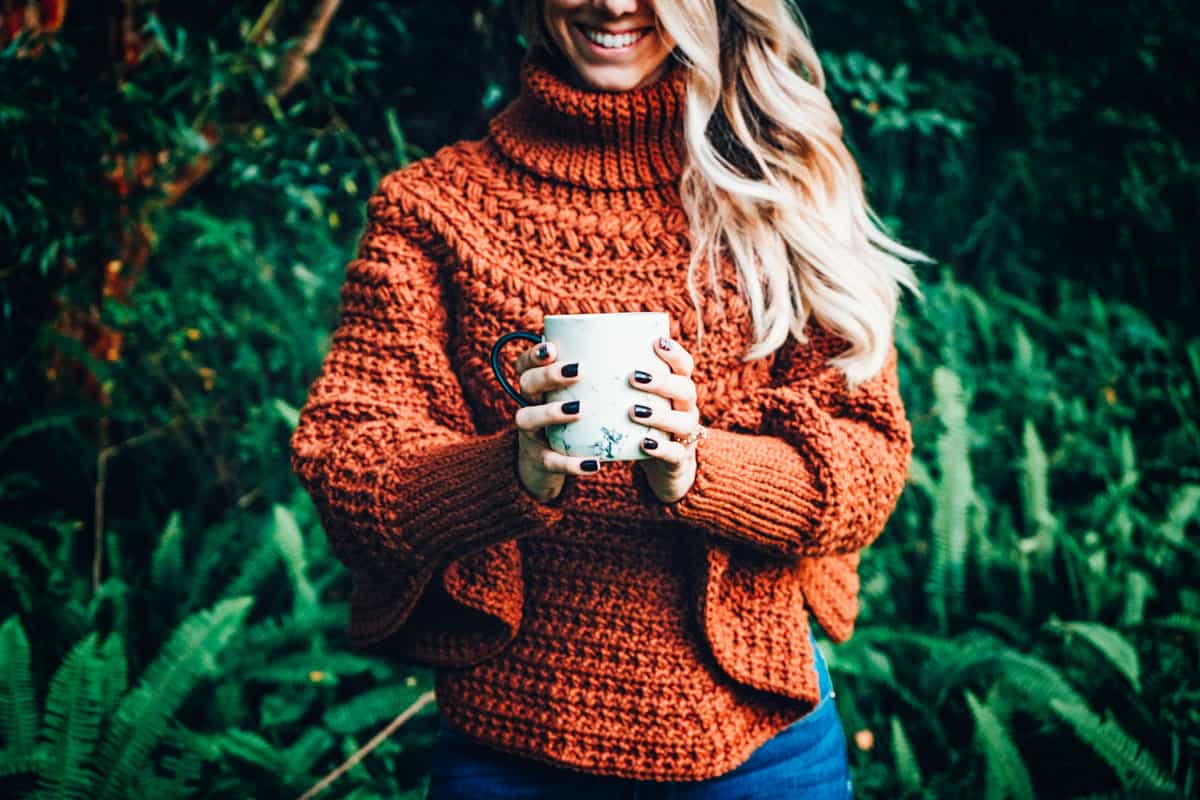
The Macchiato Poncho proves that cozy comfort and timeless style can go hand in hand. With its simple construction, range of sizes, and wear-it-anywhere vibe, this free crochet poncho pattern belongs in your project queue. Whether you’re sipping lattes on a crisp morning walk or layering up for a chilly day indoors, you’ll love having this handmade essential in your wardrobe.
Now, let’s talk about keeping this stunning piece looking as beautiful as the day you finished it.
To keep your handmade crochet poncho looking beautiful, hand wash gently in cold water using a mild detergent. Lay it flat to dry, reshaping as needed. Avoid wringing or hanging to prevent stretching. If needed, a light steam can help smooth out the stitches.
And if you’re hooked on crochet garments, check out these other popular patterns:
- Autumn Wheat Crochet Sweater – one-piece construction and beautiful texture
- Granny Square Cardigan – unique squares and flattering fit
- Finch V-Neck Cardigan – flattering V-neckline with two length options
Showcase your creations and connect with the vibrant crochet community. Share your styling tips, color variations, and personal touches using #MacchiatoPoncho, and let’s inspire each other in the wonderful world of handmade fashion. Happy crocheting, and may your Macchiato Poncho bring warmth, style, and joy to your everyday wear!
Well, That Was Fun! What’s Next?


I love this stitch pattern and neck. Do you have something like this in a sweater form? Or could this be converted to a sweater easily?
There is a sweater and hat pattern available too 🙂
https://brianakdesigns32520.e.wpstage.net/macchiato-sweater-and-beanie/
Hi, I really like your works. I am very new in knitting. I am following one of ur sweater video and making my first sweater.
I want to request you to make a tutorial on beret hat for adult. It’s really classy and beautiful hat. I hope u will make it one day.
Stay safe and happy sweetheart.
Beautiful poncho! I love it!!