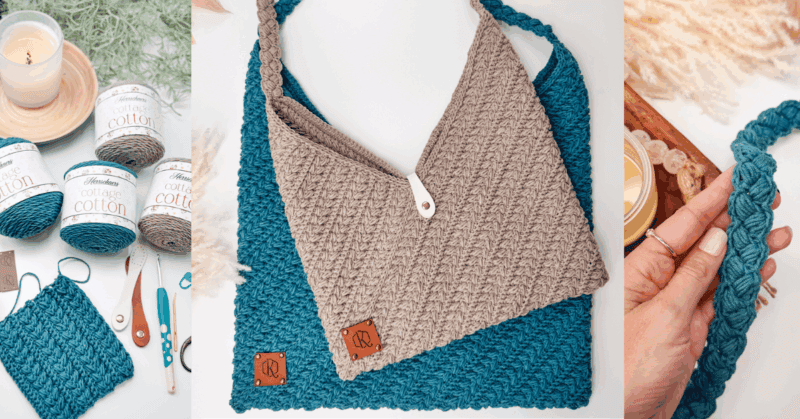
Wheat Stitch Crochet Rectangle Bag
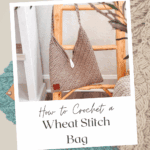

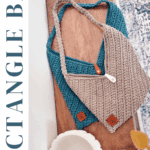

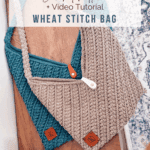
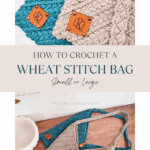
The Wheat Stitch Rectangle Bag is the perfect project for adventurous beginners ready to try something beautiful and practical! Featuring the stunning wheat stitch—a textured, eye-catching design—this accessory is worked up simply as a rectangle. That’s right! Just crochet a rectangle, fold it, sew up two seams, and attach a handle. Voilà, you’ve made a chic, handmade bag!
Disclosure: This post contains affiliate links. Please read my disclosure for more info.
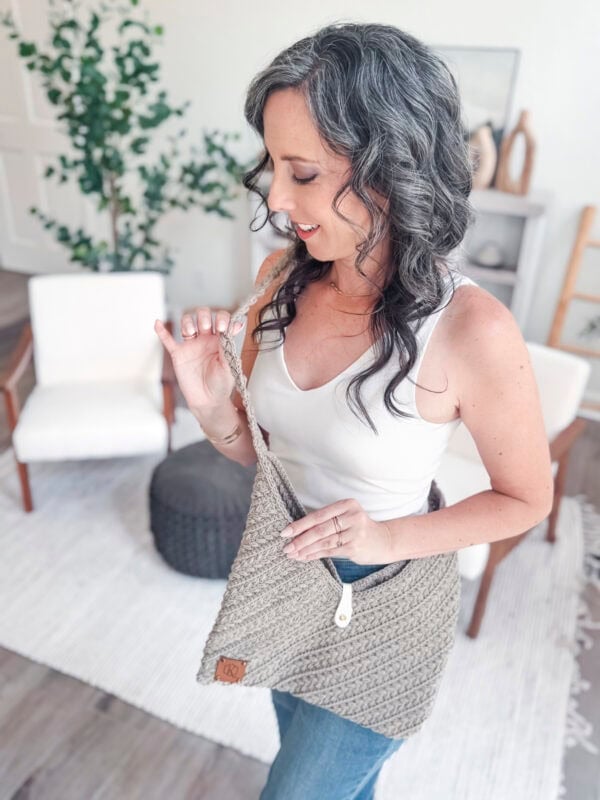
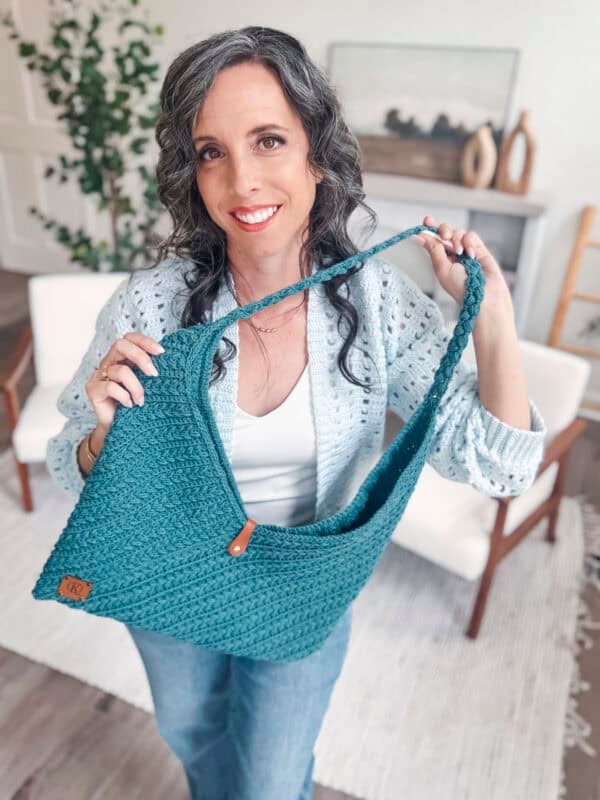
The pattern includes two versatile sizes (small and large), so you can choose the perfect fit for your lifestyle. Crafted with soft, sturdy worsted-weight cotton-blend yarn, this bag is both stylish and durable—ideal for everyday adventures or thoughtful handmade gifts. If you like this simple construction and look, you’ll love the Danbury Rectangle Bag and the Granny Rectangle Bag!
Crochet Supplies
Yarn
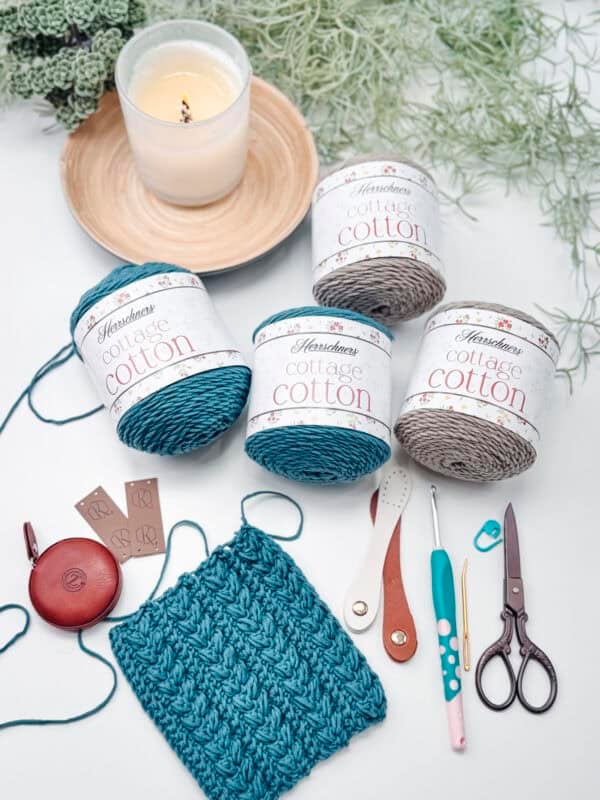
Herrschners Cottage Cotton
60% Cotton/40% Acrylic Blend, 207yds/100g
Yarn Quantities
Small shown in Oceanside:
475yds; 3 Balls
Large shown in Oyster Bay:
630yds; 4 Balls
Yarn Substitutions
WeCrochet Comfy – 75% Pima Cotton, 25% Acrylic; 109yds/50g
Lion Brand Made With Love – 60% Cotton, 40% Acrylic; 185yds/100g
Dishie – 100% Cotton; 190yds/100g
Remember always to check the gauge and drape when substituting yarns.
Crochet Hook
Size US G (4.0mm) Crochet Hook or hook to obtain gauge.
Notions
Scissors
Yarn Needle
Removable Stitch Marker
Faux Leather Snap
Sewing Thread & Needle
Skill Level
Advanced Beginner
What you’ll love about this pattern.
🩶 2 Easy Seams – This crochet bag is made as one flat rectangle, then folded and finished with only two seams.
🩶 Gorgeous texture – The wheat stitch adds dimension without being too bumpy or thick.
🩶 Perfect for gifting or keeping all to yourself – Because sometimes, keeping a project for ourselves feels so good!
Two Sizes
Small and Large
Bag rectangle measures 30 (36) inches by 10 (12) inches before folding.
Abbreviations
blo – back loop only
ch – chain
dc – double crochet
sc – single crochet
sl st – slip stitch
st(s) – stitch(es)
Gauge
18 sts and 14 rows = 4″ by 4″ in st pattern.
How to Crochet A Gauge Swatch
Working a gauge swatch will let you know if you will have the correct sizing for this pattern. It will also help you practice the stitches used in this project and improve your stitch work for a flawless look.
Are you struggling to match the gauge? Check out the blog post on What is Crochet Gauge and How To Fix It
Construction
This beautiful, textured accessory is perfect for any level crocheter looking for a fun, satisfying project that’s as practical as it is pretty. Featuring the stunning wheat stitch, this bag looks intricate but is surprisingly simple to make. All you need to do is crochet a rectangle, then fold it, sew two seams, and add a handle. That’s it!
Try making the Braided Wheat Easy Summer Top as a gorgeous coordinating piece perfect for warm weather! For cooler seasons, pair your new bag with a Snowy Wheat Hat and Winter Wheat Flat Mittens!
Special Stitches
Modified Puff Stitch: Yarn over and insert your hook into the stitch/space. Yarn over again and pull up a long loop. Yarn over and insert your hook into the same stitch/space. Yarn over again and pull up a long loop (5 loops on the hook). Yarn over and pull through the first 4 loops, yarn over and pull through remaining loops.
Pattern Notes
- The chain 1 at the beginning of the row does not count as a stitch.
- For a full tutorial on the Wheat Stitch visit: https://brianakdesigns.com/how-to-crochet-the-wheat-stitch/
Subscribe & Like
Video Tutorial for the Crochet Bag Part 1
Relax & Crochet
Upgrade to the Printable PDF
Beautifully formatted to print and relax while crocheting. The paid pattern includes:
The Ad-Free PDF can be purchased on Etsy or Ravelry.
Click the box below to unlock this exclusive subscriber content for free. Add your email and create a password. If you are having trouble, reset your password or login to the Grow Portal.
I’m thrilled to share this amazing crochet pattern with you! Please don’t copy, paste, or distribute this pattern. Prefer an ad-free experience? Purchase a digital PDF file for a small fee from one of my online stores. I appreciate your support and readership. You are why I can keep doing what I love and sharing it with others. Thank you from the bottom of my heart.
Written Crochet Pattern Instructions
Main Rectangle
Note: The stitch gauge is most important for the width as the rows can easily be adjusted.
Once your piece of fabric is complete, block it to the dimensions before folding.
Join The Kindest Community
Join our vibrant community of crafters on Facebook today. Whether you enjoy crafting with others or simply have burning questions, we’ve got you covered – join us now!
Video Tutorial for the Crochet Bag Part 2
Folding the Bag
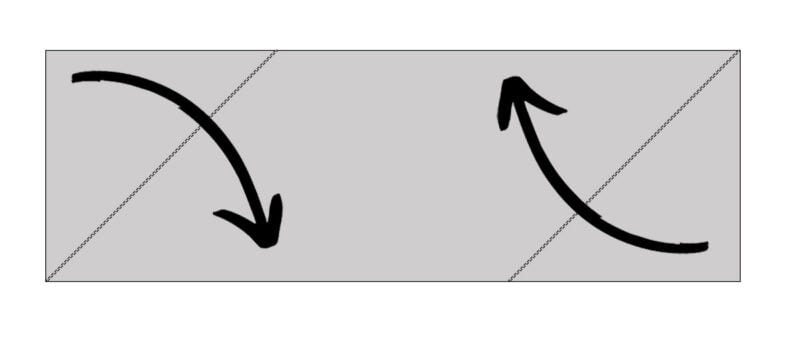
Lay the bag fabric in front of you and fold the top left corner down, and the bottom right corner up; this will create the parallelogram shape.
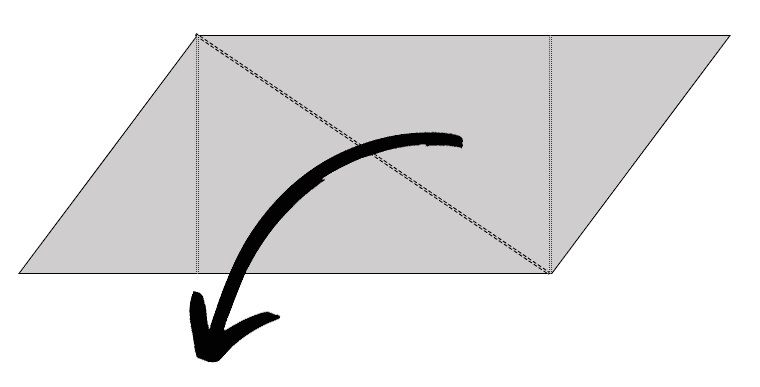
Keeping the previous sections folded, grab the right side of the fabric and fold again across the diagonal dotted line.
Optional Lining
If you want to line your bag, it’s very simple to do.
Option 1:
Cut a rectangle of fabric just slightly bigger than the original crochet bag rectangle.
Fold down all the edges and either glue them with fabric glue or sew. This will create a hem with finished edges. Next, fold the fabric and sew along the same lines we did for the bag seaming. Insert the fabric into the bag and either glue in place or sew around the top opening of the bag.
Option 2:
If you want to do less seaming, lay the finished bag on top of your fabric (folded in half so two pieces are cut at once) and trace the shape. Cut out the shape, seam the edges except for the top. Then insert the fabric into the bag and either glue in place or sew around the top opening of the bag.
More information on a no-sew bag liner: https://brianakdesigns.com/no-sew-bag-liner/
Seaming
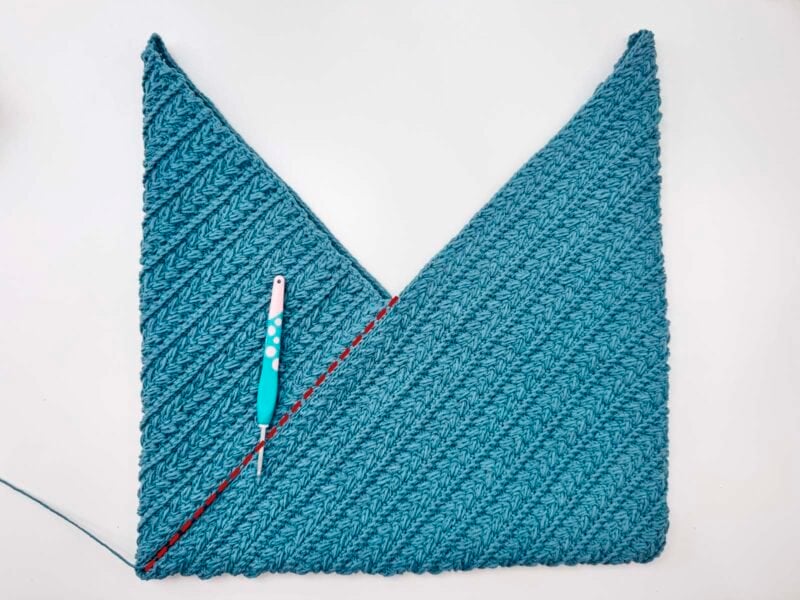
Next, we will either do a crochet surface sl st or a hand-sewn seam on the front and the back of the bag. This is shown with a red dotted line in the following image. With these two seams, we will have created the finished bag shape.
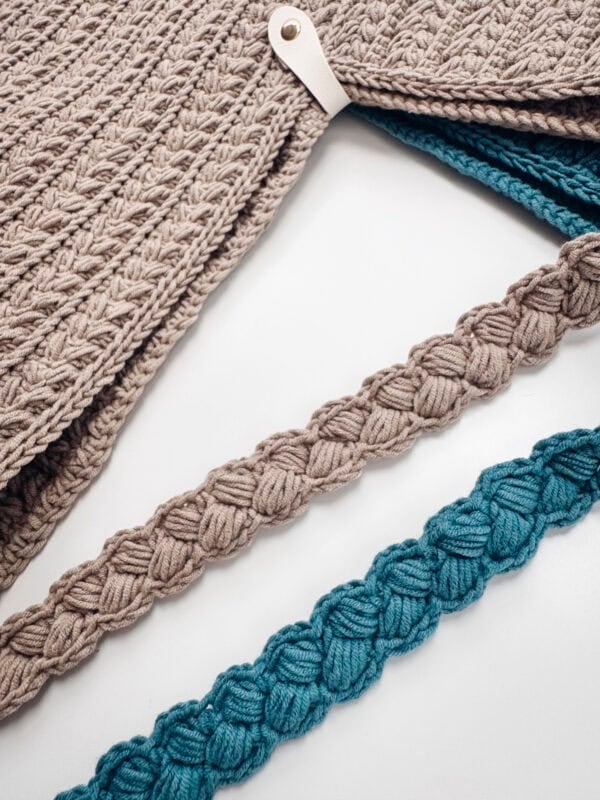
Handle
Leave a tail for sewing onto the bag later, and ch 3.
Bulky Puff Stitch (used in this section only): (Yarn over and insert your hook into the stitch/space; yarn over again and pull up a long loop) five times. You should now have 11 loops on your hook. Yarn over and pull through 10 loops, yarn over and pull through the remaining 2 loops on the hook to complete the stitch.
Step 1: Bulky Puff St in the 3rd ch from the hook.
Step 2: Ch 2, turn your work by rotating to the left.
Step 3: Working in the ch space, bulky puff st, turn.
Repeat Steps 2-3 until the desired length of the strap.
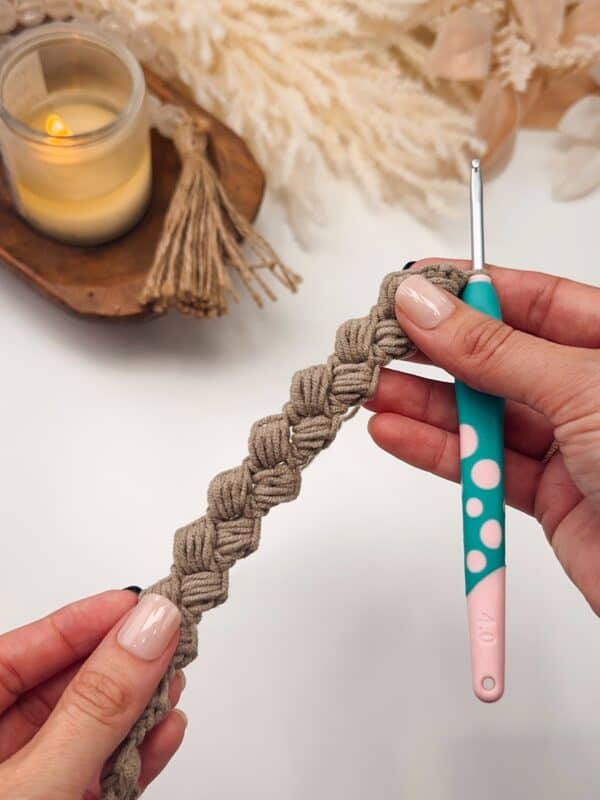
With your yarn needle, stitch the bag handle to each top point of the bag, weave in well, and fasten off.
Bag Opening Trim
Working around the bag opening:
To finish off the bag, we can work around the openings and across the handle for a clean look. Start by attaching your yarn next to the bag handle. We will first work across the edge of the handle.
* Ch 3, sl st into the next space between puff sts on one edge of the handle. Repeat from * across the handle edge.
Next working along the body of the bag, ch 1, sc 1, *insert your hook into the left bar of the sc just made, then insert into the next space on the edge of thebag, yarn over and pull a loop through the bag fabric and also through one loop on the hook. Yarn over and pull through two loops on the hook. Repeat from * all the way around the top edge of the bag and back to where you joined.
See video.
Either fasten off and reattach to the other side of the bag opening and repeat, or sl st to the other side of the handle and repeat.
Finishing
Subscribe to my youtube channel
Weave in all ends. If desired, sew on a leather snap to close the bag.
Now you’re ready to show off your brand-new bag! To keep it looking its best, take care of it by gently cleaning it every once in a while. Remove everything (including the strap if you used a removable one), and give your bag a gentle shake to remove loose dirt and dust.
If needed, use a soft cloth and some gentle soap to spot-clean. If a thorough washing is needed, hand-washing is always best. Soak your bag and agitate it gently with your hands. Rinse well, and then lay flat to dry (remember – no wringing or twisting). Reattach your handles or any other embellishments, and you’re ready to go!
Handmade bags are so much fun to make. Plus, they’re the perfect addition to any outfit! For more gorgeous accessories, check out the Summer House Cross Body Bag, the Granny Stitch Clutch, and the Seven Hexagon Bag!
Cheers, and happy crocheting!
Well That Was Fun! What’s Next?
📌 PIN THIS POST – Don’t lose this project; save it to your Pinterest crochet board so you can quickly come back to it again.
💌 SHARE – Share your yarn choice, in-progress, or finished projects on Facebook or Instagram and use the hashtag #brianakdesigns
🥂 JOIN – Join the kindest crafters in the Briana K Designs Community Group on Facebook. We love yarny friends!
🔗 RAVELRY LINK -Link and share your project on Ravelry. Having inspirational photos can help crafters.