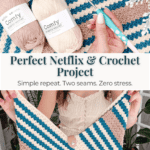
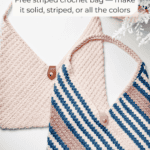
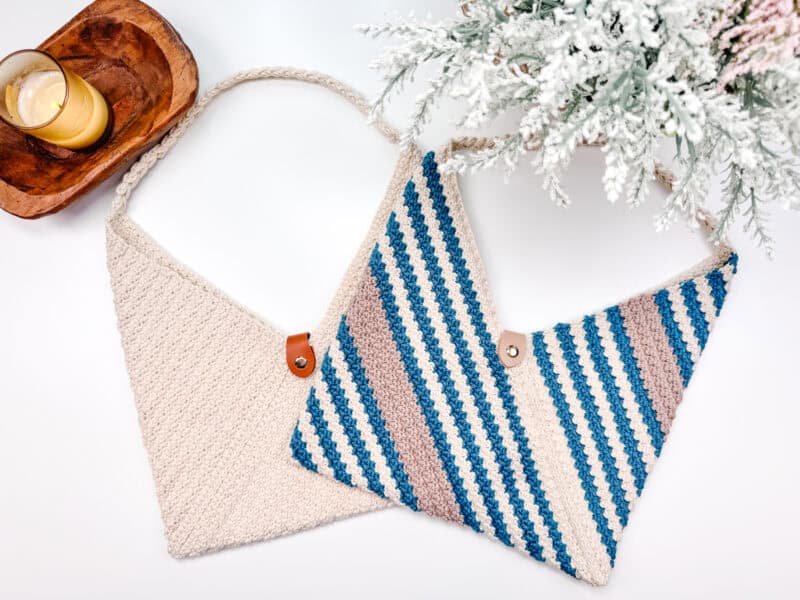
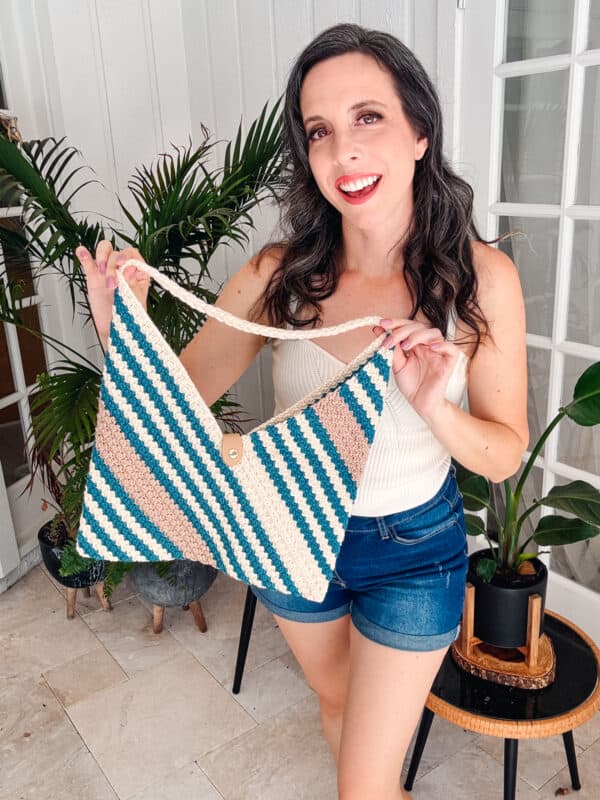
I wanted a bag I could actually throw things in without worrying about it. No zipper fuss, no lining drama — just crochet a rectangle, fold it twice, sew two seams, and you’ve got a real bag. I made mine first in solid cream with the WeCrochet Comfy Worsted, then immediately started a striped version in blue and beige because one was not going to be enough. That’s when I knew this pattern had to go on the blog.
With its simple stitch repeat and two-seam construction, this pattern is perfect for an evening of Netflix and crochet — and a great gift for anyone who loves a handmade accessory that doesn’t look handmade. The Wheat Stitch Rectangle Bag, the Easy Granny Stitch Rectangle Bag, and the Granny Square Flower Bag are made in a similar, dreamy style!
Disclosure: This post contains affiliate links. Please read my disclosure for more info.
Grab some yarn, a hook, and the remote control, and indulge in some cozy YOU time. The simplicity of this pattern and your hook’s rhythmic motion allow you to immerse yourself entirely in the fantasy unfolding on your screen.
The Hexagon Granny Square Bag and Herringbone Clutch are also quick projects to keep the momentum going after this one!
Why This Is the Easiest Crochet Bag You’ll Ever Make
♥️ 2 Easy Seams – This crochet bag is made as one flat rectangle, then folded and finished with only two seams.
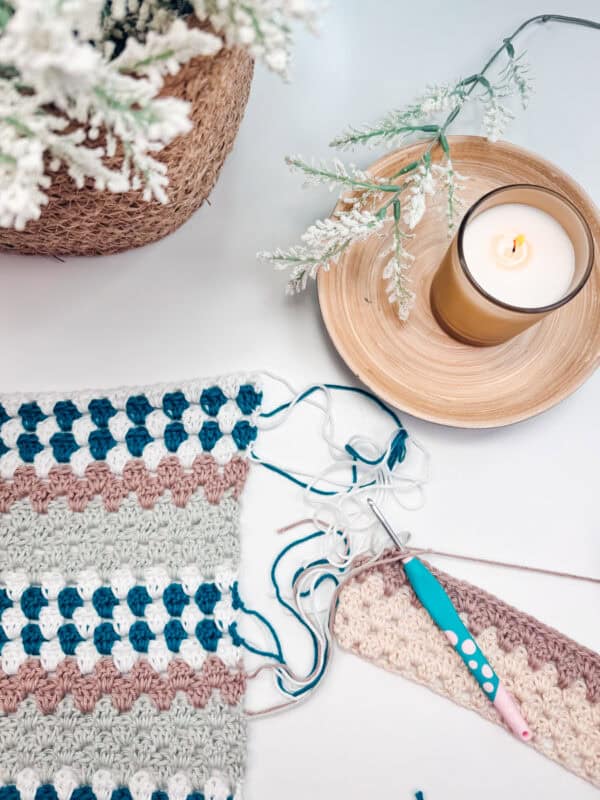
♥️ Simple Stitch Repeat – The texture of this bag is made with simple crochet stitches in a simple repeat, so it’s perfect for an evening of Netflix and Crochet!
♥️ Customizable – Add your personal flair to this cute bag with colorful buttons and snaps, or even by adding tassels to the corners.
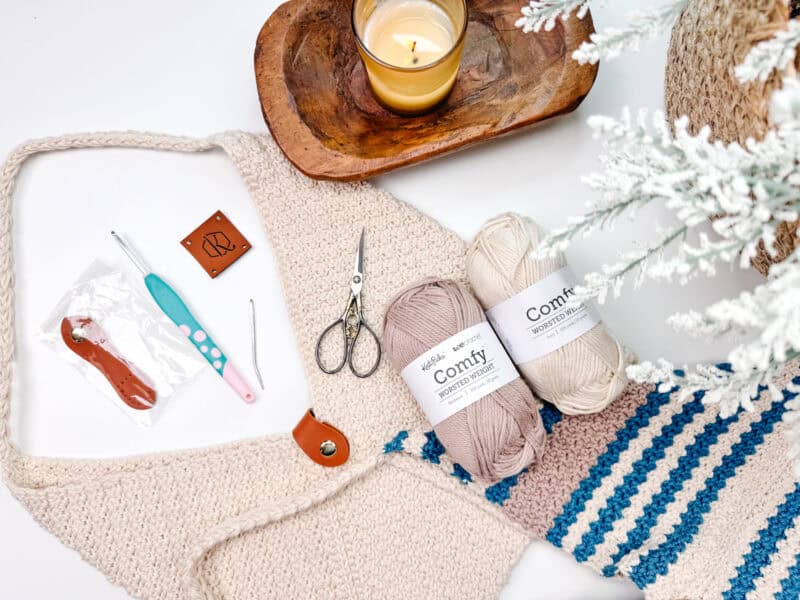
Crochet Rectangle Bag Supplies (What You’ll Need)
Yarn
WeCrochet Comfy Worsted
75% Pima Cotton, 25% Acrylic; 109yds/50g
Yarn Quantities
380 yards
Solid Color Bag: 4 balls; Three Color Striped Bag: 2 balls Color A, 2 balls Color B, 1 ball Color C
Yarn Substitutions
Herrschners Cottage Cotton – 60% Cotton, 40% Acrylic; 185yds/100g
Dishie – 100% Cotton; 190yds/100g
Remember always to check the gauge and drape when substituting yarns.
Best Yarn for a Crochet Rectangle Bag (And What to Avoid)
The yarn you choose makes a real difference in how this bag holds its shape over time. The WeCrochet Comfy Worsted I used is a 75% Pima Cotton / 25% Acrylic blend, and that cotton content is what gives the bag its structure — it holds its shape when full and doesn’t stretch out with regular use. Pure cotton works too, though it can feel a little stiffer to work with.
If you want to use 100% acrylic, it’ll work, but the finished bag will have more stretch. Over time and with regular use, an all-acrylic bag can lose that clean rectangular shape. If acrylic is what you have on hand, try going down a hook size to get tighter stitches and a firmer fabric.
The yarn substitutions listed in the supplies section above — Cottage Cotton and Dishie (and other worsted-weight cotton/cotton blends) — are all solid options. When in doubt, look for a worsted-weight yarn with some cotton content, and you’ll be in good shape.
Crochet Hook
Size US G (4.0mm) Crochet Hook or hook to obtain gauge.
Notions
Scissors
Yarn Needle
Removable Stitch Marker
Faux Leather Snap
Skill Level
One Size
The bag rectangle measures 30 inches by 10 inches before being folded.
How to Size Your Crochet Rectangle Bag
This bag is made from a single flat rectangle that is folded into thirds — so the rectangle needs to be 3 times as wide as your finished bag will be. The height of your rectangle becomes the height of your finished bag. The original pattern makes a rectangle that’s about 30″ wide and 10″ tall, which folds into a finished bag that’s roughly 10″ wide and 10″ tall.
Want to make a completely custom size? Decide how wide and tall you want the finished bag to be. Your starting chain should produce a rectangle that’s 3 times your finished width, and your row count should match your finished height. Use your gauge swatch to calculate from there.
Abbreviations
blo – back loop only
ch – chain
dc – double crochet
sc – single crochet
sl st – slip stitch
st(s) – stitch(es)
Gauge
18 sts and 15 rows = 4″ by 4″ in st pattern.
How to Crochet A Gauge Swatch
Working a gauge swatch will let you know if you will have the correct sizing for this pattern. It will also help you practice the stitches used in this project and improve your stitch work for a flawless look.
Are you struggling to match the gauge? Check out the blog post on What is Crochet Gauge and How To Fix It
Construction
The Danbury Rectangle Bag only needs two seams to finish! It’s perfect for any level of crocheter looking for a texture-rich and easy-to-make project.
Love two-seam construction? Try making the Autumn Wheat Beginner Crochet Cardigan or the Sparrow Sweater in coordinating colors to match your new bag!
Special Stitches
Puff Stitch: Yarn over and insert your hook into the stitch/space. Yarn over again and pull up a long loop. (Yarn over and insert your hook into the same stitch/space. Yarn over again and pull up a long loop) two more times (7 loops on the hook). Yarn over and pull through the first 6 loops; yarn over and pull through the remaining loops.
Danbury Rectangle Bag FAQs
🧶 Can I make this bag bigger or smaller?
Yes! This bag is totally customizable using the 1:3 ratio rule — see the sizing section above. To make a larger bag, simply start with more chain stitches and crochet more rows to maintain the ratio. You can also adjust the yarn weight: a bulkier yarn with a larger hook will give you a chunkier, roomier bag. Just make sure your starting chain measures in inches before you begin.
🧶 What hook size should I use for a crochet bag?
This pattern uses a US G (4.0mm) hook with the WeCrochet Comfy Worsted yarn. As with any crochet project, your gauge matters — 18 stitches and 15 rows should equal 4 inches. If your swatch is bigger than that, go down a hook size. If it’s smaller, go up. For bags especially, it’s worth taking the time to swatch because the structure of the finished bag depends on it.
🧶 How do I add a lining to a crochet rectangle bag?
Adding a lining is optional, but a great touch if you’re carrying small items that might slip through the stitches. The easiest method: after the bag is completely finished, cut a piece of fabric to match the interior dimensions. Fold the raw edges under about 1/2 inch all the way around, then hand-sew the fabric lining to the inside of the bag using a yarn needle and matching thread. A fat quarter of fabric is usually plenty for this size bag.
🧶 Can I use acrylic yarn for this bag?
You can, but the bag will have more stretch than a cotton-blend version. Acrylic doesn’t have the same natural structure as cotton, so the bag may lose its shape a bit over time — especially if you’re carrying heavier items. If you want to use acrylic, I’d suggest going down a hook size to get tighter stitches, which helps compensate for the stretch. For gifts or bags you want to last, I’d stick with a cotton or cotton-blend yarn.
🧶 How long does this bag take to make?
This one works up faster than you’d expect. The stitch repeat is simple enough that once you have the rhythm down, you can really get into a groove — it’s the kind of project that’s perfect for an evening on the couch with something good on TV. Most people finish the main rectangle in one or two sittings, and the folding and seaming at the end takes maybe 15 minutes once you get the hang of the fold. The puff stitch handle adds a little extra time, but it’s a satisfying finish. Start to finish, plan for a few hours spread across a couple of evenings, or knock it out in one dedicated afternoon if you’re in the zone.
Subscribe & Like
Pattern Notes
- The chain 1 at the beginning of the row does not count as a stitch.
Hate Weaving in Ends? Try This Crochet Trick
If you craft this bag with stripes and lots of color, there will be many ends to weave in. If you are crocheting a border along the edges, you can use a special knot to change colors, reducing the number of ends to weave in.
Video Tutorial for the Easiest Crochet Bag Ever!
Relax & Crochet
Upgrade to the Printable PDF
Beautifully formatted to print and relax while crocheting. The paid pattern includes:
The Ad-Free PDF can be purchased on Etsy or Ravelry.
Click the box below to unlock this exclusive subscriber content for free. Add your email and create a password. If you are having trouble, reset your password or log in to the Grow Portal.
I’m thrilled to share this amazing crochet pattern with you! Please don’t copy, paste, or distribute this pattern. Prefer an ad-free experience? Purchase a digital PDF file for a small fee from one of my online stores. I appreciate your support and readership. You are why I can keep doing what I love and sharing it with others. Thank you from the bottom of my heart.
Free Crochet Rectangle Bag Pattern — Written Instructions
If making color changes, see colorwork charts for rows to change colors. Or mix it up and design your own color changes.
Sizing Tip
- This crochet bag needs to be a 1:3 ratio. If you need to add or remove rows to achieve the correct height, please do so.
- Want to make this bag with any yarn? Your starting chain and first row should be 30 inches. Then crochet in pattern until your bag is 10 inches in height.
Folding the Bag
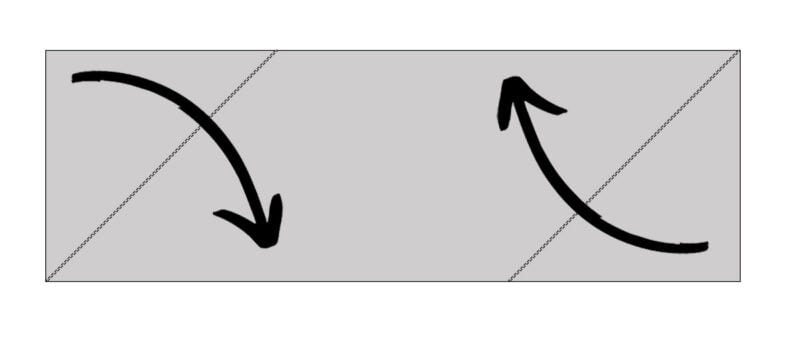
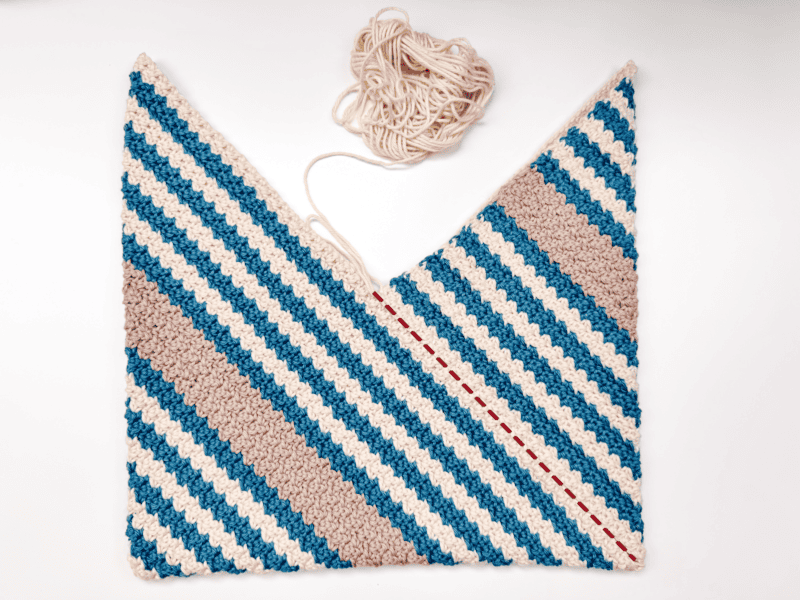
Lay the bag fabric in front of you and fold the top left corner down, and the bottom right corner up, this will create the parallelogram shape.
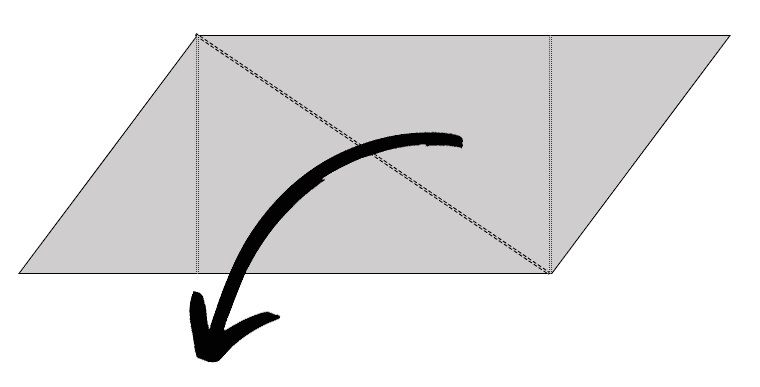
Keeping the previous sections folded, grab the right side of the fabric and fold again across the diagonal dotted line.
Seaming
Next, we will either crochet a surface sl st or sew a hand-sewn seam on the front and back of the bag. This is shown with a red dotted line in the next image. With these two seams, we will have created the finished bag shape.
Style
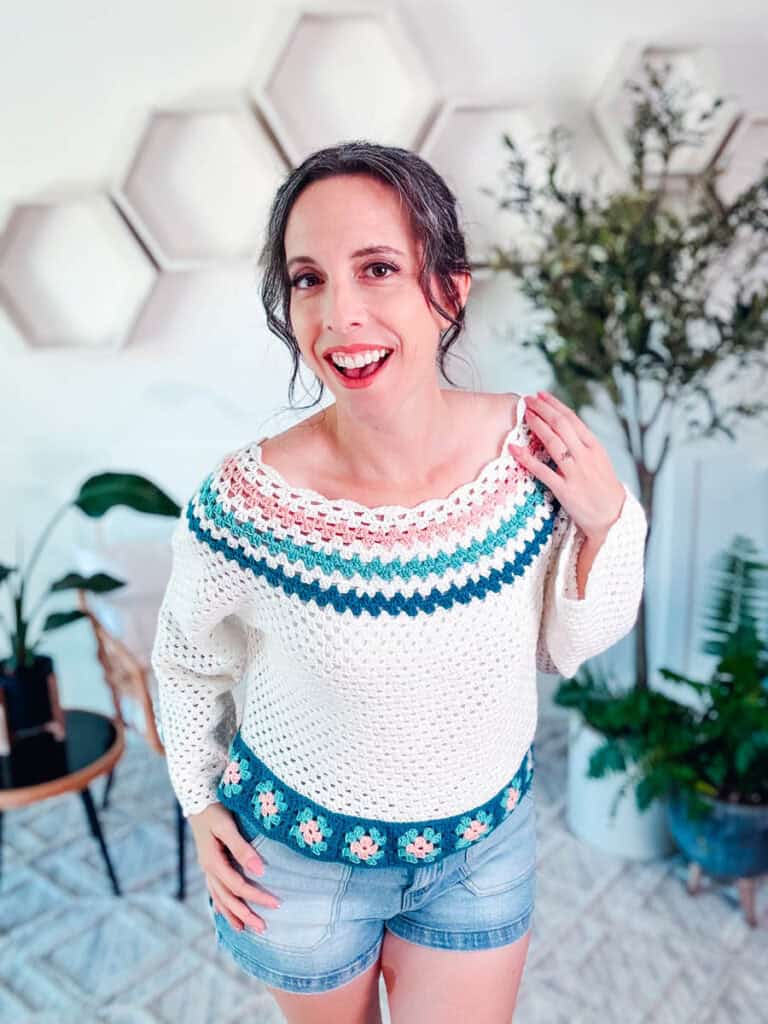
Style the Danbury Crochet Bag with a variety of outfits. This pattern is so addictive you will want to make several with your favorite colors, or a neutral solid to go with anything. Pair it with the Easy Stitch Crochet Cardi Pattern as seen in the photos, or throw it over your shoulder for a pop of color with a neutral summer outfit.
Handle
If using multiple colors, use Color A for the handle.
Leave a tail for sewing onto the bag later and ch 3.
Puff st in the 3rd ch from the hook. Turn your work by rotating it to the left.
Working in the ch space, puff st, turn.
Working into the space between the last two puff sts made, work a puff st, turn.
Repeat this last step until there are a total of 58 puff sts, or the desired length. Fasten off, leaving a long tail for sewing.
Join The Kindest Community
Join our vibrant community of crafters on Facebook today. Whether you enjoy crafting with others or simply have burning questions, we’ve got you covered – join us now!

Finishing
With your yarn needle, stitch the bag handle to each top point of the bag, weaving in well before fastening off. If desired, sew on a leather snap to close the bag.
Weave in all ends, wash, and lightly block if desired.
How to Add a Fabric Lining to Your Crochet Bag (Optional)
Adding a fabric lining is totally optional — the WeCrochet Comfy Worsted is structured enough that most items won’t slip through the stitches. But if you want a polished interior or you’re planning to carry small items like keys or chapstick, a simple lining makes a big difference. Cut fabric to match the interior dimensions of the finished bag, fold raw edges under about 1/2 inch, and hand-sew it into place with a yarn needle. A fat quarter is more than enough for this size.
More Crochet Bag Patterns You’ll Love
Willow Mesh Market Bag
Easy Envelope Clutch
Clutch Wristlet WIP Bag
Summer House Crossbody Bag
Granny Stitch Clutch
Cheers, and happy crocheting!
Well, That Was Fun! What’s Next?