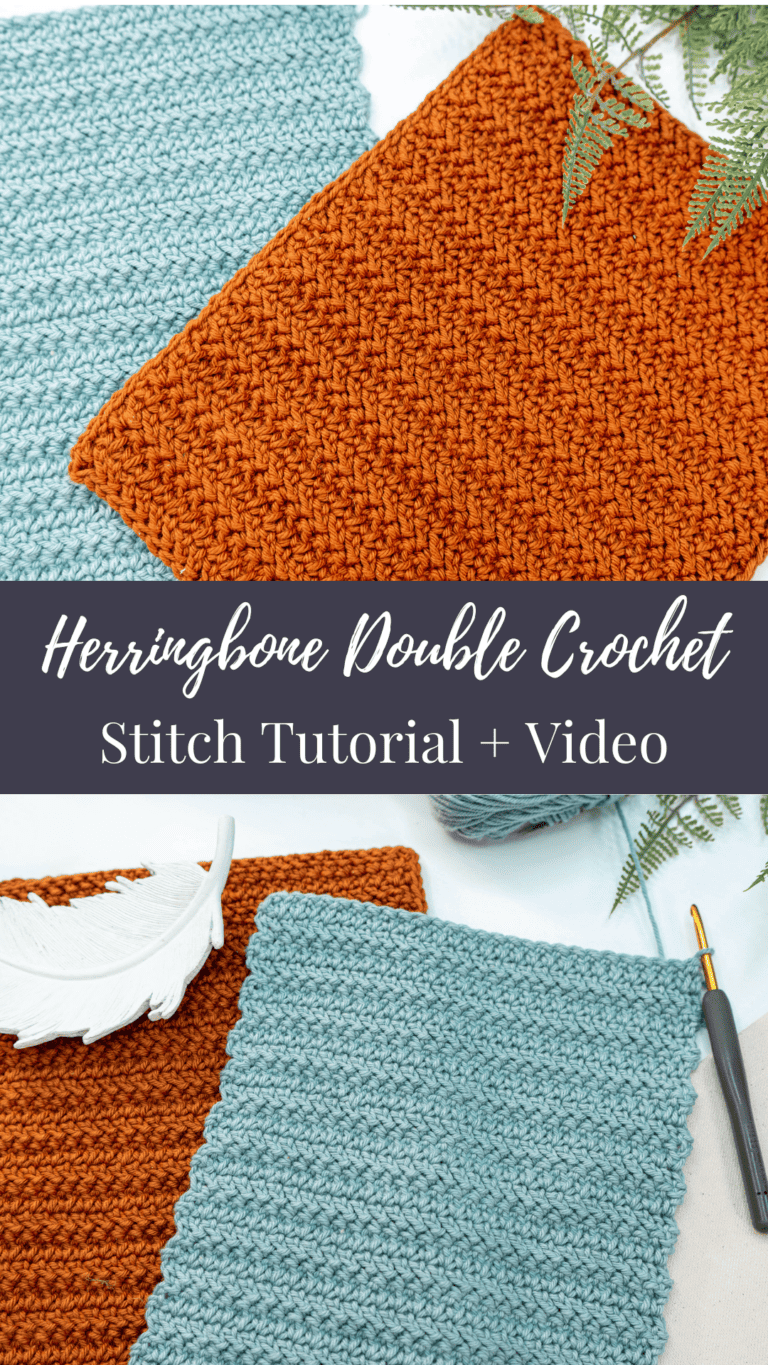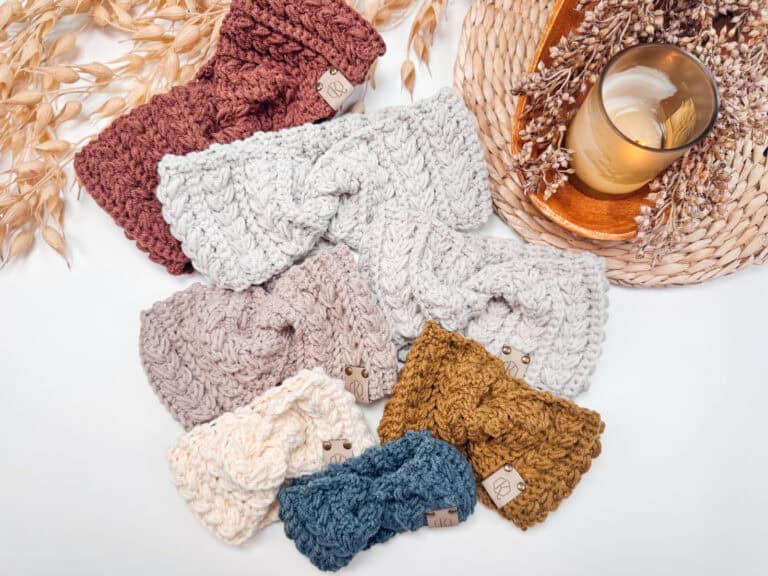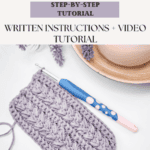
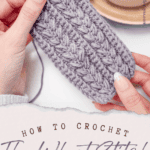

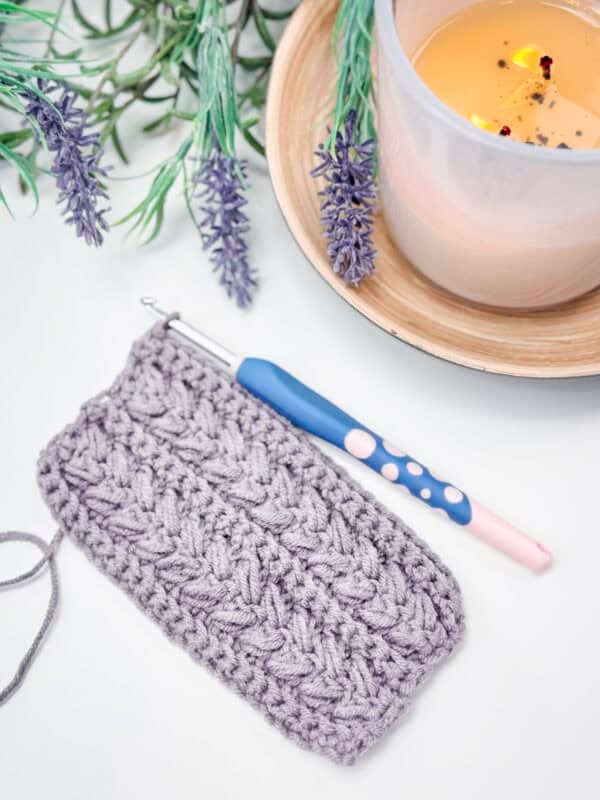
I didn’t set out to create a signature stitch, I just kept going back to this one. The Wheat Stitch™ started as an experiment with modified puff stitches, and somewhere between the first swatch and the fifteenth pattern I built around it, it became the thing I’m most known for. If you’ve seen it on my blankets, hats, or sea creatures and thought “what IS that stitch?”, this is the tutorial you’ve been looking for. I’ll walk you through the full 4-row repeat with written instructions, step-by-step photos, and a video tutorial so you can pick it up even if puff stitches are new to you.
Disclosure: This post contains affiliate links. Please read my disclosure for more info.
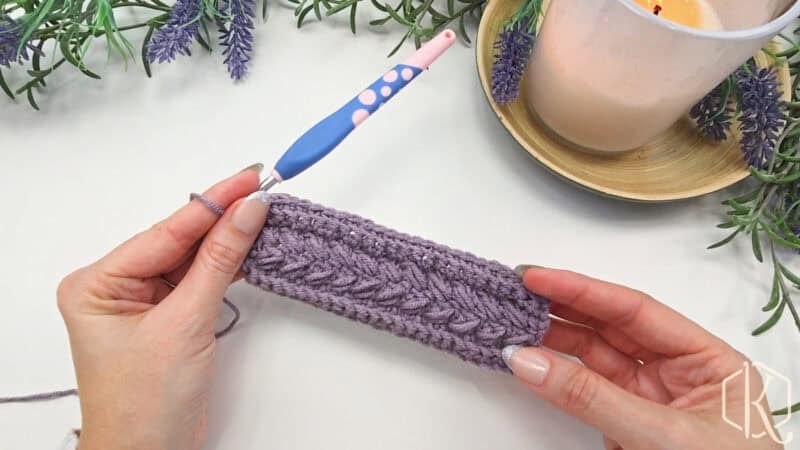
What is the wheat stitch? The wheat stitch is a textured crochet stitch that creates a series of raised, V-shaped clusters resembling stalks of wheat. It’s worked using a combination of double crochet stitches and chain spaces, building dense, cozy rows with a woven look that’s perfect for blankets, scarves, and home decor.
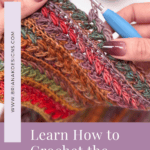
To make learning this stitch even easier, I’m breaking it all down for you step-by-step with detailed images and a full video tutorial! Whether you’re a beginner looking to expand your skills or an experienced crocheter searching for a fresh new texture, this stitch is a perfect addition to your skill library! If you’re learning the wheat stitch, keep the Stitch Keeper open to count your rows, stitches, and repeats as you practice.
What you’ll love about this crochet stitch.
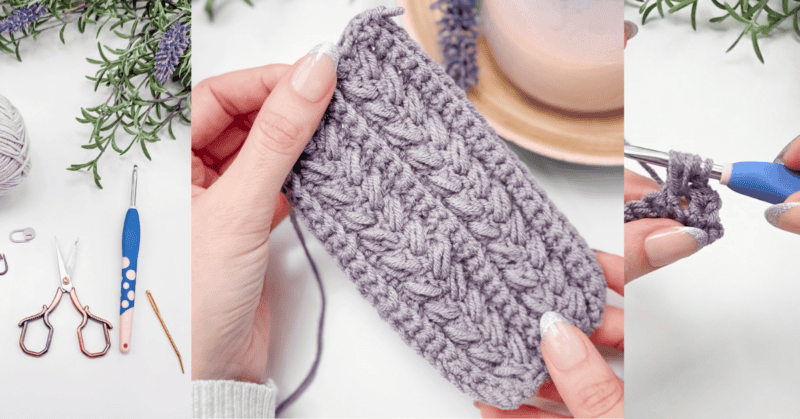
For my Wheat Stitch patterns, worsted-weight yarn has been an absolute favorite – especially Lion Brand’s Color Theory! Not only is it affordable (which is always a win!), but it also gives the modified puff stitches amazing definition, making the texture pop beautifully. I love the feel of this yarn, and the color palette fits my aesthetic perfectly. Plus, with so many worsted-weight options out there, you might already have the perfect yarn in your stash to start your next Wheat Stitch project!
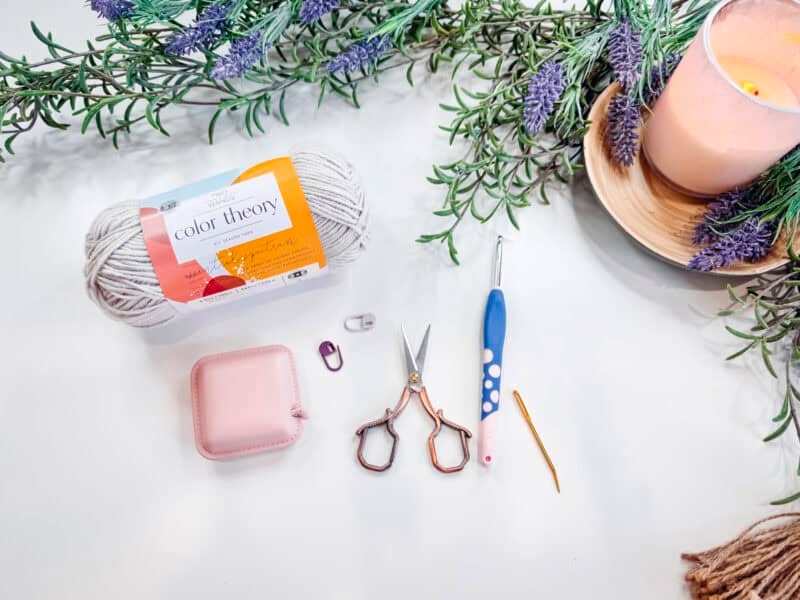
Crochet Supplies
Yarn
Lion Brand Color Theory
100% Acrylic, 246yds/100g
Yarn Quantities
If making a swatch, you will need 50 yards.
Crochet Hook
Size US H (5.0mm) Crochet Hook or hook to obtain gauge.
Notions
Scissors
Yarn Needle
Removable Stitch Marker
Skill Level
Advanced Beginner
Sizing
Sizing is adjustable, get started with a small swatch to see if you like the stitch.
Abbreviations
blo – back loop only
ch – chain
RS – right side
sc – single crochet
sl st – slip stitch
st(s) – stitch(es)
WS – wrong side
Gauge
17 sts and 12 rows = 4″ by 4″ unblocked, in pattern repeat.
How to Crochet A Gauge Swatch
Working a gauge swatch will let you know if you will have the correct sizing for this pattern. It will also help you practice the stitches used in this project and improve your stitch work for a flawless look.
Are you struggling to match the gauge? Check out the blog post on What is Crochet Gauge and How To Fix It
Stitch Instruction Notes
- The Wheat Stitch™ has a Stitch Multiple of 2 + 1 turning chain.
- The pattern is a 4-row repeat.
- Work the first row of stitches in the back humps of the starting chain.
- Using a stitch marker at the beginning of the row is recommended.
- Beginning ch 1 doesn’t count as a stitch.
- The RS of the work (even rows facing out) has a ridge line from the blo sc rows.
- This pattern uses Standard US Terminology.
Construction
The Wheat Stitch™ is worked back and forth in rows. We’ll start by chaining a multiple of 2 + 1 (for a turning chain), and work two rows of single crochet in the back loop. Then we’ll work two rows of the wheat stitch, followed by two rows of blo sc. And that’s our 4-row repeat! Keep working those 4 rows (two wheat stitch, two blo sc) until desired height, or per the directions of the chosen Wheat Stitch pattern.
Special Stitches
Modified Puff Stitch: Yarn over and insert your hook into the stitch/space. Yarn over again and pull up a long loop. Yarn over and insert your hook into the same stitch/space. Yarn over again and pull up a long loop (5 loops on the hook). Yarn over and pull through the first 4 loops, yarn over and pull through remaining loops.
Wheat Stitch FAQs
What yarn weight works best for the Wheat Stitch?
Worsted weight is my go-to for the Wheat Stitch; it gives the modified puff stitches enough body to really pop without being too stiff or heavy. I’ve been especially happy with Lion Brand Color Theory at this weight because the smooth, consistent twist lets each puff come out the same size.
That said, the stitch works in a range of weights: bulky yarn creates an extra-cozy, pillowy texture perfect for blankets and scarves, while DK weight produces a more refined, lightweight fabric that works great for wearables. I’d recommend starting your first practice swatch in worsted so you can see the stitch definition clearly before experimenting with other weights.
How do I keep my Wheat Stitch puff stitches even?
Uneven puff stitches are the most common issue new Wheat Stitch crafters run into, and almost always, it comes down to one thing: inconsistent loop height. When you pull up each loop for the modified puff, aim to pull it to the same height as your current row. A good visual cue is to pull it up to the level of your crochet hook before yarning over.
If your puffs look flat, you’re probably pulling those loops too short. If they look loose and floppy, try going down a half hook size rather than trying to tighten your grip, which can strain your hands. Practicing on a swatch of 20–30 stitches before starting your project makes a noticeable difference.
Why do my Wheat Stitch puff stitches look offset or misaligned?
They’re supposed to! The puff stitches in the Wheat Stitch are intentionally offset between rows, that slight stagger is what creates the organic, woven-braid look that gives the stitch its texture. If you look closely at a finished swatch, the puffs in rows 3 and 4 land in different positions relative to each other. This is by design, and it’s part of what makes the Wheat Stitch look like actual wheat in the field. If you’re seeing an offset you didn’t expect, double-check that you’re working row 4 as a repeat of row 3 (not a mirror of it), that’s the most common source of unintended misalignment.
Can I use the Wheat Stitch with cotton yarn?
Yes, and it’s a great choice for certain projects, particularly dishcloths, market bags, and summer accessories, where you want texture without warmth. Cotton has less stretch than acrylic, which means your puff stitches may look slightly more compact and structured. I’d suggest going up a half hook size from what the label recommends to keep the fabric from getting too stiff, especially since the modified puff stitch draws up a lot of yarn at once. For 100% cotton, something in the worsted to DK range gives the best definition. If you want a bit more give and drape, a cotton-acrylic blend is a nice middle ground.
Is the Wheat Stitch good for beginners?
I list this stitch as Advanced Beginner, which means it’s approachable if you’re comfortable with single crochet and are ready to try something with a little more texture. The modified puff stitch is the only new technique involved, everything else in the 4-row repeat is a single crochet or back-loop single crochet. I’d recommend watching the video tutorial once all the way through before starting your swatch, so you can see what the puff stitch looks like in motion before you try it yourself. Most crafters who are new to puff stitches get the hang of it within the first few rows.
How do I adjust the Wheat Stitch for a different project size?
The Wheat Stitch has a stitch multiple of 2, so any starting chain that’s an even number (plus 1 for the turning chain) will work. To make something wider, simply add stitches in multiples of 2, for example, if the sample uses 24 stitches, you could expand to 40, 60, or 80 stitches depending on your project. For length, add or remove rows in full increments of the 4-row repeat (Rows 3–6), always ending on Row 6. If you’re working from one of my specific Wheat Stitch patterns, follow the stitch counts in that pattern rather than improvising the math, they’ve already been worked out for the finished measurements listed.
What’s the difference between the Wheat Stitch and a regular puff stitch?
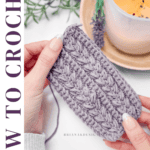
A standard puff stitch is worked on its own, typically into the same stitch multiple times to create a single fluffy bump. The Wheat Stitch uses a modified version of the puff stitch, one with fewer yarn overs than a traditional puff, and pairs it with a specific skip-and-stagger sequence alongside back-loop single crochets. That combination is what creates the layered, braid-like texture you see in the finished fabric. A plain puff stitch on its own would look like a series of individual bumps; the Wheat Stitch organizes those modified puffs into rows that flow together like a woven pattern. It’s also a 4-row repeat, which gives it more visual rhythm than a single stitch used in isolation.
Video Tutorial for the Wheat Stitch
Written Crochet Stitch Pattern Instructions
Setup:
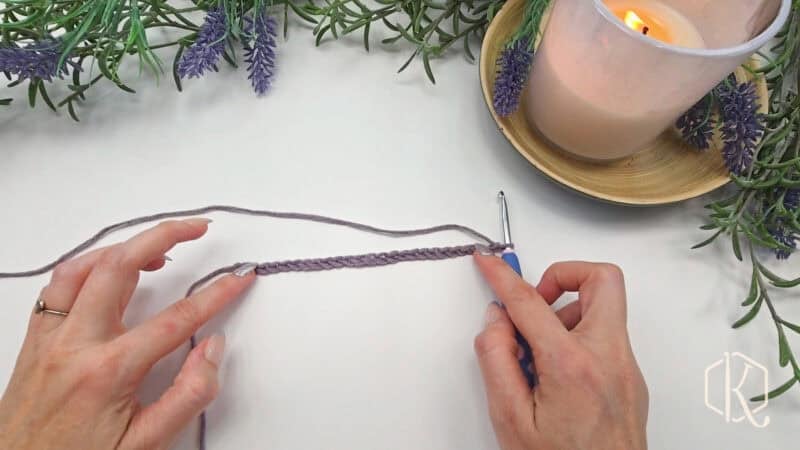
Start by creating a slip knot and placing it on your crochet hook.
Ch 25.
Row 1 (WS):
Starting in the 2nd ch from the hook, sc in each ch across, turn. | 24 sts
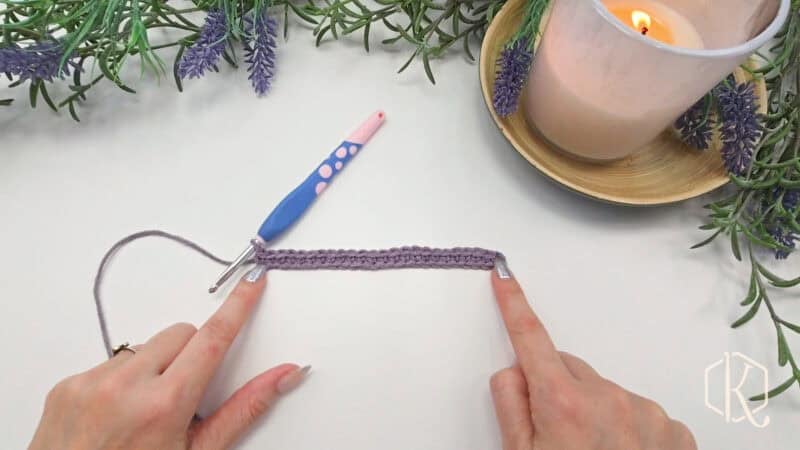
Row 2 (RS):
Ch 1 (doesn’t count as a st throughout), blo sc in each st across, turn. | 24 sts
Join The Kindest Community
Join our vibrant community of crafters on Facebook today. Whether you enjoy crafting with others or simply have burning questions, we’ve got you covered – join us now!
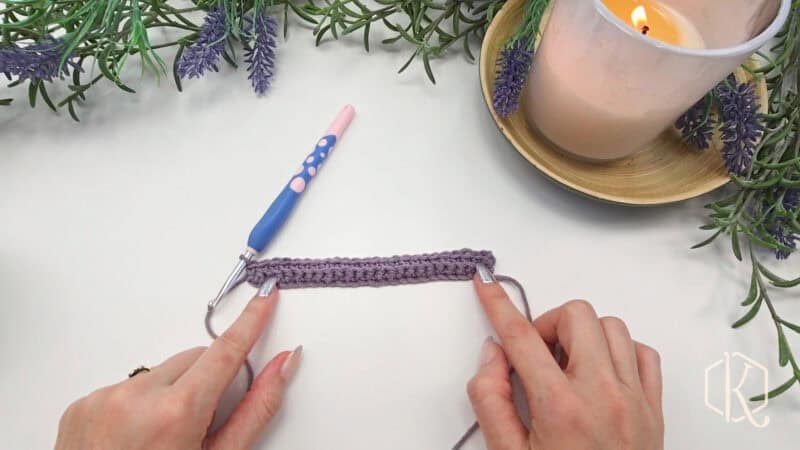
Row 3:
Ch 1, sc 1, [skip the next st, sc in next, work a puff st into the skipped st]. Work across until the last st, sc in last, turn. | 24 sts
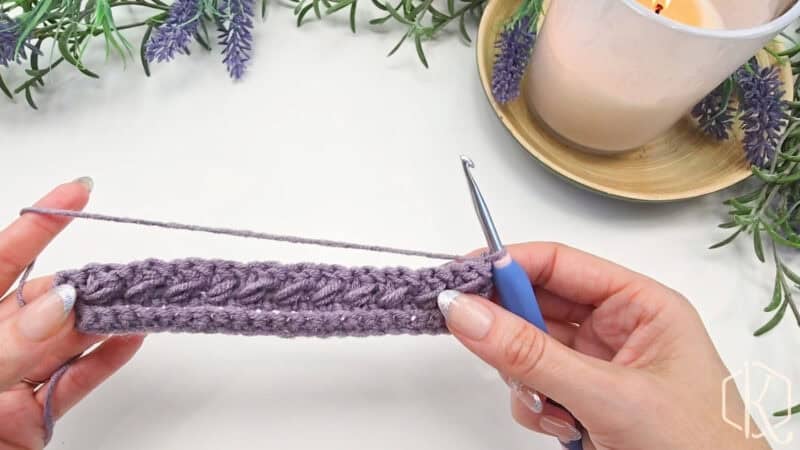
Let’s break this down a little.
The Wheat Stitch Rows (Rows 3 and 4) are worked under both loops of the previous row’s stitches and will begin and end with a regular sc. I find that this adds a nice little buffer on the ends.
After your first sc, you will skip the next st and sc in the next. Your modified puff stitch will be worked in the stitch you just skipped. It might be helpful to use your fingers (or a needle) to figure out exactly where that skipped stitch is. There will be a gap!
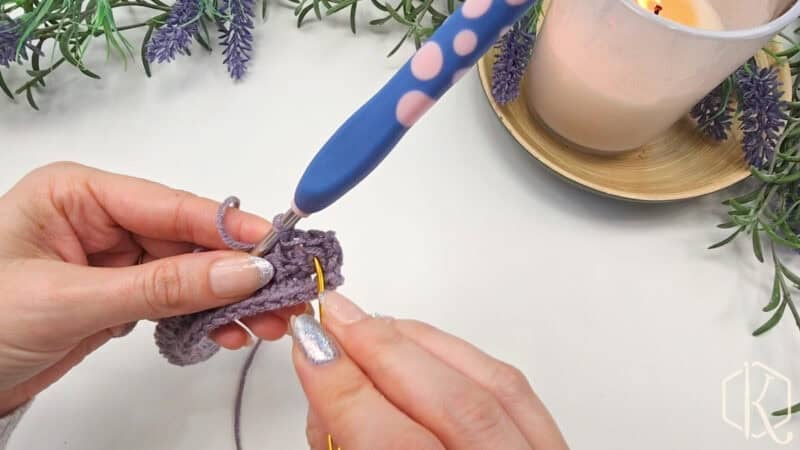
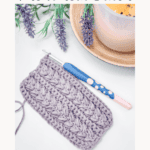
To make our modified puff stitch, we’re going to yarn over, insert our hook into the skipped stitch, yarn over, and pull up a long loop (this just means pull it a little higher so it’s the same height as your hook) for a total of 3 loops on the hook, yarn over again and insert our hook into the same stitch, yarn over and pull up a long loop for a total of 5 loops on the hook.
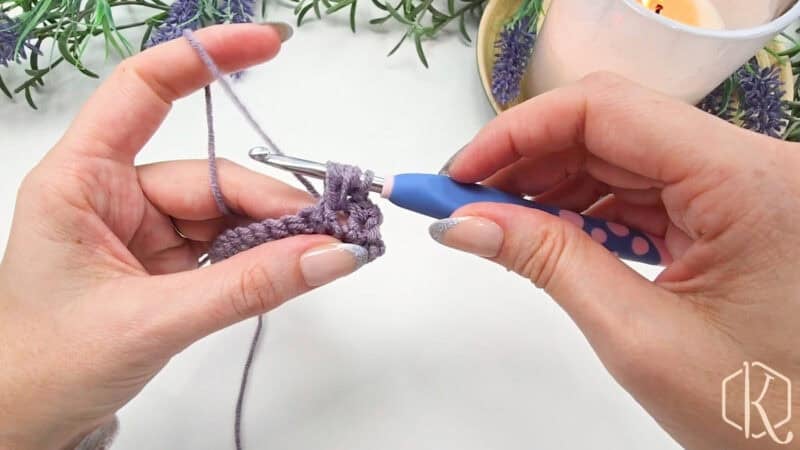
Now we’re going to yarn over and pull through 4 of those loops, then yarn over and pull through the last 2.
You will continue those steps – skip the next st, sc in the next, puff in skipped st – across your row until you reach the last st, then you will sc in the last. You will have 13 sc and 11 puff sts.
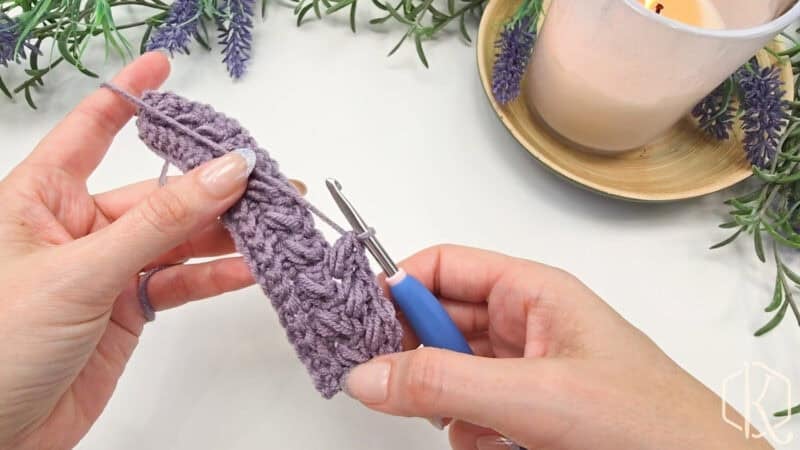
Row 4:
Repeat Row 3.
Rows 5 & 6:
Ch 1, blo sc in each st across, turn. | 24 sts
Wheat Stitch Tips
- To adjust the length, work more or fewer rows in increments of the 4-row repeat (Rows 3-6), ending on Row 6.
- You will notice that the puff stitches do not perfectly line up – this is intentional! They are a bit offset to make them a bit more organic – like a pretty woven braid.
- For some Wheat Stitch designs, the fabric benefits from wet blocking. For more on blocking, visit the “How to Block” post.
Now that you know how to crochet the Wheat Stitch, I hope you love it as much as I do! With its gorgeous texture and endless versatility, it’s a stitch that can add something special to so many projects. Whether you’re making a cozy blanket, a stylish scarf, or something completely unique, I can’t wait to see what you create.
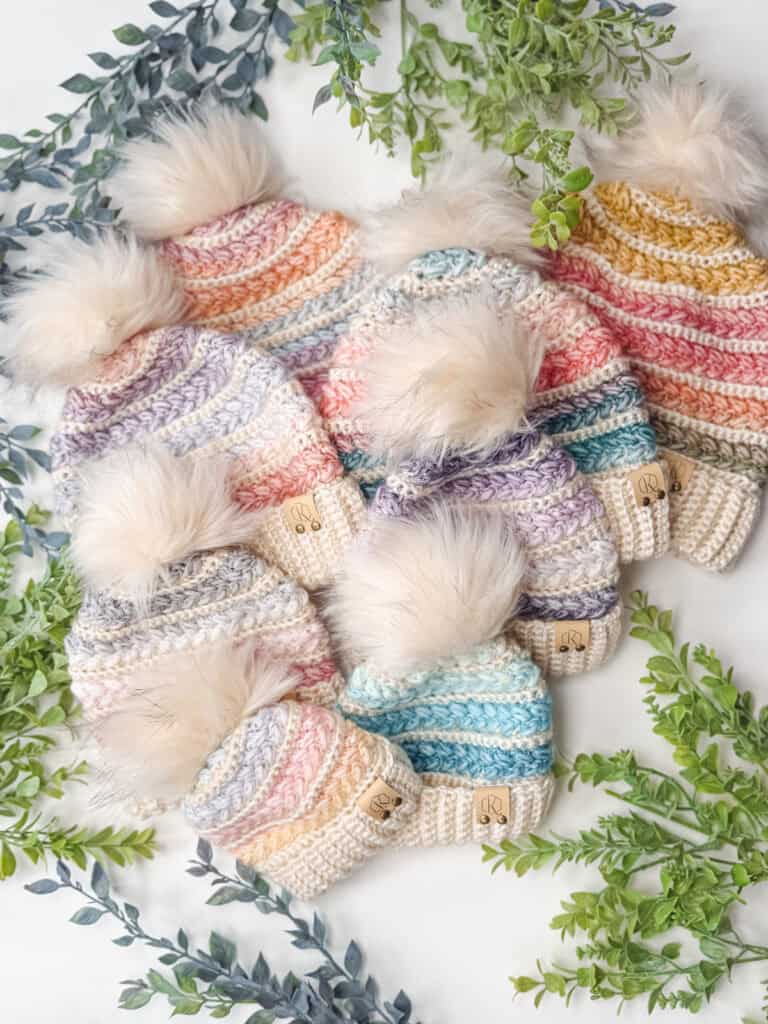
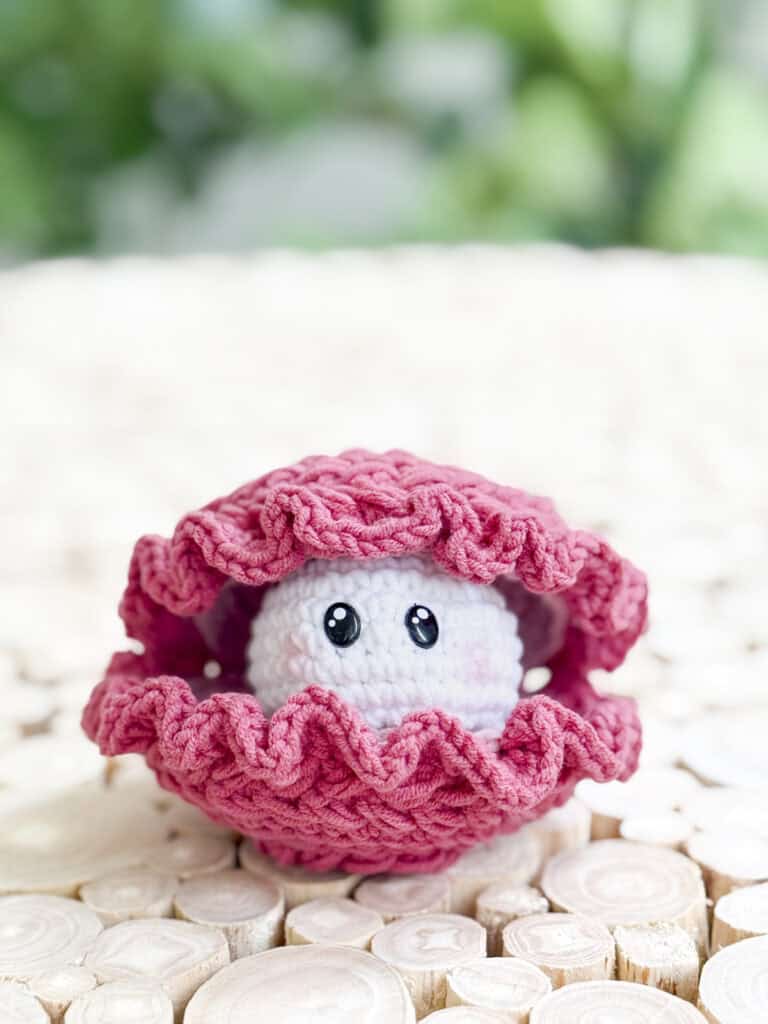
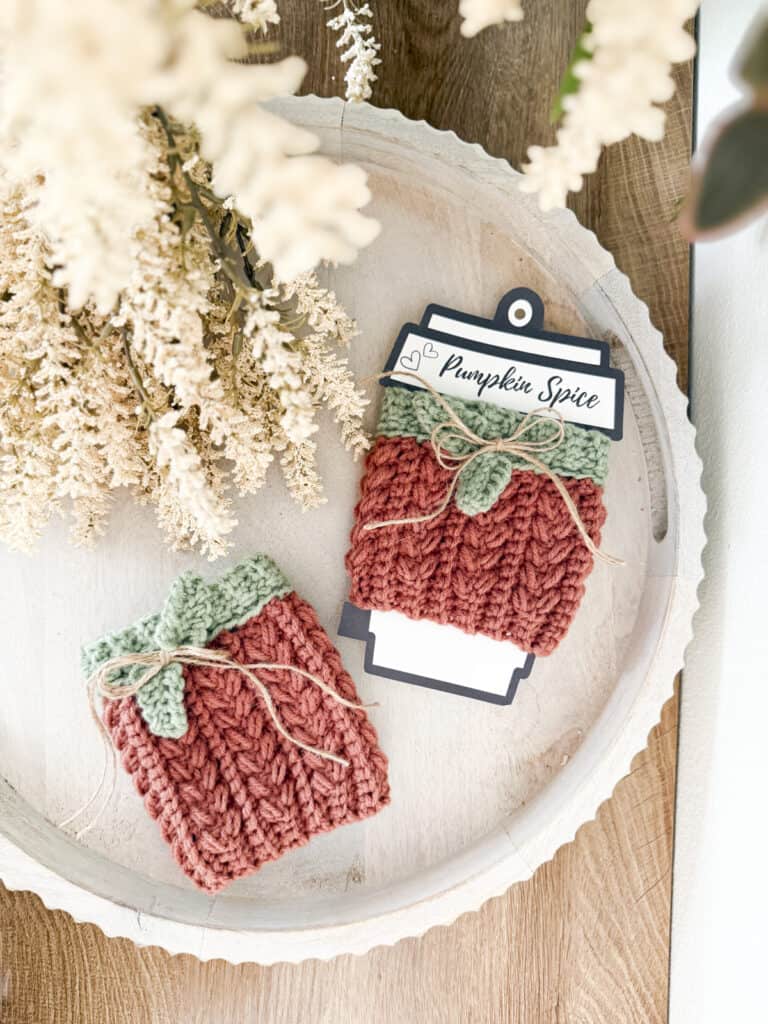
Crochet Patterns That Use My Signature Wheat Stitch™
Wheat Stitch Mushrooms
Wheat Stitch Water Bottle Holder
Wheat Stitch Chick
Wheat Stitch Easter Egg
Wheat Stitch Carrot
Wheat Stitch Bunny
Wheat Stitch Fingerless Mittens
Wheat Stitch Dishtowel Holder
Wheat Stitch Napkin Ring
Wheat Stitch Mug Cozy
Wheat Stitch Sweetheart Hat
Wheat Stitch Hotpad
Wheat Stitch Snail
Wheat Stitch Heart (from the Wheat Stitch Snail with Heart)
Wheat Stitch Hooded Scarf
Wheat Stitch Pocket Shawl
Wheat Stitch Earwarmer
Wheat Stitch Snowman
Wheat Stitch Tree Skirt
Wheat Stitch Santa & Elf Stocking Hat
Wheat Stitch Pickle Ornament
Wheat Stitch Mini Stocking
Wheat Stitch Stocking
Wheat Stitch Wreath
Wheat Stitch Keychain & Lanyard
Wheat Stitch Scarf
Wheat Stitch Trees
Wheat Stitch Ripple Blanket
Wheat Stitch XS Dog Sweater
Wheat Stitch Pumpkin Cup Cozy
Wheat Stitch Ghost
Wheat Stitch Beanie
Wheat Stitch Triangle Shawl
Wheat Stitch Clam
Wheat Stitch Pufferfish
Wheat Stitch Whale
Wheat Stitch Turtle
Wheat Stitch Jellyfish
Wheat Stitch Octopus
Wheat Stitch Tank Top
Wheat Stitch Rectangle Bag
Wheat Stitch Chickens
Braided Wheat Summer Top
Wheat Stitch Easter Bunny Basket
Snowy Wheat Crochet Hat
Winter Wheat Sweater Scarf
Braided Wheat Blanket
Snowdrift Slipper Socks
Twisted Wheat Ear Warmer
Winter Wheat Flat Mittens
Toasty Wheat Sweater
Snowy Wheat Ornament
Festive Wheat Stocking
Pumpkin Spice Trio
Cheers, and happy crocheting!
Well, That Was Fun! What’s Next?
Well, That Was Fun! What’s Next?