Mosaic Ridge Adult Crochet Pullover
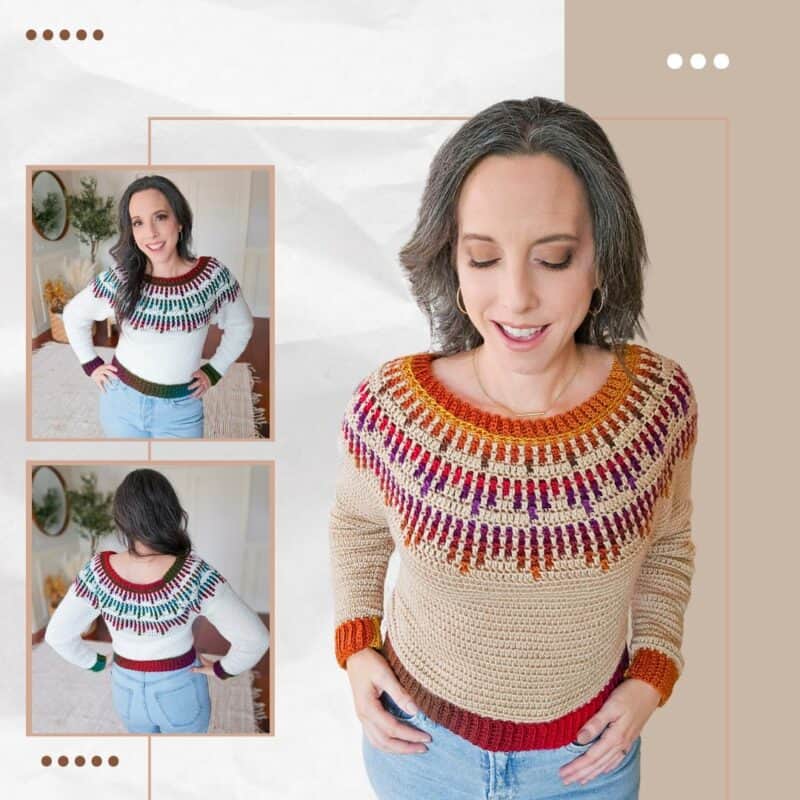
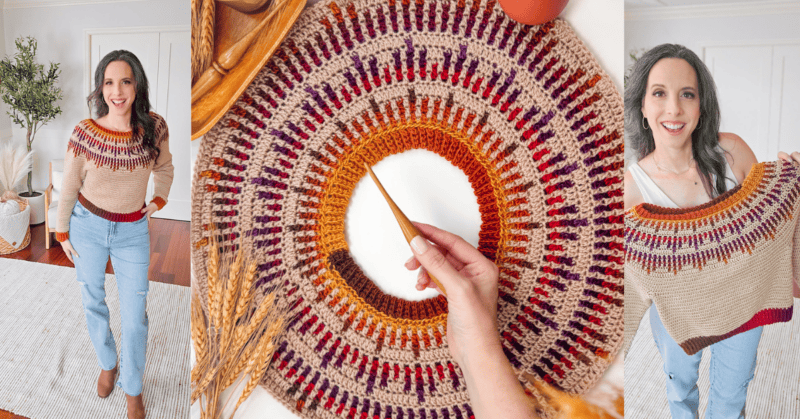
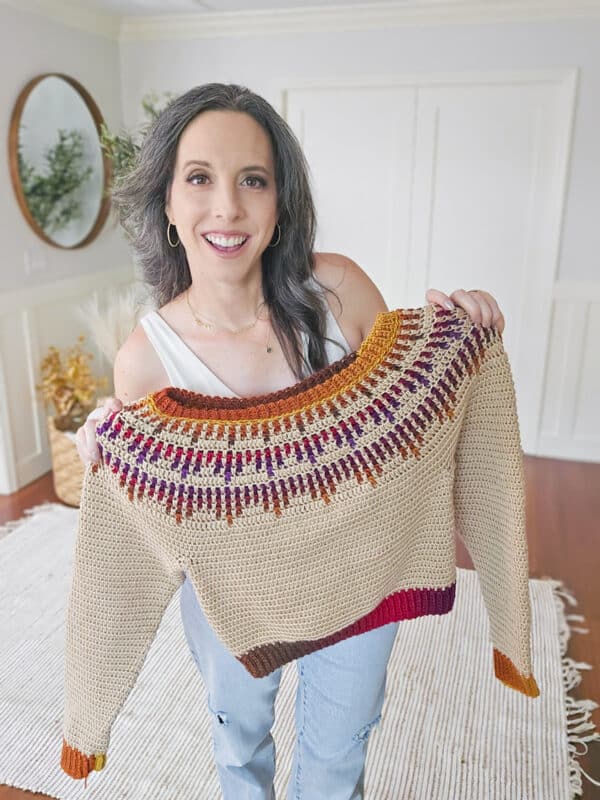
Fall in love with the Mosaic Ridge Adult Crochet Pullover! This stunning piece is worked in the round, using a top-down yoke style that makes for a seamless and cozy fit. The mosaic colorwork technique adds a unique texture while easy increases throughout the yoke keep the pattern approachable. With Mary Maxim Mellowspun Yarn for the main solid color and Mary Maxim Prism Yarn (featuring slow ombre color changes) for the mosaic details, this sweater has a dynamic look that’s both bold and elegant.
Disclosure: This post contains affiliate links. Please read my disclosure for more info.
If you love this sweater, then you will also love the matching Mosaic Ridge Child Pullover and the coordinating Mosaic Ridge Crochet Hat Pattern. The cozy fit and vibrant colorwork of this design makes it a perfect addition to your wardrobe, whether you’re layering up for a chilly day or showcasing your crochet skills. If you love mosaic crochet garments, add the Wish Upon a Star Cardigan and the Seabird Cardi to your must-crochet list!
What is Overlay Mosaic Crochet?
Overlay Mosaic Crochet is a colorwork technique that creates intricate patterns by layering contrasting colors over each other.
In this technique, geometric designs and motifs are crocheted by working stitches over rows of different colors, allowing for bold and visually striking patterns without the need for complex color changes in every stitch. We will only work one strand of yarn at a time, no need to be switching back and forth in a round to do the color work.
Basic Technique: Overlay mosaic crochet uses single crochet and double crochet stitches, usually worked in the back loops only. To create the overlay effect, double crochet stitches are placed two rows below the current working row, crossing over the front of the fabric.
Each row is worked with just one color, and colors are switched at the end of the row to maintain the pattern. The unused yarn is carried up the sides, keeping the project neat and reducing the number of ends to weave in. This technique allows for beautiful colorwork with less hassle, making it accessible for various skill levels.
Want to Join A Fun Crochet Along?
The ultimate fall crochet collection has arrived! I’ve joined forces with my friends at MJ’s Off The Hook and Han Jan Crochet for this exciting event. The collection includes 6 gorgeous patterns, featuring mosaic crochet garments and hats. Sign up for the crochet-along to get a special coupon code and supply list. Don’t wait—this collection is available for a limited time and is currently over 50% off!
Mesmerizing Mosaic Collection
Pattern + Yarn
Crochet Supplies
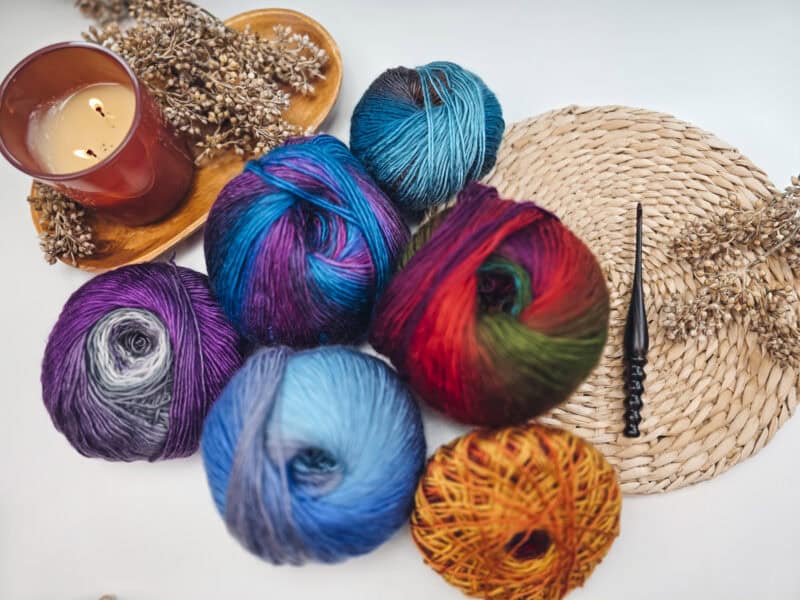
Yarn
Mary Maxim Mellowspun
100% Acrylic, 284yds/100g
Color A: Shown in White or Sand
Mary Maxim Prism
100% Acrylic, 290yds/100g
Color B: Shown in Autumn Mist or Sunset
Yarn Quantities
Total Yardage:
1140 (1190, 1250, 1300, 1375) (1450, 1530, 1610, 1690)
Main Color A Yardage:
820 (855, 900, 935, 990) (1040, 1102, 1160, 1215); 3 (4, 4, 4, 4) (4, 4, 5, 5) Skeins
Accent Color B Yardage:
320 (335, 350, 365, 385) (410, 428, 450, 475); 2 skeins each color
Yarn Substitutions
WeCrochet Swish
100% Fine Superwash Merino Wool 110yds/50g
Premier Anti-Pilling Everyday DK Yarn
100% Acrylic, 273yds/100g
Premier Colorfusion DK Yarn
100% Acrylic, 325yds/100g
Remember always to check the gauge and drape when substituting yarns.
Crochet Hook
Size 4.5mm Crochet Hook or hook to obtain gauge.
Notions
Scissors
Yarn Needle
Removable Stitch Marker
Skill Level
Intermediate
What you’ll love about this pattern.
🩶 Simple Stitches – The mosaic colorwork section of this sweater is crocheted with simple stitches, so it’s not too hard! If you can make a double crochet, you can do mosaic!
🩶 Eye-Catching Design – The colorwork section of this garment is gorgeous, yet simple. It’s eye-catching without being too much for the garment.
🩶 Cozy Fit – This sweater comes in sizes XS-5X, ensuring that every body can feel comfortable and confident. You can adjust the length of the body to make this sweater longer or shorter as you please, too!
Sizes
XS (S, M, L, 1X) (2X, 3X, 4X, 5X)
To fit chest: 32 (34, 38, 42, 46) (50, 54, 58, 62)
Actual measurements: 32 (35.5, 39.5, 42.5, 47) (51, 55.5, 59.75, 64)
This garment has an oversized relaxed fit and is meant to be worn with a 2-4 inch ease. For a more fitted look, go down a size.
Abbreviations
blo – back loop only
ch – chain
dc – double crochet
Ehdc – extended half double crochet
Ehdc2tog – extended half double crochet two together
rnd- round
sc – single crochet
sl st – slip stitch
st(s) – stitch(es)
Gauge
5 sts and 16 rows = 4″ by 4″ Worked in the Overlay Mosaic Pattern
15 sts and 10 rows = 4″ by 4″ Worked in the Ehdc
How to Crochet A Gauge Swatch
Working a gauge swatch will let you know if you will have the correct sizing for this pattern. It will also help you practice the stitches used in this project and improve your stitch work for a flawless look.
Are you struggling to match the gauge? Check out the blog post on What is Crochet Gauge and How To Fix It
Construction
This crochet sweater is constructed using a top-down, circular yoke design. We begin by working the neck ribbing in rows, which are then joined to continue in rounds. The overlay mosaic yoke is crafted with simple increases to shape the shoulders. After completing the yoke, we’ll separate the stitches for the sleeves and body. The body is crocheted down to the bottom ribbing, and the sleeves are worked separately, finishing with a cuff for a polished look. The Pine Fair Isle Sweater and the Fawning Over You Sweater are constructed in a similar fashion!

Special Stitches
Mosaic Double Crochet (mdc): is worked as a double crochet stitch, but it will be worked into the skipped stitch three rows below. This stitch will be worked on the front (or right sides) of the cardigan.
Extended half double crochet (Ehdc): is a variation of the half double crochet (Hdc) that adds a bit more height and drape to the stitch. Start by yarn over (YO) and insert your hook into the stitch, YO again and pull through the stitch (3 loops on your hook). YO and pull through the first loop on your hook only (3 loops on your hook). YO once more and pull through all three loops to complete the extended half double crochet.
Extended half double crochet 2 together (Ehdc2tog): yarn over (YO) and insert your hook into the stitch, YO again and pull through the stitch (3 loops on your hook), (YO) and insert your hook into the next stitch, YO again and pull through the stitch (4 loops on your hook). YO and pull through 2 loops on your hook only (3 loops on your hook). YO once more and pull through all three loops to complete the Ehdc2tog.
Pattern Notes
- Do not ch 1 at the beg of row unless indicated.
- Overlay mosaic crochet for this pattern involves two colors. Each row is worked with a single color, alternating between them.
- Carry the color not in use inside of the work as you go.
- Colored squares on the outside of the red lines on the chart denote color to use for row.
- Blank squares in same color as worked single crochet stitches into the back loops only (BLO).
Subscribe & Like
With Subtitles
Video Tutorial for the Mosaic Ridge Adult Sweater
Relax & Crochet
Upgrade to the Printable PDF
Beautifully formatted to print and relax while crocheting. The paid pattern includes:
The Ad-Free PDF can be purchased on Etsy or Ravelry.

Click the box below to unlock this exclusive subscriber content for free. Add your email and create a password. If you are having trouble, reset your password or login to the Grow Portal.
I’m thrilled to share this amazing crochet pattern with you! Please don’t copy, paste, or distribute this pattern. Prefer an ad-free experience? Purchase a digital PDF file for a small fee from one of my online stores. I appreciate your support and readership. You are why I can keep doing what I love and sharing it with others. Thank you from the bottom of my heart.
Written Crochet Pattern Instructions
Join The Kindest Community
Join our vibrant community of crafters on Facebook today. Whether you enjoy crafting with others or simply have burning questions, we’ve got you covered – join us now!
Mosaic Yoke Colorwork
Section 1 of Mosaic Yoke
Row 1:
With Color A blo sc in each st around. | 120 sts
Rnd 2:
With Color B blo sc in the first, Mdc in next (working into the front loop of the setup round), *blo sc 1, Mdc 1; repSection 2 of Mosaic Yokr
eat from * around.
Rnd 3:
With Color A, *Mdc 1, blo sc 1; repeat from * around.
Rnd 4:
Repeat Rnd 2.
Rnd 5:
Repeat Rnd 3.
Rnd 6:
With Color B, *blo sc 3, Mdc 1, blo sc 2; repeat from * around.
Rnd 7:
With Color A, *Mdc 2, 2 Mdc in next, blo sc 1, Mdc 1, 2 Mdc in next; repeat from * around. | 160 sts
Section 2 of Mosaic Yoke
Rnd 1:
With Color B, blo sc in each st around.
Rnd 2:
With Color A, *blo sc 1, Mdc 1; repeat from * around.
Rnd 3:
With Color B, *Mdc 1, blo sc 1; repeat from * around.
Rnd 4:
Repeat Rnd 2
Rnd 5:
With Color B, *blo sc 2, [Mdc 1, blo sc 1] three times; repeat from * around.
Rnd 6:
With Color A, * Mdc 2, [blo sc 1, Mdc 1] three times, ; repeat from * around.
Rnd 7:
With Color B, *blo sc 4, Mdc 1, blo sc 3; repeat from * around.
Rnd 8:
With Color A, * Mdc 3, 2 Mdc in next, blo sc 1, Mdc 2, 2 Mdc in next, ; repeat from * around. | 200 sts
Section 3 of Mosaic Yoke
Rnd 1:
With Color B blo sc in each st around.
Rnd 2:
With Color A *Mdc 1, blo sc 1; repeat from * around.
Rnd 3:
With Color B, * blo sc 1, Mdc 1; repeat from * around.
Rnd 4:
Repeat Rnd 2.
Rnd 5:
Repeat Rnd 3.
Rnd 6:
Repeat Rnd 2.
Rnd 7:
With Color B, *blo sc 3, [Mdc 1, blo sc 1] three times, blo sc 1; repeat from * around.
Rnd 8:
With Color A, *Mdc 3, [blo sc 1, Mdc 1] three times, Mdc 1; repeat from * around.
Rnd 9:
With Color B, *blo sc 5, Mdc 1, blo sc 4; repeat from * around.
Rnd 10:
With Color A, *Mdc 4, 2 Mdc in next, blo sc 1, Mdc 4; repeat from * around. | 220 sts
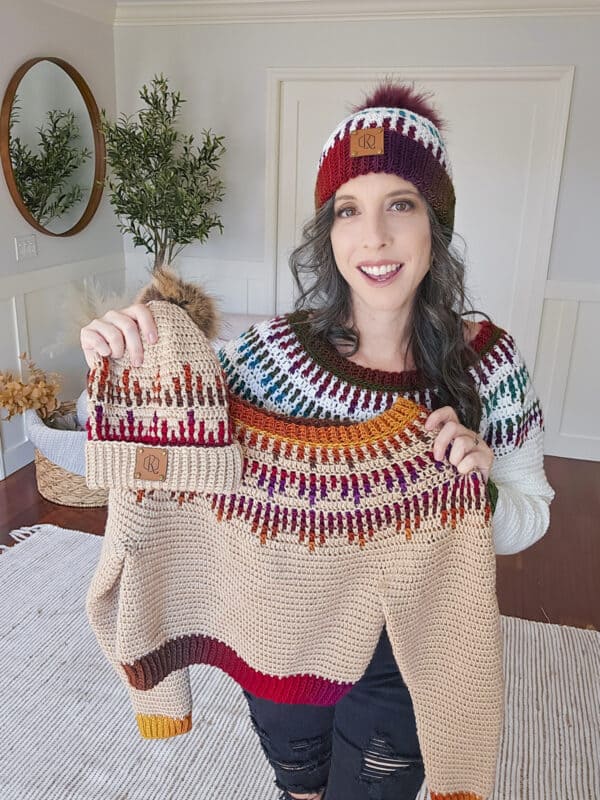
Style
Casual Look: Pair the sweater with high-waisted jeans and ankle boots. The intricate mosaic design adds texture and interest, making it the standout piece of the outfit. Add a Herringbone Clutch in a coordinating color to complete your look.
Layered: Wear a collared shirt underneath, letting the collar and cuffs peek out for a preppy, layered style. Opt for neutral shades to complement the sweater’s colorwork. The Just a Rectangle Bag would look gorgeous in a warm or cool solid and would complement your sweater perfectly!
Sporty: For a laid-back, sporty feel, pair the sweater with leggings and sneakers. On a chilly day, add a simple hat, like the Extend That Mellow Beanie, to keep warm and cozy.
Yoke Depth Repeats
Size XS Only: Work 4 Rnds in Ehdc and go to next section. | 220 sts
Size Small Only:
Rnd 1: 2 Ehdc in the first, Ehdc in the next 21 sts, *2 Ehdc in next, Ehdc in the next 21 sts; repeat from * around. | 230 sts
Then work 3 Rnds in Ehdc and go to next section.
All Other Sizes:
Rnd 1: 2 Ehdc in the first, Ehdc in the next 10 sts, *2 Ehdc in next, Ehdc in the next 10 sts; repeat from * around. | 240 sts
Size M Only: Work 4 Rnds in Ehdc and go to next section.
Size L Only:
Rnd 2: 2 Ehdc in the first, Ehdc in the next 23 sts, *2 Ehdc in next, Ehdc in the next 23 sts; repeat from * around. | 250 sts
Then work 4 Rnds in Ehdc and go to next section.
All Other Sizes:
Rnd 2: 2 Ehdc in the first, Ehdc in the next 11 sts, *2 Ehdc in next, Ehdc in the next 11 sts; repeat from * around. | 260 sts
Size 1X Only:
Rnd 3: 2 Ehdc in the first, Ehdc in the next 25 sts, *2 Ehdc in next, Ehdc in the next 25 sts; repeat from * around. | 270 sts
Then work 3 Rnds in Ehdc and go to next section.
All Other Sizes:
Rnd 3: 2 Ehdc in the first, Ehdc in the next 12 sts, *2 Ehdc in next, Ehdc in the next 12 sts; repeat from * around. | 280 sts
Size 2X Only:
Rnd 4: 2 Ehdc in the first, Ehdc in the next 19 sts, *2 Ehdc in next, Ehdc in the next 19 sts; repeat from * around. | 294 sts
Then work 3 Rnds in Ehdc and go to next section.
All Other Sizes:
Rnd 4: 2 Ehdc in the first, Ehdc in the next 12 sts, *2 Ehdc in next, Ehdc in the next 12 sts; repeat from * around. | 300 sts
Size 3X Only:
Rnd 5: 2 Ehdc in the first, Ehdc in the next 29 sts, *2 Ehdc in next, Ehdc in the next 29 sts; repeat from * around. | 310 sts
All Other Sizes:
Rnd 5: 2 Ehdc in the first, Ehdc in the next 13 sts, *2 Ehdc in next, Ehdc in the next 13 sts; repeat from * around. | 320 sts
Size 4X Only: Work 3 Rnds in Ehdc and go to next section.
Size 5X Only:
Rnd 6: 2 Ehdc in the first, Ehdc in the next 19 sts, *2 Ehdc in next, Ehdc in the next 19 sts; repeat from * around. | 336 sts
Then work 2 Rnds in Ehdc and go to next section.
Split for Body & Sleeves
Rnd 1:
*Ehdc 56 (60, 64, 69, 78) (90, 96, 100, 106), ch 8 (8, 8, 10, 10) (10, 12, 12, 10), skip the next 54 (55, 56, 56, 57) (57, 59, 60, 62) sts; repeat from * one more time. | 128 (136, 144, 158, 176) (200, 216, 224, 232) total body sts
Sweater Body
Rnds 1-17:
Ehdc in each st around.
Tip: To make the sweater shorter or longer, work fewer or more rounds. Remember changing the length will affect the overall yardage.
Bottom Ribbing
Setup: To even out the height difference of rounds, sc in next, sl st in next and join with color B.
Row 1:
Ch 9, sc in second chain from hook and across remaining chs, sl st 2 sts on the body (these do not count as sts), turn. | 8 sts
Row 2:
Skip the two sl st sts from the bottom body, blo sc in each st across, turn.
Row 3:
Ch 1 (turning chain does not count as a stitch, blo sc in each st across, sl st 2 sts on the body, turn.
Repeat Rows 2-3 around the bottom of the sweater body. Join last row to beginning row by slip stitching through blo of first and last row at the same time with the WS facing.
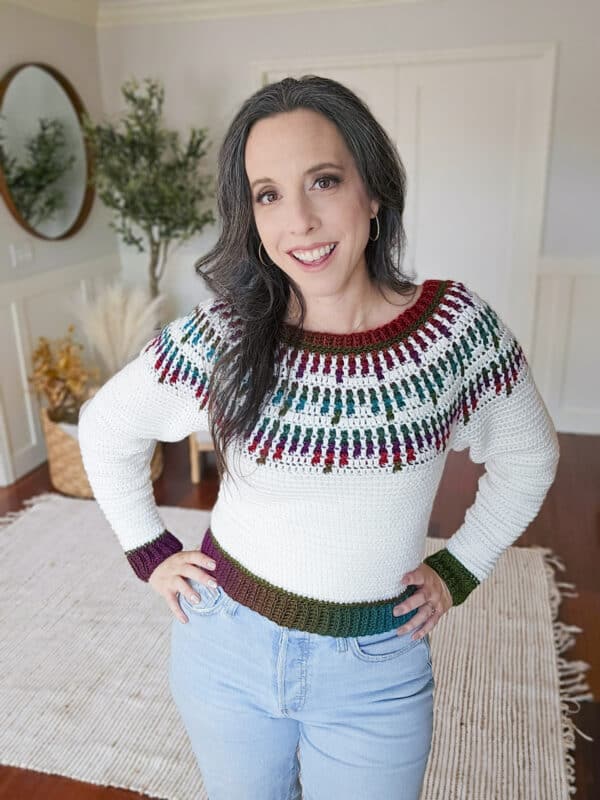
Customization Tips
- Want a cropped sweater? Simply work fewer rounds of the body to adjust the length. And you could even keep on going and turn this into a sweater dress!
- You can easily adjust the sleeve length before starting the cuff—just add or reduce the number of rows to reach your desired length. For a puff sleeve effect, skip the decreases but keep the same number of cuff rows around the bottom of the sleeve.
Sleeves
Rnd 1:
Join the yarn to the center of the underarm, sc in first (place marker), Ehdc in next, Ehdc in remaining sts around the arm opening, do not join and work continuously. Tip: Be careful not to miss any stitches or pick up any extras; check your stitch count. There will be a gap on each underarm side, use your tail end to close these gaps, see video for tip. | 62 (63, 64, 66, 67) (67, 71, 72, 72) sts
The sleeve rounds will be decreased to the cuff. You can adjust as needed for your fit, add or reduce the number of rnds for a custom sleeve length.
Tip: To avoid a ‘wandering decrease,’ try keeping the decrease under the center arm but mixing up the placement every few rounds.
Size XS:
Ehdc in each st around for 10 rnds.
Next Rnd: *Ehdc2tog, Ehdc in remaining sts around. Repeat from * until there are 39 total sleeve rnds and 36 sts.
Size Small:
Ehdc in each st around for 9 rnds.
Next Rnd: *Ehdc2tog, Ehdc in remaining sts around. Repeat from * until there are 39 total sleeve rnds and 36 sts.
Size Medium:
Ehdc in each st around for 10 rnds.
Next Rnd: *Ehdc2tog, Ehdc in remaining sts around. Repeat from * until there are 39 total sleeve rnds and 38 sts.
Size Large:
Ehdc in each st around for 8 rnds.
Next Rnd: *Ehdc2tog, Ehdc in remaining sts around. Repeat from * until there are 39 total sleeve rnds and 38 sts.
Size 1X & 2X:
Ehdc in each st around for 9 rnds.
Next Rnd: *Ehdc2tog, Ehdc in remaining sts around. Repeat from * until there are 39 total sleeve rnds and 40 sts.
Size 3X:
Ehdc in each st around for 7 rnds.
Next Rnd: *Ehdc2tog, Ehdc in remaining sts around. Repeat from * until there are 39 total sleeve rnds and 40 sts.
Size 4X & 5X:
Ehdc in each st around for 6 rnds.
Next Rnd: *Ehdc2tog, Ehdc in remaining sts around. Repeat from * until there are 39 total sleeve rnds and 40 sts.
Sleeve Cuff
Setup: To even out the height difference of rounds, sc in next, sl st in next and join with color B.
Row 1:
Ch 9, sc in second chain from hook and across remaining chs, sl st 2 sts on the sleeve edge (these do not count as sts), turn. | 8 sts
Row 2:
Skip the two sl st sts from the sleeve edge, blo sc in each st across, turn.
Row 3:
Ch 1 (turning chain does not count as a stitch, blo sc in each st across, sl st 2 sts on the sleeve edge, turn.
Repeat Rows 2-3 around the sleeve edge. Join last row to beginning row by slip stitching through blo of first and last row at the same time with the WS facing.
Finishing
Subscribe to my youtube channel
Weave in any ends, block the garment if needed, and enjoy!
The great thing about colorwork designs is that you can mix up the tones to create something that expresses your unique style. Use contrasting solid colors for a bold, eye-catching look.
Alternatively, you can use a single color with varying shades—either lighter or darker—for a subtle mosaic effect. You can also switch up the main and accent colors: try working the body in the color-changing Prism yarn while the mosaic colorwork is done in a solid Mellowspun.
The choice is yours – and it’s going to be gorgeous no matter what you choose! If you loved making a mosaic sweater, you might also love making a Lotus Blanket or a Waves Blanket!
Cheers, and happy crocheting!
Well That Was Fun! What’s Next?
📌 PIN THIS POST – Don’t lose this project; save it to your Pinterest crochet board so you can quickly come back to it again.
💌 SHARE – Share your yarn choice, in-progress, or finished projects on Facebook or Instagram and use the hashtag #brianakdesigns
🥂 JOIN – Join the kindest crafters in the Briana K Designs Community Group on Facebook. We love yarny friends!
🔗 RAVELRY LINK -Link and share your project on Ravelry. Having inspirational photos can help crafters.
