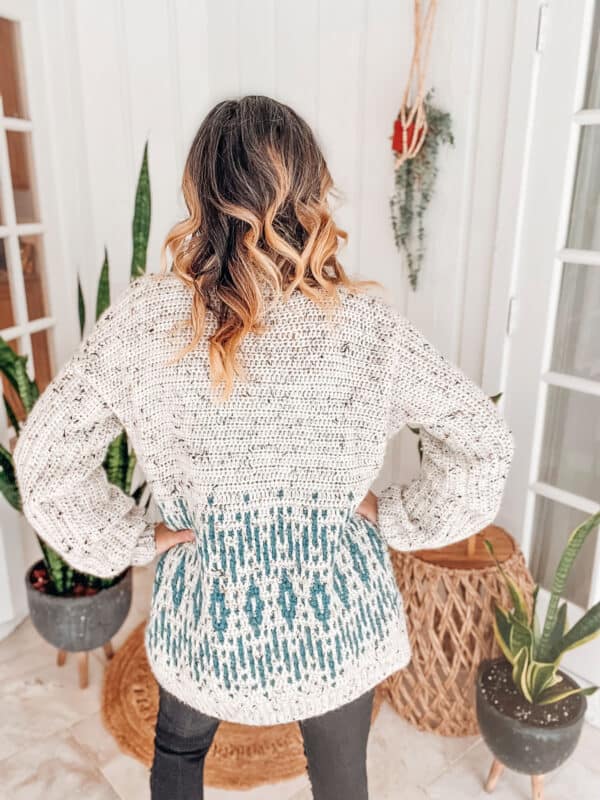
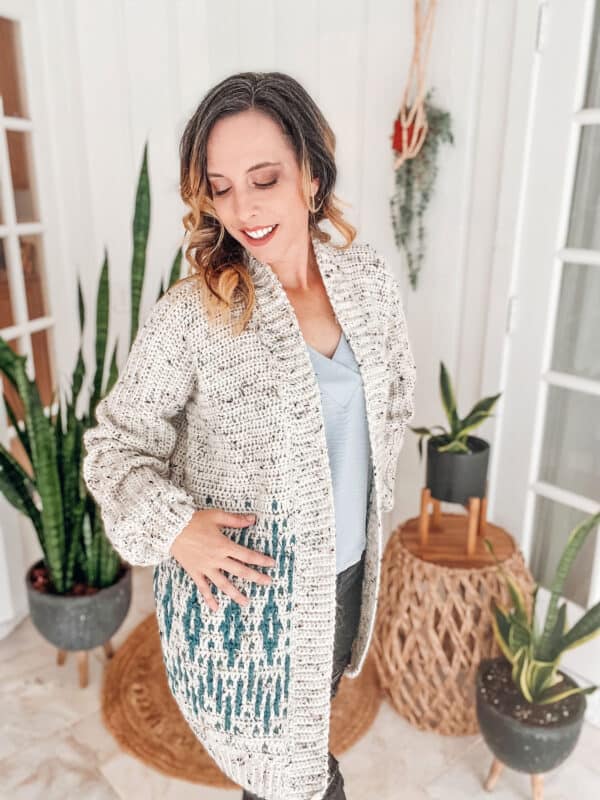
How to Crochet an Incredible Cardigan Using the Mosaic Crochet Technique
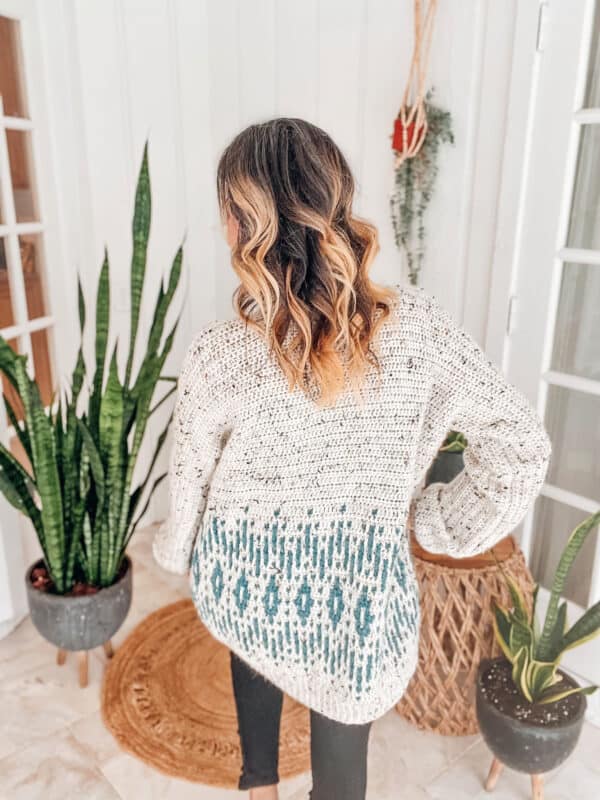
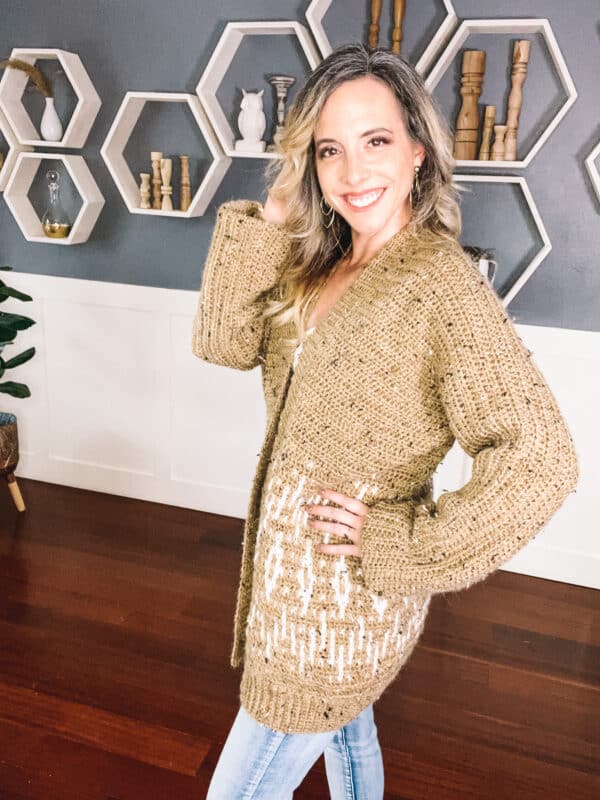
The Wish Upon A Star Mosaic Crochet Cardigan Pattern is the perfect crochet project for both experienced and novice crocheters. The mosaic crochet technique used to create this stunning crochet garment is so unique you'll surely stand out in any crowd! Plus its colorwork meets and easy crochet pattern. If you are hooked on mosaic crochet, now there is a matching Wish Upon A Star Crochet Blanket Pattern. And if you love minimal seaming, check out the Autumn Wheat Beginner Crochet Cardigan.
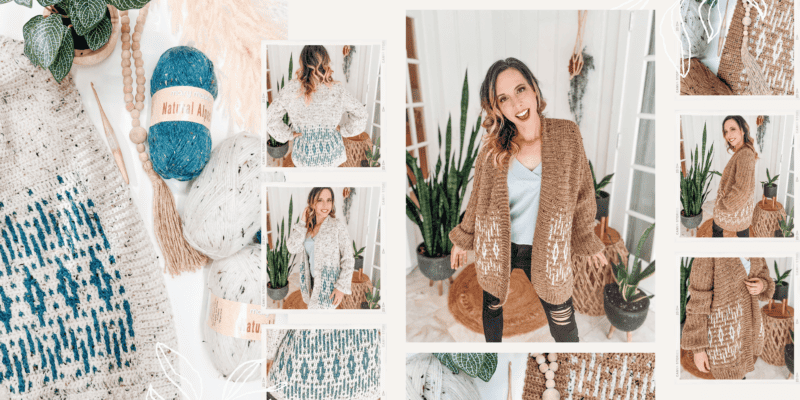
This intricate yet straightforward pattern is also a great way to hone your crochet skills. Plus, you can personalize the design to make it your own. Whether you choose a subtle dual-color crochet pattern or a vibrant multi-hued version, you're sure to feel fashionable and cozy all at once!
Disclosure: This post contains affiliate links. Please read my disclosure for more info.
What is Mosaic Crochet?
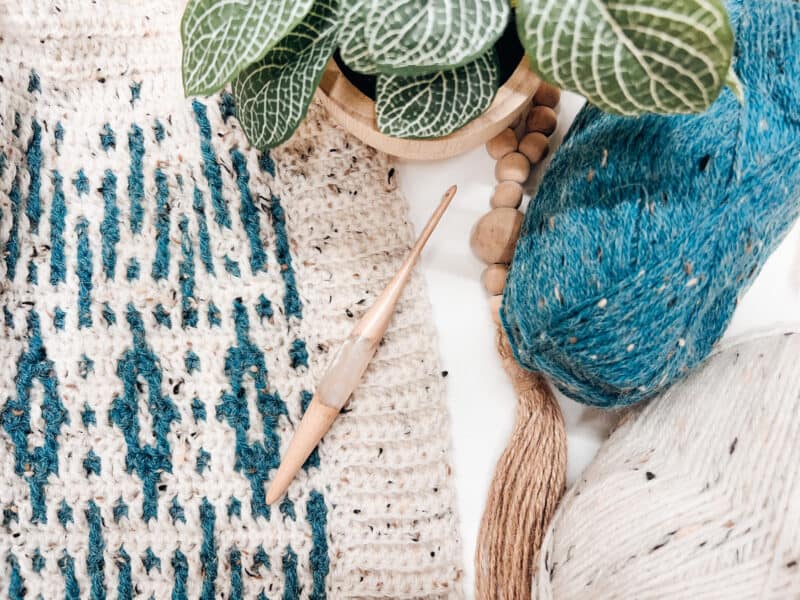
Mosaic crochet is a type of crochet colorwork that breaks down complex cardigan patterns into a primary method using simple stitches such as single crochet and double crochet stitches. For this pattern below, we will also use half double crochet stitches for the top of the body.
This crochet technique allows intricate designs to work efficiently without carrying yarn throughout the row. Mosaic crochet, although complex-looking, is one of the most straightforward colorwork crochet techniques available.
Unlike tapestry crochet patterns, mosaic crochet uses only basic stitches and one color on each row, alternating back and forth until the desired pattern is achieved. Mosaic crochet patterns can bring stunning visual details to projects like bags, scarves, and blankets, making them stand out. With basic crochet skills, anyone can quickly learn how to create fantastic mosaic crochet designs and make cardigans like the Seabird Mosaic Crochet Cardigan!
Can I Crochet a Mosaic Cardigan As a Beginner?
The answer is a resounding YES! The mosaic crochet technique makes for an easy pattern with easy stitches and the look of an intricate and impressive design without being too challenging to master. It’s perfect for beginners who want to crochet something extraordinary but don’t have much experience yet with colorwork.
Many pattern designers are jumping on the mosaic crochet pattern craze, and you should too. The Wish Upon A Star Crochet Cardigan is great because it has very little shaping and is a great everyday cardigan.
Because this technique only uses one color at a time, I feel many pattern designs are a beginner friendly pattern for a garment. There are mosaic designs that use lots of colors with more extensive charts that are more for the experienced crocheter.
If you’re ready to crochet an incredible mosaic cardigan, you are in luck, keep on reading this blog post for the free crochet cardigan pattern. With step by step instructions and a crochet video tutorial, this flat crochet cardigan with simple construction is a great place to start.
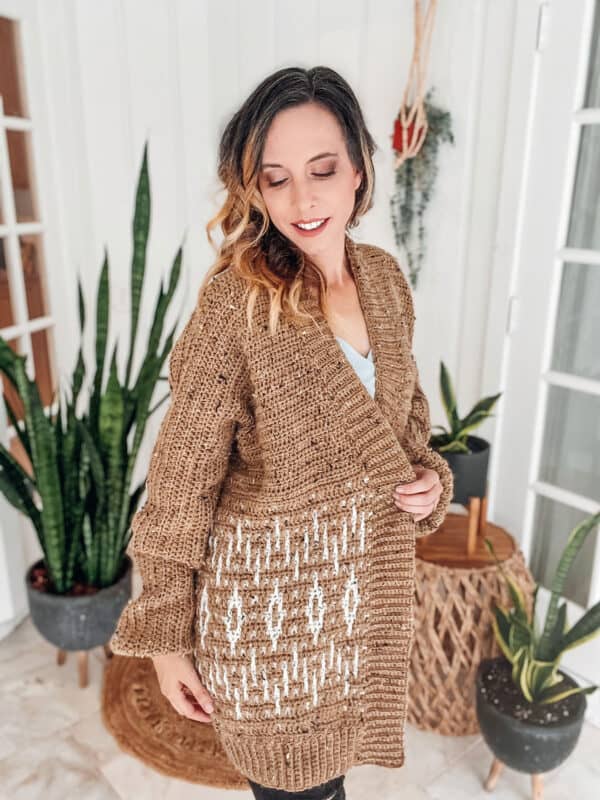
How to Style Your Mosaic Crochet Cardigan.
Once you have created your versatile cardigan masterpiece, it’s time to style it! Here are some great tips for styling your beautiful cardigan:
1. Choose a yarn color that complements your wardrobe and personal style. If you’re feeling daring, try an unexpected color or bright hue. Your crochet cardigan will be the center of attention, so make sure it stands out in all the best ways! See color palette inspirations below.
2. Play around with textures and fabrics when you are choosing what to pair your crochet cardigan with. Light cotton t-shirts and tank tops look great next to crochet, as do silk blouses for a more sophisticated look.
3. Layer your crochet cardigan over a dress or jumpsuit for an effortlessly cool style. This is perfect for days when you want to look more dressed up, but still feel comfortable. Add a pair of ballerina flats or boots to head out for the afternoon.
4. Don’t forget the accessories! A wide-brimmed hat and fun jewelry can add much personality to crochet cardigan looks.
By following these tips, you will be sure to look and feel great in your crochet cardigan. And with the mosaic crochet technique, your crochet cardigan will surely be one-of-a-kind!
Happy crocheting!
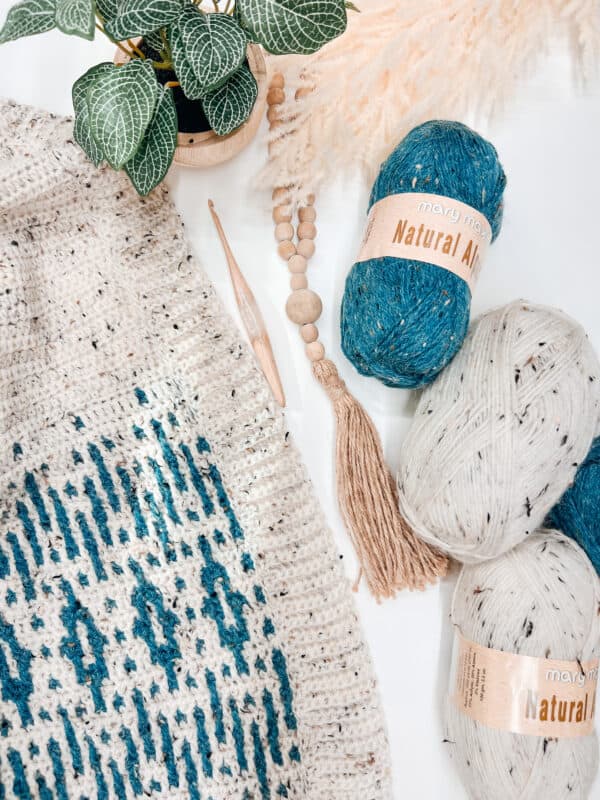
About the Crochet Yarn Used for the Mosaic Crochet Cardigan
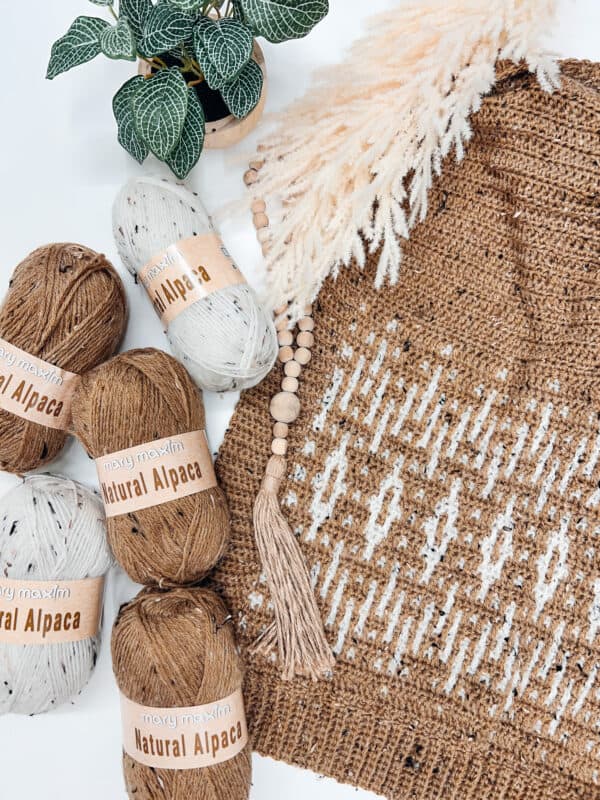
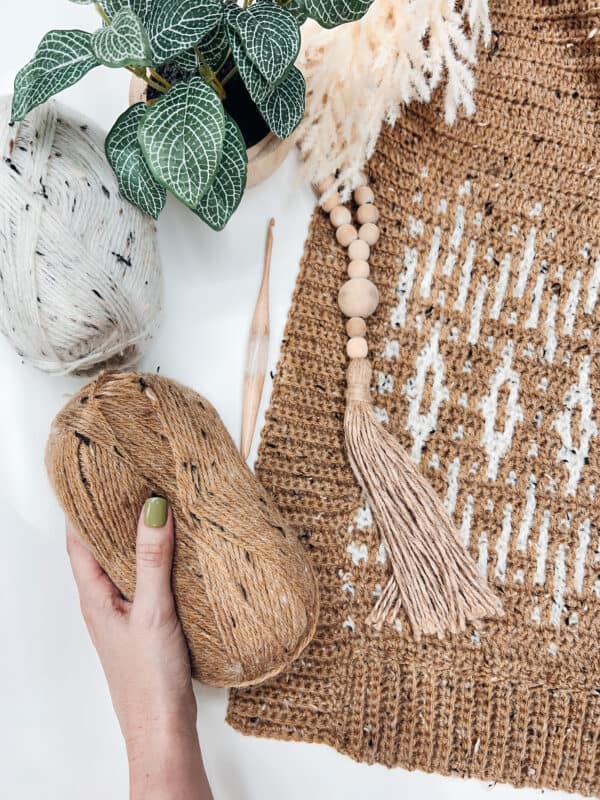
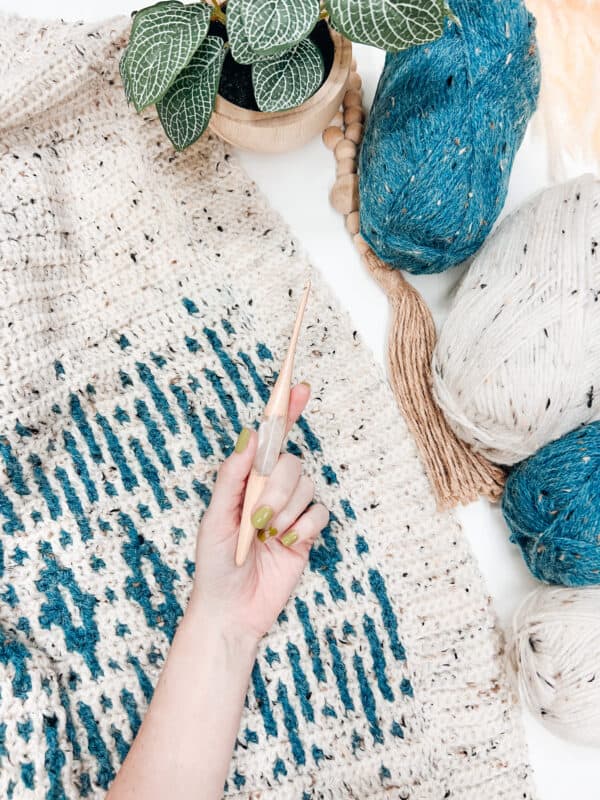
The recommended yarn I used for this easy crochet cardigan pattern is the Mary Maxim Natural Alpaca Tweed. This is a warm yarn for a fall wardrobe and winter wardrobe but is super soft and lightweight. This yarn is perfect for crochet projects, like this simple fit crochet cardigan pattern, using the mosaic crochet technique.
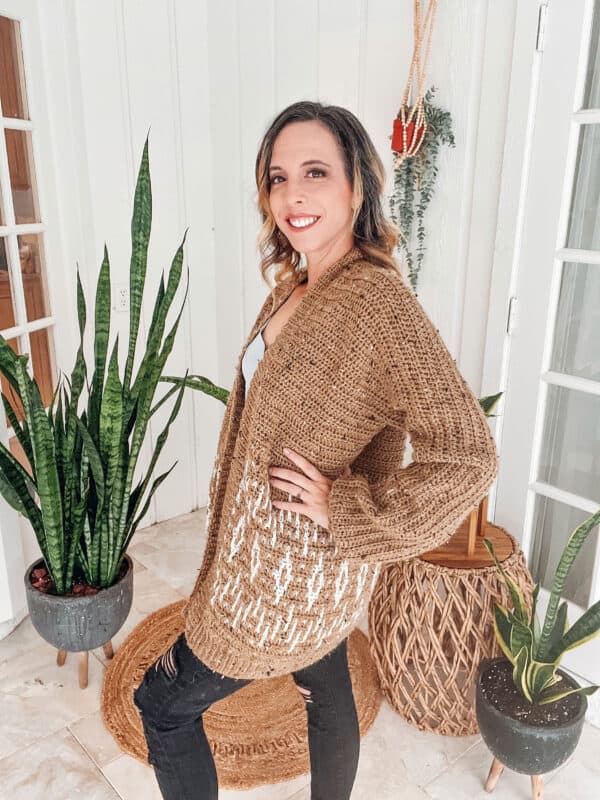
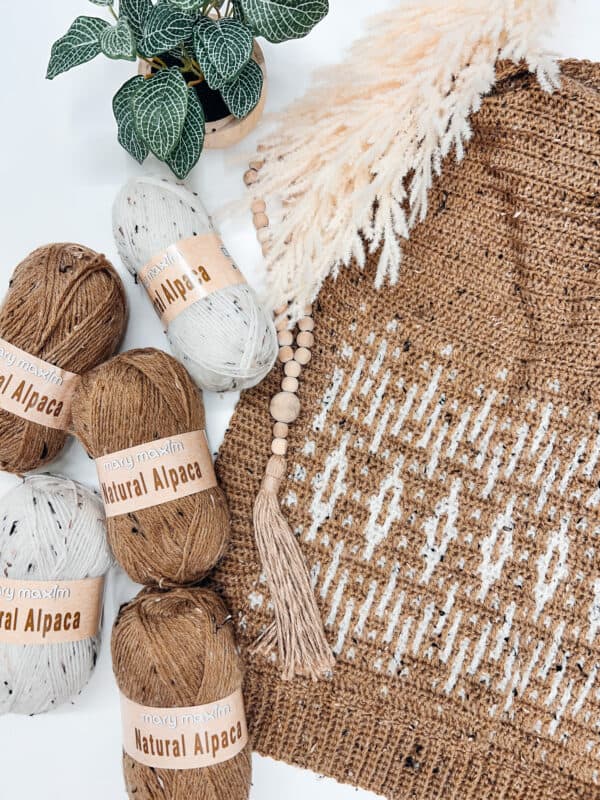
The colors of the crochet yarn mix and match well with some neutral tones and color pops. I wanted to make several of these because they are so fun to see in different shades of yarn. Make this cardigan as fitted or as an oversized cardigan with the yarn color inspiration below.
If you prefer to use acrylic yarn, I recommend the WeCrochet Brava Tweed. And if you are in love with cotton yarn for those warmer climates, check out WeCrochet Comfy Colormist
Are Crocheting Cardigans Your Thing?
If you love cardigans, I have even more inspiration for you; many are free patterns and easy crochet cardigan patterns. If you love creating a flat cardigan, visit Create an Easy Diamond Crochet Cardigan Pattern To Wear all Year or Get Comfy with the Crochet Cardigan Free Pattern.
If you love the look of knit cardigans, but don't want to ditch the crochet hooks, then the Campside Cardi Easy Free Knit-Look Crochet Pattern which is a free crochet cardigan pattern, or the Crochet a Flat Cardigan with this Easy Crochet Duster Pattern, which is a long cardigan pattern.
But what if you prefer to create a simple crochet cardigan with a top-down construction? I've got a free crochet pattern for you to try, come on to the How to Crochet a Top Down Cardigan with an Optional Hood. And if you don't want to use warm wool yarn because you like summer cardigans, check out this Lightweight & Lacy Lollipop Summer Simple Cardigan Crochet Pattern, which uses cotton yarn.
You can enjoy the free crochet pattern on my blog or purchase the ad-free downloadable pdf by clicking on one of the buttons below.
Where To Purchase My Ad-Free Downloadable PDFs:
Supplies for the Mosaic Crochet Cardigan Free Pattern
Crochet Hook:
Notions:
Removable stitch markers if needed
Yarn needle to weave in ends
Scissors
Yarn:
Mary Maxim Natural Alpaca
77% Acrylic, 20% Alpaca, 3% Viscose,
262yds/100g, Worsted Weight Yarn
Colorway: Raw Cotton & Cool Stream, see more color inspiration above
Worsted weight yarn suggested substitutes:
WeCrochet Brava Tweed
Mary Maxim Aran Irish Tweed
Yardage:
1655 (1700, 1800, 1900, 2000) (2150, 2250, 2300, 2450) yds.
Abbreviations/Stitches:
blo - back loop only
ch - chain stitches
dc - double crochet
hdc - half double crochet
mdc - mosaic double crochet (see page 2)
sc - single crochet
sl st - slip stitch
st(s) - stitch(es)
Stsc - stacked single crochet
Gauge:
15 sts x 16 rows = 4x4 inches in mosaic blocked
15 sts x 12 rows = 4x4 in hdc blocked
For more on Mosaic Crochet Gauge visit Mosaic Crochet Tips & Tricks + Free Pattern
Measurements/ Crochet Cardigan Sizes:
Finished Garment Bust (includes 6-10 inches of ease):
39 (43, 48, 52, 56) (60, 65, 69, 73)” See schematic.
Skill Level:
Intermediate or advanced crocheter.
Mosaic Crochet Cardigan Video Tutorial:
"When you wish upon a star, your dreams come true."
Notes for the Easy Mosaic Crochet Cardigan
The Wish Up A Star Crochet Cardigan has a unique simple construction making it a beginner-friendly crochet garment. The cardigan body and arms are crocheted flat in one piece with half double crochet stitches, then seamed under the arms and down the sides. After seaming the top of the cardigan, the Mosaic crochet colorwork and ribbing is added to the bottom of the body.
The mosaic crochet colorwork is really what makes this garment shine. It’s a gratifying repeat that adds eye-catching repeats and style.
Sizes are written as Extra Small (Small, Medium, Large, 1X) (2X, 3X, 4X, 5x). There is 6-10 inches of ease
for this pattern, the finished bust measurements are 39 (43, 48, 52, 56) (60, 65, 69, 73)”. This is an oversized
cardigan, for a more fitted look consider going down in size.
Stitch counts are shown in ( ).
For an oversized crochet cardigan you can go up a size to add more ease, for a fitted crochet cardigan, go down a size.
Special Crochet Stitches for the Mosaic Crochet Cardigan
Mosaic Double Crochet (mdc): is worked as a double crochet stitch, but it will be worked into the
skipped stitch three rows below. This stitch will be worked on the front (or right sides) of the cardigan.
Stacked Single Crochet (Stsc): Do NOT chain, insert hook into next stitch, yo, pull up a loop, yo and pull through both loops, insert hook in the vertical bar below, yo, pull up a loop, yo and pull through both loops on the hook. Read more instructions at How To Create the Stacked Single Crochet Stitch (STSC), there is even a video tutorial.
If you want even more free crochet patterns and stitch instructions, check out the Crafty Tutorials & More to Increase Your Skills.

Click the box below to unlock this exclusive subscriber content for free. Add your email and create a password. If you are having trouble, reset your password or login to the Grow Portal.
I'm thrilled to share this amazing crochet pattern with you! Please don't copy, paste, or distribute this pattern. Prefer an ad-free experience? Purchase a digital PDF file for a small fee from one of my online stores. I appreciate your support and readership. You are why I can keep doing what I love and sharing it with others. Thank you from the bottom of my heart.
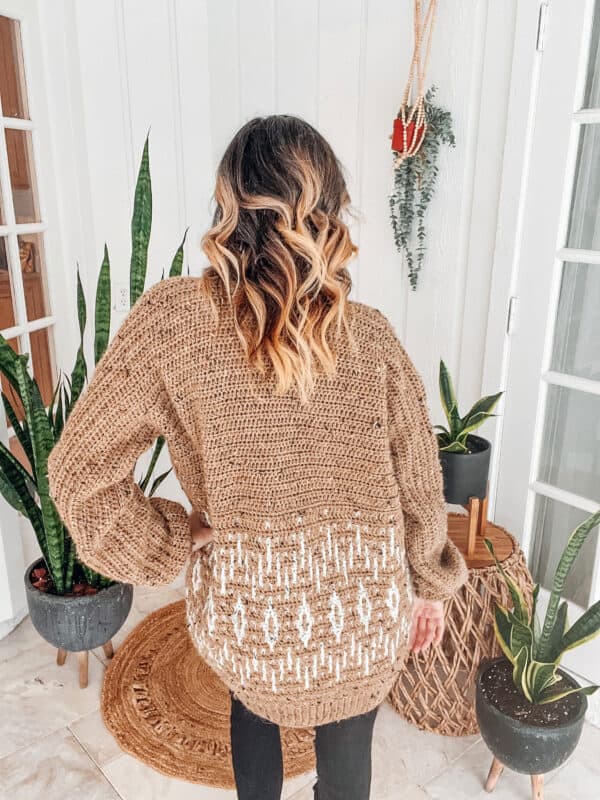
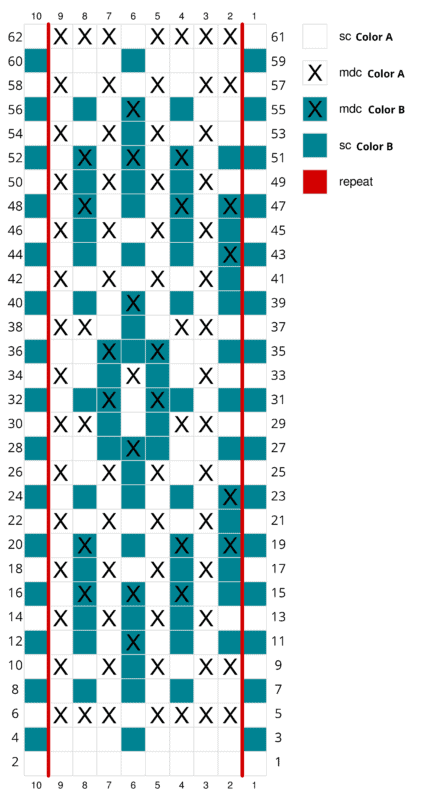
Row 51: With Color B sc in first, *sc 1, (ch 1, skip 1, mdc 1) three times, ch 1, skip 1*; repeat from * to * until the last st, sc 1 in last, turn.
Row 53: With Color A sc in first, *(sc 1, mdc 1) twice, ch 1, skip 1, mdc 1, sc 1, mdc 1*; repeat from * to * until the last st, sc 1 in last, turn.
Row 55: With Color B sc in first, *ch 2, skip 2, sc 1, ch 1, skip 1, mdc 1, ch 1, skip 1, sc 1, ch 1, skip 1*; repeat from * to * until the last st, sc 1 in last, turn.
Row 57: With Color A sc in first, *mdc 2, (sc 1, mdc 1) three times*; repeat from * to * until the last st, sc 1 in last, turn.
Row 59: With Color B sc in first, *ch 4, skip 4, sc 1, ch 3, skip 3*; repeat from * to * until the last st, sc 1 in last, turn.
Row 61: With Color A sc in first, *mdc 4, sc 1, mdc 3*; repeat from * to * until the last st, sc 1 in last, turn.
Row 62: Repeat an even row, turn.
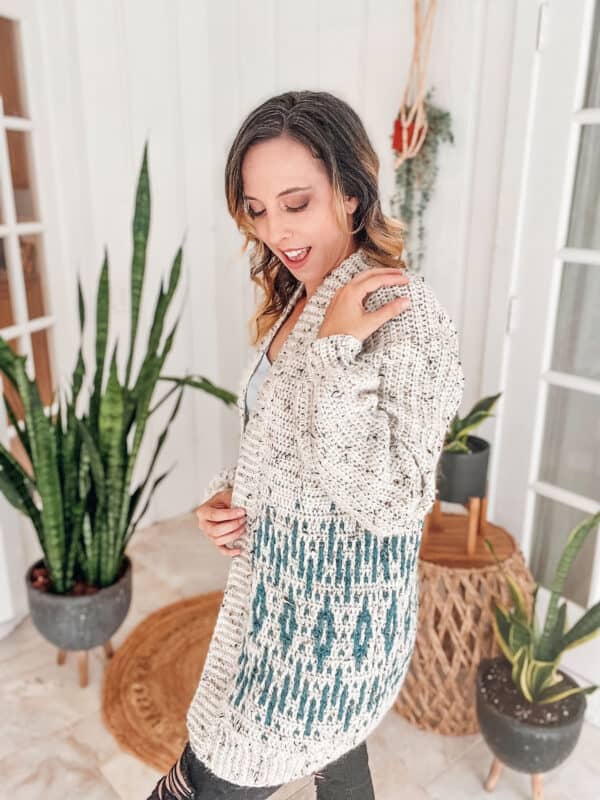
Bottom Ribbing on the Crochet Cardigan
Row 1: With the RS facing ch 12, sc in second chain from hook and across to the bottom body edge, sl st 2 sts along the bottom body edge (these do not count as sts), turn. 11 sts
Row 2: Skip the two sts from the bottom body edge, working in blo sc in each st across until the last st, sc in both loops of the last st, turn.
Row 3: Ch 1 (does not count as a stitch), sc through both loops of the first st, blo sc in each st across, sl st 2 sts along the bottom body edge, turn.
Repeats: Repeat Rows 2-3 across the bottom body edge of the cardigan, ending on a Row 2, do not fasten off.
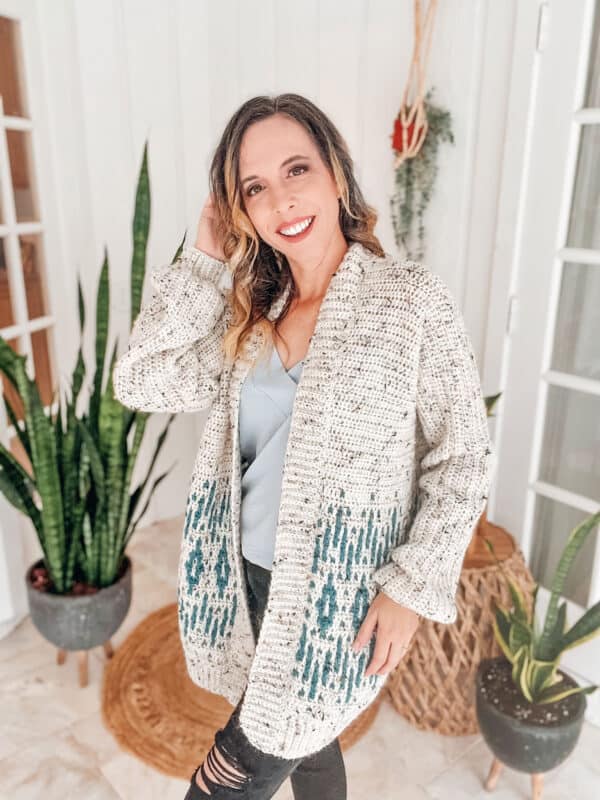
Crochet Cardigan Front Opening Ribbing
This section will be creating the ribbing up the front, around the neck, and back down the other side of the opening. This will be worked with the larger size hook.
Row 1: Rotate the piece 90 degrees to the right and ch 12, sc in second chain from hook and across to the bottom body edge, sl st 2 sts along the two rows of the body edge (these do not count as sts), turn. 11 sts
Row 2: Skip the two sts from the body edge, in blo sc in each st across until the last st, sc in both loops of the last st, turn.
Row 3: Ch 1 (does not count as a stitch), sc through both loops of the first st, blo sc in each st across, sl st 2 sts along the body edge row, turn.
Repeats: Repeat Rows 2-3 around the front opening of the cardigan, and cut yarn.
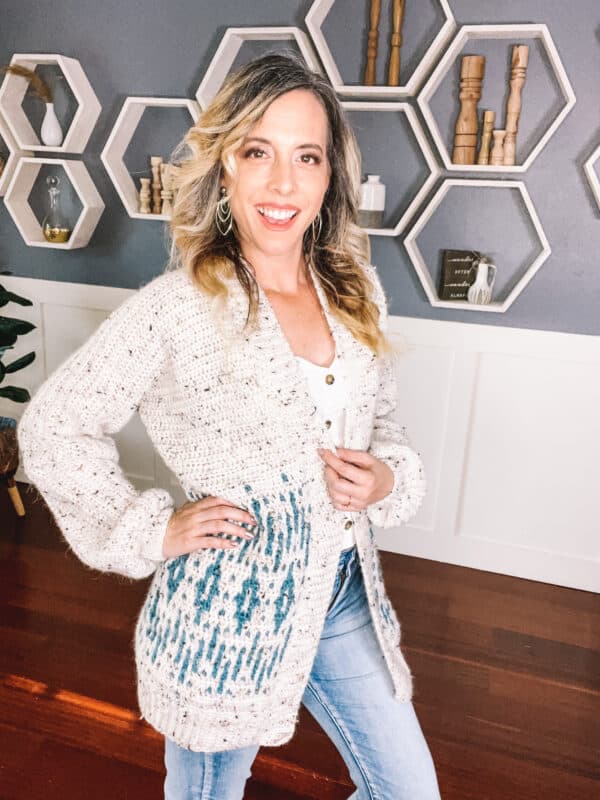
Crochet Cardigan Sleeve Cuff Ribbing
Row 1: With 3.0-hook, join yarn to the bottom of the sleeve next to the seam and ch 12, sc in second chain from hook and across to the sleeve edge, sl st 2 sts (two stitches per every three rows) along the sleeve edge (these do not count as sts), turn. 11 sts
Please note, if you want a tighter cuff, you can alternate between sl st one st per three rows and two sts per three rows.
Row 2: Skip the two sts from the sleeve edge, in blo sc in each st across until the last st, sc in both loops of the last st, turn.
Row 3: Ch 1 (does not count as a stitch), sc through both loops of the first st, blo sc in each st across, sl st 2 sts along the sleeve edge (two stitches per every three rows, this can be adjusted for more or less rows around the cuff), turn.
Repeats: Repeat Rows 2-3 around the sleeve edge opening. Join the last row to the beginning row by slip stitching through blo of first and last row at the same time with the WS facing, cut yarn.
Repeat for the other sleeve.
Finishing Touches For Your Mosaic Crocheted Cardigan
Weave in all ends, light block if necessary. I find these blocking pins and blocking mat speed up the process. Wear and enjoy!
I really hope you enjoyed the simple stitch pattern on this gorgeous crochet cardigan pattern. Want to know how to support a pattern designer? By sharing your Wish Upon A Start Crochet Cardigan on social media. The more you spread the word about this fun pattern, the better I can continue to bring you free crochet patterns.
