Fawning Over You Crochet Sweater
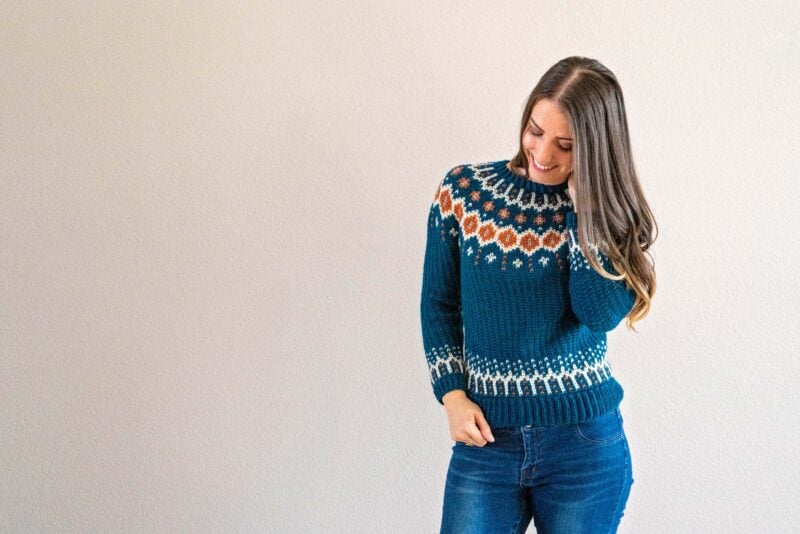
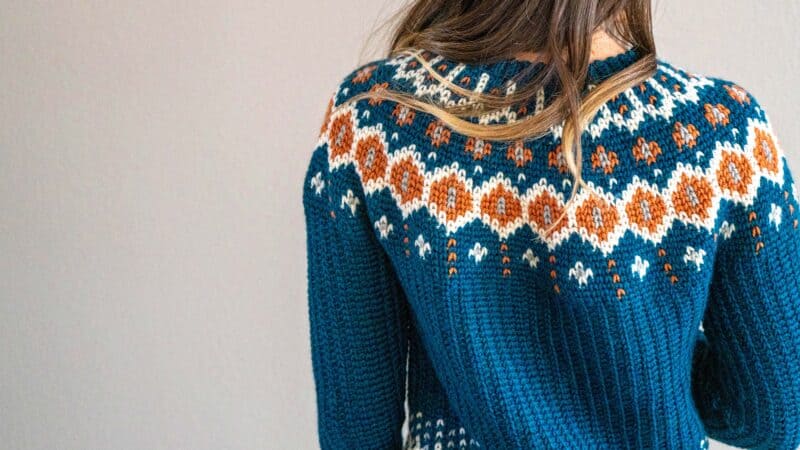
Have you ever tried colorwork crochet? This is a perfect piece to master the skill or show off your knowledge. This sweater is worked in Valley Yarns Northampton, which provides warmth and clear stitch definition, allowing the colorwork design to pop. It’s as fun to crochet as it is to wear, just like the Pine Crochet Sweater or the Arizona Sweater or Sweater Dress.
Disclosure: This post contains affiliate links. Please read my disclosure for more info.
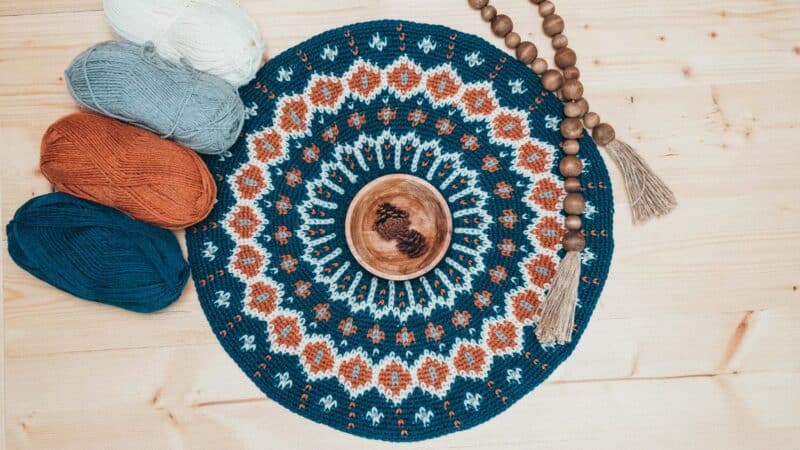
Colorwork in crochet is a form of beautiful artwork. Each time I create the circular yoke I consider stopping there and framing it; it's just so pretty. Many people ask me what level of crochet is a colorwork pattern. Most of the time, crochet colorwork is labeled advanced because of the new techniques introduced. However, I've seen beginner crocheters tackle colorwork by taking it step by step and watching the video tutorial.
Mastering the crochet colorwork craft takes time and patience, but do not be afraid to jump right in. With a few tips to get you started, it will end up being easier than you think.
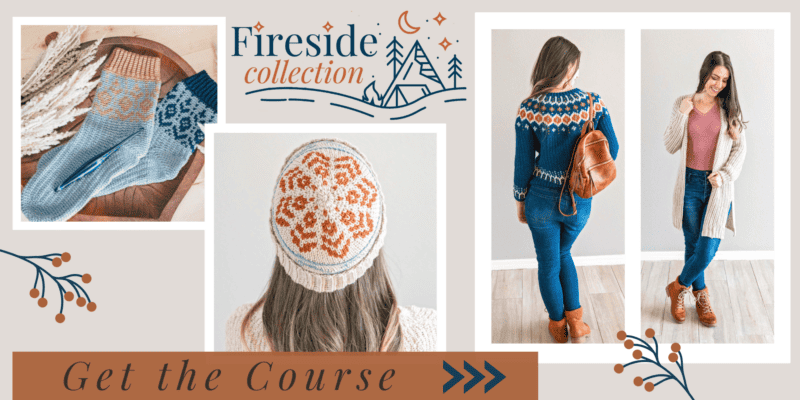
Want to pick your own yarn colors? In the Fireside Collection Course & eBook there are printable charts to color in your own choices. It’s a great way to visualize different colors. Plus, you get all the other patterns in the collection as well! It’s a win-win.
The collection will be released either on the blog or through individual sales over the next few weeks. The Forest Brooks Crochet Beanie is the first one to release.
If you don’t want to wait for each release, get the entire collection for a fantastic promo price. Inside the course, there are extra goodies (like the color your own chart) that won’t be available on the blog. The printable eBook is ad-free and easy for the on-the-go.
Tip: If this is your first time doing colorwork, come read all the tips and tricks for success.
Fawning Over You Crochet Sweater Supplies:
Crochet Hook:
US size H-8 (5mm) crochet hook, or size needed to get gauge.
US size G-6 (4mm) crochet hook.
Notions:
2 Removable stitch markers if needed
Yarn needle to weave in ends
Scissors
Yarn & Yardage:
Valley Yarns Northampton (100% Wool, 100g/247 yds).
A: 4 (4, 4, 5, 6) (7, 8, 8, 9) balls Ocean Heather.
B: 1 (1, 1, 1, 2) (2, 2, 2, 2) balls Natural.
C: 1 (1, 1, 1, 1) (1, 2, 2, 2) balls Autumn Heather.
D: 1 ball Light Grey.
Suggested Yarn Substitute:
A: 7 (7, 8, 9, 11) (13, 15, 16, 17) balls Blue.
B: 1 (1, 1, 1, 2) (2, 2, 2, 2) balls Cream.
C: 1 (1, 1, 1, 1) (1, 2, 2, 2) balls Orange.
D: 1 ball Light Grey.
Abbreviations/Stitches:
Blo: back loop only
Ch: chain
Dec(d): decrease(d)
Inc(d): increase(d)
Rep: repeat
Rnd(s): round(s)
Sc: single crochet
Sc3tog: single crochet 3 together (2 sts decreased)
Ssc: split single crochet
Sk: skip
Sl st: slip stitch
Ssc2tog: split single crochet 2 together (1 st decreased)
St(s):stitch(es)
13 sts and 15 rows = 4" in Split Single Crochet using a larger hook.
Skill Level:
Intermediate
Sizes:
Adult XS (S, M, L, XL) (2XL, 3XL, 4XL, 5XL).
Finished Measurements:
Bust: 37 (39 1⁄2, 41 3⁄4, 46 3⁄4, 51 3⁄4) (56 1⁄2, 60 1⁄4, 64 1⁄2, 68 1⁄4)". Fits with 2-6" positive ease.
Subscribe & Like
Special Stitches
Special Stitches:
Ssc - Split Single Crochet, also known as the Waistcoat Stitch: Insert hook between the legs of
the stitch (on the back of work the hook should be under the horizontal bar and between the upsidedown ‘V’ shape as well), yarn over, pull up a loop to the height of a single crochet, yarn over, pull through both loops on hook. Keep a loose tension so the stitches are easily worked.
Sscinc - Split Single Crochet Increase: Work 2 split single crochets into the next stitch. For a
demonstration of this technique, see the tutorial video linked above.
Sc3inc - Single Crochet Double Increase: [Single crochet in back loop only, single crochet in
front loop only, single crochet in back loop only] into the next st. 2 sts increased.
Construction
This sweater is worked from the top-down with a seamless yoke. The body is worked in continuous rounds without joining. It is important to place a stitch marker on the first stitch of the round, moving it down with each subsequent round.
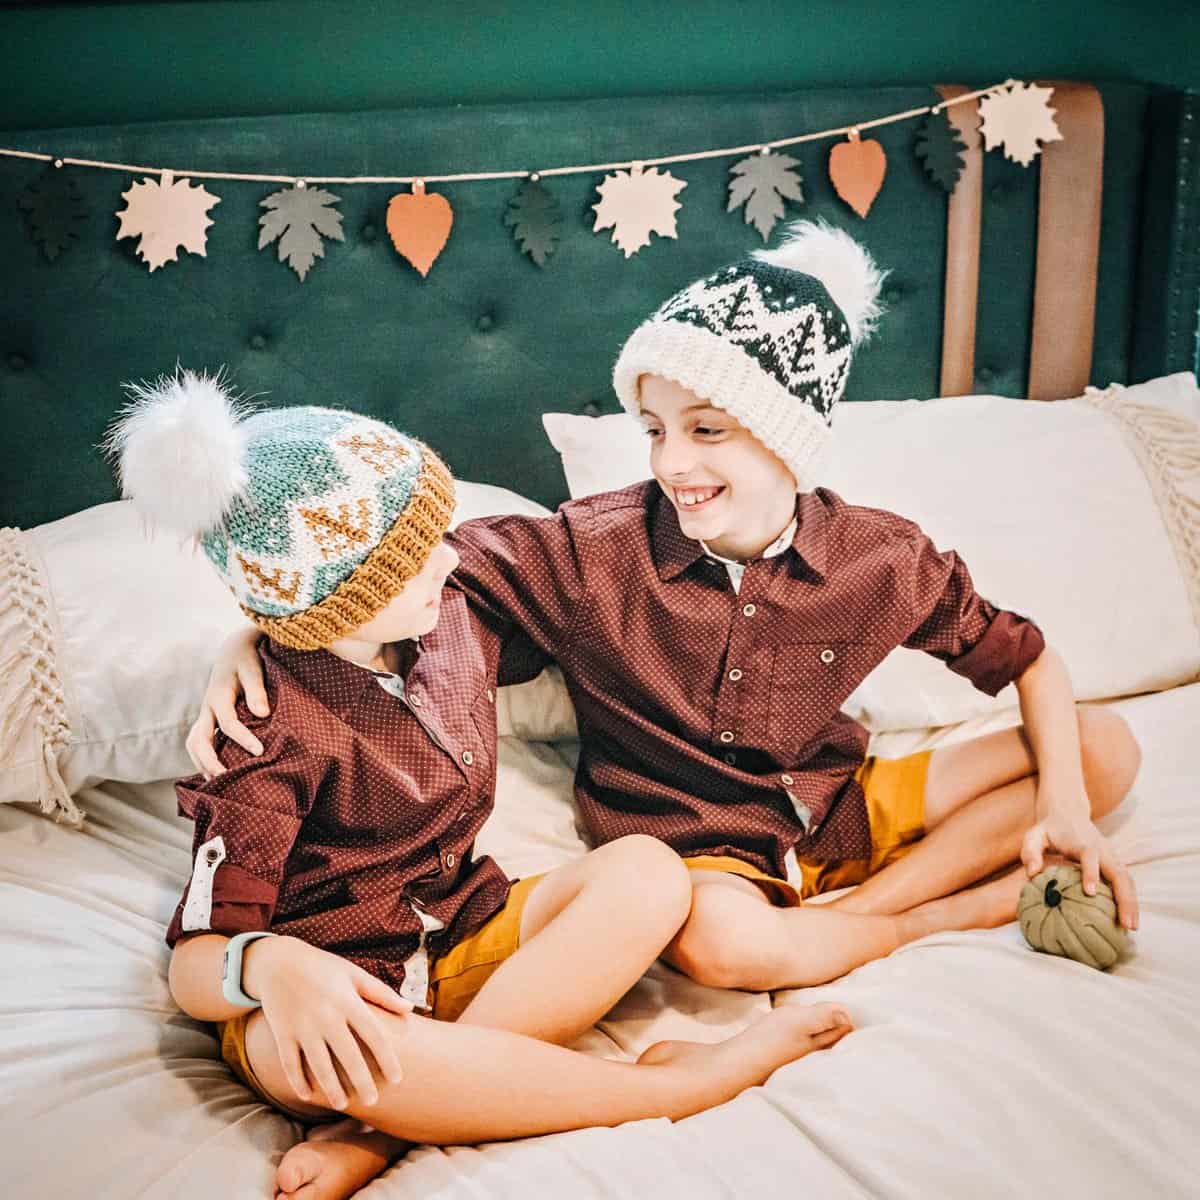
The Forest Brooks Beanie is also worked from top down.
Fawning Over You Crochet Sweater Video Tutorial:
Relax & Crochet
Upgrade to the Printable PDF
Beautifully formatted to print and relax while crocheting. The paid pattern includes:
This pattern on Etsy or Ravelry includes two versions of the colorwork charts: one filled in with the colors of the sample, and one with color letters so you can fill in your own colors with pencils or crayons.
Click the box below to unlock this exclusive subscriber content for free. Add your email and create a password. If you are having trouble, reset your password or login to the Grow Portal.
I'm thrilled to share this amazing crochet pattern with you! Please don't copy, paste, or distribute this pattern. Prefer an ad-free experience? Purchase a digital PDF file for a small fee from one of my online stores. I appreciate your support and readership. You are why I can keep doing what I love and sharing it with others. Thank you from the bottom of my heart.
Crochet Sweater Written Instructions
Collar Ribbing
Join The Kindest Community
Join our vibrant community of crafters on Facebook today. Whether you enjoy crafting with others or simply have burning questions, we've got you covered - join us now!
Rnd 4:
*Ssc 1 B, ssc 3 A, rep from * to end.
Rnd 5:
Rep Rnd 3.
Rnd 6:
*Ssc 2 B, ssc 1 A, ssc 1 B, rep from * to end.
Rnd 7:
*Ssc 1 A, ssc 3 B, rep from * to end.
Rnd 8:
*Ssc 2 A, ssc 1 B, sscinc A, rep from * to end. 120 (120, 125, 135, 140) (145, 145, 145, 145)
sts
Rnd 9:
Ssc with A in each st to end.
Rnd 10:
*Ssc 2 A, ssc 1 C, ssc 2 A, rep from * to end.
Rnd 11:
*Ssc 1 A, ssc 1 C, ssc 1 D, ssc 1 C, ssc 1 A, rep from * to end.
Rnd 12:
Rep Rnd 11.
Rnd 13:
Rep Rnd 10.
Rnd 14:
*Sscinc A, ssc 4 A, rep from * to end. 144 (144, 150, 162, 168) (174, 174, 174, 174) sts.
Rnd 15:
*Ssc 1 B, ssc 2 A, ssc 1 B, ssc 2 A, rep from * to end.
Rnd 16:
*Ssc 2 B, ssc 3 A, ssc 1 B, repeat from * to end.
Rnd 17:
*Ssc 1 C, ssc 2 B, ssc 1 A, ssc 2 B, rep from * to end.
Rnd 18:
*Ssc 2 C, ssc 3 B, ssc 1 C, rep from * to end.
Rnd 19:
*Ssc 1 D, ssc 2 C, ssc 1 B, ssc 2 C, rep from * to end.
Rnd 20:
Rep Rnd 19.
Rnd 21:
Rep Rnd 19.
Rnd 22:
Rep Rnd 18.
Rnd 23:
*Ssc 1 C, ssc 2 B, sscinc A, ssc 2 B, rep from * to end. 168 (168, 175, 189, 196) (203,
203, 203, 203) sts.
Rnd 24:
*Ssc 2 B, ssc 4 A, ssc 1 B, rep from * to end.
Rnd 25:
*Ssc 1 B, ssc 6 A, rep from * to end.
Rnd 26:
*Ssc 3 A, sscinc A, ssc 3 A, rep from * to end. 192 (192, 200, 216, 224) (232, 232, 232,
232) sts.
Rnd 27:
*Ssc 1 C, ssc 3 A, ssc 1 B, ssc 3 A, rep from * to end.
Rnd 28:
*Ssc 3 A, ssc 1 B, ssc 1 D, ssc 1 B, ssc 2 A, rep from * to end.
Rnd 29:
Rep Rnd 27.
Rnd 30:
With A, ssc in each st to end.
Rnd 31:
*SSc1B, Ssc 7; repeat form * to end.
Break Colors B, C and D. The yoke will have a bit of a lean at this point. For best results,
pause and aggressively wet block this section of the yoke to lessen the lean.
How To Wet Block
To wet block a crochet yoke, gently submerge the yoke in lukewarm water, making sure it's fully saturated.
Remove it from the water and gently press out excess moisture without wringing. Lay the yoke flat on a blocking mat, carefully shaping it to the desired dimensions.
Pin the edges in place using rust-proof pins, ensuring the shape is even and symmetrical. Allow the yoke to dry completely before removing the pins.
Yoke Continued
Rnd 32:
With A, ssc in each st to end.
Rnd 33:
*Sc 1 in blo, ssc 1, repeat from * to end. Note: This rnd establishes the stitch pattern
for the remainder of the body. Always work sc blo into sc blo, and ssc into ssc from here until
the colorwork begins again.
SIZE XS ONLY:
Go to Separate Body and Sleeves. 192 sts.
SIZES S, M, and L ONLY:
Rnds 34 and 35: *Sc 1 in blo, ssc 1, rep from * to end.
SIZES S and M ONLY:
Go to Separate Body and Sleeves. - (192, 200, -, -) (-, -, -, -) sts.
SIZE L ONLY:
Rnds 36 and 37: Work in Est.St.Patt to end.
Go to Separate Body and Sleeves. 216 sts.
SIZES XL, 2XL, 3XL, 4XL AND 5XL ONLY:
Rnd 34:
*[Sc 1 in blo, ssc 1] - (-, -, -, 13) (6, 4, 6, 5) times, sc3inc, ssc, rep from * to last - (-, -, -,
0)(8, 12, 8, 16) sts, [sc1 in blo, ssc] - (-, -, -, 0) (4, 6, 4, 8) times; - (-, -, -, 8) (16, 22, 16, 18) sts
inc’d. -(-, -, -, 232) (248, 254, 248, 250) sts.
Rnd 35:
*Sc 2 in blo, ssc 1, rep from * to end.
Size XL ONLY:
Rnds 36 and 37: Work in Est.St.Patt to end.
Go to Separate Body and Sleeves. 232 sts.
SIZES 2XL, 3XL, 4XL AND 5XL ONLY:
Rnd 36:
*[Sc 1 in blo, ssc 1] - (-, -, -, -) (6, 3, 7, 4) times, sc3inc, ssc, rep from * to last - (-, -, -,
-)(24, 46, 24, 10) sts, [sc1 in blo, ssc] - (-, -, -, -) (12, 23, 12, 5) times; - (-, -, -, -) (16, 26, 14, 24)
sts inc’d. - (-, -, -, -) (264, 280, 262, 274) sts.
Rnd 37:
*Sc 2 in blo, ssc 1, rep from * to end.
SIZES 2XL AND 3XL ONLY:
Rnds 38 and 39:
*Sc 1 in blo, ssc 1, rep from * to end.
Go to Separate Body and Sleeves. - (-, -, -, -) (264, 280, -, -) sts.
SIZES 4XL AND 5XL ONLY:
Rnd 38:
*[Sc 1 in blo, ssc 1] - (-, -, -, -) (-, -, 6, 6) times, sc3inc, ssc, rep from * to last - (-, -, -, -)
(-, -, 10, 22) sts, [sc1 in blo, ssc] - (-, -, -, -) (-, -, 5, 11) times; - (-, -, -, -) (-, -, 18, 18) sts inc’d. -
(-, -, -, -) (-, -, 280, 292) sts.
Rnd 39:
*Sc 1 in blo, ssc 1, rep from * to end.
Rnd 40:
*[Sc 1 in blo, ssc 1] - (-, -, -, -) (-, -, 6, 7) times, sc3inc, ssc, rep from * to last - (-, -, -, -)
(-, -, 30, 4) sts, [sc1 in blo, ssc] - (-, -, -, -) (-, -, 15, 2) times; - (-, -, -, -) (-, -, 18, 18) sts inc’d. -
(-, -, -, -)(-, -, 298, 310) sts.
Rnd 41: *Sc 1 in blo, ssc 1, rep from * to end.
Go to Separate Body and Sleeves. - (-, -, -, -) (-, -, ) sts.
Separate for Body & Sleeves
Rnd 1:
Ch 4 (8, 10, 10, 12) (12, 12, 12, 14) for underarm, sk next 40 (40 , 42, 42, 44) (52, 54, 56,
58) sts for Left Sleeve, work 56 (56, 58, 66, 72) (80, 86, 92, 96) sts in est st patt. for Back, ch
4 (8, 10, 10, 12) (12, 12, 12, 14) for underarm, sk next 40 (40 , 42, 42, 44) (52, 54, 56, 58) sts
for Right Sleeve, work 56 (56, 58, 66, 72) (80, 86, 94, 98) sts in est st pat for Front. 120 (128, 136, 152, 168) (184, 196, 210, 222) Body sts.
Sweater Body
Rnd 1:
Sc 4 (8, 10, 10, 12) (12, 12, 12, 14),work 56(56,58,66,72)(80,86,94,98) in Est.St.Patt, sc 4 (8, 10, 10, 12) (12, 12, 12, 14), work the remaining st in Est.st.patt.
Rnd 2:
work in Est.st.patt.to the end of rnd.
Rep Rnd 2: 22(22,22,22)(26,26,26) times or until body measures 5½” less than desired finished
length.
Bottom Body Colorwork
SIZES XS, S, M, L, XL, 2XL, AND 3XL ONLY:
Set-Up Rnd: With A, ssc in each st to end. 120 (128, 136, 152, 168) (184, 196, -, -) sts.
SIZES 4XL AND 5XL ONLY:
Set-Up Rnd: With A, *ssc - (-, -, -, -) (-, -, 104, 110), sscinc; rep from * once more. - (-, -, -, -) (-, -,212, 224)sts.
All Sizes:
Rnd 1:
*Ssc A1, Ssc B1, Ssc A2; rep from * to end.
Rnd 2:
Ssc A, to end.
Rnd 3:
Rep Rnd 1.
Rnd 4:
Rep Rnd 2.
Rnd 5:
Rep Rnd 1.
Rnd 6:
*Rep Rnd 1 * to end.
Rnd 7:
*Ssc B3, ssc A1; rep from * to end.
Rnd 8:
*Ssc B1, Ssc A1, Ssc B2 rep from * to end.
Rnd 9:
*Ssc A1, Ssc C1, Ssc A1, Ssc B1 rep from * to end.
Rnd 10:
*Ssc A3, Ssc B1 ; rep from * to end.
Rnd 11:
Rep Rnd 9.
Rnd 12:
Rep Rnd 10.
Rnd 13:
Rep Rnd 9. Break Color B and C.
Rnd 14:
With A, ssc in each st to end. Sl st into the first st of rnd to join.
Body Bottom Ribbing
Change to smaller hook. Ch 11.
Row 1:
Sc in blo of second ch from hook and each ch to body, sl st in next 2 body sts (these are
not included in the st count for the Rib), turn. 10 sts.
Row 2:
Sk 2 sl sts on body, sc in blo of each sc to end, turn.
Row 3:
Ch1 (does not count as a st), sc in blo sc of each sc to body, sl st in next 2 body sts, turn.
Rep Rows 2-3 around body. Join the last row to the beginning row by sl st in blo of first and last row at the same time with WS facing.
Sweater Sleeves
Join with A at the center of underarm sts.
Set-Up Rnd:
Sc 2 (4, 6, 6, 6) (6, 6, 6, 8) in underarm sts, [Est.St.Patt] 40(40, 42, 42, 44)(52,54,56,58) sts,sc 2 (4, 4, 4, 6) (6, 6, 6, 6) in underarm sts. Do not join. Sleeves are worked in continuous rnds. 44 (48,52, 52, 56) (64, 66, 68, 72) sts.
Rnd 1: *Est.St.Patt to end of rnd.
Rep Rnd 1: 4 (5, 3, 3, 2) (2, 2, 1, 1) more time(s).
Dec Rnd: *Sc 1 in blo, ssc 1; rep from * to last 2 sts, remove SM, sc3tog, place SM on this st as first st of next rnd. 2 sts dec’d. Cont in est.st.pattern, rep Dec Rnd every 6th (7th, 5th, 5th, 4th) (4th, 4th, 3rd, 3rd) rnd 5 (5, 7, 7, 9) (11,12, 13, 15) more times. 32 (36, 36, 36, 36) (40, 40, 40, 40) sts.
Work even in established pattern until Sleeve measures 11¼ (11¾, 11¾, 12¼, 12¼) (12¾, 12¾, 13¼, 13¼)”,or 4½” less than desired finished length.
Sleeve Colorwork
Set Up Rnd:
Ssc in each st to end.
Rnd 1:
*Ssc A1, Ssc B1, Ssc A2; rep from * to end.
Rnd 2:
Ssc A, to end.
Rnd 3:
Rep Rnd 1.
Rnd 4:
Rep Rnd 2.
Rnd 5:
Rep Rnd 1.
Rnd 6:
*Rep Rnd 1 * to end.
Rnd 7:
*Ssc B3, ssc A1; rep from * to end.
Rnd 8:
*Ssc B1, Ssc A1, Ssc B2 rep from * to end.
Rnd 9:
*Ssc A1, Ssc C1, Ssc A1, Ssc B1 rep from * to end.
Rnd 10:
Ssc A3, Ssc B1 ; rep from to end.
Rnd 11:
Rep Rnd 9.
Rnd 12:
Rep Rnd 10.
Rnd 13:
Rep Rnd 9. Break Color B and C.
Rnd 14:
With A, ssc in each st to end. Sl st into the first st of rnd to join.
The colowork chart for the sleeve cuff is the same as the bottom body colorwork.
Ribbed Cuff
Change to the smaller hook. Ch 6.
Row 1:
Sc in blo of second ch from hook and each ch to sleeve edge, sl st in next 2 Sleeve sts (these are not included in the st count for the Cuff), turn. 5 sts.
Row 2:
Sk 2 sl sts on Sleeve, sc in blo of first 5 scs, sc through both loops of last sc, turn. Row 3: Ch 1, sc through both loops of first sc, sc in blo of next 4 scs, sl st in next 2 Sleeve sts, turn. Rep Rows 2-3 around Sleeve. Join last row to beginning row by sl st in blo of first and last row at the same time with WS facing. Repeat for the other Sleeve.
Finishing
Fasten off and weave in all ends, closing any gaps under the arm. Block to finished measurements. And if you are ready for your next fall project, also check out the Woodland Walker Crochet Socks, another colorwork pattern, or the Campside Crochet Cardi which has easy chill stitches.
To maintain the beautiful shape and texture of your Fawning Over You Crochet Sweater, it's important to store it properly. After blocking and wearing, gently fold the sweater and place it in a breathable cotton bag to protect it from dust and pests.
Avoid hanging the sweater, as this can cause it to stretch out of shape over time. If possible, store it flat in a drawer or on a shelf, keeping it away from direct sunlight to prevent fading.
By following these care tips, your crochet sweater will stay looking fresh and stylish for seasons to come. Cheers and Happy Crocheting!
Well That Was Fun! What's Next?
📌 PIN THIS POST - Don't lose this project; save it to your Pinterest crochet board so you can quickly come back to it again.
💌 SHARE - Share your yarn choice, in-progress, or finished projects on Facebook or Instagram and use the hashtag #brianakdesigns
🥂 JOIN - Join the kindest crafters in the Briana K Designs Community Group on Facebook. We love yarny friends!
🔗 RAVELRY LINK -Link and share your project on Ravelry. Having inspirational photos can help crafters.