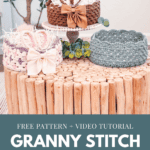
Granny Stitch Easter Bunny Basket Pattern
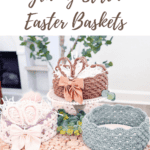
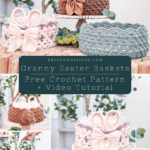
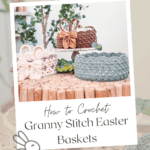
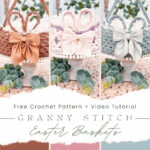
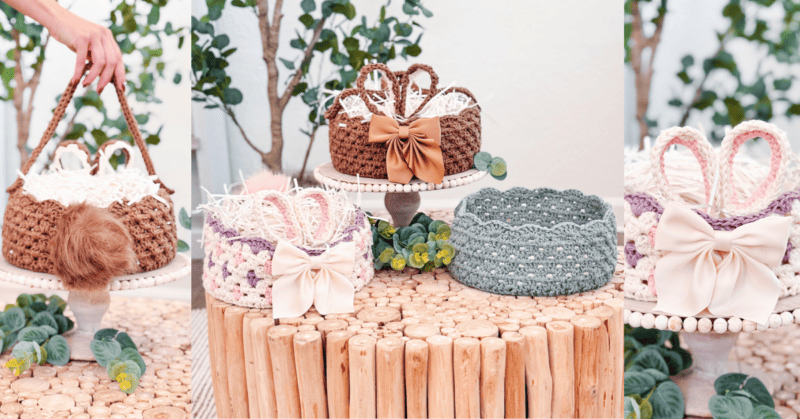
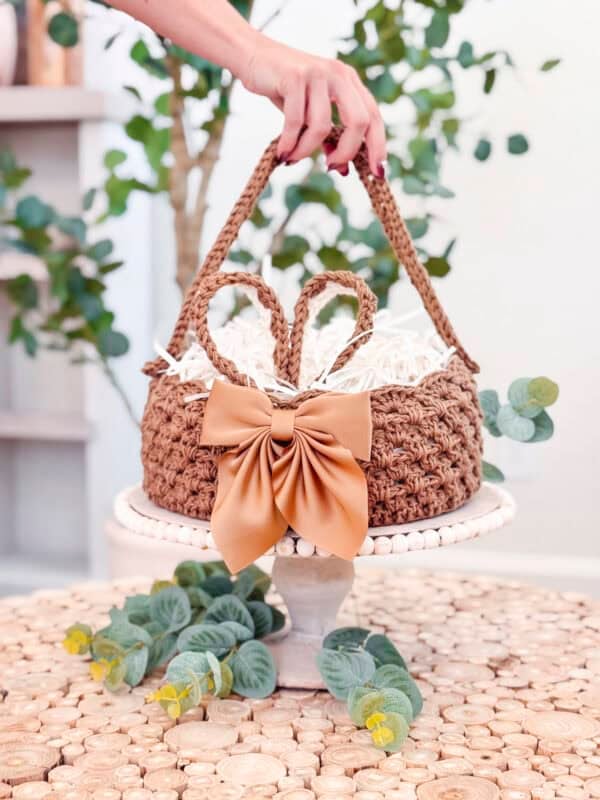
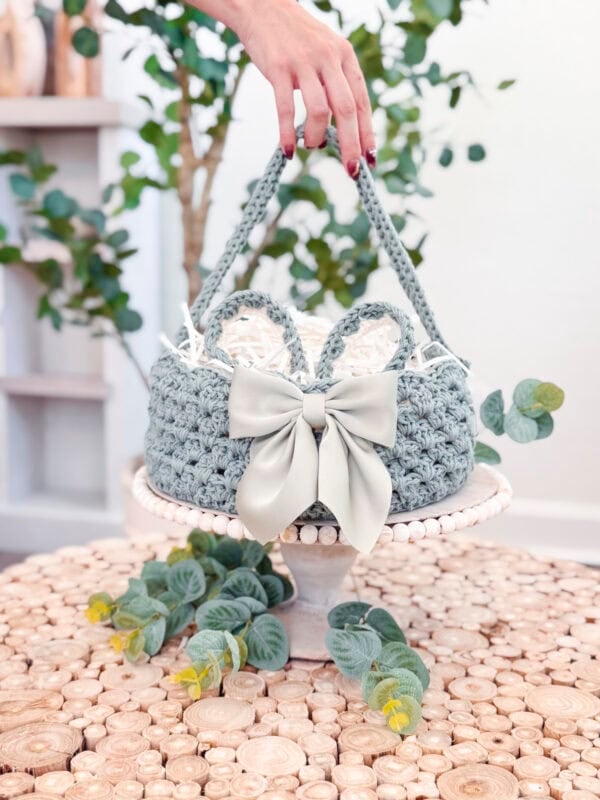
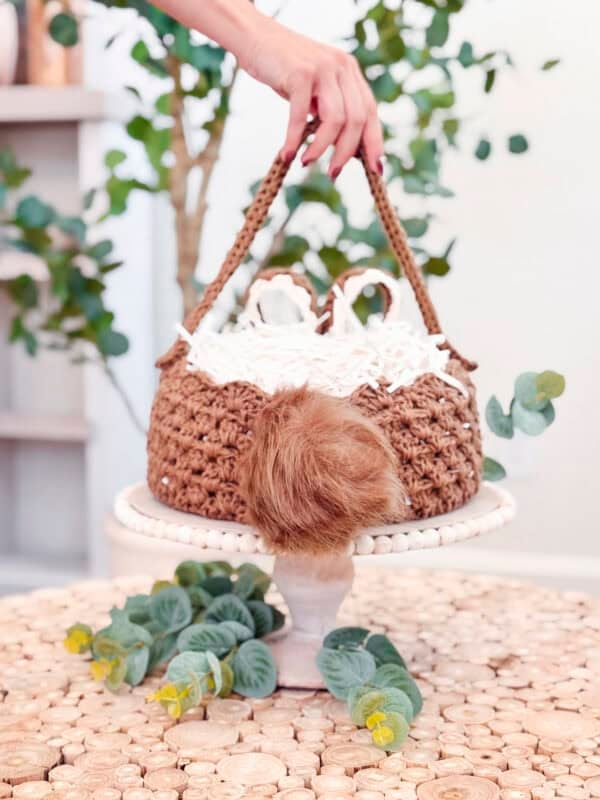
The Granny Stitch Easter Basket is a delightful, timeless treasure that brings a burst of springtime joy to any home! Worked with two strands of yarn held together and the classic granny stitch worked back and forth in rows, this charming basket is both nostalgic and stylish, making it the perfect piece for Easter celebrations.
Disclosure: This post contains affiliate links. Please read my disclosure for more info.
Whether you’re filling it with colorful eggs, sweet treats, or festive decorations, its sturdy yet cozy texture adds a handmade touch of warmth. Don’t forget to fill your basket with Reusable Easter Eggs! The Be My Bunny Buddy would make an adorable companion if you’re looking for a friend to add to your basket, and the Bunny Ear Hair Ties are perfect for adding a little fun to a sweet hairstyle!
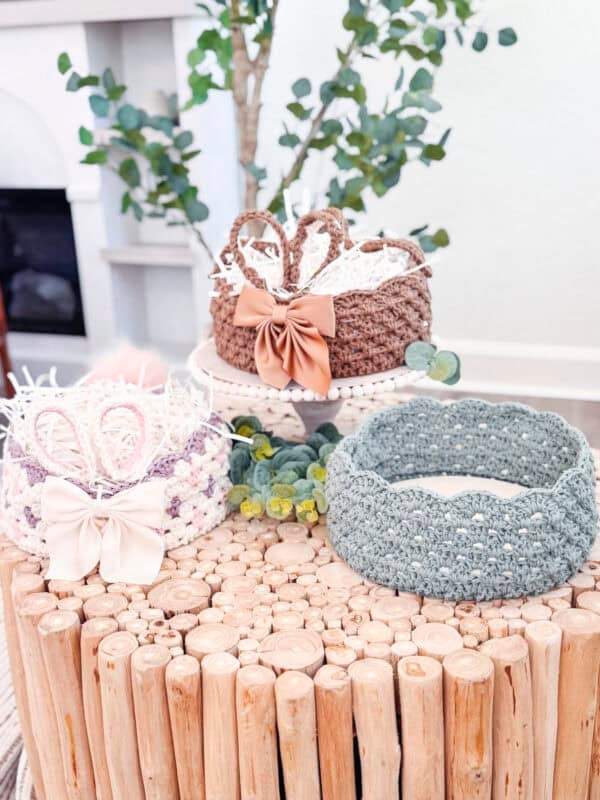
Feel free to make your Easter basket in a solid color, or add cheerful pops of pastel yarn to make a beautiful keepsake that can be cherished year after year! Use colors that coordinate with your style to create a functional storage piece of home decor. With detachable features, this basket is perfect for year-round use!
Crochet Supplies
Yarn
WeCrochet Dishie
100% Cotton; 190yds/100g
Colorways Shown:
Swan with Blush & Lilac Mist
Mushroom & Swan
Inlet & Swan
Yarn will be held double-stranded throughout.
Yarn Quantities
500 total yards
3 balls of main color, one ball of any accent colors
Yarn Substitutions
Lily Sugar’n Cream Worsted
100% Cotton, 120yds/70g
Village Yarn Craft Cotton
100% Cotton, Solids 115yds/71g
Remember always to check the gauge and drape when substituting yarns.
Crochet Hook
Size US I (5.5mm) Crochet Hook or hook to obtain gauge.
Notions
Scissors
Yarn Needle
Removable Stitch Marker
16 Gauge Copper Wire
Round Nose Pliers Wire Cutter
Pompom Buttons
Large Pompoms
Pompom in Teal Color
Optional: Wooden Circle For A Flat, Sturdy Bottom – 10 inch
Optional: Hair Bows
Skill Level
Advanced Beginner
What you’ll love about this pattern.
🩶 Timeless & Classic: The granny stitch gives this basket a vintage, handmade charm.
🩶 Beginner-Friendly: Easy-to-follow pattern, great for all skill levels!
🩶 Customizable: Choose your favorite spring colors to match your decor.
🩶 Reusable & Durable: A handmade treasure to enjoy year after year!
One Size
Basket measures roughly 5″ (Height) x 10″ (diameter) without handle
Abbreviations
blo – back loop only
ch – chain
dc – double crochet
flo – front loop only
RS – right side
sc – single crochet
sl st – slip stitch
st(s) – stitch(es)
Stsc – Stacked single crochet
WS – wrong side
Gauge
12 sts and 7 rows = 4″ by 4″ in st pattern
How to Crochet A Gauge Swatch
Working a gauge swatch will let you know if you will have the correct sizing for this pattern. It will also help you practice the stitches used in this project and improve your stitch work for a flawless look.
Are you struggling to match the gauge? Check out the blog post on What is Crochet Gauge and How To Fix It
Construction
This Easter basket is worked with two strands of yarn held together throughout. First, we’ll crochet the bottom of the basket and set it aside. Next, we’ll create the body piece by working the granny stitch back and forth in rows, finishing with a scalloped edge. Finally, we’ll crochet the ears and handle and finish the basket by adding a fluffy tail.
If you love Easter baskets, try the Wheat Stitch Easter Bunny Basket or any of my other imaginative Easter Baskets!
Special Stitches
Magic Ring: To make a magic ring, wrap the yarn around your fingers to form a loop, then insert your hook under the first strand, grab the working yarn, and pull up a loop. Chain one to secure (if needed), then work your stitches into the ring, crocheting over the tail. Once all stitches are made, pull the tail tightly to close the center, then continue with your pattern.
Stacked Single Crochet (Stsc): Do NOT chain, insert hook into next stitch, yo, pull up a loop, yo and pull through both loops, insert hook in the vertical bar below, yo, pull up a loop, yo and pull through both
loops on the hook.
Pattern Notes
- Before you dive into your project, take a moment to identify the stitch and row counts that match the size you’re making. By highlighting or marking them, you’ll save time and effort later on. Trust us, this small step will make a big difference in your crochet journey!
- Using a stitch marker at the beginning (or end) of each round is recommended.
- Two strands of yarn will be held together throughout the entire project.
- This Pattern Uses Standard US Terminology.
Subscribe & Like
Video Tutorial for the Granny Stitch Easter Bunny Basket
Relax & Crochet
Upgrade to the Printable PDF
Beautifully formatted to print and relax while crocheting. The paid pattern includes:
The Ad-Free PDF can be purchased on Etsy or Ravelry.
Click the box below to unlock this exclusive subscriber content for free. Add your email and create a password. If you are having trouble, reset your password or login to the Grow Portal.
I’m thrilled to share this amazing crochet pattern with you! Please don’t copy, paste, or distribute this pattern. Prefer an ad-free experience? Purchase a digital PDF file for a small fee from one of my online stores. I appreciate your support and readership. You are why I can keep doing what I love and sharing it with others. Thank you from the bottom of my heart.
Written Crochet Pattern Instructions
Basket Base
With two strands of Main Color held together.
Do not fasten off. Go to Basket Body.
Join The Kindest Community
Join our vibrant community of crafters on Facebook today. Whether you enjoy crafting with others or simply have burning questions, we’ve got you covered – join us now!
Basket Body – Solid Color
Still working with two strands of Main Color. If desired, work Rnd 1 in the flo.
Rnd 1 (WS):
Stsc in first, dc in each st around, join and turn. | 90 sts
Rnd 2 (RS):
Stsc in the space before the first dc of the round, 2 dc in same space, skip 3 dc sts, *3 dc in the space between dc sts, skip 3 dc; repeat from * around, join with a sl st, and turn. | 90 sts, 30 granny groups
Rnd 3 (WS):
Working into the first space, Stsc, 2 dc in same space, *3 dc in next space; repeat from * around, join to top of Stsc, and turn. | 90 sts, 30 granny groups
Rnds 4-7:
Repeat Rnd 3.
Rnd 8:
Working into the first space, Stsc, 4 dc in same space, sc in the next space, *5 dc in the next space, sc in the next space; repeat from * around, join and fasten off. Weave in ends.
Basket Body – Polkadot
With two strands of yarn held together, use the Accent Colors of your choice for the polkadot rounds.
Start with the Main Color. Always carry the yarn on the WS of the work.
Rnd 1 (WS):
Stsc in the first, dc in each st around, join and turn. | 90 sts
Rnd 2 (RS):
Stsc in the space before the first dc of the round, 2 dc in same space, *skip 3 dc sts, with Accent Color, 3 dc in the space between dc sts, skip 3 dc sts, with Main Color 3 dc in the space between dc sts; repeat from * around to last 6 sts, skip 3 dc, with Accent Color 3 dc in the space between dc sts, skip the last 3 dc, join to top of Stsc with Main Color and turn. | 90 sts, 30 granny groups
Rnd 3:
Working into the first space with Main Color, Stsc, 2 dc in same space, *3 dc in next space; repeat from * around, join to top of Stsc with Accent Color, and turn.
Rnd 4:
Working into the first space with Accent Color, Stsc, 2 dc in same space, *with Main Color 3 dc in next space, with Accent Color 3 dc in next space; repeat from * around until the last space, with Main Color 3 dc in last space, join to top of Stsc with Main Color, and turn.
Rnd 5:
Repeat Rnd 3.
Rnd 6:
Working into the first space, Stsc, 2 dc in same space, *with Accent Color 3 dc in next space, with Main Color 3 dc in next space; repeat from * around until the last space, with Accent Color 3 dc in last space, join to top of Stsc with Main Color, and turn.
Rnd 7:
Repeat Rnd 3, join to top of Stsc with Accent Color, and turn.
Rnd 8:
Working into the first space with Accent Color, Stsc, 4 dc in same space, sc in the next space, *5 dc in the next space, sc in the next space; repeat from * around, join, and fasten off. Weave in ends.
Video Tutorial Part 2
Bunny Ears
Cut 2 pieces of wire, each 16 inches long, and curl the ends to not be sharp points.
Row 1:
With Accent Color, place a slip knot onto your hook. Working around the wire, sc 1, *insert your hook into the left front bar of the sc, then under the wire, yo, pull up a loop, pull through two loops, yo, and pull through the two remaining loops on your hook; repeat from * until there are 31 sts worked around the wire, turn. See video. | 31 sts
If working around the wire isn’t for you, foundation single crochet 31 sts and feed the wire through the row.
Row 2:
Join with Main Color and Stsc in first, dc in the same, *skip 2 sts, 3dc in the next; repeat from * until the last 3 sts of the row, skip 2 sts and dc in the last, turn.
Fasten off and weave in the Accent Color tail ends. Leave the Main Color tails for permanently attaching to the basket if desired. For removable bunny ears, weave in all ends.
Basket Handle
Row 1 (RS):
Ch 65, starting in the 2nd ch from the hook, sl st in each st across, turn. | 64 sts
Row 2:
Stsc in the first st, dc in same, skip 2 sts, *3 dc in next, skip 2 sts; repeat from * until the last st of the row, dc in the last, turn. | 63 sts
Row 3:
Ch 1, sl st in each st across, fasten off, leaving a tail end for sewing buttons.
Assembly & Finishing
If desired, place the wooden 10 inch circle into the bottom of the basket.
Optional: To strengthen the sides, cut plastic canvas into approximately 5-inch-wide strips. If needed, sew multiple pieces together to ensure it’s long enough to wrap around the basket’s sides.
Secure the ends of the canvas and position it inside the basket at the base. Then, stitch the canvas in place by weaving through the basket and Round 7 of the basket body.
Attaching the Bunny Ears
For permanent ears, insert the wire from the bunny ears through the top edge of the basket. Using a yarn needle and Main Color yarn tails, stitch the ears securely to the inside of the basket.
Wrap the yarn around the wire to firmly attach it to the edge of the crochet fabric. For detachable ears, twist the wire ends together. After adding Easter grass, shove the ends down inside the Easter grass and position as desired.
Adding the Pompom Tail
Position the pompom at the center of the back of the basket. Thread the long yarn tails through the fabric and canvas, weaving them from the outer edge to the inside.
Pull tight and knot the ends securely to hold the pompom in place. You can also use a pompom button for a detachable tail. See video.
OR
Using an extra large pompom maker, create a large pompom in the accent color. When tying the center of the pompom, leave a long tail and use it to attach to the basket.
Attaching the Handle
Using the yarn ends, attach a pompom button to each side of the handle, fasten off, and weave in ends. When the handle is needed, simply button to the side of the basket through one of the granny stitch spaces.
Subscribe to my youtube channel
Weave in any remaining ends. Fill your basket with Easter grass and have fun hunting for Easter eggs!
Like baskets, reusable and durable crocheted projects are a perfect blend of beauty and practicality! Handcrafted with love and care, these sturdy creations are made to last, offering a sustainable and charming alternative to store-bought storage.
Crocheted baskets bring a cozy, handmade touch to any space for organizing, decorating, or seasonal festivities. Plus, they’re endlessly customizable—choose your favorite colors, textures, and sizes to suit your style.
Best of all, they can be used year after year, making them a craft and a cherished part of your home’s story! Try the Wheat Stitch Nesting Baskets and the Herringbone Baskets to add a touch of texture to your decorating.
Cheers, and happy crocheting!
Well That Was Fun! What’s Next?
📌 PIN THIS POST – Don’t lose this project; save it to your Pinterest crochet board so you can quickly come back to it again.
💌 SHARE – Share your yarn choice, in-progress, or finished projects on Facebook or Instagram and use the hashtag #brianakdesigns
🥂 JOIN – Join the kindest crafters in the Briana K Designs Community Group on Facebook. We love yarny friends!
🔗 RAVELRY LINK -Link and share your project on Ravelry. Having inspirational photos can help crafters.