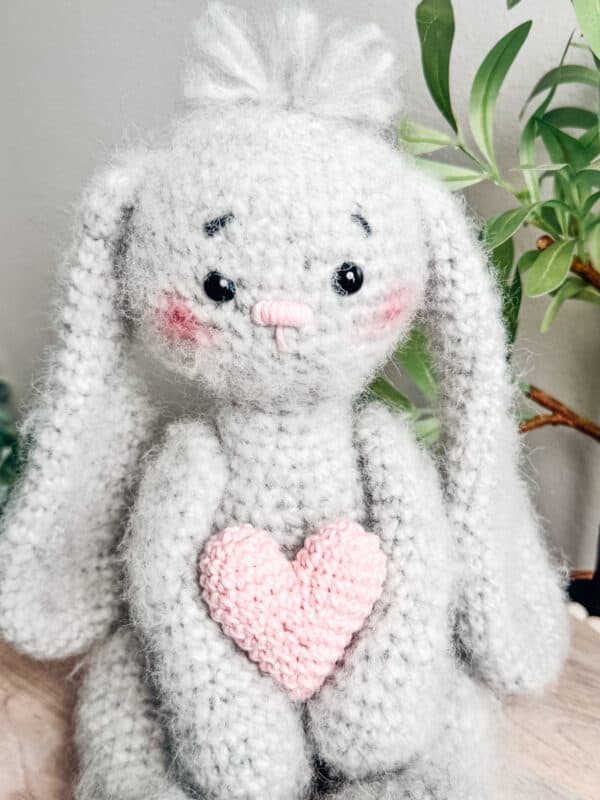
This cute crochet bunny pattern might steal your heart (and a carrot, too). If you want to know how to crochet a bunny with floppy ears, keep on reading for an adorable twist on a classic plushie. It’s perfect for home decor, holiday decor, a baby nursery, or to snuggle with. This amigurumi stuffie is not only great for Valentine’s Day, but Easter as well. If you love bunnies also check out the Bunny Easter Basket Crochet Pattern and the Newborn Bunny Crochet Pattern.

Disclosure: This post contains affiliate links. Please read my disclosure for more info.
What you’ll love about this pattern.
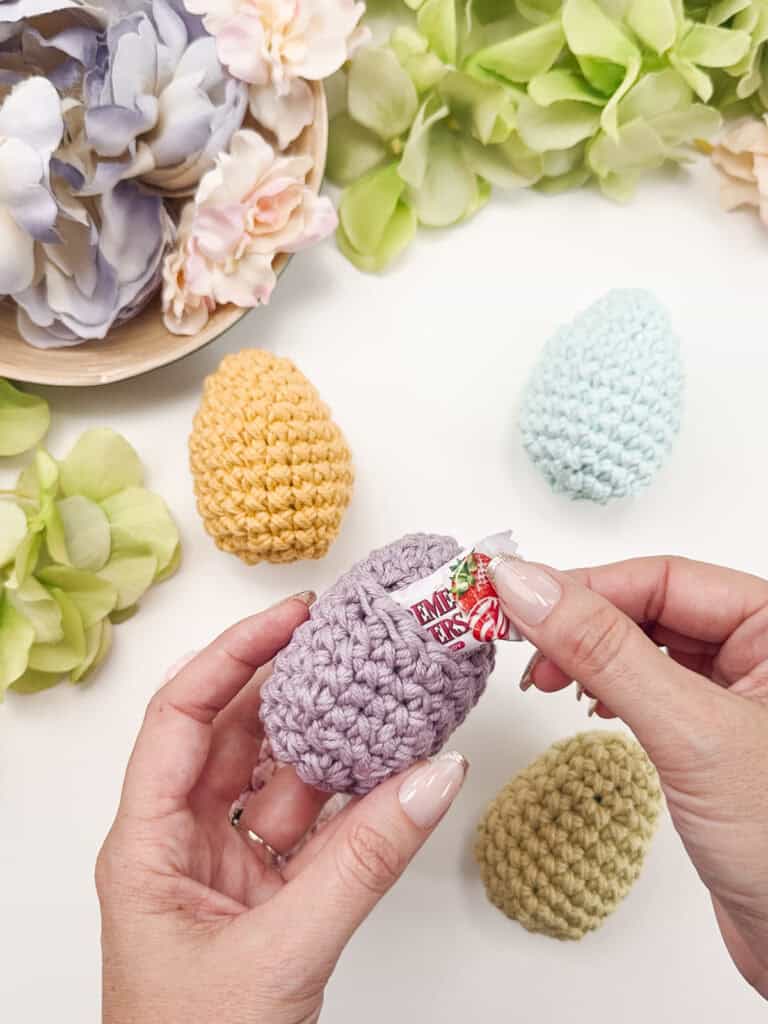
Hop into the world of adorable amigurumi with our enchanting Crochet Bunny Pattern! This delightful pattern lets you create a charming bunny with movable arms and legs, adding an extra touch of playfulness to your handmade creation. This sweet friend would look adorable sitting in a Wheat Stitch Easter Bunny Basket surrounded by Reusable Crochet Easter Eggs!
Whether you’re gearing up for Easter festivities or spreading love during Valentine’s Day, this bunny comes prepared with a heart accessory symbolizing affection and a carrot for some whimsical charm. Your finished amigurumi bunny will be a heartwarming addition to any occasion. Get your crochet hooks ready and craft your own cuddly companion today!
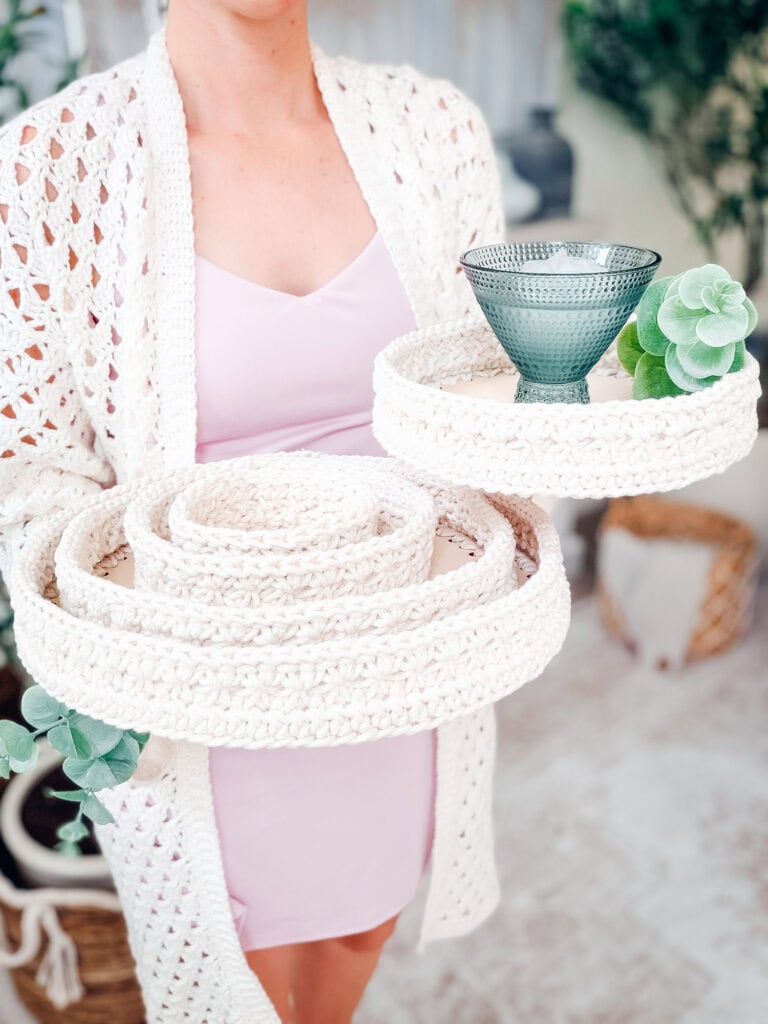
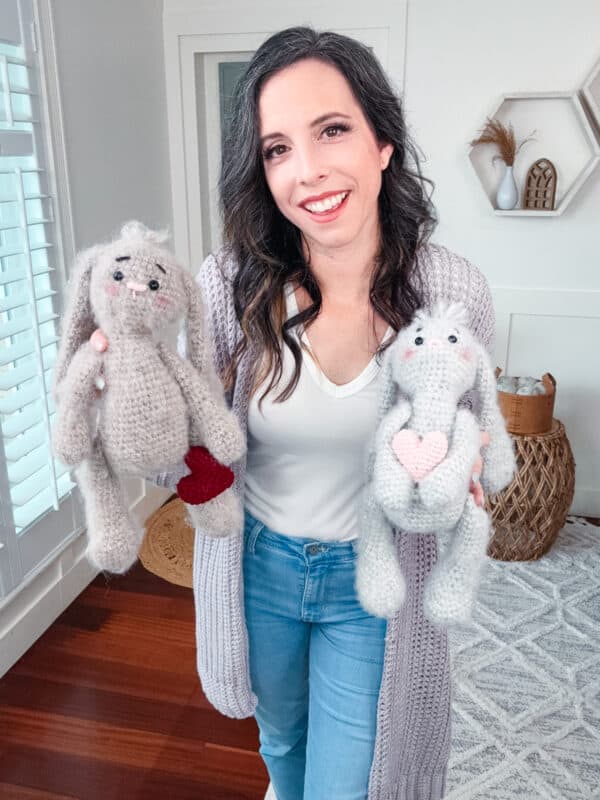
And if you are wondering what cardigan I’m wearing in the image above, it’s a free pattern right here on the blog. Check out the Campside Cardi Easy Knit-Look Crochet Pattern
Can a thicker yarn be used?
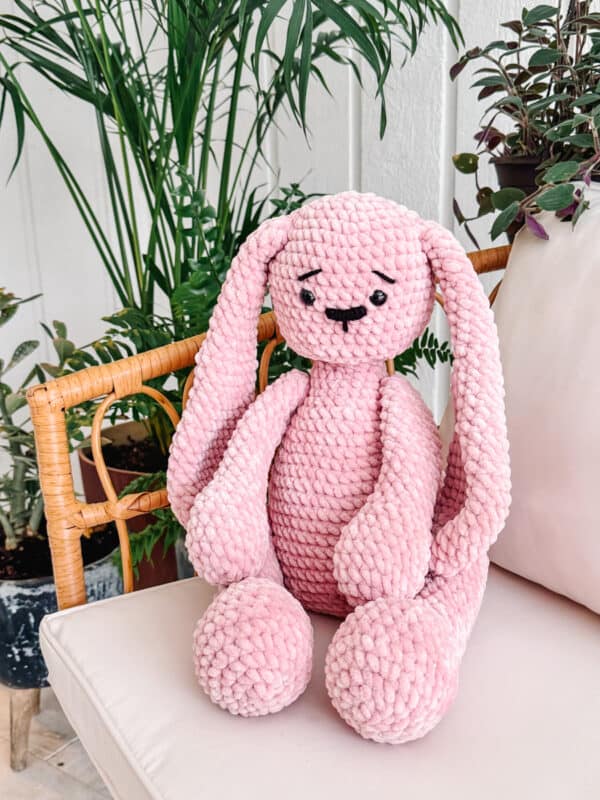
I took this to the test and made another crochet bunny using a super bulky pink chenille yarn and a 6mm crochet hook. I think it turned out fabulous! Working with a chenille yarn was new to me so here are a few tips:
- Start your magic ring with a cotton yarn, working the stitches in the first round with chenille, but you will be able to pull the ring closed without breaking the yarn since cotton is strong. Chinelle often breaks.
- When attaching the legs and arms, use a cotton yarn for extra strength. Trust me, you do not want to fight with a chenille.
- And if you are looking for some chenille yarn suggestions, check out Happy Chunky Double, Honey Bunny Big, or Baby Snuggle Solid, all from Hobbii Yarns.
The best thing about amigurumi crochet is the flexibility to experiment with yarn. Since this is not a fitted item, use what you may have in your stash. There are so many possibilites to explore for different looks.
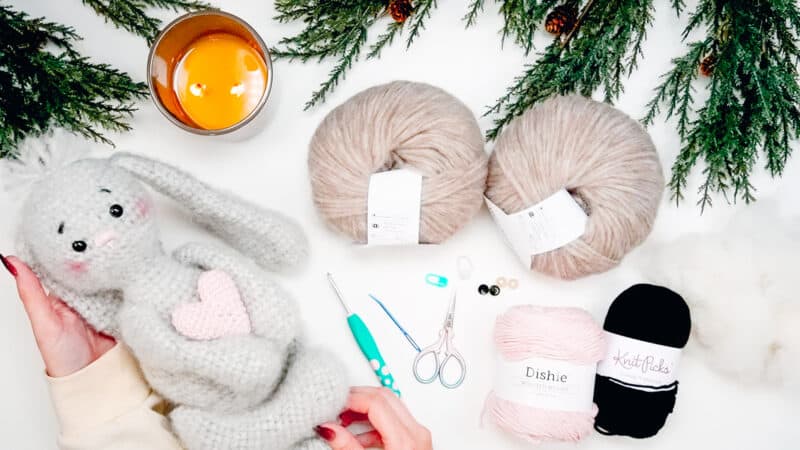
What You Will Need To Crochet The Bunny & Accessories
Crochet Hook
Size G (4.0mm) Crochet Hook, or hook to obtain gauge.
Yarn
Bunny:
Wonderfluff Bulky Yarn
70% Baby Alpaca, 7% Merino Wool, 23% Nylon, 142yds/50g
Colorways Shown: Finnley Heather (grey) or Hare Heather (brown)
Heart & Carrot:
Dishie
in colorways Blush or Sunbaked, plus small amount of Honeydew for carrot top (or other shade of green), and also a small amount of Black for eyebrows; 100% Cotton
Yarn Substitutions
Brava Bulky
100% Premium Acrylic, 136yds/100g
Brava Worsted
100% Premium Acrylic, 218yds/100g
Mighty Stitch
80% Acrylic / 20% Superwash Wool 208yds/100g
Want to Make The Bunny Bigger?
For a Larger Bunny, Try using A Super Bulky Weight Chenille Yarn:
Hobbii Baby Snuggle
100% Polyester, 131yds/100g
Hobbii Honey Bunny
100% Polyester, 131yds/100g
Yarn Quantities
282 yards for bunny (2 balls for each bunny). While you can do this with two balls, it’s playing a bit of yarn chicken, so add a 3rd ball if you don’t want to stress.
Approx. 30 yds main color for each accessory.
Notions
Scissors
Yarn Needle
Removable Stitch Marker
10mm Safety Eyes
Safety Eye Tool (optional)
Fiberfill
Round Magnets (optional)
Rectangle Magnets (optional)
Eyeshadow for Cheeks
Small Brush or Velcro to Fluff Yarn
Skill Level
Intermediate
Sizing
The bunny is 13 inches tall and 5 inches wide at it’s belly. The accessories are from 2.25 to 3.25 inches tall.
Abbreviations
ch – chain
blo – back loop only
sc – single crochet
sc2tog – single crochet two together
sl st – slip stitch
st(s) – stitch(es)
Gauge
17 sts and 16 rows = 4″ by 4″ in cross stitch single crochet.
How to Crochet A Gauge Swatch
If you want this exact size bunny, working a gauge swatch will let you know if you have the correct stitch sizing for this pattern.
However, gauge is not critical for this project as it’s not a fitted item. You may want to make a bigger bunny by changing the gauge with a larger hook and thicker yarn. Or go tiny and size down in hook and yarn choice.
Are you struggling to match gauge? Check out the blog post on What is Crochet Gauge and How To Fix It
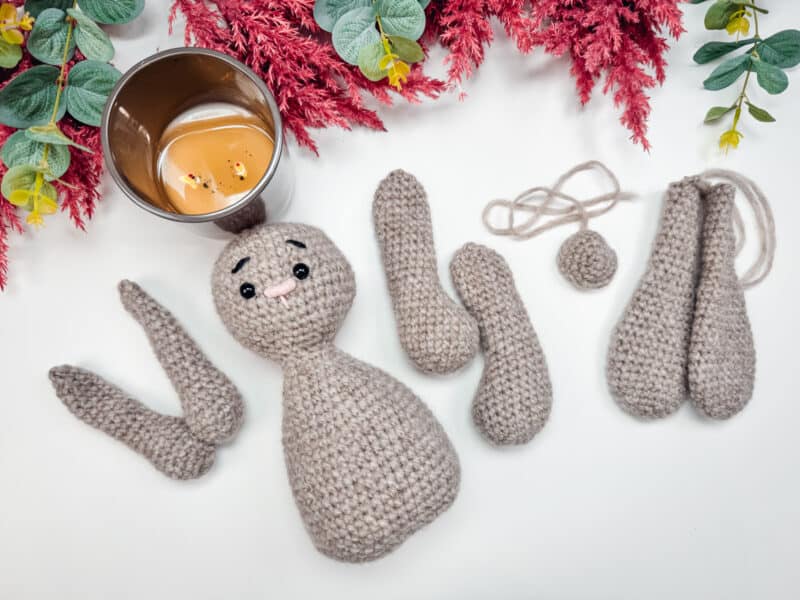
Construction
This amigurumi bunny is crocheted in pieces and then sewn together. The instructions will show an option for having movable arms and legs if desired.
Another option is to place magnets in the bunny’s hands and accessories, if desired, to change what the bunny can hold.
Notes
- Each round is worked continuously unless indicated otherwise.
- Using a stitch marker at the beginning of each round is recommended.
How to change the size of your stuffed bunny or heart:
The wonderful thing about crochet amigurumi is the ability to change the size of the object
easily. Since it’s not a fitted item, we have more flexibility when it comes to gauge. But how
will you know what hook and yarn to go with?
The first step is to choose the yarn. Then, you will want to do a gauge swatch with cross
stitch single crochet stitches to make sure the fabric is the correct density. You don’t want it
to be so stiff it’s not very cuddly. And you also want to avoid gaps between the stitches. Once
you test out the fabric and determine the correct drape/density, you can simply follow all the
same instructions.
Special Stitches:
Cross stitch single crochet: this variation of a crochet stitch works the stitch tighter and creates an ‘X’ on the front of the stitch. To work a single crochet stitch this way, insert your hook into the stitch, yarn under, pull up a loop, yarn over, pull through both loops on the hook. This way of working the single crochet stitch is used for the hat and the body.
Magic Circle/Ring: Start by creating a loop with your yarn. The tail of the working yarn will be over the working end. Insert your hook into the loop from behind. Yarn over and pull through the loop. Ch 1, Work all of your indicated stitches into the loop. Pull the tail end of your yarn to close the loop. Pull firmly to fasten the loop closed, this end will be weaved in and fastened off.
sc2tog invisible decrease: Insert your hook into the flo of the next stitch, insert your hook into the flo of the next stitch, yarn over, pull up a loop, yarn over and complete stitch.
This Pattern Uses Standard US Terminology

Video Tutorial for the Crochet Bunny:
Watch how easy and beginner friendly it is to work up this crochet piece with a tutorial.

The crochet pattern for the bunny can be purchased on Ravelry or Etsy.
To Unlock Exclusive Subscriber Content click the Box below and join for free! Grow will pop up so you can subscribe to my Blog. Enter your email and create a password. Every time you see Exclusive Content on my Blog, log in to your account!
How to Make a Crochet Bunny
Optional Neck Insert
With Main Color Yarn.
Rnd 1: Inside MC sc 6, do not join; work continuously. | 6 sts
Rnd 2: 2 sc in each st around. | 12 sts
Rnds 3-8: sc in each st around. | 12 sts
Stuff firmly as you work the remaining rnds.
Rnd 9: sc2tog around. | 6 sts
Fasten off, finish stuffing, then weave end throughout the front loop of each remaining st and pull closed, weave in end. Set aside until needed.
Head & Body
Rnd 1: Inside MC sc 6, do not join; work continuously. | 6 sts
Rnd 2: 2 sc in each st around. | 12 sts
Rnd 3: [2 sc in next, sc in next] 6 times. | 18 sts
Rnd 4: [2 sc in next, sc in next 2 sts] 6 times. | 24 sts
Rnd 5: [2 sc in next, sc in next 3 sts] 6 times. | 30 sts
Rnd 6: [2 sc in next, sc in next 4 sts] 6 times. | 36 sts
Rnd 7: [2 sc in next, sc in next 5 sts] 6 times. | 42 sts
Rnds 8-15: sc in each st around. | 42 sts
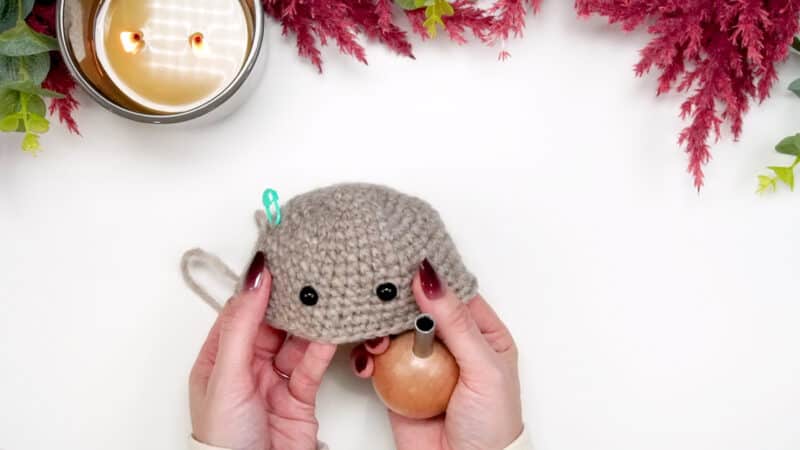
Place safety eyes between rounds 11 & 12 approx 6 sts apart.
Rnd 16: [sc2tog, sc in next 5 sts] 6 times. | 36 sts
Rnd 17: [sc2tog, sc in next 4 sts] 6 times. | 30 sts
Rnd 18: [sc2tog, sc in next 3 sts] 6 times. | 24 sts
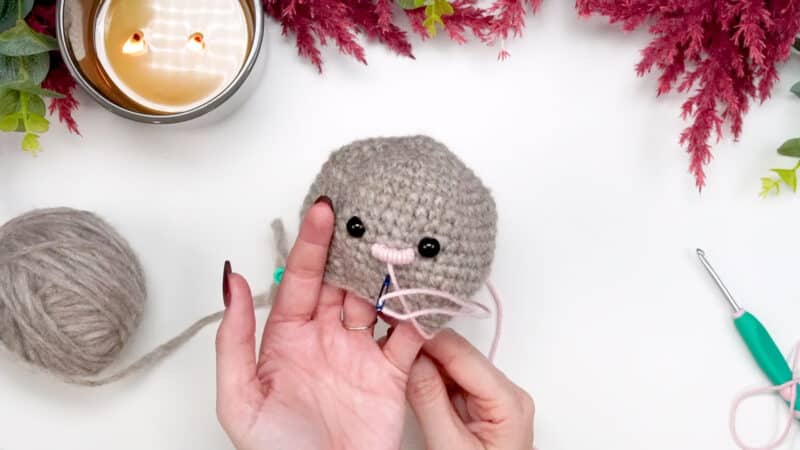
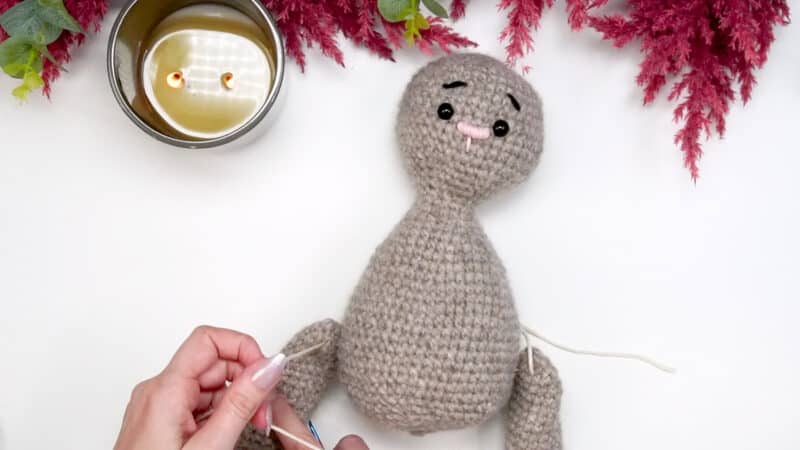
Using pink yarn, embroider nose between rnds 12 & 13. See the Gallery images below, tap the right arrow for more images.
Making the nose is done by creating 3 horizontal lines between the eyes, and then looping around those lines to create the nose. Then a line goes from the center of the nose and down across 2 rounds. Watch the video tutorial for more help.


Amigurumi Tip
Don’t overstuff! Adding too much stuffing to a crochet plushie can stretch the stitches.
With black yarn, sew on eyebrows. Begin to stuff the bunny with fiberfill as you go.

Rnd 19: [sc2tog, sc in next 2 sts] 6 times. | 18 sts
Rnd 20: [sc2tog, sc in next] 6 times. | 12 sts
Rnd 21: [2 sc in next, sc in next] 6 times. | 18 sts
Rnd 22: [2 sc in next, sc in next 2 sts] 6 times. | 24 sts
Rnd 23: sc in each st around. | 24 sts
Rnd 24: [2 sc in next, sc in next 3 sts] 6 times. | 30 sts
Rnd 25: sc in each st around. | 30 sts
Rnd 26: [2 sc in next, sc in next 4 sts] 6 times. | 36 sts
Rnd 27: sc in each st around. | 36 sts
Rnd 28: [2 sc in next, sc in next 5 sts] 6 times. | 42 sts
Rnd 29: sc in each st around. | 42 sts
Rnd 30: [2 sc in next, sc in next 6 sts] 6 times. | 48 sts
Place the optional neck insert inside the neck and tack in place for a less wobbly neck.
Rnd 31: sc in each st around. | 48 sts
Rnd 32: [2 sc in next, sc in next 7 sts] 6 times. | 54 sts
Rnds 33-40: sc in each st around. | 54 sts
Rnd 41: [sc2tog, sc in next 7 sts] 6 times. | 48 sts
Rnd 42: [sc2tog, sc in next 6 sts] 6 times. | 42 sts
Rnd 43: [sc2tog, sc in next 5 sts] 6 times. | 36 sts
Rnd 44: [sc2tog, sc in next 4 sts] 6 times. | 30 sts
Rnd 45: [sc2tog, sc in next 3 sts] 6 times. | 24 sts
Rnd 46: [sc2tog, sc in next 2 sts] 6 times. | 18 sts
Rnd 47: [sc2tog, sc in next st] 6 times. | 12 sts
Rnd 48: sc2tog around. | 6 sts
Fasten off, finish stuffing, then weave end through the front loop of each remaining st and pull closed; weave in end. Set aside until assembly.
Bunny Arms (Make 2)
Rnd 1: Inside MC sc 6, do not join; work continuously. | 6 sts
Rnd 2: 2 sc in each st around. | 12 sts
Rnd 3: [2 sc in next, sc in next 2 sts] 4 times. | 16 sts
Rnd 4: [2 sc in next, sc in next 3 sts] 4 times. | 20 sts
Rnds 5-6: sc in each st around. | 20 sts
If using magnets, stitch them to the inside of the hand on rounds 4 & 5.
Rnd 7: [sc2tog, sc in next 8 sts] 2 times. | 18 sts
Rnd 8: [sc2tog, sc in next 7 sts] 2 times. | 16 sts
Rnd 9: [sc2tog, sc in next 2 sts] 4 times. | 12 sts
Stuff hand portion, lightly stuff arm as you crochet.
Rnds 10-20: sc in each st around. | 12 sts
Rnd 21: [sc2tog, sc in next 4] 2 times. | 10 sts
Rnd 22: [sc2tog, sc in next 3] 2 times. | 8 sts
Fasten off, finish stuffing, then weave end through the front loop of each remaining st and pull closed; weave in end. Set arms aside until assembly.
Join The Kindest Community
Join our vibrant community of crafters on Facebook today. Whether you enjoy crafting with others or simply have burning questions, we’ve got you covered – join us now!
Bunny Legs (Make 2)
Rnd 1: Inside MC sc 6, do not join; work continuously. | 6 sts
Rnd 2: 2 sc in each st around. | 12 sts
Rnd 3: [2 sc in next, sc in next] 6 times. | 18 sts
Rnd 4: [2 sc in next, sc in next 2 sts] 6 times. | 24 sts
Rnd 5: [2 sc in next, sc in next 11 sts] 2 times. | 26 sts
Rnds 6-9: sc in each st around. | 26 sts
Rnd 10: sc in next 11, sc2tog twice, sc in next 11. | 24 sts
Rnd 11: sc in next 10, sc2tog twice, sc in next 10. | 22 sts
Begin stuffing as you continue to crochet the leg.
Rnd 12: sc in next 9, sc2tog twice, sc in next 9. | 20 sts
Rnd 13: sc in next 8, sc2tog twice, sc in next 8. | 18 sts
Rnd 14: sc in next 7, sc2tog twice, sc in next 7. | 16 sts
Rnds 15-24: sc in each st around. | 16 sts
Rnd 25: [sc2tog, sc in next 6] 2 times. | 14 sts
Rnd 26: [sc2tog, sc in next 5] 2 times. | 12 sts
Rnd 27: sc2tog around. | 6 sts
Fasten off, finish stuffing, then weave end throughout the front loop of each remaining st and pull closed; weave in end. Set legs aside until assembly.
Bunny Ears (Make 2)
Rnd 1: Inside MC sc 6, do not join; work continuously. | 6 sts
Rnd 2: 2 sc in each st around. | 12 sts
Rnd 3: [2 sc in next, sc in next] 6 times. | 18 sts
Rnd 4: [2 sc in next, sc in next 2 sts] 6 times. | 24 sts
Rnds 5-12: sc in each st around. | 24 sts
Rnd 13: [sc2tog, sc in next 2 sts] 6 times. | 18 sts
Rnds 14-18: sc in each st around. | 18 sts
Rnd 19: [sc2tog, sc in next st] 6 times. | 12 sts
Rnds 20-25: sc in each st around. | 12 sts
Rnd 26: [sc2tog, sc in next 4 sts] 2 times. | 10 sts
Rnds 27-30: sc in each st around. | 10 sts
Fasten off leaving a long tail for assembly, set both ears aside.
Bunny Tail
Rnd 1: Inside MC sc 6, do not join; work continuously. | 6 sts
Rnd 2: 2 sc in each st around. | 12 sts
Rnd 3: [2 sc in next, sc in next] 6 times. | 18 sts
Rnd 4: [2 sc in next, sc in next 2 sts] 6 times. | 24 sts
Rnd 5: sc in each st around. | 24 sts
Rnd 6: [sc2tog, sc in next 2 sts] 6 times. | 18 sts
Fasten off leaving a long tail.
Want to see the assembly in real time?
Check out the YouTube Video:
Assembly of the Bunny
We will use yarn to loop through two stitches of the first leg, then through the center of the body between rnds 37-38, coming out the other side. Then, loop through a couple stitches on the second leg. To reinforce, we will repeat by going back and forth a couple more times.
If you don’t want movable legs, simply sew the legs on each side of the body on rounds 37-38.
The arms will be attached in the same way between rnds 24-25.
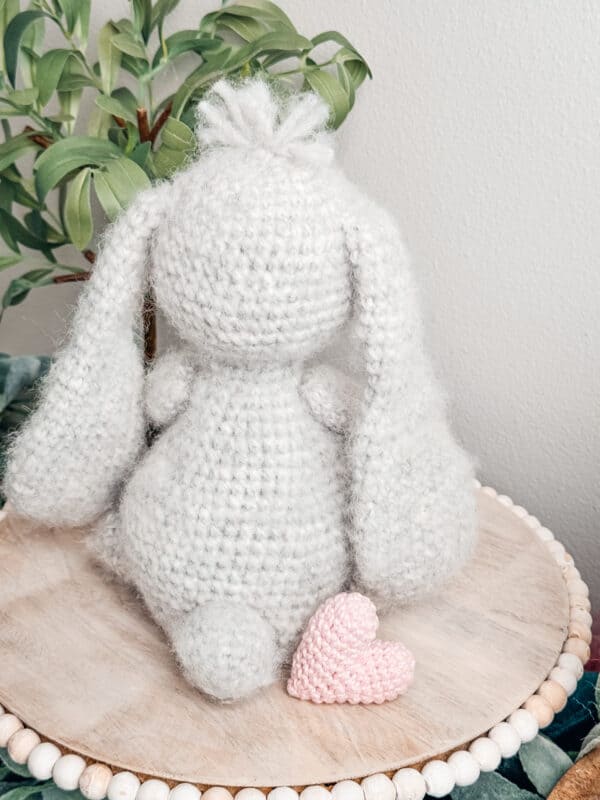
For the bunny tail, stuff and whipstitch on the back of bunny on rnds 38-41.

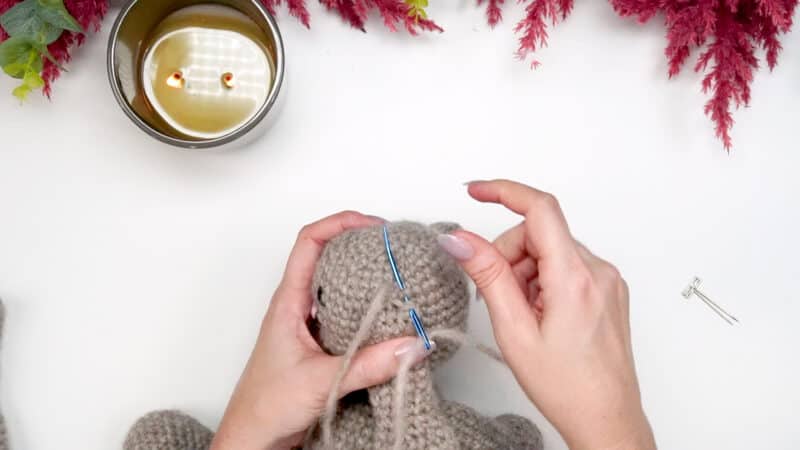
The bunny ears will be sewn to either side of the head on rnd 8. It helps to pin them in place to get them just right.
Finishing the Bunny
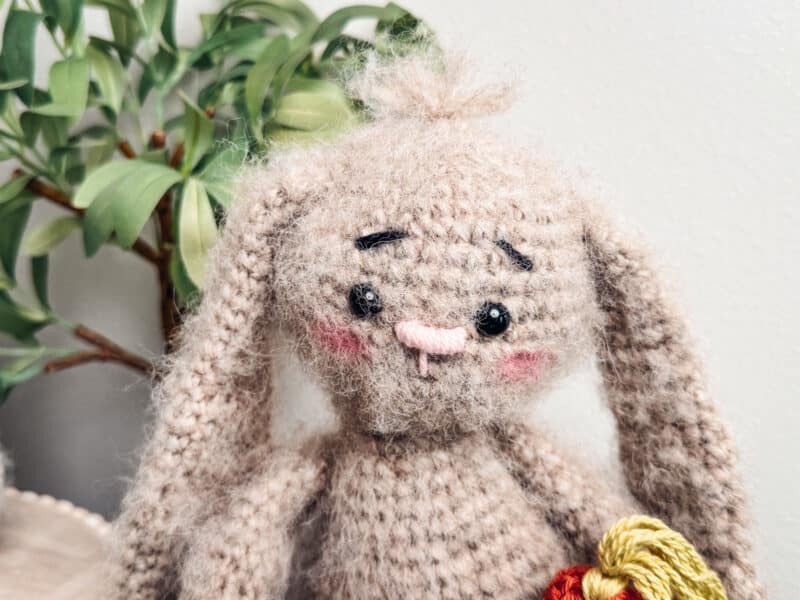
If you would like to add some blush, use a makeup brush and eye shadow in the color of your choice to dab some color on each side of the face to make cheeks.
How to Make The Bunny Fluffy?
For a fluffy bunny, use a piece of velcro and gently brush the fibers.
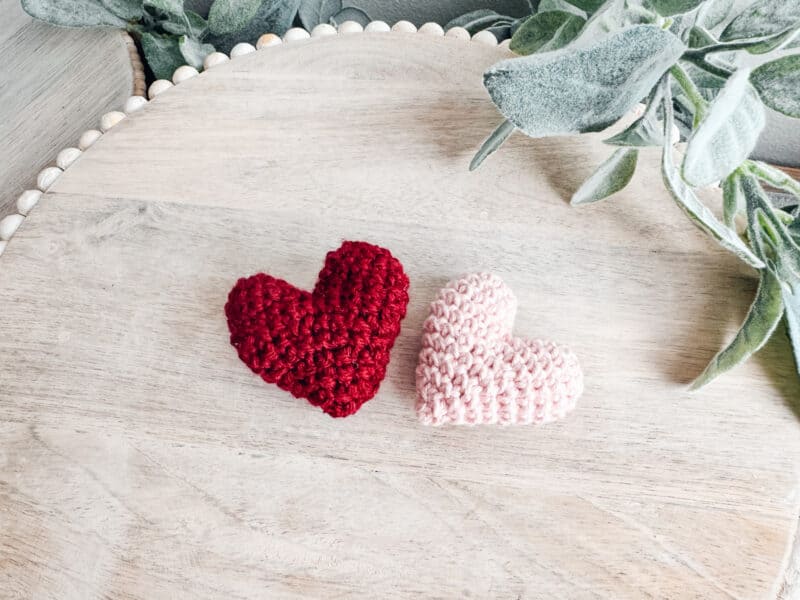
How To Crochet A Heart
With Red or Pink Yarn.
Rnd 1: Inside MC sc 6, do not join; work continuously. | 6 sts
Rnd 2: 2 sc in each st around. | 12 sts
Rnds 3-4: sc in each st around. | 12 sts
Fasten off and weave in end, set aside. Work a second piece from the instructions above and do not fasten off.
Rnd 5: sc in first 6 sts from current piece, sc 12 from the piece set aside, sc 6 from the current piece. | 24 sts
Use one of the tail ends to close the gap between the pieces.
Rnd 6: sc in each st around. | 24 sts
Rnd 7: [sc2tog, sc in next 2 sts] 6 times. | 18 sts
Rnd 8: sc in each st around. | 18 sts
If using magnets, stitch them inside the heart in each side. Stuff with fiberfill.
Rnd 9: [sc2tog, sc in next st] 6 times. | 12 sts
Rnd 10: sc in each st around. | 12 sts
Rnd 11: sc2tog around. | 6 sts
Fasten off, finish stuffing, then weave end through the front loop of each remaining st and pull closed; weave in end.
Crochet Heart Video Tutorial

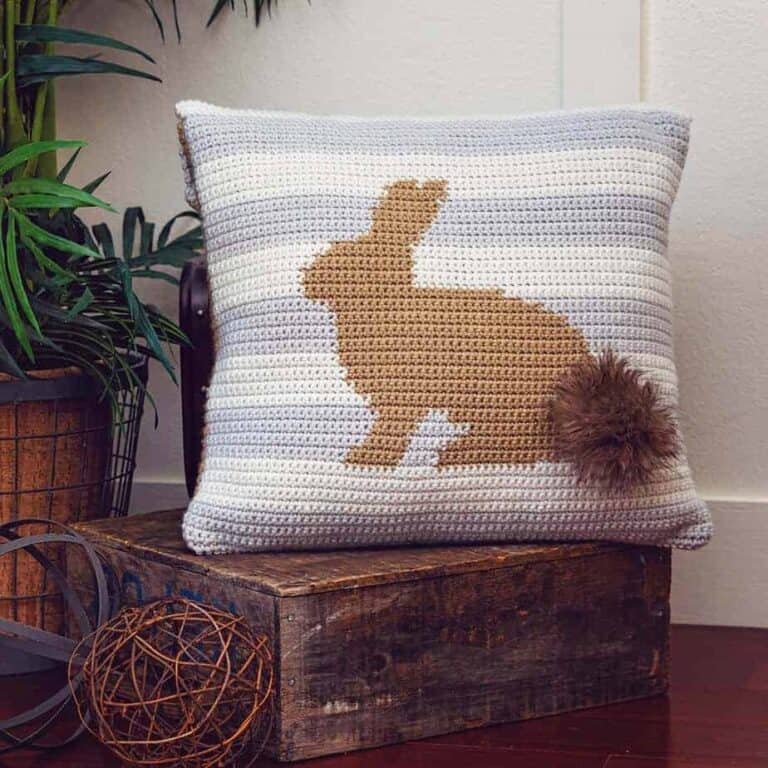
When crafting crochet dolls, especially if intended for children, prioritize safety by using secure stitching techniques and ensuring all parts are securely attached. Opt for non-allergenic and child-friendly materials, avoiding small parts that could pose a choking hazard. Additionally, for the longevity of these cherished bunnies, store them in a cool, dry place away from direct sunlight to prevent fading. If they require cleaning, follow care instructions on the yarn label diligently. Crafting these adorable bunnies not only brings joy but also ads to home decor, which means you might also like the Fluffy Bunny Crochet Pillow Free Pattern or the Bunny Easter Basket Crochet Pattern. Happy crafting, with safety and longevity at the forefront!
Well, That Was Fun! What’s Next?