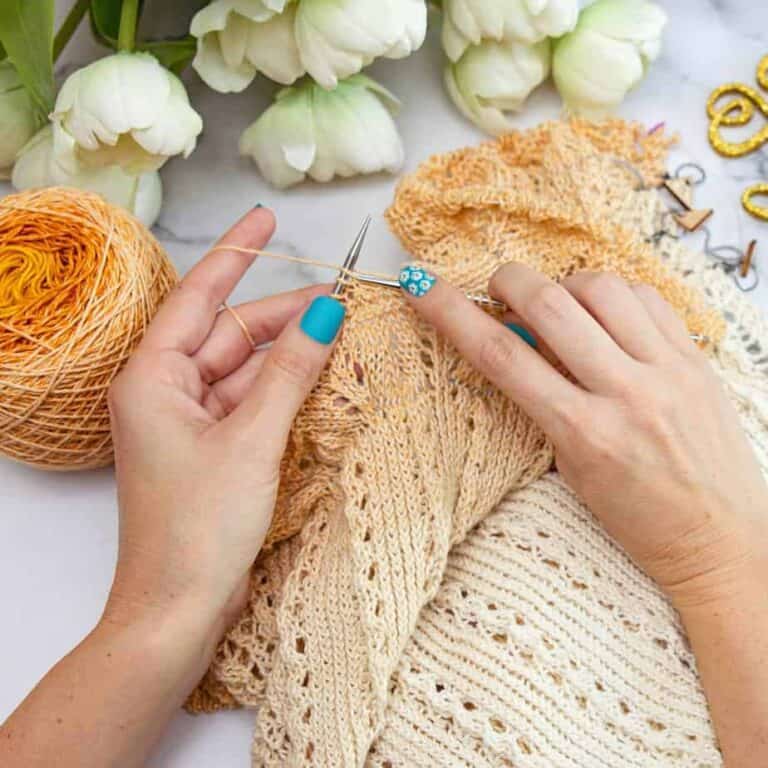
Knit socks are so popular so if you want to learn how to knit socks, you’ve come to the right place. When I first learned to knit, knitting sock patterns kept popping up everywhere, and I was so scared to pick up my needles and give them a go. Now I wonder why I was so intimidated, and I hope you feel the same after you try out the Knit Beginner Sock Pattern. If working socks in the round is intimidating, check out a flat knitted pattern with the How To Knit Socks in Rows: Whims Easy Flat Knit Socks blog post. This is also a free knit pattern and it’s fun to work socks in different styles of constructions.
Disclosure: This post contains affiliate links. Please read my disclosure for more info.
Want an Ad-Free PDF Download of this pattern?
This pattern is available in my shops:
Looking for the Crochet Version?
Click HERE for the Felici Crochet Socks Free Beginner Pattern >>>
The Yarn
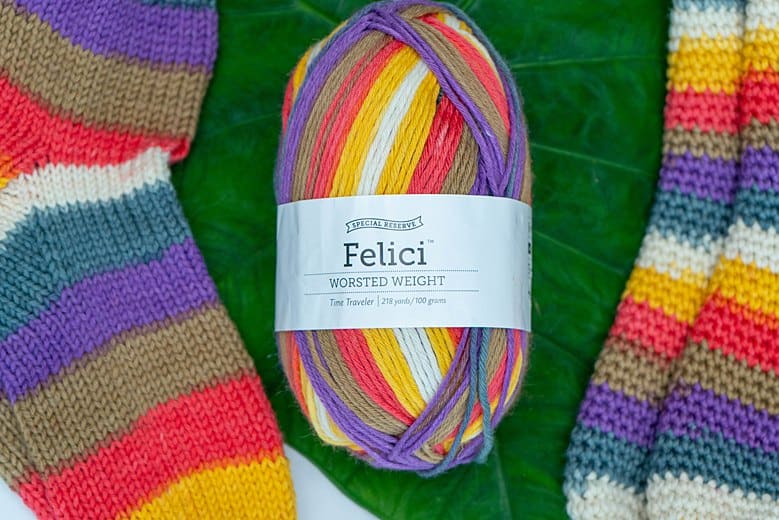
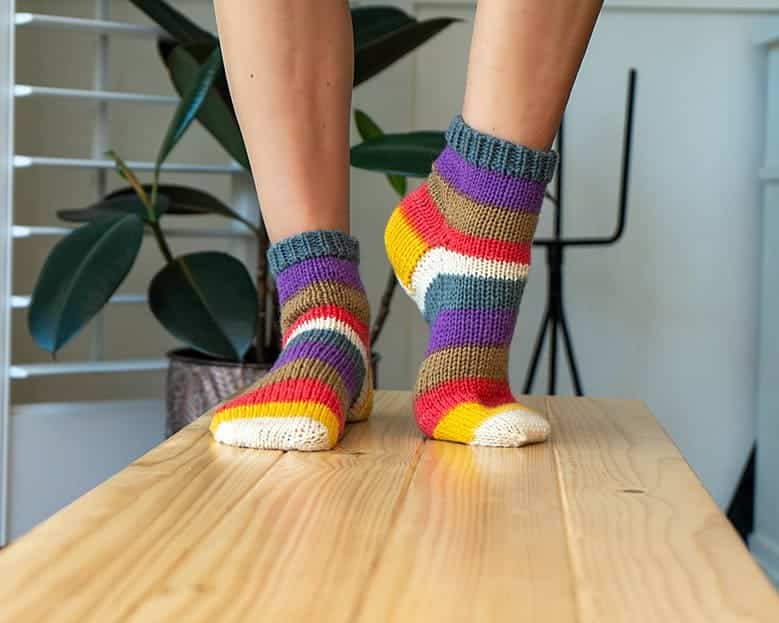
Self-striping yarns might be one of my favorite sock yarns. I mean, who wants to weave in a ton of ends? This way, we have beautiful striped socks without the hassle of having to change colors. The limited-edition Felici Worsted Yarn by Knit Picks is 75% Merino, 25% Nylon. It has the perfect softness plus stretch for knitted socks. It takes easy sock knitting patterns and makes them more wow.

Did you know crochet stockings are similar to socks?
Yep, the construction of a stocking is basically a sock. The only difference is we aren’t sizing it the same way we would a knit sock, because we aren’t making them for a giant, haha.
If you want to check out a fun and easy stocking with loads of knit texture, come over to the Beginner Knit Stocking Pattern. It’s another great pattern to understand the basic techniques of sock knitting. Learn How to Crochet Socks and Customize Fit With Sizing Guides. Grab those circular needles and get started!
If you would like some inspiration for toe up socks, check out Conquer Toe Up Crochet & Knit Socks With These Terrific Patterns
Try out some of my other patterns!
Vine Colorwork Crochet Sock – Free Pattern
Creepy Crawly Spider Sock Free Crochet Pattern
Comfy Cozy Winter Crochet Slipper Sock Pattern
Penguin Buddy Knit Pattern
Roundup blog posts below!
Conquer Toe Up Crochet & Knit Socks With These Terrific Patterns
40 Ultimate Ways To Crochet Crafty Coasters For Home Decor
Crafting Your Way to the Best Lacy Crochet Patterns
The Best 27 Crochet Leaf Patterns for Any Season
26 Beautiful Knit & Crochet Flower Patterns Bouquet Inspiration
The 30 Best Crochet Bee and Hexagon Inspired Patterns
33 Of The Best Crochet Pot Holder Patterns Ever

Knit Beginner Sock Pattern Supplies:
Knitting Needle:
Size 3 (3.25mm) circular needles
Size 4 (3.5mm) circular needles
Or size needed to meet gauge
Notions:
Removable stitch markers
Yarn needle to weave in ends
Scissors
Stitch Holder
Fingering Weight Yarn:
Knit Picks Special Reserve Felici (discontinued):
In colorway Time Traveler
worsted 4 weight yarn, 75% Merino, 25% Nylon, 218yds/199m/100g
Yardage:
300 yards (274 m)
2 Balls Needed for all sizes
Abbreviations/Stitches:
k – knit
k2tog – knit two stitches together
p – purl
p2tog – purl two stitches together
sl – slip stitch
st(s) – stitch(es)
ssk – slip slip knit
Gauge:
22 sts and 30 rows = 4×4” (10 cm) in stockinette with 3.25mm needles
Measurements/Sizes:
S: US Shoe Size 4-7
M: US Shoe Size 7-9
L: US Shoe size 9-11
Skill Level:
Easy Beginner
Knit Beginner Sock Pattern Notes:
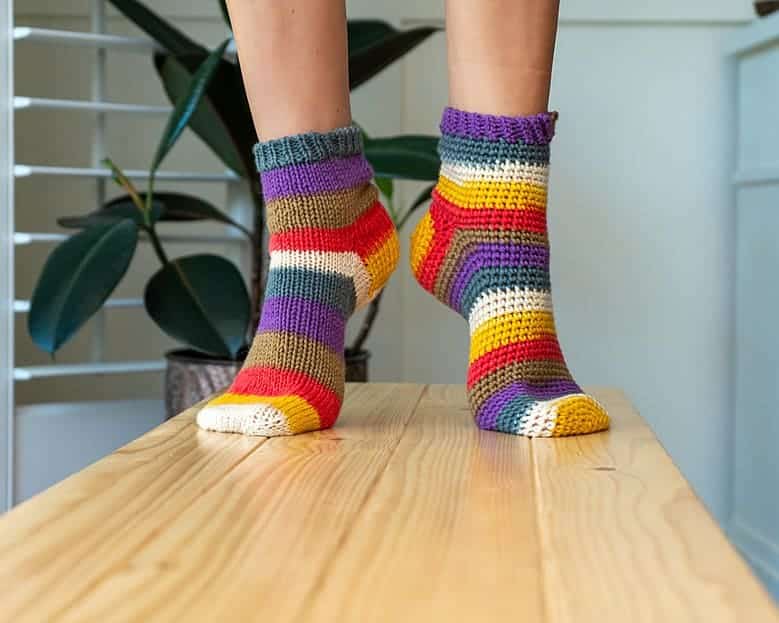
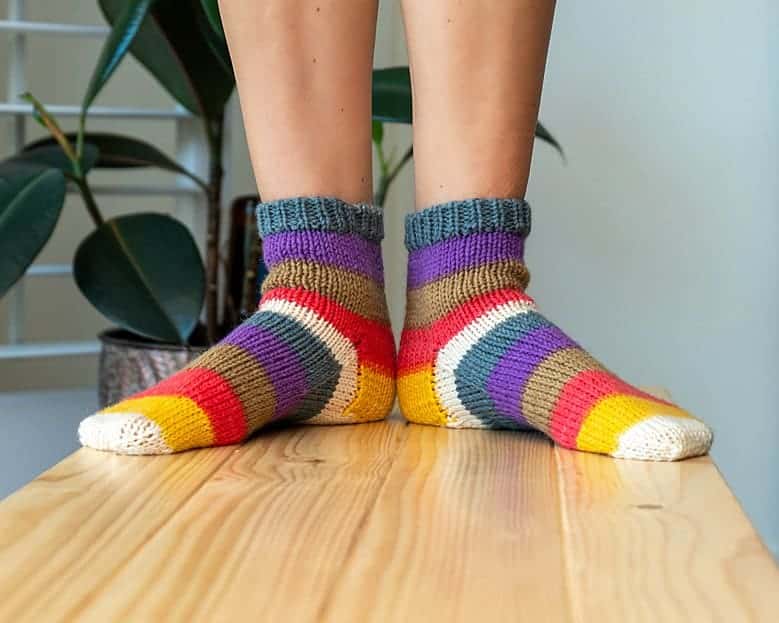
I love self-striping yarn. It makes colorwork easy and fun, with fewer ends to weave in later. For this pattern, I really enjoyed working with the Felici Worsted Weight Yarn from Knit Picks. It creates a comfy sock that can keep the toes warm. This basic sock pattern is worked from the top to the toe.
Sizes are written as S (M, L)
I suggest using a stitch marker to keep track of the rounds.
Want a guide on sock sizing? Download the How To Crochet Socks and custom Fit With Sizing Guides. All of the information applies to knit socks as well.
This is a knit sock that is worked from the top down. We will start with the cuff of the knitted sock and end with the toe of the knitted sock.
Special Stitches:
For written and video instructions on decreases, please visit: https://brianakdesigns.com/how-to-decrease-knitting/
Ribbed Cable Cast On 1×1: https://brianakdesigns.com/how-to-knit-cast-on/#alternating


How to Knit Socks for Beginners:
Top of Sock
Rnd 1: With smaller needles, Ribbed Cable 1×1 Cast On 40 (44, 48), or the cast-on method of choice, join to work in the round. 40 (44, 48) sts
Rnds 2-7: Work in k1, p1 ribbing. 40 (44, 48) sts
Rnds 8-27: Change to larger 3.5mm needles and knit. 40 (44, 48) sts
Heel Flap
Set Up: Row 1 will be worked across the next 21 (23, 25) sts for the heel, and slip remaining 19 (21, 23) sts to a stitch holder. This section is worked across in rows (not in rounds). Slip the first stitch in every row. 21 (23, 25) sts
Row 1 (RS): Knit and turn. 21 (23, 25) sts
Row 2: Purl and turn. 21 (23, 25) sts
Repeats: Repeat rows 1-2 for 20 (24, 24) total rows, 10 (12, 12) total slipped stitches on each side of heel flap. 21 (23, 25) sts
Heel Shaping
Row 1 (RS): Place a st marker in st # 11 (12, 13). The shaping will be evenly spaced on each side of this center st. Sl 1, k11 (12, 13), k2tog, k1, turn. 20 (22, 24) sts
Row 2: Sl 1, p4 (5, 6), p2tog, p1, turn. 19 (21, 23) sts
Row 3: Sl 1, k5 (6, 7), k2tog, k1, turn. 18 (20, 22) sts
Row 4: Sl 1, p6 (7, 8), p2tog, p1, turn. 17 (19, 21) sts
Row 5: Sl 1, k7 (8, 9), k2tog, k1, turn. 16 (18, 20) sts
Row 6: Sl 1, p8 (9, 10), p2tog, p1, turn. 15 (17, 19) sts
Row 7: Sl 1, k9 (10,11), k2tog, k1, turn. 14 (16, 18) sts
Row 8: Sl 1, p10 (11, 12), p2tog, turn. 13 (15, 17) sts
Row 9: Knit across. 13 (15, 17) sts
Instep
Rnd 1: Change to smaller needles. Pick up and knit 10 (12,12) sts along the first side of the heel flap, k across the 19 (21, 23) held sts, pick up and knit 10 (12,12) stitches along the second side of the heel flap, Knit across the remaining 13 (15, 17) . 52 (60, 62) sts
Rnd 2: K52 (60, 62) sts, place st marker at for the beginning of round. This is now working in the round again. 52 (60, 62) sts
Rnd 3: K14 (17, 17) , k2tog, k21 (23, 25), ssk, k13 (16, 16). 50 (58, 60) sts
Rnd 4: Knit. 50 (58, 60) sts
Rnd 5: K13 (16, 16) , k2tog, k21 (23, 25), ssk, k12 (15, 15). 48 (56, 58) sts
Rnd 6: Knit. 48 (56, 58) sts
Rnd 7: K12 (15, 15) , k2tog, k21 (23, 25), ssk, k11 (14, 14). 46 (54, 56) sts
Rnd 8: Knit. 46 (54, 56) sts
Rnd 9: K11 (14, 14) , k2tog, k21 (23, 25), ssk, k10 (13, 13). 44 (52, 54) sts
Rnd 10: Knit. 44 (52, 54) sts
Rnd 11: K10 (13, 13) , k2tog, k21 (23, 25), ssk, k9 (12, 12). 42 (50, 52) sts
Rnd 12: Knit. 42 (50, 52) sts
Rnd 13: K9 (12, 12) , k2tog, k21 (23, 25), ssk, k8 (11, 11)
For size Small, skip the remaining instep rounds and go to repeats. 40 (48, 50) sts
Rnd 14: Knit. 40 (48, 50) sts
Rnd 15: K (11, 11) , k2tog, k (23, 25), ssk, k (10, 10)
For size Large, skip the remaining instep rounds and go to repeats. (46, 48) sts
Rnd 16: Knit. 46 sts
Rnd 17: K10, k2tog, k23, ssk, k9. 44 sts
Repeats: Work in knit until the foot measures 7.5 (8, 8.5) inches, 10 (20, 21.5) cm or approx. 2 inches less than the desired length. 40 (44, 48) sts
Toe
Rnd 1: K7 (8, 9), k2tog, k1, ssk, k15 (17, 19), k2tog, k1, ssk, k8 (9, 10). 36 (40, 44) sts
Rnd 2: Knit. 36 (40, 44) sts
Rnd 3: K6 (7, 8), k2tog, k1, ssk, k13 (15, 17), k2tog, k1, ssk, k7 (8, 9). 32 (36, 40) sts
Rnd 4: Knit. 32 (36, 40) sts
Rnd 5: K5 (6, 7), k2tog, k1, ssk, k11 (13, 15), k2tog, k1, ssk, k6 (7, 8). 28 (32, 36) sts
Rnd 6: Knit. 28 (32, 36) sts
Rnd 7: K4 (5, 6), k2tog, k1, ssk, k9 (11, 13), k2tog, k1, ssk, k5 (6, 7). 24 (28, 32) sts
Rnd 8: Knit. 24 (28, 32) sts
Rnd 9: K3 (4, 5), k2tog, k1, ssk, k7 (9, 11), k2tog, k1, ssk, k4 (5, 6).
For size Small, go to finishing. 20 (24, 28) sts
Rnd 10: Knit. (24, 28) sts
Rnd 11: K (3, 4), k2tog, k1, ssk, k (7, 9), k2tog, k1, ssk, k (4, 5). (20, 24) sts
Finishing
Fasten off yarn leaving an 18-inch tail. With half of the stitches on the front needle, and half on the back, use the kitchener stitch to close the toe.
Kitchener stitch steps:
Set up:
Insert needle purlwise through 1st st in front, leave on.
Insert needle knitwise through 1st st in back, leave on.
- Front st knitwise, slip off.
- Next front st purlwise, leave on.
- First back st purlwise, slip off.
- Next back st knitwise, leave on.
Repeat 1-4 until all the stitches have been dropped.
Knit your second sock, then weave in ends and wear!
Want to try a different length of socks? While this pattern shows more of a knit ankle socks style, you can also use this for a thigh-high knitting pattern. Simply keep working the height and increasing it when necessary to fit around your calves. It’s all about trying on the knit sock as you go. So what do you think? Have you caught the sock knitting bug?

I hope you have enjoyed making the Free Knit Beginner Felici Sock Pattern!
Are you looking for another small knit beginner project to go with these knit socks? Might I recommend the Chateau Knit Cowl? It’s an easy repeat and fun for any level of knitter. Or if you want something mroe lightweight the Ray Of Sunshine Knit Shawl or the Light Summer Shawl Knit Pattern might be the next thing to inspire your needles.
Well, That Was Fun! What’s Next?