
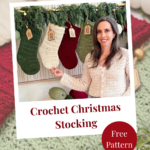
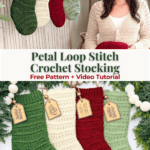
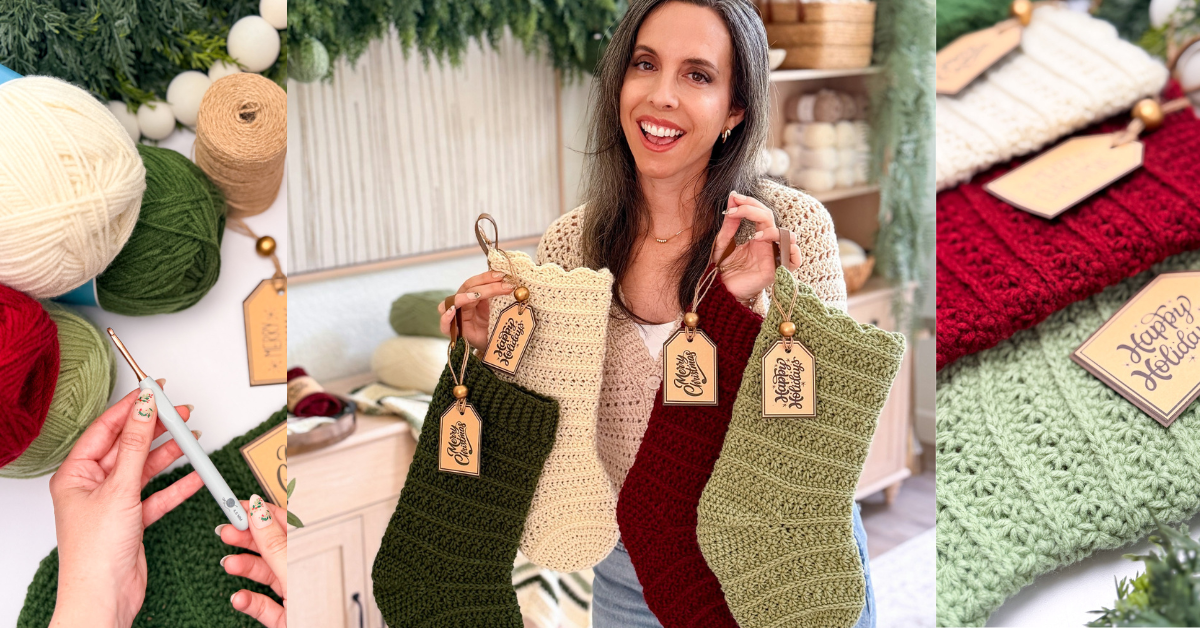
Every year I tell myself I have enough crochet Christmas stocking patterns, and every year one more idea talks its way onto my hook. So when I sat down to design another one, I half expected to be going through the motions. The Petal Loop Stitch had other plans.
I wanted to see what those soft, overlapping rows would look like running up the leg of a stocking, so I grabbed some green Herrschners Worsted 8 sitting closest to my chair and found out. The texture stopped me in my tracks. It looks like something you would pay a small fortune for at a boutique, and it works up in a simple four-row repeat once it clicks.
Disclosure: This post contains affiliate links. Please read my disclosure for more info.
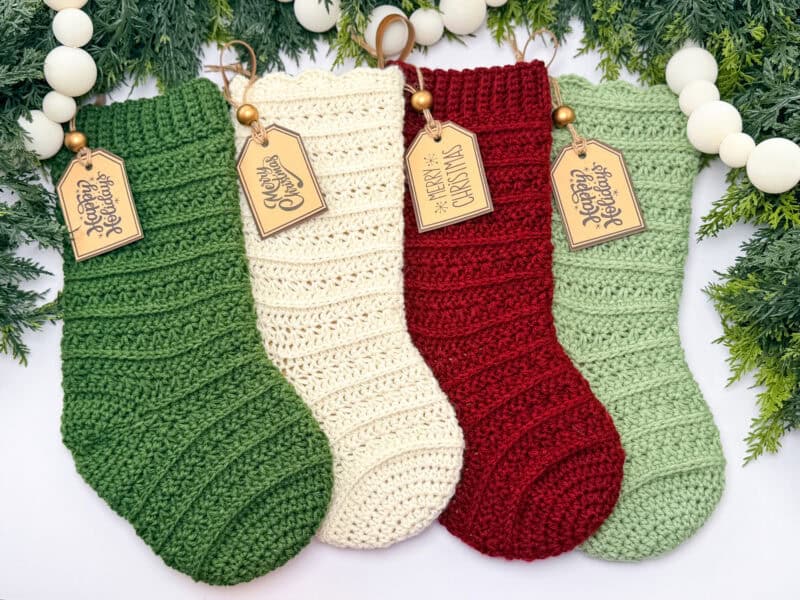
What surprised me most is how well these hold their shape once they are stuffed with goodies. I made mine in one size: 16 inches tall by 6.5 inches wide, which is roomy enough for real presents, not just candy canes. If you have never worked a stocking from the toe up before, this is a friendly place to start, and I will walk you through why that construction makes life easier further down. Add a Petal Loop Ornament or a coordinating Wheat Stitch Wreath for more textured fun.
Before You Hook: Petal Loop Christmas Stocking Pattern Details
🧶 Yarn Used: Herrschners Worsted 8 (100% acrylic, 489yds/226g)
⚖️ Yarn Weight: Worsted, #4
🧵 Featured Stitch: Petal Loop Stitch
🪝 Hook Size: US G+/7 (4.5mm) Crochet Hook, or hook to obtain gauge
📏 Sizes: One size, 16″ by 6.5″
🩷🩷🩷🤍 Difficulty level: Intermediate
🕐 Approx Crochet Time: About 4 to 7 hours
🏷️ Project Type: A textured crochet Christmas stocking worked from the toe up for holiday home decor and handmade gifts
Save for Later • Get a Summary • Pick Up Where You Left Off
The Crochet Smarter Starter Pack
Crochet smarter.
Rip out less.
Three printables I actually use, free when you join my email list.
- ✓Temperature Blanket Starter Kit: color key, 2027 and any year trackers, and how to look up the weather.
- ✓Gift Tags & Wine Charms: 30 icons, ready to print, punch and tie.
- ✓Crochet, Decoded: US vs UK terms, stitch symbols, hook sizes, all in one place.
Plus 30% off any two crochet tools in my app, tucked inside. You'll land on my email list too, so we can be pen pals. Bail out whenever you like, no hard feelings. Privacy policy
Why You’ll Love This Petal Loop Stitch Stocking
- The Petal Loop Stitch texture looks intricate, but it’s an easy-to-memorize four-row repeat.
- It is worked from the toe up in joined rounds, so most of the shaping happens as you go, and the only real seaming is closing the heel at the end.
- One generous size, 16 by 6.5 inches, big enough to actually fill on Christmas morning.
- Solid or striped, so you can make a coordinating set for the whole family without buying a cart full of yarn.
- A full step-by-step video tutorial walks you through every part.
- Add a Petal Loop Trivet or Petal Loop Chevron Washcloth as a gorgeous hostess gift!
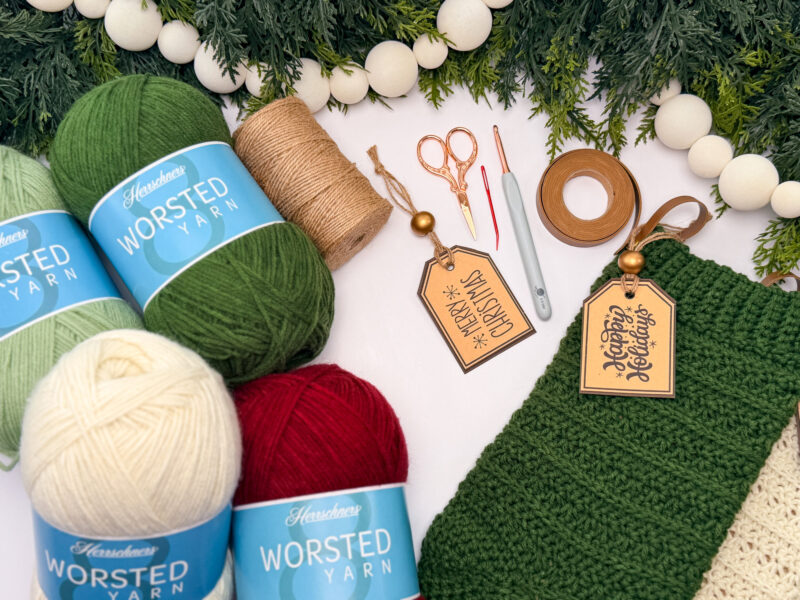
Petal Loop Stitch Christmas Stocking Pattern Supplies
Yarn
Herrschners Worsted 8
100% Acrylic, 489yds/226g
Colorways: Aran, Wine, Army, and Leaf
Yarn Quantities
Solid Color: 230 yds per stocking
Crochet Hook
Size US G+/7 (4.5mm) Crochet Hook or hook to obtain gauge.
Notions
Scissors
Yarn Needle
Removable Stitch Marker
Rivets, burlap ribbon or twine, leather fabric, and wooden tags if you want to finish with a hanging tab like the ones in the photos
Be sure to check out the full pattern tips below
Yarn Substitutions
I used Herrschners Worsted 8, a #4 worsted-weight yarn that is 100 percent acrylic, 489 yards per 226-gram skein. The stockings shown use the colorways Aran, Wine, Army (dark green), and Leaf (light green). You will need about 230 yards for a solid-color stocking, so a single skein makes two stockings with yarn to spare.
I keep coming back to this one for holiday makes because it is smooth enough to show off the Petal Loop Stitch texture, holds its shape when the stocking gets stuffed, and comes in those rich, true holiday shades that are hard to find in an acrylic at this affordable price.
If you want a different look, here are the substitutes I would reach for:
- Herrschners Holiday Sparkle, 92% Acrylic, 8% Polyester, 489yds/226g, for a little festive shimmer.
- Herrschners Supreme Worsted,100% Acrylic; 169yds/100g, for a rich, vibrant, softer stocking
- Mary Maxim Maximum Value, 100% Acrylic; 474yds/227g, a great budget pick for a big family set.
- Brava Tweed, 97% Premium Acrylic, 3% Viscose; 340yds/100g, if you love a little fleck of texture.
Remember always to check the gauge and drape when substituting yarns.
Juggling a few holiday makes at once? The free WIP Tracker keeps all your projects in one place.
Skill Level
This is an intermediate pattern, and the Petal Loop Stitch is what earns that rating. It has a four-row rhythm you learn by doing, and it clicks quickly if you work the first repeat slowly while the video plays. Gauge is not critical, and the toe-up construction is straightforward, so if you can single crochet and half double crochet, you are ready for this one.
Sizing & Finished Measurements
The Petal Loop Stitch Stocking comes in one size, and it is a generous one. Finished, it measures 16” from the top of the cuff to the tip of the toe, and 6.5”across the widest part of the foot. That is deliberately roomy. I wanted a stocking you can actually fill with a wrapped paperback or a pair of socks, not just a few pieces of candy.
Gauge
Gauge is not critical here, which is part of why it is such a relaxing make.
For the record, my gauge runs 15 stitches and 13 rows to a 4” by 4” square in the stitch pattern. If your stocking is coming out noticeably larger or smaller and you want to rein it in, matching your gauge is the lever to pull. Go down a hook size to shrink it, up a size to grow it.
Tips
How to Crochet A Gauge Swatch
- Working a gauge swatch will let you know if you will have the correct sizing for this pattern. It will also help you practice the stitches used in this project and improve your stitch work for a flawless look.
- Are you struggling to match the gauge? Check out the blog post on What is Crochet Gauge and How To Fix It
Abbreviations
blo – back loop only
ch – chain
hdc – half double crochet
RS/WS – Right Side/Wrong Side
sc – single crochet
sl st – slip stitch
st(s) – stitch(es)
Stsc – stacked single crochet
Special Stitches Used in This Pattern
The star of this pattern is the Petal Loop Stitch, a textured stitch I designed that builds those soft, scalloped rows. It is made from two little building blocks, a 3 Loop Petal and a 2 Loop Petal, worked over a base of stacked single crochet and third-loop single crochet. Written out, it can look like alphabet soup, which is exactly why I filmed it. Watch the Petal Loop Stitch video tutorial once, and the rhythm will make sense in a way no amount of text can match.
Stacked single crochet (Stsc): a single crochet worked in two stacked halves so it stands as tall as the row without a turning chain.
3 Loop Petal: pulls up loops across the back loop of a previous stitch and the next two stitches, then closes them into one soft petal.
2 Loop Petal: the smaller sibling worked at the end of a row to keep the edge tidy.

Important Pattern Notes
How the Petal Loop Stitch Stocking Is Made
This stocking is worked from the toe up, and I promise that is good news. Starting at the toe means you build the shape the way a sock actually forms, and you can try the proportions as you go instead of hoping it all comes together at the end.
You begin at the toe with a small round of increases, as you would start a hat crown, until the foot is the right width. From there, the foot works straight until it is time to set the stitches aside for the heel later. Then the leg begins, and this is where the Petal Loop Stitch takes over, with the texture really showing up as it repeats in a tidy four-row rhythm all the way up.
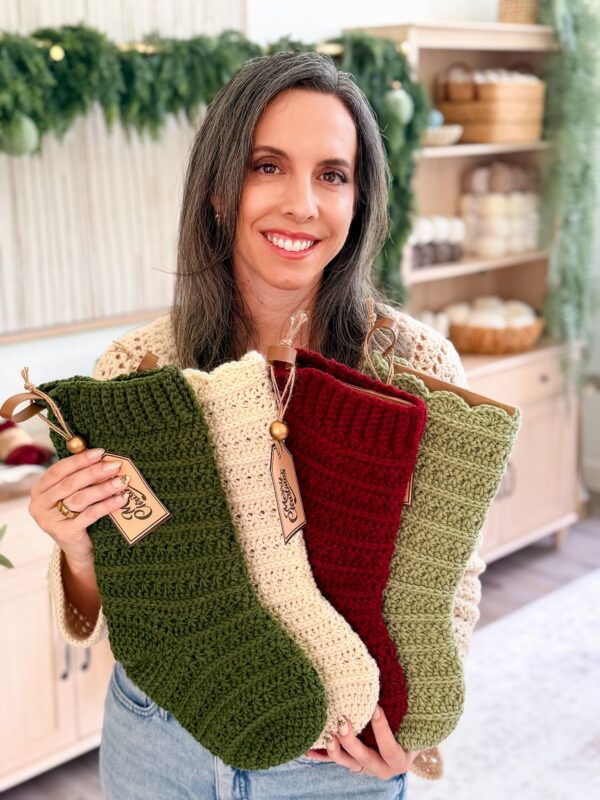
Once the leg is tall enough, finish the top with a band of ribbing worked sideways for that cozy, folded-cuff look, or add a simple scalloped edge for a softer look. The heel is added afterward by going back to the stitches you set aside, so you are never fighting to shape both the heel and the leg simultaneously. A hanging tab and any other festive embellishments desired are the final, festive touches.
Love toe-up stockings? Check out the Wheat Stitch Stocking and the Granny All the Way Stocking Collection.
Subscribe, Like & Watch on YouTube
Petal Loop Christmas Stocking Video Tutorial: Part 1
Relax & Crochet with NO Ads
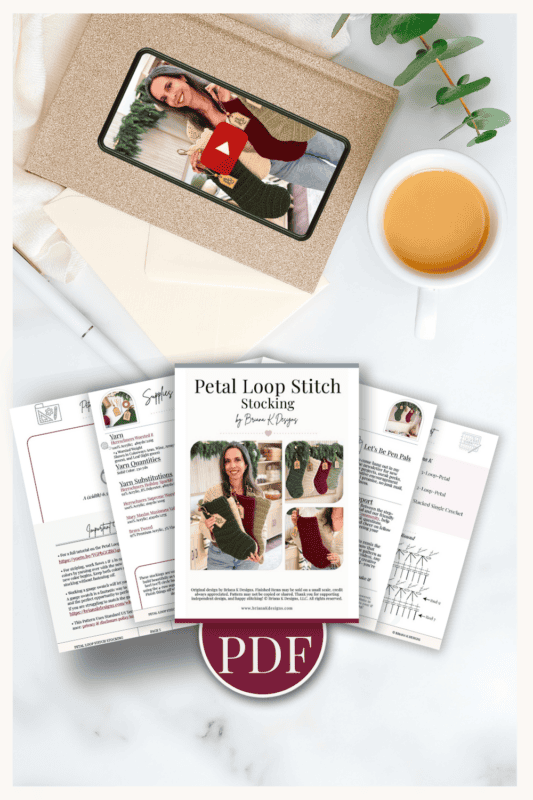
Upgrade to the Printable PDF
Beautifully formatted to print and take with you anywhere. The paid pattern includes:
Add your email in the box below to unlock this pattern to view on the blog for free. I’m thrilled to share this amazing crochet pattern with you! Please don’t copy, paste, or distribute this pattern. Prefer an ad-free experience? Purchase a digital PDF file for a small fee from one of my online stores. I appreciate your support and readership. You are why I can keep doing what I love and sharing it with others. Thank you from the bottom of my heart.
Want it ad free and printable? The PDF is in my shop.
Get the Ad Free PDF
Make it in my app
Get the interactive version of this pattern right on your phone whenever you pick up your hook.
- Free to join, no card needed
- Free yarn calculator and stash tracker
- Your patterns, all in one place
Printable Version
This pattern is free to read here on the blog. The ad-free printable PDF is available in the Briana K Designs shop on Etsy and Ravelry.
brianakdesigns.com
Petal Loop Stitch Stocking Written Pattern
Stocking Foot
Note: If using two colors, change to the color of choice for the foot, or change colors for Rounds 9 and 10.
Rnd 7 (RS): Stsc in first st, hdc in remaining sts around, join and turn. (48 sts)
Rnd 8 (WS): Ch 1 (the turning chain does not count as a st throughout), working in the third loop sc in each st around, join and turn.
Rnd 9: Stsc in first, insert your hook into the loop on the back of the Stsc, yarn over and pull up a loop, insert your hook into the next st, yarn over and pull up a loop, insert into the next st, yarn over and pull up a loop (4 loops on the hook), yarn over and pull through all the loops on the hook, ch 1. Then insert into the loop on the back of the previous st, yarn over and pull up a loop, insert your hook into the next st and pull up a loop, then into the next st and pull up a loop (4 loops on the hook), yarn over and pull through all the loops on the hook, ch 1; repeat this across to the last st. Insert into the loop on the back of the previous st, yarn over and pull up a loop, insert your hook into the next st, yarn over and pull up a loop (3 loops on the hook), yarn over and pull through all the loops on the hook, join and turn.
Rnd 10: Ch 1, sc in the first, 2 sc in the next st, then skip 1, 2 sc in the next; repeat from the last comma across until the last 2 sts, skip 1, sc in the last, join and turn.
Repeat: Repeat Rounds 7 to 10 two more times, which will end on Round 18.
How to Stripe Your Stocking
Want a two-tone stocking? Striping this one is easier than it sounds because the Petal Loop Stitch is a four-row repeat. Work rows one and two in your first color, then rows three and four in your second color, and you get clean bands that follow the texture.
The trick that keeps the inside neat is to change color by pulling the new shade through on the very last stitch of the row before the new color starts. Keep both colors attached and carry the unused one up the inside of the stocking rather than cutting and rejoining every time. Because a stocking is a closed tube, the strands carried inside disappear, and nobody is ever the wiser.
Petal Loop Christmas Stocking Video Tutorial: Part 2
Split for Heel
Stocking Leg
Rnd 21: Repeat Rnd 9.
Rnd 22: Repeat Rnd 10.
Rnds 23 to 42: Repeat Rnds 7 to 10 five more times.
Rnd 43: Repeat Rnd 7.
Rnd 44: Repeat Rnd 8.
Join The Kindest Community
Join our vibrant community of crafters on Facebook today. Whether you enjoy crafting with others or simply have burning questions, we’ve got you covered – join us now!
Top Ribbing
Row 1: With color of choice, ch 8 (or ch 25 for a fold-over cuff), in blo sc in the second chain from the hook and across to the leg, sl st 2 sts on the leg (these do not count as sts), turn. | 7 or 24 sts
Row 2: Skip the two slip stitches from the body, blo sc in each st across, turn. | 7 or 24 sts
Row 3: Ch 1, blo sc in each st across, sl st 2 sts on the body, turn.
Repeats: Repeat rows 2 and 3 around the top of the stocking leg. Join the last row to the beginning row by slip-stitching through the back loops of the first and last rows at the same time, with the wrong side facing.
Top Scallop
Rnd 1: Skip the first 2 sts, 5 dc in the next, skip 2 sts, sl st in next, then skip 2 sts, 5 dc in the next, skip 2 sts, sl st in next; repeat around, join and fasten off. | 8 scallops
Heel
Tip: See the video for working the corners and reducing holes.
Rnd 1: Attach the color of choice for the heel to the edge of the stitch from Rnd 19 on a corner, ch 1, then hdc2tog by working into the edge stitch and the first st of the round, hdc 18, hdc2tog by working into the next st and the edge stitch; repeat by working around the other side of the heel and decreasing on the corners, join and turn. | 40 sts
Rnd 2: Ch 1, hdc2tog, hdc 16, hdc2tog, then repeat that sequence once more, join. | 36 sts
Rnd 3: Ch 1, hdc2tog, hdc 14, hdc2tog, then repeat once more, join. | 32 sts
Rnd 4: Ch 1, hdc2tog, hdc 12, hdc2tog, then repeat once more, join. | 28 sts
Rnd 5: Ch 1, hdc2tog, hdc 10, hdc2tog, then repeat once more, join. | 24 sts
Fasten off, leaving a long tail; fold the heel opening in half from top to bottom, and seam it closed. Weave in ends.
Finishing
Weave in all ends and give your stocking a little fluff. Add a hanging tab to the top using ribbon and rivets for a polished, ready-to-hang finish, or crochet a tab, or use a strip of leather with a punched hole for a rustic look. You can also create an i-cord for a hanging loop.
For an extra special touch, add a wooden tag. If you are using your stocking as decor, slipping a cardboard insert, cut to shape, inside will help maintain that crisp silhouette. Your stocking is finished and ready to be displayed or wrapped as a thoughtful gift.
Petal Loop Stitch Stocking FAQs
How much yarn do I need to crochet a Christmas stocking?
For this pattern, you need about 230 yards of worsted-weight yarn for a single solid-color stocking. A standard 489-yard skein of Herrschners Worsted 8 will make two stockings with a bit to spare, which makes a family set surprisingly affordable. If you are striping, you will use less of each individual color but want to have both full skeins on hand. I always suggest buying one extra skein for a set, since dye lots and tension can vary just enough to leave you short on the last stocking.
What yarn is best for a crochet Christmas stocking?
A number 4 worsted-weight acrylic is my top pick for stockings, and here is why. Acrylic is sturdy, holds its shape when stuffed, wipes clean if it meets a candy cane, and comes in every festive color you could want. Wool is lovely but pricier and fussier to care for on something that lives in a box eleven months of the year. I used Herrschners Worsted 8, but any smooth worsted acrylic will behave the same way. Save your splurge yarn for a scarf.
Is this stocking pattern beginner-friendly?
I would call it a confident beginner-to-intermediate make. The stitches themselves are not hard, but the Petal Loop Stitch has a rhythm you need to learn, and the stacked single crochet is probably new if you have only done basic patterns. The good news is that both are shown stitch by stitch in the video tutorial, and gauge is not critical, so there is a lot of room to relax and learn as you go. If you can single crochet and half double crochet, you can absolutely make this.
How do I make a crochet stocking hold its shape on the mantel?
Two things make the difference. First, block the finished stocking so the texture relaxes and the edges lie flat. Second, if you are displaying it empty, cut a piece of cardboard to the stocking silhouette and slip it inside to keep it standing crisp and upright. The tight worsted acrylic already gives this stocking more structure than a softer fiber would, so it holds up well on its own once filled, but the cardboard trick is what gets you that magazine-ready look for photos.
Can I make this stocking bigger or smaller?
Yes. Because gauge is not critical, the simplest way to resize is to change your hook. A larger hook and the same pattern give you a bigger stocking; a smaller hook gives you a daintier one. You can also adjust the height by working more or fewer repeats of the Petal Loop Stitch on the leg before you start the cuff. Just keep in mind that a bigger stocking drinks more yarn, so buy accordingly.
Where can I find other Petal Loop Holiday patterns?
Right here on the blog! The patterns for the Petal Loop Chevron Washcloth, Chevron Blanket (Small Throw size), and the Petal Loop Ornament are all here.
Can I sell stockings I make from this pattern?
You are welcome to sell finished stockings you make from this pattern on a small scale, and a credit back to Briana K Designs is always appreciated. What you cannot do is copy, share, or resell the pattern itself. In other words, sell the stockings you stitch with your own two hands, not the instructions. That is what keeps independent designers like me able to keep giving patterns away for free on the blog.
More Crochet Patterns You’ll Love
If this one puts you in a holiday mood, here is where I would head next.
🥂 Cheers, and happy crocheting!
Psst: my crochet pattern app keeps your row count and your place for you, plus four free crochet tools. No subscription required.
Hook down? Not so fast…
I’d Love to See Yours!
You made something beautiful. Here’s how to keep it, show it off, and inspire the next maker.
Make the matching set
More holiday makes for your mantel.


Who are you making for this year?
Keep the hook movingReaders Are Loving
 Wine Glass Cover
 Wheat Stitch Acorns
 Reed Washcloth
 Wheat Mushrooms