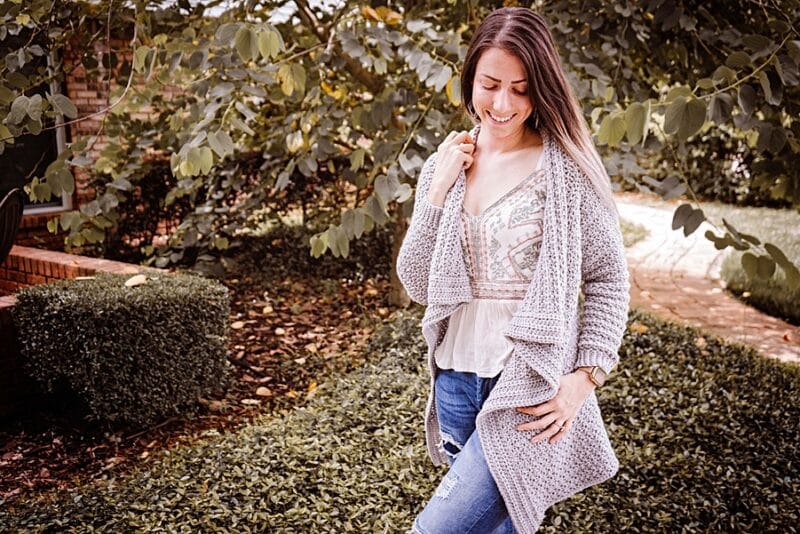
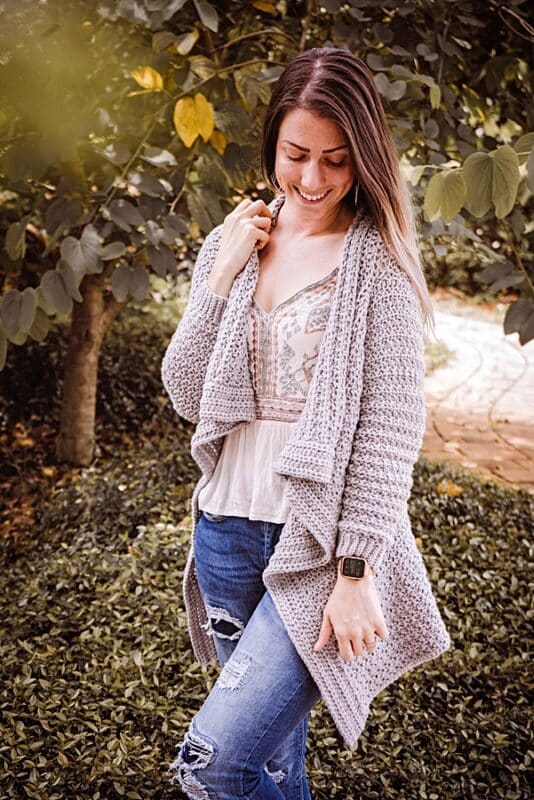
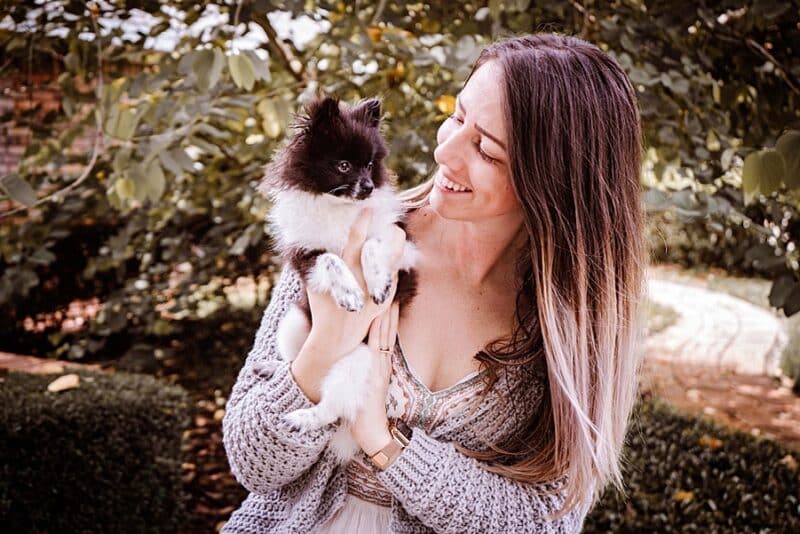
I don’t know anyone who wouldn’t want to whip up this Snuggle Puff Crochet Cardigan Pattern. This is such a soft and easy piece to wear or layer. For sure this will become a staple in your crochet wardrobe. This free crochet pattern has written instructions on this blog, as well as video instructions on YouTube or found below. Want to try a v-neck flat construction? Check out the Finch V-Neck Crochet Cardi.
Want an Ad-Free PDF Download of this pattern?
This pattern is available in my shops:
About the Yarn
This is my first crochet project using Snuggle Puff Yarn from WeCrochet. I’ve been told it’s so soft and amazing to work with, and it did not disappoint. I’ve already started other projects and I want all the colors. Can you imagine the Snuggle Puff Crochet Cardigan in a light blue! Or maybe even a tan, swoon.
Snuggle Puff Yarn is an Aran/Heavy Worsted Weight with 142 yards per ball. What I love most is that it’s mainly cotton, the fibers used are 70% Pima Cotton, and 30% Nylon.
That means it’s a great yarn for the warmer climates, as well as cold places in the north. It’s also good for those who are allergic to wool. This is a great, soft yarn with a slight halo mimicking some of your high-end wools. Its airy fibers help with drape and comfort.
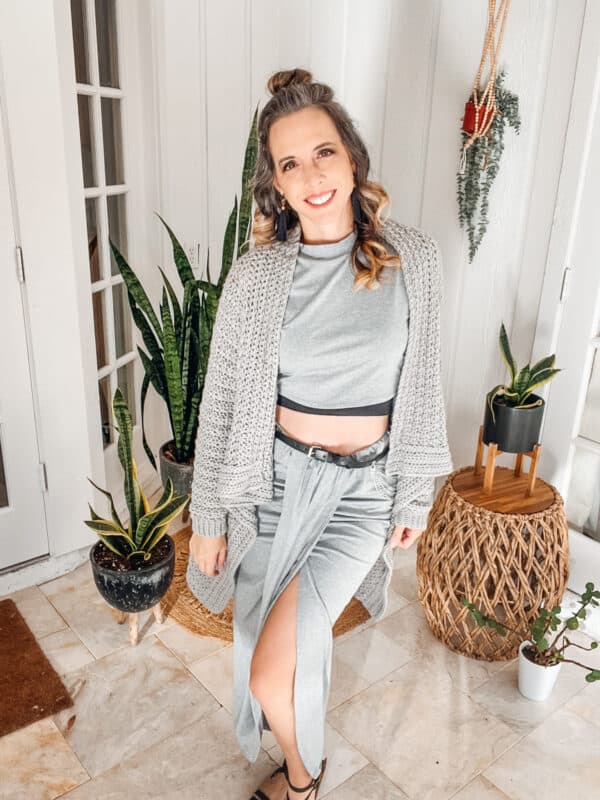
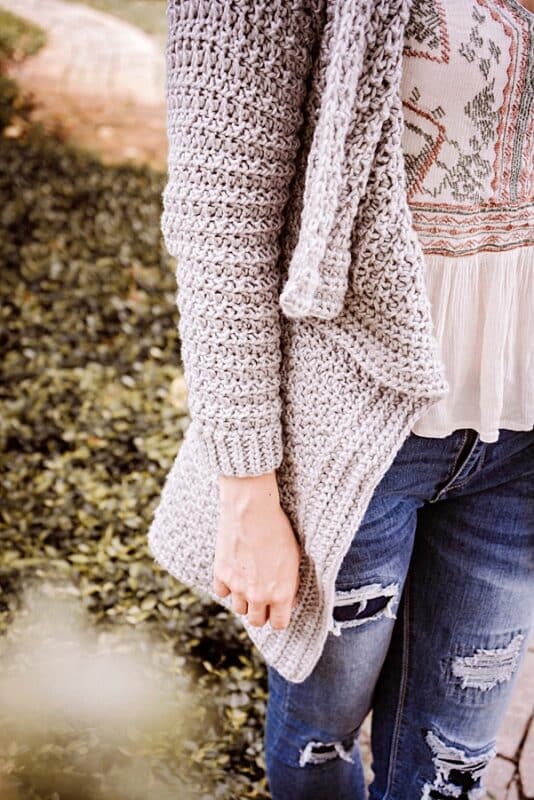
Get Creative with Wearing The Snuggle Puff Cardigan
Looking to harness your inner Jedi for the Star Wars Galactic Starcruiser? I’ve got the inside scoop on cosplay-style outfits that will have you feeling the Force. Crochet accessories are a budget-friendly and stylish addition, as I recently discovered myself.
No need to break the bank, just raid your own closet and let your creativity take the wheel. To see more images and Star Wars Inspiration, visit Popular Star Wars Knit & Crochet Patterns for the Galactic Starcruiser.
May the fashion be with you!
Snuggle Puff Crochet Cardigan Supplies
Crochet Hook:
6.0mm (J hook), or hook to obtain gauge


Notions:
Removable stitch markers if needed
Yarn needle to weave in ends
Scissors
Yarn:
WeCrochet Snuggle Puff (discontinued)
70% Pima Cotton, 30% Nylon, 142yds/50g
Colorway: Bunny
8 (9, 10, 10, 11) (12, 12, 13, 14) Balls
Yardage:
XSmall: 1100 yds (1006 m)
Small: 1200 yds (1097 m)
Medium: 1300 yds (1189 m)
Large: 1400 yds (1280 m)
1X: 1500 yds (1372 m)
2X: 1600 yds (1463 m)
3X: 1700 yds (1554 m)
4X: 1850 yds (1692 m)
5X: 2000 yds (1829 m)
Abbreviations/Stitches:
blo – back loop only
ch – chain
est st pat – established stitch pattern*
flo – front loop only
hdc- half double crochet
hdc3tog – half double crochet 3 sts together
na – not applicable
st(s) -stitch(es)
- See notes
Gauge:
12 sts by 8.5 rows = 4×4” in est st pat
Skill Level:
Beginner/Easy
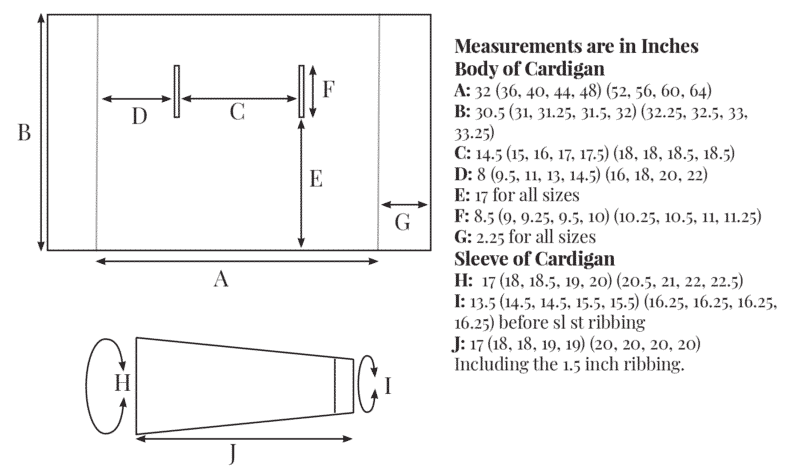
Sizes/Measurments:
Finished Bust Sizes Before Front Trim
XSmall: 32” (81 cm)
Small: 36” (91 cm)
Medium: 40” (102 cm)
Large: 44” (112 cm)
1X: 48” (122 cm)
2X: 52” (132 cm)
3X: 56” (142 cm)
4X: 60” (152 cm)
5X: 64” (163 cm)
This has an additional is a 2.25” Front Trim.
Notes:
Sizes are written as: xs (s,m, l, 1X) (2X, 3X, 4X, 5X)
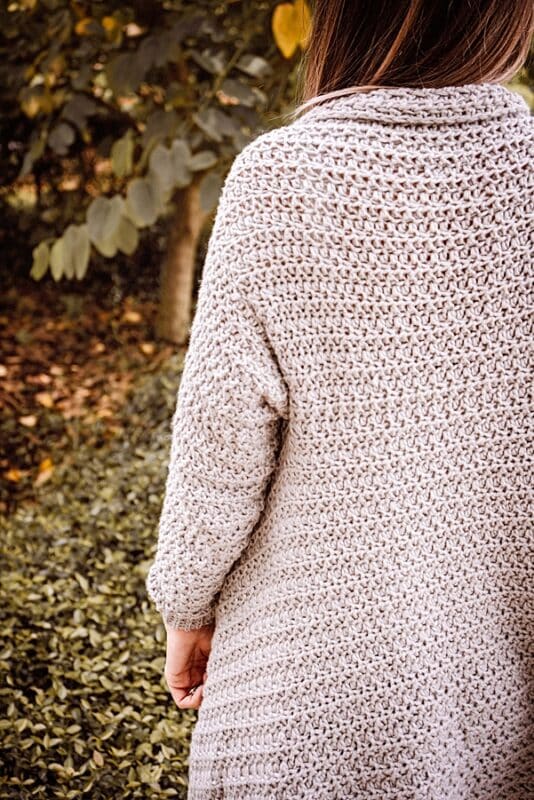
The Snuggle Puff Cardigan body is worked flat from the bottom up. A center panel will be crocheted while making openings for the arms and then a texture panel is added to the front sides. The sleeves are worked in the rounds and decreased toward the wrist. This is a fitted cardigan, for an oversized cardigan go up a bust size.
The ch 1 at the beginning of the row does not count as a stitch.
Established Stitch Pattern:
Row 1: Ch 1 (chain does not count as a st here and throughout the pattern), blo hdc in first, flo hdc in the next; repeat from * to * across, turn.
Row 2: Ch 1, flo hdc in first, blo hdc in the next; repeat from * to * across, turn.
These two rows create the established stitch pattern. Each stitch will be working in the opposite blo or flo from the row below.
Tip: Mark the first stitch with a stitch marker so you know which stitch is your first stitch in the row.
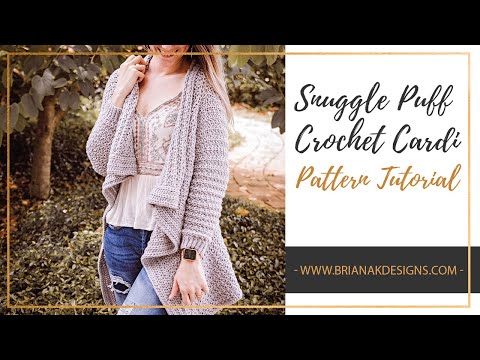
Snuggle Puff Crochet Cardigan Video:
Click the box below to unlock this exclusive subscriber content for free. Add your email and create a password. If you are having trouble, reset your password or log in to the Grow Portal.
I’m thrilled to share this amazing crochet pattern with you! Please don’t copy, paste, or distribute this pattern. Prefer an ad-free experience? Purchase a digital PDF file for a small fee from one of my online stores. I appreciate your support and readership. You are why I can keep doing what I love and sharing it with others. Thank you from the bottom of my heart.
Snuggle Puff Crochet Cardigan Schematic:
Snuggle Puff Crochet Cardigan Written Pattern:
Cardigan Body
| Row | Description |
| 1 (RS) | Ch 97 (109, 121, 133, 145) (157, 169, 181, 193), working in the second ch from the hook hdc 96 (108, 120, 132, 144) (156, 168, 180, 192), turn. |
| 2 (WS) | Ch 1 (chain does not count as a st), *blo hdc in first, flo hdc in the next*; repeat from * to * across, turn. 96 (108, 120, 132, 144) (156, 168, 180, 192) sts St count for this section will not change. |
| 3 | Ch 1 (chain does not count as a st), *flo hdc in first, blo hdc in the next*; repeat from * to * across, turn. Row 2 & 3 is the established stitch pattern. Each stitch will be working in the opposite blo or flo from the row below. |
| Repeats | Repeat rows 2 & 3 for 38 rows. Repeat row 2 one more time or until the desired length to the underarm is achieved, ending on a WS row. This is the ‘E’ length on the back of the cardigan, check diagram for visual. |
First Arm Hole (Right Panel)
| Row | Description | St Count |
| 1 (RS) | Ch 1, working in the est st pat, hdc 24 (29, 34, 39, 44) (49, 55, 60, 66), turn | 24 (29, 34, 39, 44) (49, 55, 60, 66) |
| Repeats | Repeat row 1 for 14 (15, 16, 17, 18) (19 20, 21, 22) rows. Fasten off. | 24 (29, 34, 39, 44) (49, 55, 60, 66) |
Across the Shoulders (Center Panel)
| Row | Description | St Count |
| 1 (RS) | Skip 2 sts from the last stitch worked on row 1 of the First Arm Hole. Attach yarn and ch 1, working in the est st pat, hdc 44 (46, 48, 50, 52) (54, 54, 56, 56), turn. | 44 (46, 48, 50, 52) (54, 54, 56, 56) |
| 2 | Repeat row 1 for 14 (15, 16, 17, 18) (19 20, 21, 22) rows. Fasten off. | 44 (46, 48, 50, 52) (54, 54, 56, 56) |
Second Arm Hole (Left Panel)
| Row | Description | St Count |
| 1(RS) | Skip 2 sts from the last stitch worked on row 1 of Across the Shoulders. Attach yarn and ch 1, working in the est st pat, hdc 24 (29, 34, 39, 44) (49, 55, 60, 66), turn. | 24 (29, 34, 39, 44) (49, 55, 60, 66) |
| 2 | Repeat row 1 for 14 (15, 16, 17, 18) (19 20, 21, 22) rows. Do not fasten off. | 24 (29, 34, 39, 44) (49, 55, 60, 66) |
Working Across All Panels
| Row | Description | St Count |
| 1(RS) | Ch 1, working in the est st pat, hdc 24 (29, 34, 39, 44) (49, 55, 60, 66) across the first panel, ch 2, hdc 44 (46, 48, 50, 52) (54, 54, 56, 56) across the center panel, ch 2, hdc 24 (29, 34, 39, 44) (49, 55, 60, 66) across the last panel, turn. | 96 (108, 120, 132, 144) (156, 168, 180, 192) Including chains. |
| 2 | Ch 1, working in the est st pat, hdc across all stitches, turn. | 96 (108, 120, 132, 144) (156, 168, 180, 192) |
| 3 | Repeat row 2 for 9 more times, or until desired height after the arm holes. Fasten off. | 96 (108, 120, 132, 144) (156, 168, 180, 192) |
Front Trim
| Row | Description |
| 1(RS) | With the right side facing, turn your work sideways and join at one corner of the cardigan to work across the side. Slip stitch across the side working 3 slip stitches per every two rows, turn. (see video tutorial) |
| 2 (WS) | Ch 1, working into the sl sts, hdc in each stitch across, turn. |
| 3-5 | Repeat row 2. Trim height can be adjusted to desired size, by adding or decreasing row 2 count. Fasten off and repeat on the other side. |
Sleeve
| Round | Description | St Count |
| 1 | Attach yarn to the stitch at the bottom of the arm opening. Ch 1, sl st 52 (54, 56, 58, 60) (62, 64, 66, 68) sts around, join. Mark first stitch with a st marker. | 52 (54, 56, 58, 60) (62, 64, 66, 68) |
| 2 | Ch 1, working in the est st pattern, hdc in each sl st around, join with a sl st to the first st in round, and turn. | 52 (54, 56, 58, 60) (62, 64, 66, 68) |
| Repeats | Continue working in the est st pattern, joining and turning at the end of each round, while also decreasing every 3 (3, 3, 3, 3) (3, 2, 2, 2) rounds until there are 30 (32, 32, 34, 34) (36, 36, 36, 36) sts. Work any remaining rows in est st pat, without decreasing, until there are a total of 34 (36, 36, 38, 38) (40, 40, 40, 40) rows. Do not fasten off and continue to Sleeve Ribbing. How to decrease: Ch 1, hdc3tog, continue working in the est st pattern for the rest of the round, join with a sl st to the first stitch in the round and turn. | 30 (32, 32, 34, 34) (36, 36, 36, 36) |
Sleeve Ribbing
| Row | Description | St Count |
| 1 | Ch 8, in blo sl st in second chain from hook and across to the sleeve edge, sl st 2 sts on the body (these do not count as sts), turn. | 7 |
| 2 | Skip the two sts from the sleeve edge, blo sl st in each st across, turn. | 7 |
| 3 | Ch 1, in blo sl st in each st across, sl st 2 sts on the sleeve edge, turn. | 7 |
| Repeats | Repeat Rows 2-3 around the sleeve edge. Join last row to beginning row by slip stitching through blo of first and last row at the same time with the WS facing. Repeat Sleeve and Sleeve Ribbing on the other sleeve hole/arm hole. |
Finishing:
Fasten off and weave in all ends. Block and wear.
I love seeing what you create! Please tag me @brianakdesigns or #brianakdesigns on social 🙂
Well, That Was Fun! What’s Next?