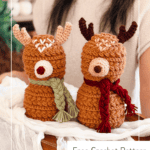
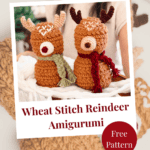
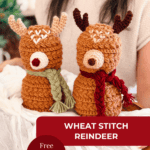
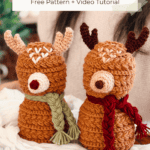
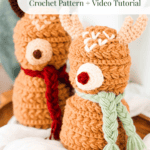
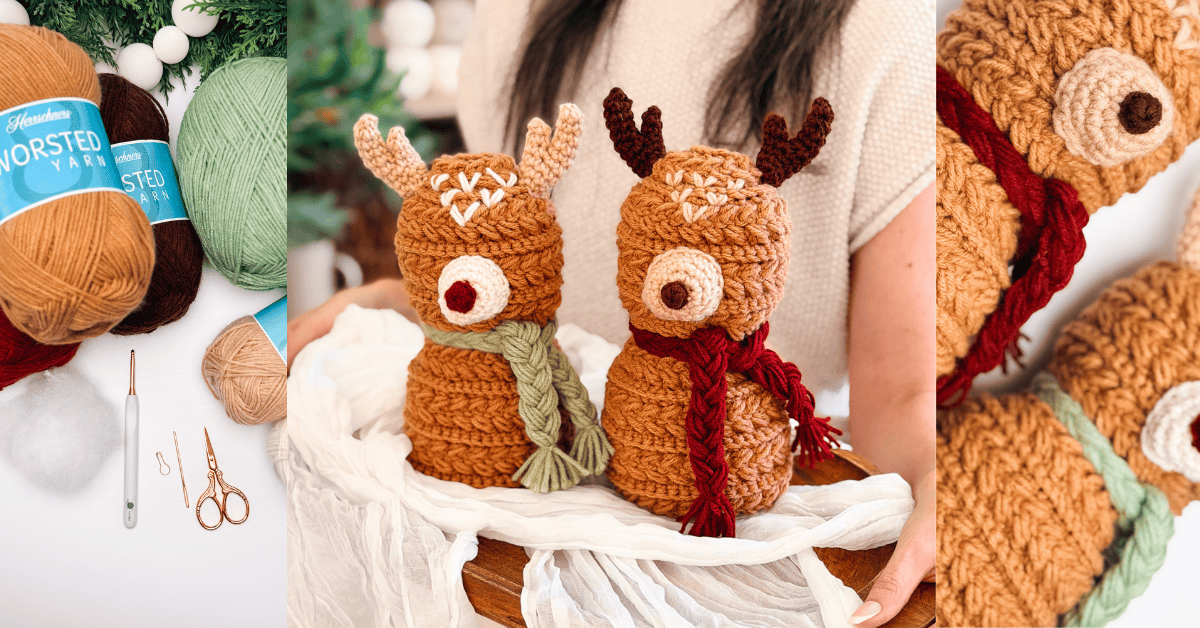
What I wanted from this crochet reindeer was texture you could see from across the room. Not a sweet little face you have to lean in for, but a whole body that reads as handmade from the doorway. So this cutie is built as one tall, rounded shape, worked in my signature Wheat Stitch from the crown of the head all the way down, with antlers standing up on top and a thick braided scarf tied at the neck.
Disclosure: This post contains affiliate links. Please read my disclosure for more info.
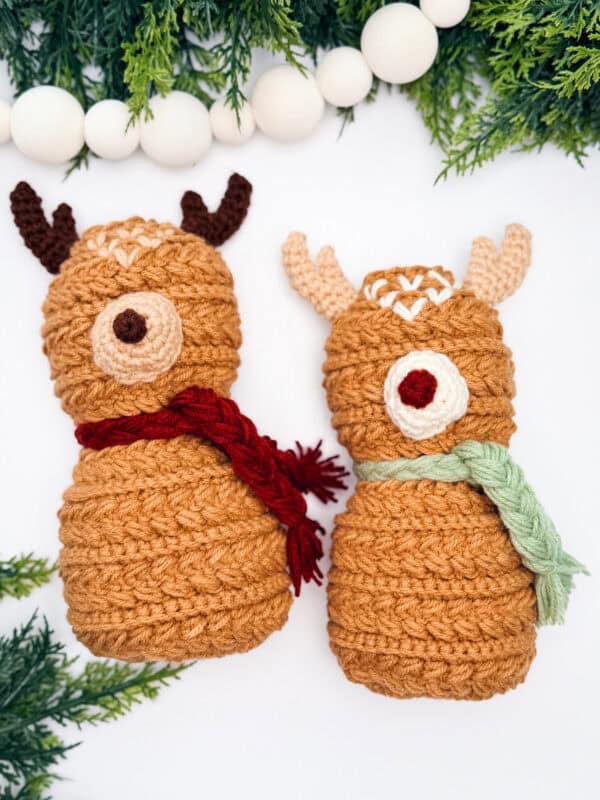
This free crochet reindeer pattern finishes at 5.5 inches wide and 10.5 inches tall, making it the perfect size for a mantel or basket. The head and the body are worked together as one continuous piece, so all the shaping happens while you crochet. You sew on two antlers and a snout at the halfway point, and that is the whole assembly. Those raised puff rounds do most of the decorating for you, which is exactly the point of the Wheat Stitch. Add a simple braided scarf at the end, and your sweet little reindeer is ready to display!
I have been designing crochet patterns for over a decade, and the Wheat Stitch is the one I keep circling back to. Here it is worked in Herrschners Worsted 8 in Pecan on a G (4.0mm) hook, which is a size smaller than most worsted weight projects call for. That is on purpose. A tighter fabric on an amigurumi means no fiberfill peeking through the stitches, and combined with the back-loop-only rounds this pattern uses, the finished reindeer is dense enough to sit up on a shelf without a single white fluff showing.
Before You Hook: Wheat Stitch Reindeer Crochet Pattern Details
🧶 Yarn Used: Herrschners Worsted 8 and Herrschners Worsted 3
⚖️ Yarn Weight: #4 Worsted Weight
🧵 Featured Stitch: Wheat Stitch™
🪝 Hook Size: US G (4.0mm) Crochet Hook
📏 Sizes: One Size
🩷🩷🩷🤍 Difficulty level: Intermediate
🕐 Approx Crochet Time: About 6 to 8 hours, usually spread across two evenings
🏷️ Project Type: A textured amigurumi reindeer for Christmas decorating, handmade gifts, and craft fair tables, worked in worsted weight yarn with a one-piece body.
Save for Later • Get a Summary • Pick Up Where You Left Off
Why You’ll Love This Crochet Reindeer Pattern
- Simple by design. One rounded shape, one stitch pattern, and two small pieces to attach. Nothing here is fiddly, because the texture is doing the work.
- Minimal sewing. The head and the body are worked together as one continuous piece, so the antlers and the snout are the only things you attach.
- Nothing extra to source. Eyes are optional, and there are no buttons, no felt, and no glue anywhere in this pattern. The face is a crocheted snout with a small round nose, and the only embroidery is a few tiny V shapes worked in a lighter yarn across the top of the head to mimic a real reindeer’s natural markings.
- Texture from top to bottom. The Wheat Stitch runs the full height of the body, which is what gives this crochet reindeer pattern a boutique finish without a single added embellishment.
- Standard yarn and hook. Worsted-weight acrylic and a G (4.0mm) hook, no chenille, no bulky, no sport-weight cotton to hunt down.
- The perfect size. At 10.5 inches tall, your new stuffed friend won’t get lost on a mantel with other decor, and the braided scarf takes minutes and uses scraps.
- The full written pattern is free right here, and a step-by-step video tutorial comes with it.
If you have made the Wheat Stitch Snowman, this is the same idea. Simple shaping, heavy texture, almost no assembly, and a finished piece that looks far more complicated than it actually was. That is the design language across the whole Wheat Stitch line, and the reindeer is the Christmas version of it.
Wheat Stitch Crochet Reindeer Pattern Supplies
Yarn
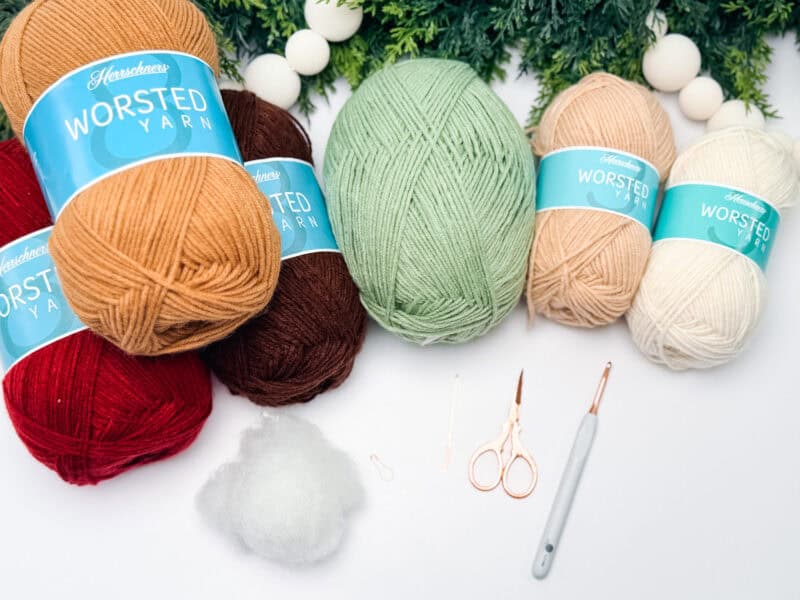
Herrschners Worsted 8
100% Acrylic, 489yds/226g
Colors shown: Espresso, Pecan, Wine, and Leaf
Herrschners Worsted 3
100% Acrylic, 183yds/85g
Colors shown: Aran and Sandstone
Yarn Quantities
Total Yardage: ~215 yds
Main body (caramel): ~150 yd
Antlers (2): ~25 yd
Scarf (braided + fringe): ~25 yd
Snout + embroidered V’s: ~12 yd
Small nose: ~2 yd
Crochet Hook
Size US G (4.0mm) Crochet Hook
Notions
Scissors
Yarn Needle
Removable Stitch Marker
Fiberfill
Poly Pellets (optional)
Burlap Ribbon or Twine (optional)
Be sure to check out the full pattern tips below
Yarn Substitutions
Any smooth worsted weight yarn will work here. These are the four I have tested and would reach for:
Brava Worsted. 100% Premium Acrylic, 218yds/100g.
Herrschners Holiday Sparkle. 92% Acrylic, 8% Polyester, 489yds/226g. A little shimmer, very festive.
Mary Maxim Maximum Value. 100% Acrylic, 474yds/227g.
Brava Tweed. 97% Premium Acrylic, 3% Viscose, 340yds/100g. The flecks give it a lovely rustic finish.
You are not limited to that list. If there is a yarn already in your stash you have been wanting to try, use it. Just check your fabric as you go, because a different yarn often wants a different hook. If your stitches look loose or you can see light through them, go down a size. If the fabric feels stiff and your hands are working hard, go up one. A fuzzier or more textured yarn will soften how much the puff rounds show, which some makers love and some do not, so work a few rounds and see what you think before you commit to a whole reindeer.
Remember always to check the gauge and drape when substituting yarns.
Skill Level
Intermediate. You should be comfortable with a magic ring, working in joined rounds, back loop only stitches, and a puff stitch. None of it is difficult on its own, but the pattern moves between joined rounds and continuous rounds and asks you to pause partway through for assembly, so it helps to have a few amigurumi projects behind you.
Sizing & Finished Measurements
As written, with the yarn and hook listed above, the reindeer measures 5.5 inches wide by 10.5 inches tall. That measurement includes the antlers standing up on top of his head.
There is one size here, but the size is not locked. Changing the yarn weight changes the reindeer, and the stitch counts stay exactly the same either way, so there is no math to do. Your own tension and how firmly you stuff him will also shift the finished measurements by half an inch or so in either direction, which is normal and nothing to chase.
Abbreviations
blo – back loop only
ch – chain
RS/WS – Right Side/Wrong Side
Puff St – modified puff stitch, see below
sc – single crochet
sc2tog – single crochet 2 together (a decrease)
sl st – slip stitch
st(s) – stitch(es)
Gauge
Gauge is not critical for this pattern. Your reindeer will come out slightly larger or smaller depending on your tension and hook, and that is perfectly fine. What does matter is that your fabric is dense. If you can see daylight through your stitches, go down a hook size before you start.
Tips
How to Crochet A Gauge Swatch
- Working a gauge swatch will let you know if you will have the correct sizing for this pattern. It will also help you practice the stitches used in this project and improve your stitch work for a flawless look.
- Are you struggling to match the gauge? Check out the blog post on What is Crochet Gauge and How To Fix It
Special Stitches Used in This Pattern
Puff Stitch (modified): Yarn over and insert your hook into the stitch or space. Yarn over again and pull up a long loop. Yarn over and insert your hook into the same stitch or space. Yarn over again and pull up a long loop (5 loops on the hook). Yarn over and pull through the first 4 loops, yarn over and pull through the remaining loops.
Invisible sc2tog: Insert your hook into the front loop of the first st, and then insert into the front loop of the second st (3 loops on the hook). Yarn over and pull through both front loops (2 loops on the hook), yarn over and pull through the remaining loops on the hook.
The Wheat Stitch itself is a repeat of single crochet, puff, and back loop only rounds. If you have never worked it before, run through the tutorial first, and the pattern below will read much faster.

Important Pattern Notes
How the Crochet Reindeer Amigurumi is Made
Here is the order of operations so you know where you are headed. You start with the small pieces, working up the antlers first and then the nose and the snout. From there you move on to the head, pausing partway through to sew those pieces on and embroider the little V’s across the top of his head before you close the head off. Once the head is done, you keep working straight down through the body, and then all that is left is the braided scarf to tie around his neck.
One thing worth flagging: most of the body is worked in joined rounds that you turn at the end of each round, which is what keeps the Wheat Stitch texture sitting evenly all the way around. From Round 34 down, you stop joining and work continuously to close the reindeer body off. The pattern says exactly where that switch happens, but if you tend to skim, that is the line to watch for.
Why This Reindeer Will Not Show Its Stuffing
The most common complaint about amigurumi is white fiberfill grinning through the stitches. It is not a stuffing problem. It is a fabric problem, and it almost always comes down to hook size.
Three things in this pattern work against it. First, the G (4.0mm) hook. Worsted weight labels usually suggest an H or an I, and following that label is exactly how people end up with gappy amigurumi. Second, most of the plain rounds here are worked in back loop only, which makes a denser fabric than working through both loops. Third, the puff rounds sit proud on the surface and physically block the light.
For the stuffing itself, pull the fiberfill apart and add it a little at a time rather than pushing in one big wad. Wads go lumpy. The pattern starts you stuffing around Round 21 and has you keep going as you work, which is far easier than filling your reindeer through a five-stitch hole at the end. Stop when the stitches look the same size stuffed as they did unstuffed. And if you want your deer to sit heavy and steady on a shelf, drop a small handful of poly pellets into the base first
Crochet Reindeer Pattern FAQs
What yarn is best for a crochet reindeer?
A smooth, well-plied worsted-weight acrylic is the best all-round choice, and it is what this pattern is written for. Acrylic holds its shape when stuffed, comes in every caramel and espresso shade you could want, washes easily if the reindeer ends up in a child’s hands, and is inexpensive enough that a craft fair batch does not hurt. Cotton works too and gives crisper stitch definition, but it has less give, so the puffs take more effort and the finished piece feels stiffer. A fuzzy or chenille yarn softens how much the puff texture shows, so if that is what you have, work a few rounds first and see whether you like the look before committing to the whole thing.
How long does it take to crochet this reindeer?
Plan on about 6 to 8 hours from start to finish, which for most people means two evenings. The range is wide because single crochet on a G hook is slow by nature and the puff rounds take longer than the plain ones. If you are new to the Wheat Stitch, add an hour while your hands learn the rhythm, and then it speeds up considerably. The antlers, nose, and snout together take under an hour; the body is the bulk of the time, and the scarf takes minutes.
What is the Wheat Stitch in crochet?
The Wheat Stitch is my signature textured stitch, built from a repeat of single crochet, a modified puff stitch worked into a skipped stitch, and rounds of back-loop-only single crochet in between. The result is a fabric with raised diagonal rows that genuinely look like heads of wheat. It works flat or in the round, and in the round is what this reindeer uses. If you want to learn it properly before you cast on, the full step-by-step tutorial walks through it with photos and video.
Do I need safety eyes for this reindeer?
No. The eyes are entirely optional, and the reindeer looks lovely with embroidered eyes or with no eyes at all if you like the minimal look. Safety eyes are fine on a decor piece that lives on a shelf, but they are not suitable for children under three years old because they can detach and become a choking hazard. For any reindeer heading to a child, embroider the eyes with a few stitches of dark yarn or embroidery floss instead. It takes two minutes and removes the worry entirely.
Why is my amigurumi showing stuffing through the stitches?
Nine times out of ten, the hook is too big for the yarn. Yarn labels recommend hook sizes for garments, where you want drape, and that is the opposite of what amigurumi needs. Go down one or two sizes until your fabric feels firm and you cannot see light through it. This pattern already calls for a G hook with worsted weight for exactly that reason. The other two culprits are loose tension, which improves with practice, and overstuffing, which stretches the stitches open. If they look bigger stuffed than unstuffed, take some fiberfill back out.
Can I make the reindeer bigger or smaller?
Yes, and you do not have to change a single stitch count. Because gauge is not critical here, the size is controlled entirely by your yarn weight and hook. A DK weight with an E or F hook gives you a smaller reindeer for a shelf cluster, and a bulky with an I or J gives you a chunky hearth-sized version. Work the pattern exactly as written either way. Just remember heavier yarn uses considerably more than the 390 yds listed, so buy an extra skein if you are sizing up.
Can I sell reindeer made from this pattern?
Yes. Finished items made from Briana K Designs patterns may be sold on a small scale, and credit back to Briana K Designs is always appreciated though never required. What you may not do is copy, share, resell, or redistribute the pattern itself in any form.
Choosing Colors for Your Crochet Reindeer
The pattern gives you a choice at three spots, and those choices are what make your reindeer look like yours.
- Antlers: Espresso for a dark, classic look, or Sandstone for something softer and more neutral.
- Nose: Espresso for a natural deer, or Wine for the obvious Rudolph nod. If you have a child in the house, they will have an opinion about this one.
- Snout: Aran or Sandstone, both of which read as a pale muzzle against the caramel body.
- Head markings: two strands of a lighter yarn for the V’s on top of his head. Aran or Sandstone against the Pecan body gives you that soft dappled look real reindeer have, and it is the detail people notice last and comment on first.
- Scarf: anything that contrasts. Wine and Leaf are shown, but a cream, a mustard, or a soft blue all work beautifully.
For a neutral farmhouse Christmas, keep everything in the tan, cream, and espresso family and let the texture carry it. For traditional Christmas, the Wine nose and scarf against the Pecan body gets you there instantly. And if you are making a set for a craft fair, make one of each. They sell better as a pair, and the contrast is what makes people stop at the table.
Where To Put Him When Christmas Is Over
I do not love making things that live in a box eleven months of the year. Yes, this is a reindeer, but also an adorable stuffed deer. And a caramel deer with a neutral scarf sits happily in a rustic or woodland room all year. Swap the Wine scarf for a sage or an oatmeal one in January, and nobody reads this as Christmas decor at all.
Through December, leave your reindeer on a mantel, a bookshelf, or tucked into a gathering of greenery. The finished project is tall enough to stand on its own rather than needing propping, which is the practical advantage of that dense one-piece body.
Subscribe, Like & Watch on YouTube
Relax & Crochet with NO Ads
Upgrade to the Printable PDF
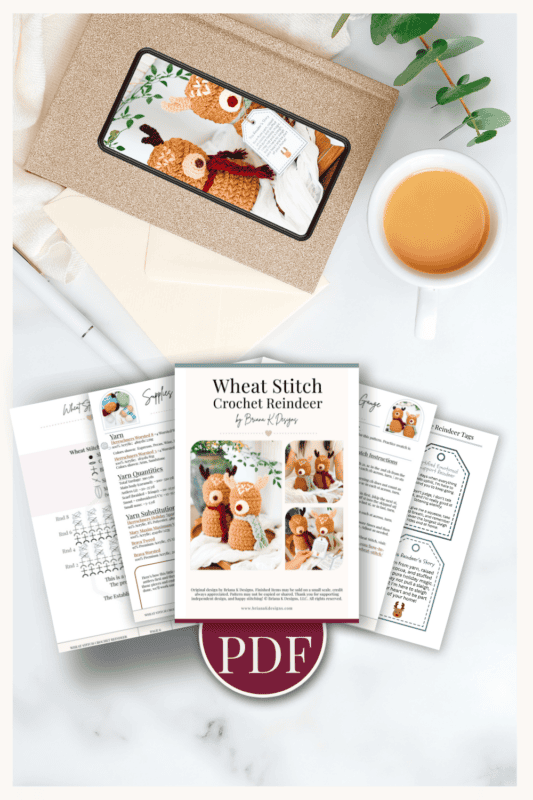
Beautifully formatted to print and take with you anywhere. The paid pattern includes:
Add your email in the box below to unlock this pattern to view on the blog for free. I’m thrilled to share this amazing crochet pattern with you! Please don’t copy, paste, or distribute this pattern. Prefer an ad-free experience? Purchase a digital PDF file for a small fee from one of my online stores. I appreciate your support and readership. You are why I can keep doing what I love and sharing it with others. Thank you from the bottom of my heart.
Wheat Stitch Crochet Reindeer Free Pattern
Safety Tip
This crochet reindeer works beautifully as a stuffy for a child, but a decor piece and a toy are not built the same way. As written, this pattern specifically omits safety eyes. If you would like to add features to this reindeer’s face, skip the safety eyes entirely and embroider them instead. Safety eyes are not suitable for children under three because they can work loose and become a choking hazard, and embroidered eyes look every bit as good here. The same goes for buttons, beads, or any other small applied detail.
Sew the antlers and the snout on securely, all the way around rather than tacked at a few points, because small hands pull at exactly the parts you attached in a hurry. Leave the poly pellets out of a child’s version and use fiberfill only. Acrylic is the right yarn choice here too, since it washes and dries fast.
Reindeer Nose
With Espresso or Wine Yarn
Rnd 1: Inside a Magic Ring, sc 8, join and fasten off, leaving a long tail. | 8 sts
Using your yarn needle, loop through the front loops only of each stitch, then begin to pull tight, pushing the nose into a ball. Set aside for attaching to the snout later.
Reindeer Snout
With Aran or Sandstone Yarn
Rnd 1: Inside a Magic Ring, sc 6, do not join and work continuously. | 6 sts
Rnd 2: 2sc in each stitch around. | 12 sts
Rnd 3: *2sc in next, sc in the next; repeat from * around. | 18 sts
Rnds 4 to 5: Sc in each stitch around, fasten off, leaving a long tail for sewing later.
Next, take your small round nose and sew that to the front of the snout. Put the whole nose piece aside for attaching to the reindeer body later.
Join The Kindest Community
Join our vibrant community of crafters on Facebook today. Whether you enjoy crafting with others or simply have burning questions, we’ve got you covered – join us now!
Reindeer Body
With Pecan Yarn. The Reindeer Body will be done in one piece.
Rnd 1: Inside a Magic Ring, sc 11, join and turn. | 11 sts
Rnd 2: Ch 1, blo 2 sc in each st around, join and turn. | 22 sts
Rnds 3 to 4: Ch 1, skip the first st, sc in next, work a puff st into the skipped st, *skip the next st, sc in next, work a puff st into the skipped st; repeat from * around, join and turn.
Rnds 7 to 8: Repeat Rnds 3 to 4.
Rnds 9 to 10: Ch 1, blo sc in each st around, join and turn.
Rnds 11 to 14: Repeat Rnds 7 to 10.
Rnds 15 to 16: Repeat Rnds 3 to 4.
Next, we’re going to pause to assemble the face of the reindeer. First, we will start by sewing the antlers on Rnds 5 and 6 on either side of the head.
Then, on the front of the reindeer’s head, we are going to sew the nose covering from Rnds 9 to 13, placing it in the center. Before you completely sew around, you can add a little bit of stuffing in the nose to help it hold some shape.
And then, lastly, you can use two strands of a lighter color of yarn to create tiny V’s on top of the head, just above the nose. See the video or image for example placement.
Rnd 17: Ch 1, blo sc2tog around, join and turn. | 22 sts
Rnd 18: Ch 1, blo 2 sc in each st around, join and turn. | 44 sts
Rnds 19 to 20: Repeat Rnds 3 to 4.
Rnd 21: Ch 1, *blo 2 sc in next, blo sc in the next 6 sts; repeat from * around until the last 2 sts, blo sc 2, join and turn. | 50 sts
Begin to stuff the reindeer as you work.
Rnd 22: Ch 1, blo sc in each st around, join and turn.
Rnds 23 to 24: Repeat Rnds 3 to 4.
Rnds 25 to 26: Ch 1, blo sc in each st around, join and turn.
Rnds 27 to 30: Repeat Rnds 7 to 10.
Rnds 31 to 32: Repeat Rnds 3 to 4.
Begin stuffing the Reindeer Body and continue stuffing as you go.
Rnd 33: Ch 1, *blo sc2tog, sc in next 3; repeat from * around, join and turn. | 40 sts
Rnd 34: Ch 1, *blo sc2tog, blo sc in next 2; repeat from * around, do NOT join or turn, work continuously for the remaining rnds. | 30 sts
Rnd 35: *Sc2tog, sc in next 1; repeat from * around. | 20 sts
Rnd 36: Sc2tog around. | 10 sts
Rnd 37: Sc2tog around. | 5 sts
Fasten off, leaving a tail. Use the tail end to loop through the 5 sts and pull closed. Weave in end.
Braided Scarf
Cut 21 strands of yarn, each approximately 24 inches long. To do this quickly, wrap your yarn around a book (or anything about 12 inches tall) 21 times, then cut once along one edge.
Cut 2 additional short strands, about 6 inches each, and set them aside for tying.
Gather all 21 long strands together and, using one of the 6-inch strands, tie one end tightly to secure them into a single bundle.
Separate the 21 strands into 3 groups of 7. Braid the three groups down to the opposite end.
Once braided, use your remaining 6-inch strand to tie off the other end tightly.
Trim the tassels on both ends so they’re even.
Tie the finished braid around the reindeer as a scarf.
Tip: Do not braid it tight. A loose, slightly chunky braid reads far more like a real knit scarf than a tight rope does. And pick a color that contrasts with the body. The Wine and the Leaf shown in the photos both pop against the caramel, which is exactly why they were chosen. A tan scarf on a tan reindeer disappears.
Finishing
Once your reindeer is complete, weave in any remaining ends and give the whole piece a gentle fluff, shaping the antlers, nose, and body so it holds its form for display.
More Crochet Patterns You’ll Love
If the Wheat Stitch texture is your thing, these use the same stitch family:
🥂 Cheers, and happy crocheting!
Printable Version
This pattern is free to read here on the blog. The ad-free printable PDF is available in the Briana K Designs shop on Etsy and Ravelry.
brianakdesigns.com
Get the Wheat Stitch Crochet Reindeer Pattern
- Free written pattern: right here on this page, scroll up to the pattern section above.
- Ad-free printable PDF on Etsy. Instant download, print and go.
- Ad-free printable PDF on Ravelry. Same pattern, add it straight to your Ravelry library.
- Video tutorial on YouTube. Watch the full walkthrough if you would rather follow along visually.
The paid PDF includes the ad-free layout, the Wheat Stitch chart, an easy print version, and the printable gift tags.
Hook down? Not so fast…
I’d Love to See Yours!
You made something beautiful. Here’s how to keep it, show it off, and inspire the next maker.

Who are you making for this year?
Keep the hook movingReaders Are Loving
 Petal Loop Pumpkins
 Petal Chevron Blanket
 Petal Loop Stocking
 Chevron Washcloth