How To Crochet A Textured Blanket - Free Pattern
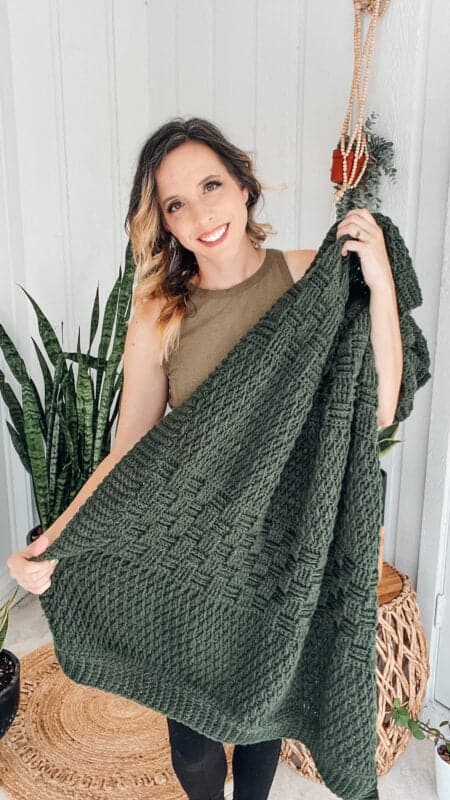
This textured crochet blanket pattern is perfect for any crafty crocheter looking to add a cozy home decor touch! Using the alpine and basket weave stitches, this easy crochet pattern will give your creations dimension and beautiful texture throughout.
Disclosure: This post contains affiliate links. Please read my disclosure for more info.
You’ll find written instructions and a video tutorial is included, making creating a beautiful blanket in your desired size easier than ever with the chart seen below.
Perfect for baby rooms or anywhere you want to add a warm, handmade touch. You’ll love how simple yet stylish these blankets look draped over the couch or draped on the end of the bed. Crochet something special with this textured crochet blanket pattern today!
Do you love this textured crochet free pattern blanket? Then you might also like the Crochet Garden Blanket Free Pattern Perfect for the Patio, the Sanibel Crochet and Chill Blanket Free Pattern, the Hello Sunshine Pillow Blanket, or the The Crochet Honey Bee Blanket Pattern.
Crochet Textured Blanket Video Tutorial

Why Textured Blankets Add Style to Home Decor
Textured blankets are a great way to add texture, color, and warmth to home decor. They provide visual interest and can be used in many different ways: as a throw blanket over the couch or as an accent piece on the bed.
Textured blankets also make a space welcoming by providing textural and visual stimulation. You can crochet a cozy textured blanket in various colors and textures, so you can find the perfect one to match your home's aesthetic.
Plus, when you crochet them with acrylic yarn, they’re easy to care for – most textured blankets are machine-washable and dryer-safe. With all these benefits, it’s no wonder that textured blankets have become such popular home decor pieces.
If you want to go beyond basic stitches and create easy texture, this crochet project is the blanket for you. By combining different stitches in sections, we can create a gorgeous blanket with one color of yarn. However, if you wanted to change colors each section that would be stunning as well, feel free to customize your textured crochet blanket.
Why this baby blanket makes a great gift.
This beautiful baby blanket makes a great gift for any new parent or expecting family. The modern and neutral design makes it perfect for both boys and girls. It's made of the softest material to ensure maximum comfort while also being machine washable to make cleaning a breeze, perfect for baby blankets.
Plus, its generous size allows it to be used as a play mat and for cozy snuggles when it’s time to rest. With its modern design, comfortable material, and practical use, this baby blanket is the perfect gift for any new parents or expecting families.
I made this one for my nephew and I know he is going to enjoy it when he visits my house. I didn't want his mom to worry about packing playmats or needing a blanket when they visit, so I thought it would be a great gift idea and be nice to have one here for when we have little visitors.
Blankets are a great way to explore new crochet stitches.
If you've ever wanted to try a new stitch, a blanket is a great way to master techniques. But making a crochet blanket in just one stitch can feel boring. This blanket design uses two different stitches to explore, keeping it interesting and mixing it up.
By the end of this project, you will be an expert at my favorite stitches, the basket weave stitch and the alpine stitch.
Want to create a beautiful blanket in various sizes with the Alpine Stitch? Head over to Alpine Stitch Textured Baby Crochet Blanket Free Pattern. You can also checkout my easy video tutorial at Alpine Crochet Stitch – Fabulous Textured Stitch Easy Video Tutorial.
Looking for even more inspiration? Check out some of my other patterns.
Desert Cactus Mosaic Crochet Free Blanket Pattern
Snowflake Hexagon Mosaic Crochet Blanket
Waves Mosaic Crochet Blanket Free Pattern
Crochet Garden Blanket Free Pattern Perfect for the Patio
Sanibel Crochet and Chill Blanket Free Pattern
How To Crochet the Moss Stitch + Free Washcloth Pattern
How To Best Crochet The Basket Weave Stitch
How To Crochet For Bee Lovers – The Perfect Buzzing Beehive Blanket Pattern
What you will need to crochet the textured blanket:
Crochet Hook:
Size J (6.0mm), or hook to obtain gauge
Notions:
Removable stitch markers if needed
Yarn needle to weave in ends
Scissors
Yarn:
Mary Maxim Maximum Value, worsted weight yarn.
100% Acrylic, 474yds/8oz
Suggested Yarn Substitutes:
WeCrochet Brava Worsted, worsted weight yarn.
100% Premium Acrylic, 218yds/100g
Yardage:
300-9130 yards depending on size
Abbreviations/Stitches:
Bpdc - back post double crochet
ch - chain
dc - double crochet
Fpdc - front post double crochet
pm - place marker
rnd- round
sl st - slip stitch
st(s) - stitch(es)
Stsc - stacked single crochet
Gauge:
12 sts x 16 rows unblocked= 4×4” in Alpine Stitch.
Measurements/Sizes:
See Chart Below for how much yarn you will need. Divide the total yardage by the yardage on label of the desired yarn to determine how many skeins you will need.
Skill Level:
Intermediate
Notes for the Textured Crochet Blanket
Tip for Alpine stitch height: When working the front post double crochet stitches, we will need to adjust to create more height so the fabric lays flat.
Yarn over and insert hook from front to back to front around the post of the next stitch, yarn over and pull up the loops to the height of the current row (this is where the adjustment is important; it must be pulled up higher than a normal post stitch, yarn over and pull through two loops, yarn over and pull through the remaining loops on the hook.
If you would like to practice the stitches for this free crochet pattern blanket, there are washcloth tutorials for each of these stitches. For the Alpine Stitch visit Alpine Crochet Stitch – Fabulous Textured Stitch Easy Video Tutorial, and for the basket weave stitch visit How To Best Crochet The Basket Weave Stitch.
Special Crochet Stitches
Front Post Double Crochet (fpdc): yarn over, insert hook from front to back to front around the post of the next st, yarn over, pull through work, {yarn over and pull through 2 loops} 2 times.
Back Post Double Crochet (bpdc): yarn over, insert hook from back to front to back around the post of the next st, yarn over, pull through work, {yarn over and pull through 2 loops} 2 times.
Stacked Single Crochet (Stsc): Do NOT chain, insert hook into next stitch, yo, pull up a loop, yo and pull through both loops, insert hook in the vertical bar below, yo, pull up a loop, yo and pull through both loop on hook. https://brianakdesigns.com/stacked-single-crochet/
Where To Purchase The Ad-Free Downloadable PDF:
Click the box below to unlock this exclusive subscriber content for free. Add your email and create a password. If you are having trouble, reset your password or login to the Grow Portal.
I'm thrilled to share this amazing crochet pattern with you! Please don't copy, paste, or distribute this pattern. Prefer an ad-free experience? Purchase a digital PDF file for a small fee from one of my online stores. I appreciate your support and readership. You are why I can keep doing what I love and sharing it with others. Thank you from the bottom of my heart.
How to Size Your Textured Crochet Blanket
If you want to modify the width of the textured blanket pattern, you can create your starting chain in increments of 8 + 2. The height measurements are approximate and include the 2-inch border.
Written Instructions for the Textured Crochet Blanket
Alpine Stitch Blanket Section
Row 1 for first section only:
Refer to the chart for the desired stitch count and then chain that amount of stitches, sc in first st and in each sts across, turn. (As an alternate, this row can be done as a foundation single crochet).
Row 1 for repeat blanket sections:
Sc in each sts across, turn.
Row 2:
Stsc in first, dc in each stitch across, turn.
Row 3:
Sc in each sts across, turn.
Row 4:
Stsc in the first st, Fpdc around the dc sts from the previous dc row, dc in next st; repeat from * to * until the last st, dc in last, turn.
Special Note:
When working the front post double crochet stitch, be sure to bring the stitch up to the height of your row before doing the last yarn over.
Row 5:
Sc in each sts across, turn.
Row 6:
Stsc in the first stitch, dc in next st, Fpdc around the dc sts from the previous dc row; repeat from * to * until the last st, dc in last, turn.
Row 7:
Sc in each sts across, turn.
Alpine Stitch Section Repeats:
Repeat Rows 4-7 three more times, then repeat Rows 4-5 one more time.
There are 21 total rows in this section, ending on a single crochet row. Approx 7 inches in height.
Basket Weave Stitch Section
Row 1:
Stsc in first, dc in each stitch across, turn.
Row 2:
Stsc in first, Fpdc the next 3 sts, Bpdc the next three stitches; repeat from * to * until the last st, dc in the last st, turn.
Rows 3-4:
Repeat Row 2.
Row 5:
Stsc in first, Bpdc the next 3 sts, Fpdc the next three stitches; repeat from * to * until the last st, dc in the last st, turn.
Rows 6-7:
Repeat Row 5.
Basket Weave Section Repeats:
Repeat Rows 2-7 one more time. Then repeat Rows 2-4 one more time.
There are 16 total rows in this section, ending on a single crochet row. Approx 7 inches in height.
Crochet Blanket Section Repeats
Alternate between the Alpine Stitch Section and the Basket Weave Section until desired height minus the 2-inch blanket border.
Textured Crochet Blanket Pattern Border Instructions
This will be worked on the top and bottom (narrow side of the blanket).
With the RS facing, attach the yarn to the corner of the blanket.
Row 1:
Ch 7, sc in the first chain from hook and across towards the blanket edge, sl st 2 sts along the blanket edge (these do not count as sts), turn. 7 sts
Row 2:
Skip the two sts from the blanket edge, working in blo sc in each st across until the last st, sc in both loops of the last st, turn.
Row 3:
Ch 1 (does not count as a stitch), sc through both loops of the first st, blo sc in each st across, sl st 2 sts along the blanket edge, turn.
Repeats:
Repeat Rows 2-3 across one side of the blanket, cut yarn.
After completing one narrow side of the blanket, repeat on the opposite narrow side.
Repeat the instructions from above along the long edges of the blanket. This will be started by attaching the yarn to the corner of the previous ribbed edge and working 2 sl sts per row along the edge of the blanket. Now the entire blanket has a ribbed edge.

Finishing the Free Crochet Blanket Pattern
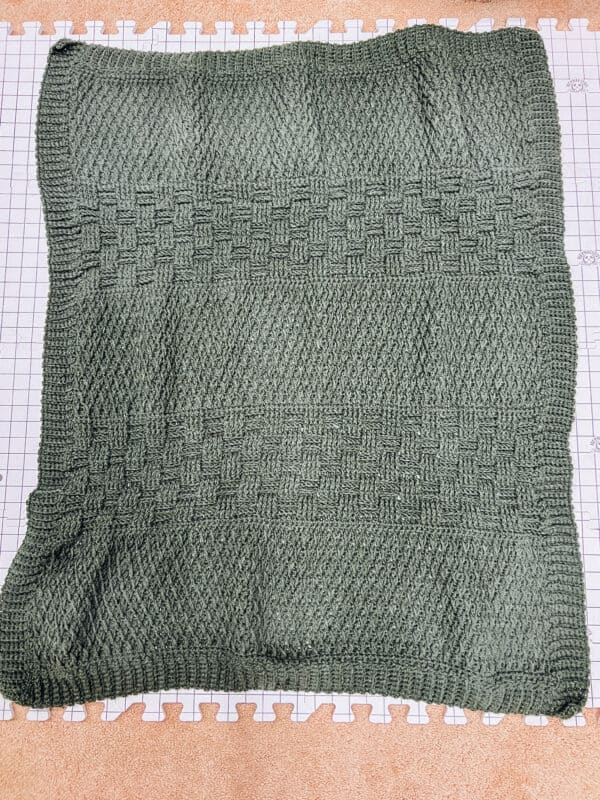
It is important to block this blanket for the best look, similar to ironing your clothes. If you have a blocking mat and pins that works best, but you can also get the blanket damp and lay it out on some towels to dry.
This will help even out the stitches as shown below in the before and during blocking.

Well That Was Fun! What's Next?
📌 PIN THIS POST - Don't lose this project; save it to your Pinterest crochet board so you can quickly come back to it again.
💌 SHARE - Share your yarn choice, in-progress, or finished projects on Facebook or Instagram and use the hashtag #brianakdesigns
🥂 JOIN - Join the kindest crafters in the Briana K Designs Community Group on Facebook. We love yarny friends!
🔗 RAVELRY LINK -Link and share your project on Ravelry. Having inspirational photos can help crafters.
