Diamond Granny Stitch Crochet Pumpkin Pattern
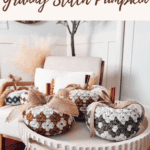
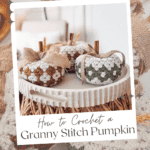
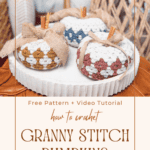
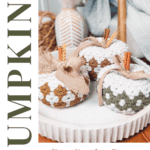
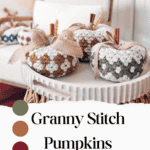
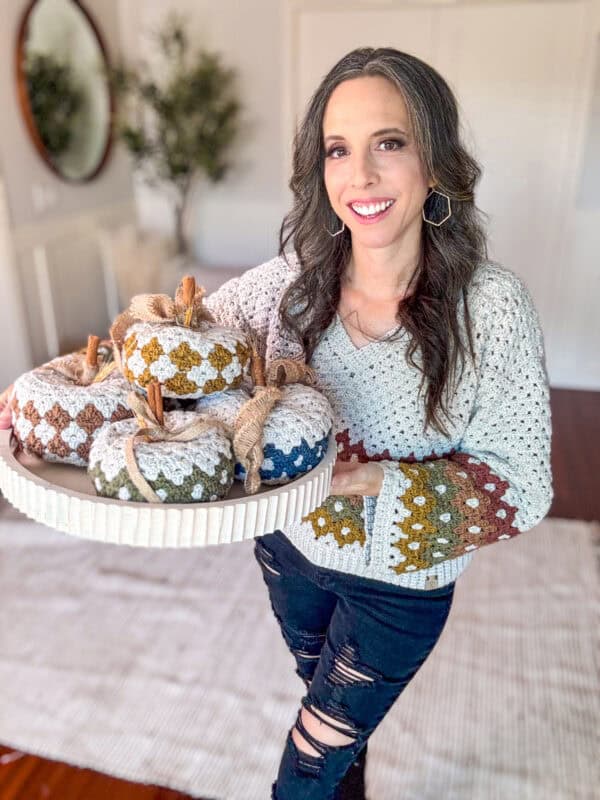
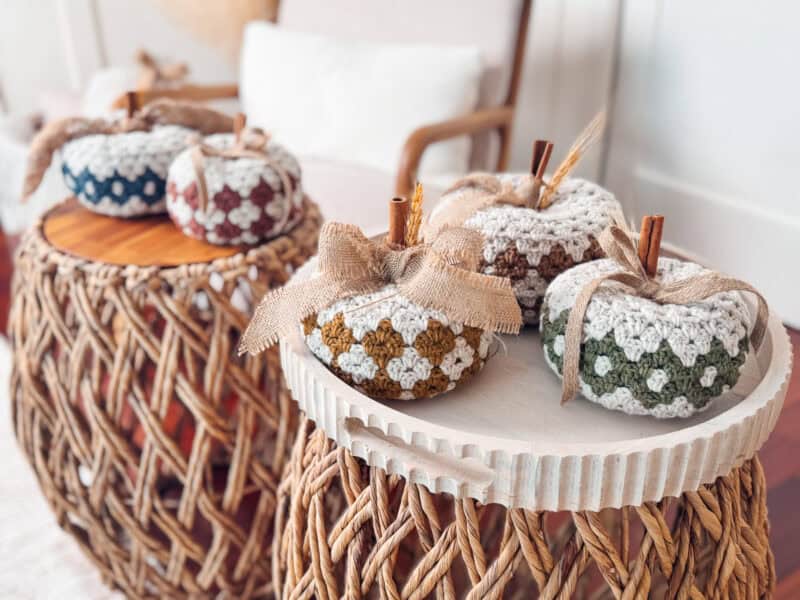
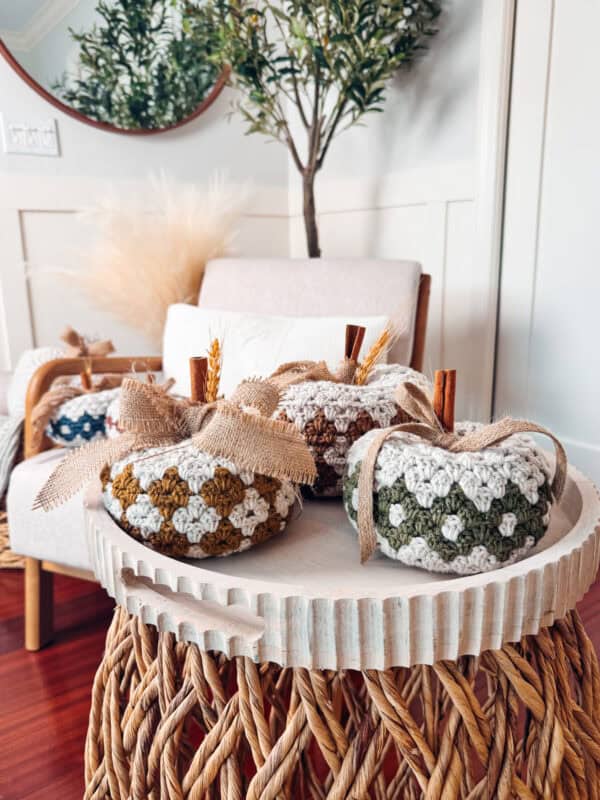
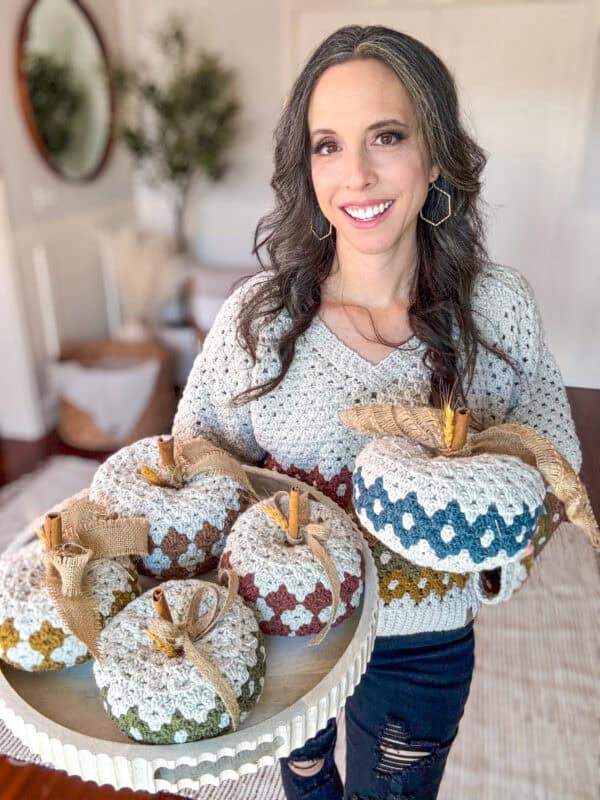
Spice up the cozy vibes of autumn with the Diamond Granny Stitch Crochet Pumpkin, a delightful home decor piece that’s perfect for adding a handmade touch to your fall decorations. With two different sizes and options for a diamond granny stitch colorwork pattern, this quick project is as fun to make as it is to display.

Disclosure: This post contains affiliate links. Please read my disclosure for more info.
Want to use the colorwork granny stitches on a hat? Check out the Diamond Granny Stitch Crochet Hat Pattern. And if you love pumpkins as much as I do, you can add to your indoor pumpkin patch with the Pumpkin Spice Trio and Cinderella's Pumpkins!
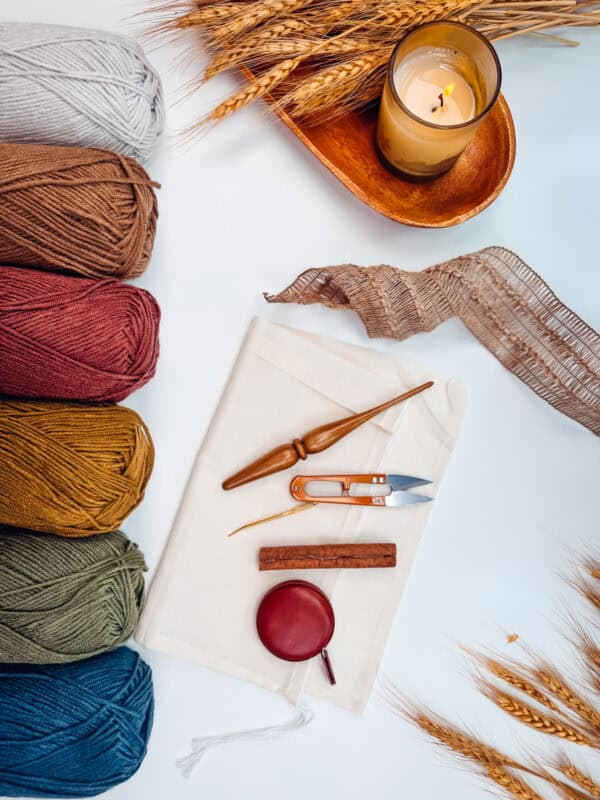
Crochet Supplies
Yarn
Lion Brand Color Theory
100% Acrylic, 246yds/100g
Yarn Quantities
Total Yardage: 150yds for Small; 220yds for Large
(Color A: 105/150yds; Color B: 45/70yds)
Yarn Substitutions
WeCrochet Dishie
100% Cotton, 190yds/100g
Lion Brand Pound of Love
100% acrylic, 1020yd /16oz
With
Hobbii Kind Feather
100% Premium Acrylic, 257yds/3.5oz
Lion Brand Mandala Ombre
100% Acrylic, 344yds/150g
Caron Blossom Cakes
61% Cotton, 39% Acrylic, 481yds/8oz
Remember always to check the gauge and drape when substituting yarns.
Crochet Hook
Size US G (4.0mm) Crochet Hook or hook to obtain gauge.
Notions
Scissors
Yarn Needle
Removable Stitch Marker
Fiberfill
Cotton Drawstring Bags
Cinnamon Stick
Burlap Ribbon
Skill Level
Intermediate
What you'll love about this pattern.
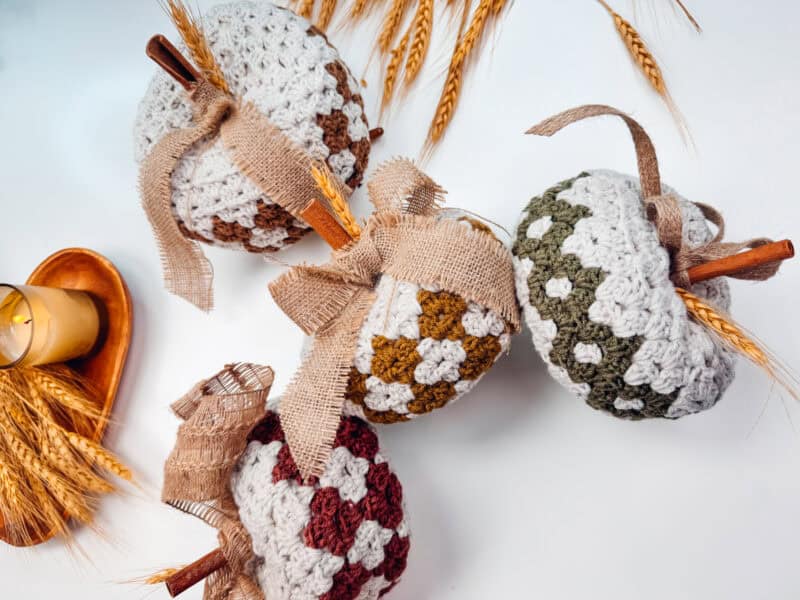
🩶 Charming Diamond Granny Stitch: Choose between two different diamond granny stitch colorwork patterns to create a pumpkin that’s uniquely yours. The intricate stitch adds texture and depth, making this pumpkin a standout piece in your fall decor.
🩶 Quick & Satisfying Project: Need a last-minute decor item or gift? This pumpkin works up quickly, making it the perfect project for busy fall days.
🩶 Perfect for Fall Decor: Add a cozy, handmade touch to your autumn decorations with these adorable pumpkins. They’re perfect for placing on mantels, tables, or anywhere that needs a little fall flair.
Two Sizes
Size Small: 3.75" x 6.5"
Size Large: 4.5" x 8"
Abbreviations
blo - back loop only
ch - chain
dc - double crochet
sc - single crochet
sl st - slip stitch
st(s) - stitch(es)
Gauge
16 sts by 8 rows = 4x4 inches stitch pattern. Not Critical for this pattern.
How to Crochet A Gauge Swatch
Working a gauge swatch will let you know if you will have the correct sizing for this pattern. It will also help you practice the stitches used in this project and improve your stitch work for a flawless look.
Are you struggling to match the gauge? Check out the blog post on What is Crochet Gauge and How To Fix It
Construction
This crochet pumpkin features a fun granny stitch colorwork and offers two pattern options. We'll start by working in the round to create the bottom, followed by rounds of granny colorwork, and finally, decreasing rounds to shape the top. The pumpkin is filled with a cotton drawstring bag stuffed with fiberfill and finished off with a cinnamon stick and ribbon.
Can’t get enough pumpkiny goodness? The Hello Pumpkin Pillow will add a touch of fall fabulousness to your home, and it coordinates well with the Hello Fall Pillow!
Special Stitches
Stacked Single Crochet (Stsc): Do NOT chain, insert hook into next stitch, yo, pull up a loop, yo and pull through both loops, insert hook in vertical bar below, yo, pull up a loop, yo and pull through both loops on hook.
Subscribe & Like
Video Tutorial for the Easiest Crochet Bag Ever!
Embrace the cozy vibes of autumn with the Diamond Granny Stitch Crochet Pumpkin, a delightful home decor piece that’s perfect for adding a handmade touch to your fall decorations. With two different sizes and options for a diamond granny stitch colorwork pattern, this quick project is as fun to make as it is to display.
Harvest Hues Crochet Collection
Relax & Crochet
Upgrade to the Printable PDF
Beautifully formatted to print and relax while crocheting. The paid pattern includes:
The Ad-Free PDF can be purchased on Etsy or Ravelry.
Click the box below to unlock this exclusive subscriber content for free. Add your email and create a password. If you are having trouble, reset your password or login to the Grow Portal.
I'm thrilled to share this amazing crochet pattern with you! Please don't copy, paste, or distribute this pattern. Prefer an ad-free experience? Purchase a digital PDF file for a small fee from one of my online stores. I appreciate your support and readership. You are why I can keep doing what I love and sharing it with others. Thank you from the bottom of my heart.
Written Crochet Pattern Instructions
Rnd 8:
Stsc in first space, 3 dc in same space, [3 dc in next space] three times, *4 dc in next space, [3 dc in next space] three times; repeat from * around, join and turn. | 72 sts; 24 granny groups
- Tip for doing the Little Diamonds Colorwork: On the last yo for Rnd 8 change to Color B.
Join The Kindest Community
Join our vibrant community of crafters on Facebook today. Whether you enjoy crafting with others or simply have burning questions, we've got you covered - join us now!
Little Diamonds Colorwork
For Rnd 1 work into the space between the 4 dc sts.
Rnd 1 (RS):
With Color B, Stsc in first space, 2 dc in same space, *with Color A 3 dc in next space, with Color B 3 dc in next space; repeat from * around, until the last space, with Color A 3 dc in last space, join with Color B and turn. | For Small Pumpkin: 72 sts and 24 granny groups; For Large Pumpkin: 90 sts and 30 granny
Rnd 2:
With Color B, Stsc in first space, 2 dc in same space, *3 dc in next space; repeat from * around, join and turn.
Rnd 3:
Stsc in first space, 2 dc in same space, *with Color A 3 dc in next space, with Color B 3 dc in next space; repeat from * around until the last space, with Color A 3 dc in last space, join and turn.
Rnd 4:
With Color A, Stsc in first space, 2 dc in same space, *3 dc in next space; repeat from * around, join and turn.
Rnd 5:
Repeat Rnd 3.
Rnd 6:
Repeat Rnd 2.
Rnd 7:
Repeat Rnd 3.
Style
Whether you want a small accent piece or a larger centerpiece, this pattern includes two different sizes to suit your decorating needs. Add a cozy, handmade touch to your autumn decorations with these adorable pumpkins. They’re perfect for placing on mantels, tables, or anywhere that needs a little fall flair. Make a few smaller pumpkins and coordinate them with r Fall Skies & Apple Pies or Thankful Table Runners!
Big Diamonds Colorwork
Rnd 1 (RS):
Stsc in first space, 2 dc in same space, [3 dc in next space] three times, *3 dc in middle of the 4 dc group, [3 dc in next space] four times; repeat from * until the last 4 dc sts, 3 dc in middle of the 4 dc group, join and turn. | 90 sts; 30 granny groups
Rnd 2:
Stsc in first space, 2 dc in same space, *with Color A 3 dc in next space, with Color B 3 dc in next space; repeat from * around until the last space, with Color A 3 dc in last space, join to top of Stsc with Color B, turn.
Rnd 3:
With Color B, Stsc in first space, 2 dc in same space, *3 dc in next space; repeat from * around, join and turn.
Rnd 4:
With Color A, Stsc in first space, 2 dc in same space, *with Color B 3 dc in next space, with Color A 3 dc in next space; repeat from * around until the last space, with Color B 3 dc in last space, join and turn.
Rnd 5:
Repeat Rnd 3.
Rnd 6:
Repeat Rnd 2.
Rnd 7:
With Color A, Stsc in first space, 2 dc in same space, *3 dc in next space; repeat from * around, join and turn.
Great for Gifting!
Looking for a handmade gift that’s sure to impress? The Diamond Granny Stitch Crochet Pumpkin makes a thoughtful and charming gift for friends and family. With its seasonal appeal and handcrafted beauty, it’s a gift that will be cherished year after year. The Pumpkin With Leaves Coaster and Pumpkin Mug Rugs (both Knit and Crochet) also make excellent hostess gifts!
Top Decreasing
Large Pumpkin Start Here:
Rnd 1 (WS):
Stsc in first space, 2 dc in same space, *2 dc in next space, [3 dc in next space] four times; repeat from * until the last 4 spaces of the rnd, 2 dc in next space, [3 dc in next space] three times, join and turn. | 84 sts; 30 granny groups
Rnd 2:
Stsc in first space, 2 dc in same space, [3 dc in next space] twice, *3 dc between the group of 2 dc sts, [3 dc in next space] three times; repeat from * until the last 2 spaces of the rnd, 3 dc in between group of 2 dc sts, join and turn. | 72 sts; 24 granny groups
Small Pumpkin Start Here:
Rnd 3 (WS):
Stsc in first space, 2 dc in same space, *2 dc in next space, [3 dc in next space] three times; repeat from * until the last 3 spaces of the rnd, 2 dc in next space, [3 dc in next space] twice, join and turn. | 66 sts; 24 granny groups
Rnd 4:
Stsc in first space, 2 dc in same space, 3 dc in next space, *3 dc between the group of 2 dc sts, [3 dc in next space] twice; repeat from * until the last 2 spaces of the rnd, 3 dc in between the group of 2 dc sts, join and turn. | 54 sts; 18 granny groups
Rnd 5:
Stsc in first space, 2 dc in same space, *2 dc in next space, [3 dc in next space] twice; repeat from * until the last 2 spaces of the rnd, 2 dc in next space, 3 dc in next space, join and turn. | 48 sts; 18 granny groups
Begin to stuff the pumpkin by placing the lining inside and then some fiberfill.
Rnd 6:
Stsc in first space, 2 dc in same space, *3 dc between the group of 2 dc sts, 3 dc in next space; repeat from * until the last 2 spaces of the rnd, 3 dc in between the group of 2 dc sts, join and turn. | 36 sts; 12 granny groups
Rnd 7:
Stsc in first space, dc in same space, 2 dc in each of the remaining spaces around, join and turn. | 24 sts; 12 granny groups
Rnd 8:
Stsc in the first space, dc in each of the remaining spaces around, join, and fasten off, leaving a long tail for closing the top and shaping. | 12 sts
Finish stuffing the pumpkin with fiberfill. Close the drawstring on the lining, leaving an opening for a stem or cinnamon stick.
Subscribe to my youtube channel
Finishing
With a yarn needle, loop through the blo of each remaining stitch and cinch the top opening closed around the stem.
Next, weave the tail end through the center of the pumpkin and out the bottom. Weave through a few strands of the center bottom, then back through the center of the pumpkin to the top. Repeat if necessary to shape the pumpkin.
Fasten off and weave in ends. Tie a bow to the stem if desired. And finally, display in your home all season long.
Enjoy the festive charm of your beautiful handmade crocheted pumpkins as they brighten up your home this fall! One of the best parts of crafting these lovely decorations is the opportunity to experiment with different yarn weights and colors.
Try using chunky yarn for a cozy, textured look, or opt for vibrant hues to create a playful vibe. Mixing and matching yarns not only adds depth to your decor but also allows you to express your unique style - and use up your yarn stash! Make a few Herringbone Baskets and fill them with wee little pumpkins, and add a few Autumn Wheat Baubles or Beaded Pumpkins to add fun texture!
Cheers, and happy crocheting!
Well That Was Fun! What's Next?
📌 PIN THIS POST - Don't lose this project; save it to your Pinterest crochet board so you can quickly come back to it again.
💌 SHARE - Share your yarn choice, in-progress, or finished projects on Facebook or Instagram and use the hashtag #brianakdesigns
🥂 JOIN - Join the kindest crafters in the Briana K Designs Community Group on Facebook. We love yarny friends!
🔗 RAVELRY LINK -Link and share your project on Ravelry. Having inspirational photos can help crafters.