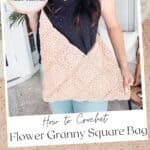
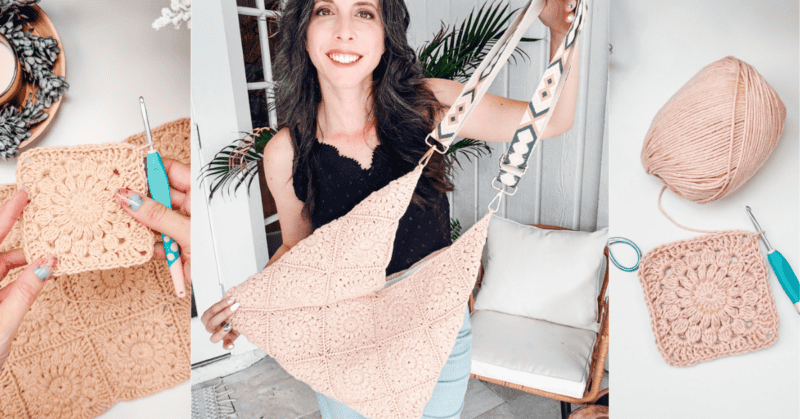
Granny Square Flower Crochet Bag Pattern
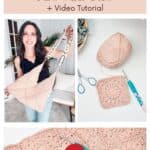

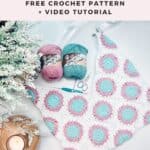
Say hello to sunshine and blooms with the Granny Square Flower Bag! This delightful project is like stitching a garden into your everyday life—each beautifully textured granny square boasts charm and whimsy. We will use a join-as-you-go method to reduce the number of ends that need to be weaved in. Then, we will create a fold and sew two seams. Finally, we’ll add a fun handle to finish the project!
Disclosure: This post contains affiliate links. Please read my disclosure for more info.
Whether you choose to go bold with a single color or have a blast with a rainbow of hues, this pattern lets your creativity blossom. It’s the perfect project for adding a splash of fun and personality to your style! Pair your new bag with the Summer House Tank or the Dove Pullover to add a delightful burst of joy to your wardrobe!
Can’t get enough of granny stitches? Check out the quick Granny Stitch Crochet Clutch Pattern or the Rainbow Hues Granny Stitch Cardigan. Both are a fun play on granny stitch colorwork.

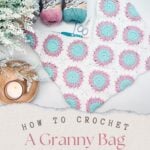
Crochet Supplies
Yarn
WeCrochet Dishie
100% Cotton, 190yds/100g
Or
Lily Sugar’n Cream
100% Cotton, 120yds/70g
Yarn Quantities
Solid Color:
650 yds; 6 balls
3 Colors:
Beach Glass: 180 yds; 2 balls
Rose Pink: 180 yds; 2 balls
White: 290 yds; 3 balls
Yarn Substitutions
WeCrochet Comfy Color Mist – 75% Pima Cotton, 25% Acrylic; 219yds/100g
Lion Brand Made With Love – 60% Cotton, 40% Acrylic; 185yds/100g
WeCrochet Comfy Worsted – 75% Pima Cotton / 25% Acrylic, 109yds/50g
Remember always to check the gauge and drape when substituting yarns.
Crochet Hook
Size US G (4.0mm) Crochet Hook or hook to obtain gauge.
Notions
Scissors
Yarn Needle
Removable Stitch Marker
Blocking Board
Skill Level
Beginner
What you’ll love about this pattern.
🩶 2 Easy Seams – This crochet bag is made as one flat rectangle, then folded and finished with only two seams.
🩶 JAYGO – We will be using a join-as-you-go method to reduce the amount of ends to weave in.
🩶 Customizable – Make this bag your own by using your favorite colors and adding colorful buttons, snaps, or even tassels to the corners.
One Size
Bag rectangle measures 16″ x 16″ laid flat (after folding and seaming).
Abbreviations
ch – chain
hdc – half double crochet
dc – double crochet
sc – single crochet
sl st – slip stitch
st(s) – stitch(es)
Stdc – stacked double crochet
Stsc – stacked single crochet
tr – treble crochet
Gauge
Each Granny Square = 4″ by 4″.
How to Crochet A Gauge Swatch
Working a gauge swatch will let you know if you will have the correct sizing for this pattern. It will also help you practice the stitches used in this project and improve your stitch work for a flawless look.
Are you struggling to match the gauge? Check out the blog post on What is Crochet Gauge and How To Fix It
Are you in love with the granny stitch? Come try the Colorful Hues Granny Stitch Blanket Pattern
or the Summer Granny Crochet Top or Dress.
Construction
The Granny Square Flower Bag only needs two seams to finish! Each motif is joined as you go, so there’s no extra sewing at the end. It’s a perfect design for any level of crocheter looking for a texture-rich and easy-to-make project.
Love bags with this simple construction? Try making the Danbury Rectangle Crochet Bag or the Easy Granny Stitch Rectangle Bag!
Special Stitches
Stacked Single Crochet (Stsc): Do NOT chain, insert hook into next stitch, yo, pull up a loop,
yo and pull through both loops, insert hook in the vertical bar below, yo, pull up a loop, yo
and pull through both loops on the hook.
Cluster: [Yarn over, insert hook into next space or stitch, yarn over and pull up a loop, yarn
over and pull through two loops on the hook] three times, yarn over and pull through all 4
loops on the hook.
Stsc Cluster: Do NOT chain, insert hook into next stitch, yo, pull up a loop, yo and pull
through both loops, insert hook in the vertical bar below, yo, pull up a loop, [yarn over, insert
hook into next space or stitch, yarn over and pull up a loop, yarn over and pull through two
loops on the hook] two times, yarn over and pull through all 4 loops on the hook.
Stsc Puff Stitch: Insert the hook into the next stitch, yo, pull up a loop, yo and pull through both loops, insert hook in the vertical bar below, yo, pull up a loop (2 loops on the hook), Yo again, insert the hook into the same stitch and pull up a loop (4 loops on the hook), Yo again, insert the hook into the same stitch and pull up a loop (6 loops on the hook), Yarn over and pull through the first 5 loops, yarn over and pull through remaining loops.
Puff Stitch: Yarn over and insert your hook into the stitch/space. Yarn over again and pull
up a long loop. (Yarn over and insert your hook into the same stitch/space. Yarn over again
and pull up a long loop) two more times (7 loops on the hook). Yarn over and pull through the
first 6 loops, yarn over and pull through remaining loops.
Pattern Notes
- Using a stitch marker at the beginning of each round is recommended.
- The instructions and stitch counts are given for the smallest size, with the larger sizes in brackets
( ). - Before you dive into your project, take a moment to identify the stitch and row counts that match the size you’re making. By highlighting or marking them, you’ll save time and effort later on. Trust us, this small step will make a big difference in your crochet journey!
Video Tutorial for the Easiest Crochet Bag Ever!

Relax & Crochet
Upgrade to the Printable PDF
Beautifully formatted to print and relax while crocheting. The paid pattern includes:
The Ad-Free PDF can be purchased on Etsy or Ravelry.
Click the box below to unlock this exclusive subscriber content for free. Add your email and create a password. If you are having trouble, reset your password or login to the Grow Portal.
I’m thrilled to share this amazing crochet pattern with you! Please don’t copy, paste, or distribute this pattern. Prefer an ad-free experience? Purchase a digital PDF file for a small fee from one of my online stores. I appreciate your support and readership. You are why I can keep doing what I love and sharing it with others. Thank you from the bottom of my heart.
Written Crochet Pattern Instructions
Join The Kindest Community
Join our vibrant community of crafters on Facebook today. Whether you enjoy crafting with others or simply have burning questions, we’ve got you covered – join us now!
Joining Granny Squares
For this pattern, we will use a join-as-you-go technique. However, feel free to use your preferred joining method. Please see the joining section of the video.
Remove your hook from the st you just made on your working square and insert it under the top loop only of the coordinating opposite stitch of the square you’re joining to. Place the working yarn back on your hook and pull through the loop on your hook (from the joining square).
Sl st into the next st on the working granny square, remove hook, insert hook into the coordinating loop from the joining granny square, place working yarn back onto crochet hook, and sl st. Continue to do this down the edge of the granny square.
Note that some squares will be joined along two edges. Once joined, fasten off.
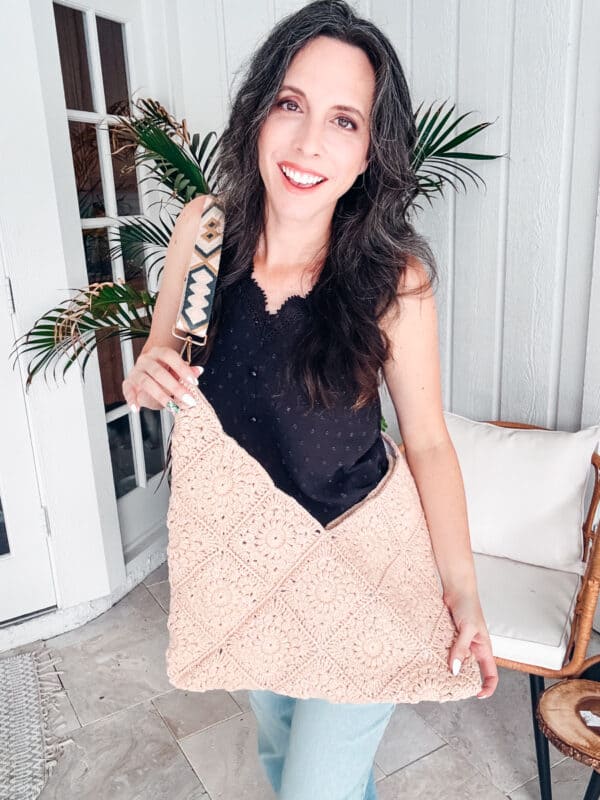
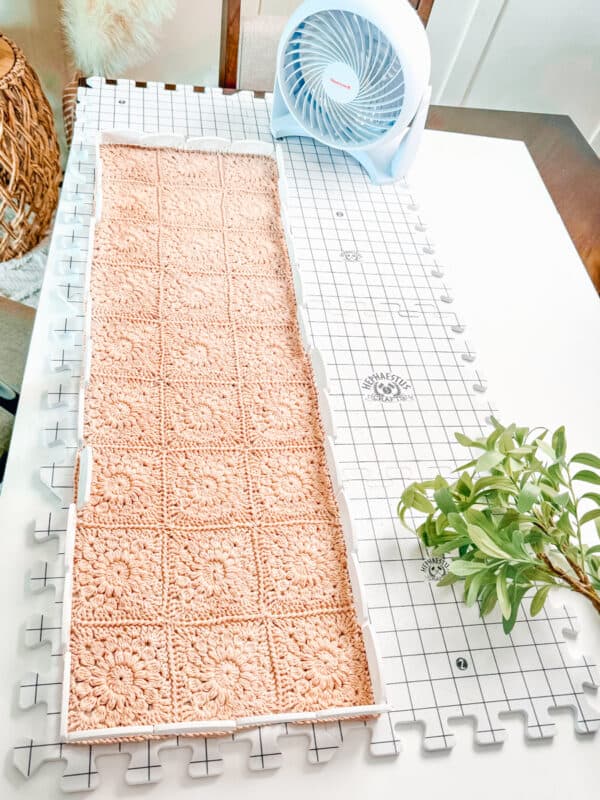
Create a total of 27 squares joined in a 3 by 9 layout. Weave in all the ends.
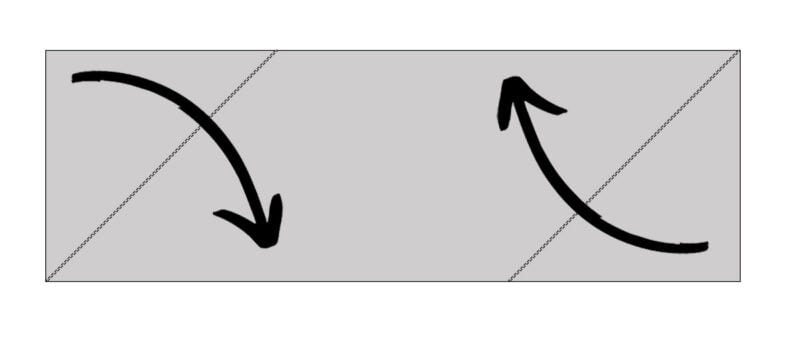
Next, join yarn to one side of the bag, and sl st in each st around to even out the outer edges of the fabric. Join and fasten off. Weave in ends and block the piece of fabric.
Style
Style the Granny Square Flower Crochet Bag with any of your favorite outfits! This modern take on the traditional granny square turns each motif into a blooming garden, adding a bit of floral magic to your wardrobe. It’s a perfect year-round accessory – make a Granny Swim Cover in the same color for a fabulously beachy ensemble. Or use some gorgeous fall colors and make a matching Granny Square Cardigan for the fall. The possibilities are endless!
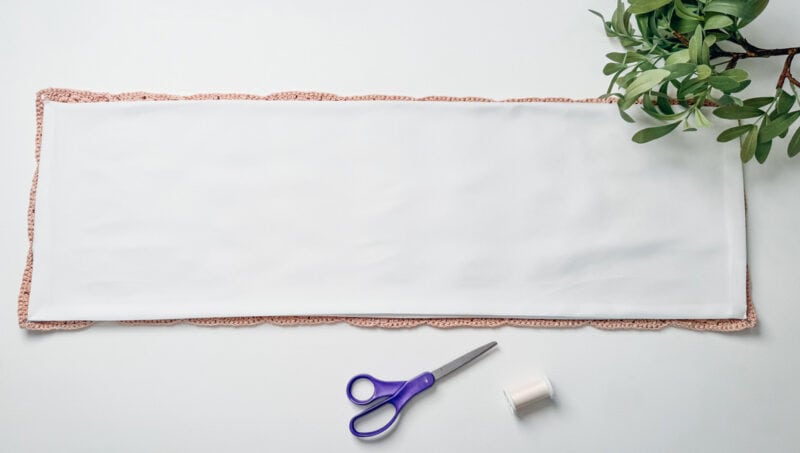
Optional Lining
If you want to line your bag, it’s very simple to do.
Cut a rectangle of fabric just slightly bigger than the original crochet bag rectangle.
Fold down all the edges and either glue them with fabric glue or sew. This will create a hem with finished edges. Next, fold the fabric and sew along the same lines we did with the bag seaming. Insert the fabric into the bag and either glue in place or sew around the top opening of the bag.
More information on a no-sew bag liner: https://brianakdesigns.com/no-sew-bag-liner/
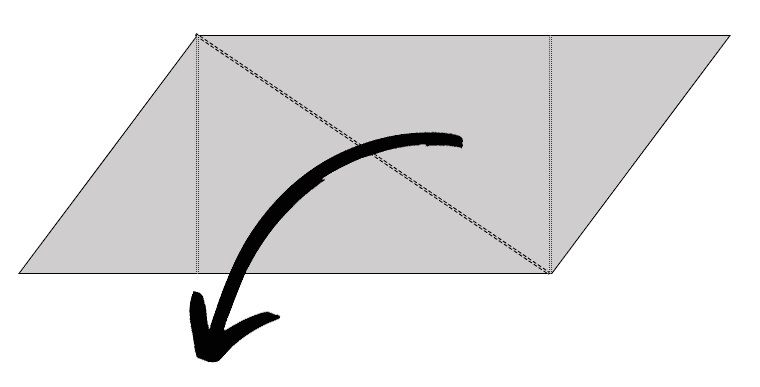
Folding the Bag
Lay the bag fabric in front of you and fold the top left corner down, and the bottom right corner up, this will create the parallelogram shape.
Keeping the previous sections folded, grab the right side of the fabric and fold again across the diagonal dotted line.
Seaming
Next, we will either do a crochet surface sl st or a hand-sewn seam on the front and the back of the bag. This is shown with a red dotted line in the next image. With these two seams, we will have created the finished bag shape.
Handle
There are lots of options for bag handles on Amazon. In my images, I used a white bag shoulder strap or a diamond bag shoulder strap. These easily clip onto each side of the bag points.
You can also crochet your strap.
Crochet Braided Cord Option:
If using multiple colors, use Color A for the handle.
Leave a tail for sewing onto the bag later and ch 3.
Puff st in the 3rd ch from the hook. Turn your work by rotating to the left.
Working in the ch space, puff st, turn.
Working into the space between the last two puff sts made, work a puff st, turn.
Repeat this last step until there are a total of 58 puff sts, or the desired length.
With your yarn needle, stitch the bag handle to each top point of the bag, weave in well and fasten off.
Finishing
Weave in any remaining ends.
If desired, sew on a leather snap to close the bag.
Make sure you take special care of your new, handmade bag. Remove everything from the bag (including the strap if you added a removable one). Give your bag a good shake to remove loose dirt and dust. If your bag is only a little dirty, a gentle spot cleaning might be all you need.
If you want to wash your bag thoroughly, handwashing is best (though you can throw your bag in the gentle cycle of the washing machine). Lay your bag flat to dry – no wringing or twisting!
Once dry, reattach your strap, and you’re good to go! Ready to start your next project? The Stashbuster Shawl and Sutherland Waterfall Cardigan would look incredible with your bag!
Cheers, and happy crocheting!
Well That Was Fun! What’s Next?
📌 PIN THIS POST – Don’t lose this project; save it to your Pinterest crochet board so you can quickly come back to it again.
💌 SHARE – Share your yarn choice, in-progress, or finished projects on Facebook or Instagram and use the hashtag #brianakdesigns
🥂 JOIN – Join the kindest crafters in the Briana K Designs Community Group on Facebook. We love yarny friends!
🔗 RAVELRY LINK -Link and share your project on Ravelry. Having inspirational photos can help crafters.