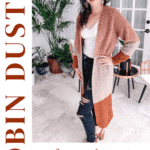
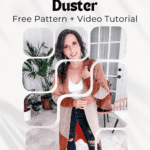
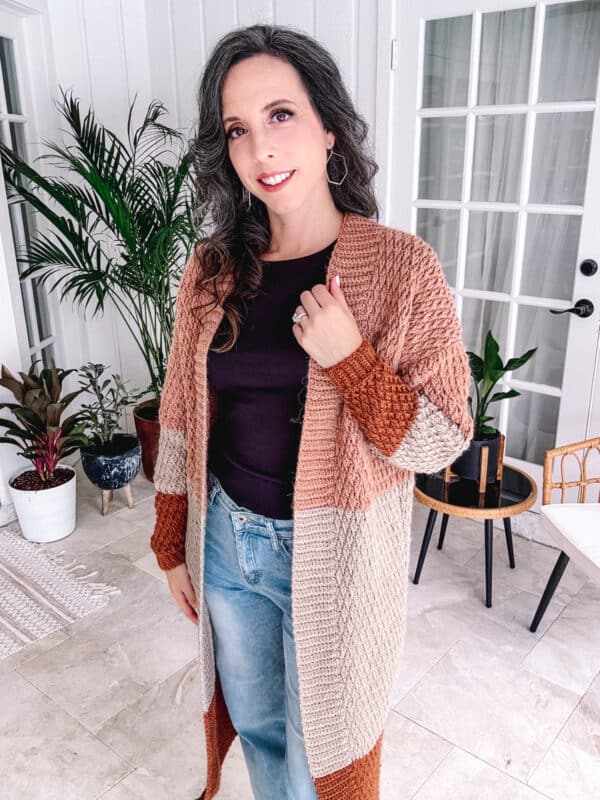
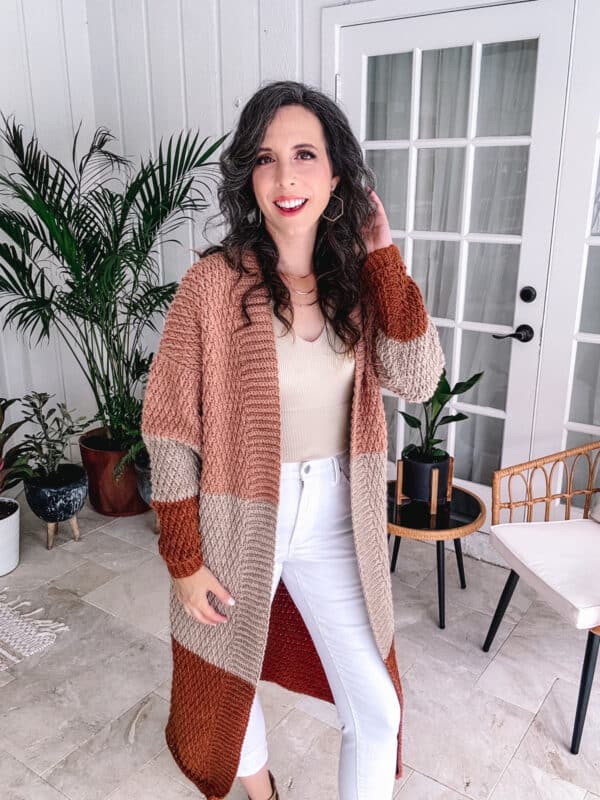
Robin Color Block Crochet Duster Pattern


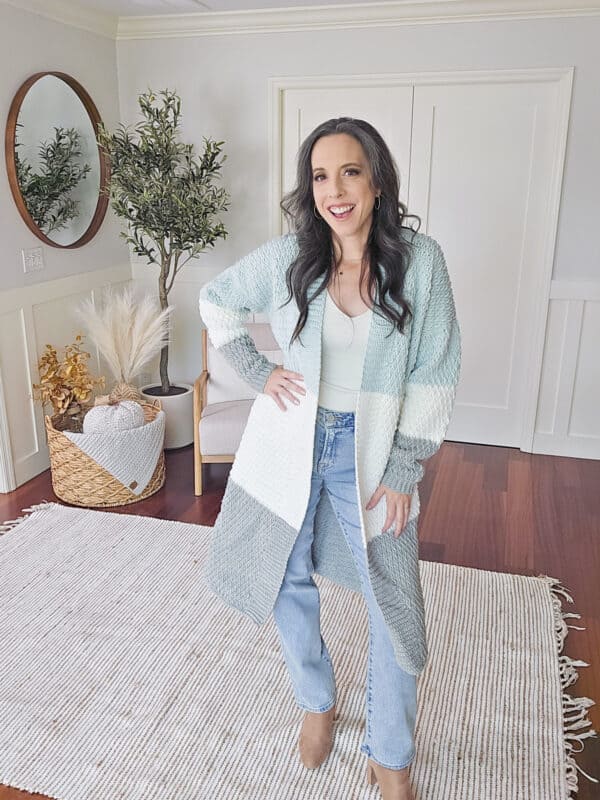
The Robin Crochet Duster pattern is color-block elegance for all sizes. This design combines texture, style, and versatility to create a long cardigan that’s as fashionable as it is comfortable. Worked flat, this piece only needs two seams to finish. Once the body and sleeves are made and seamed, a simple ribbing will be added to give a clean and crisp look to the edges.

Disclosure: This post contains affiliate links. Please read my disclosure for more info.
This pattern is size-inclusive, ranging from XS to 5X, ensuring that everyone can create their own custom-fit duster. If you love gorgeous and flowy garments with two-seam construction, the Hummingbird Cardigan and the Autumn Wheat Beginner Cardi will make gorgeous additions to your fall wardrobe (and both can be made longer to have more of a duster-type flair).
What you’ll love about this pattern.
🩶 Color-Block Design: The Robin Duster Cardigan showcases a captivating color-blocked design, using three different yarn colors to create a visually striking garment that stands out in any crowd.
🩶 Textured Stitch: Crafted with a textured alpine stitch, this cardigan boasts depth and dimension, adding an extra layer of interest to your creation.
🩶 Modular Construction: The body of the cardigan is created flat, with the sleeves added flat on each side. Two simple seams shape it into a duster cardigan, creating a seamless and polished finish.
Crochet Supplies
Yarn
Upcycle Alpaca Blend
Worsted, 33% Alpaca, 34% Wool, 33% Acrylic
219yds/100g
Yarn Quantities
2375 (2425, 2500, 2575, 2650) (2750, 2825, 2900, 3000) yards
C1 Topaz 29703; 3 (3, 4, 4, 4) (4, 4, 5, 5) balls
C2 Parchment 29707; 3 (3, 4, 4, 4)(4, 4, 5, 5) balls
C3 Latte 29701; 4 (4, 4, 4, 5) (5, 5, 5, 5) balls
Yarn Substitutions
Heatherly Worsted – 80% Acrylic, 20% Merino Wool, 218yds/100g
Comfy Worsted – 75% Pima Cotton/25% Acrylic, 109yds/50g
Swish Worsted – 100% Fine Superwash Merino Wool, 110yds/50g
Please note, other yarns can work, just check gauge.
Remember always to check the gauge and drape when substituting yarns.
Crochet Hook
Size US G (4.0mm) Crochet Hook or hook to obtain gauge.
Notions
Scissors
Yarn Needle
Removable Stitch Marker
Tape Measure
Skill Level
Advanced Beginner
Sizes
XS (S, M, L, 1X) (2X, 3X, 4X, 5X)
To Fit:
38 (42, 46, 50, 54) (58, 62, 66, 70)” finished bust measurement; garment is meant to
be worn with 6-8” of positive ease.
Abbreviations
blo – back loop only
ch – chain
dc – double crochet
fpdc – front post double crochet
fsc – foundation single crochet
sc – single crochet
sc2tog – single crochet two sts together
sl st – slip stitch
st(s) – stitch(es)
stsc – stacked single crochet
Gauge
16 sts and 13 rows = 4” over Alpine Stitch Pattern, blocked.
How to Crochet A Gauge Swatch
Working a gauge swatch will let you know if you will have the correct sizing for this pattern. It will also help you practice the stitches used in this project and improve your stitch work for a flawless look.
Are you struggling to match the gauge? Check out the blog post on What is Crochet Gauge and How To Fix It
Construction
This color block crochet duster cardigan uses the gorgeous textured Alpine Stitch and three different yarn colors, though you could easily add more or fewer. The body of the duster is crocheted flat, then the sleeves are added on each side of the main body. This means we will only require two seams to shape it into a finished garment. We’ll complete our duster by adding ribbing around the neckline and sleeves, providing structure and shaping for a comfortable fit.
Crocheted cardigans and dusters aren’t just pretty things to wear – they’re pieces of art, lovingly crafted by hand. The Shortbread Duster and the Whimsical Cardigan Dress are perfect garments to elevate your fall style.
Special Stitches
Stacked Single Crochet (Stsc): Do NOT chain, insert hook into next stitch, yo, pull up a loop, yo and pull through both loops, insert hook in the vertical bar below, yo, pull up a loop, yo and pull through both
loops on the hook.
Front Post Double Crochet (FPDC): YO, insert hook from front to back to front around indicated st, YO, pull up lp, [YO and draw through 2 lps on hook] 2 times.
Pattern Notes
📌 This pattern substitutes a traditional chain 2 on the edges for a Stacked Single Crochet.
📌 A ch 1 on the beginning of a single crochet row is not necessary.
📌 Using a stitch marker at the beginning of each row is recommended.
📌 The instructions and stitch counts are given for the smallest size, with the larger sizes in
brackets ( ).
📌 Before you dive into your project, take a moment to identify the stitch and row counts that
match the size you’re making. By highlighting or marking them, you’ll save time and effort
later on. Trust us, this small step will make a big difference in your crochet journey!
📌Bring YO to the height of the current row when working FPDC.
Subscribe & Like
With Subtitles
Video Tutorial for the Robin Color Block Crochet Duster
Relax & Crochet
Upgrade to the Printable PDF
Beautifully formatted to print and relax while crocheting. The paid pattern includes:
The Ad-Free PDF can be purchased on Etsy or Ravelry.
Click the box below to unlock this exclusive subscriber content for free. Add your email and create a password. If you are having trouble, reset your password or login to the Grow Portal.
I’m thrilled to share this amazing crochet pattern with you! Please don’t copy, paste, or distribute this pattern. Prefer an ad-free experience? Purchase a digital PDF file for a small fee from one of my online stores. I appreciate your support and readership. You are why I can keep doing what I love and sharing it with others. Thank you from the bottom of my heart.
Written Crochet Pattern Instructions
Back of Cardigan
Note: To adjust length, work more or fewer rows for each of the first 2 color block sections.
Rows 43-84:
With C2, continuing with patt as established, rep Rows 3-6 for Alpine St Patt, ending with Row 4.
Rows 85-120:
With C3, continuing with patt as established, rep Rows 3-6 for Alpine St Patt, beg with Row 5.
Note: Row 120 of Back marks the end of the Back, Fronts are worked directly from the Back working from the shoulder down to Front hem.
Join The Kindest Community
Join our vibrant community of crafters on Facebook today. Whether you enjoy crafting with others or simply have burning questions, we’ve got you covered – join us now!
Right Shoulder
Row 1 (WS):
With C3, SC in next 26 (30, 34, 38, 42) (46, 50, 54, 58) sts turn, leaving rem sts unworked. | 26 (30, 34, 38, 42) (46, 50, 54, 58) sts
Row 2 (RS):
Stsc in first st, *DC in next st, (FPDC around next st) 1 row below; rep from * to last st, DC in last st, turn.
Rows 3-6:
Rep Rows 3-6 for Alpine St Patt, PM (marker 1) on the far right (sleeve) side of Row 6.
Note: This marker denotes the top of the shoulder.
Style
This long duster seamlessly shifts from an elegant ensemble when paired with tailored pants and heels (or flats) to a relaxed, casual vibe with jeans and boots (or sneakers). Its versatility makes it an essential and stylish addition to your wardrobe. Add a gorgeous handmade accessory like the Granny Stitch Clutch or the Hexagon Granny Bag to complete your outfit!
Right Front
Rows 1-42:
Rep Rows 3-6 of Alpine St Patt.
Rows 43-84:
With C2, continuing with Alpine St Patt as established, work Rows 3-6 of Alpine St Patt.
Rows 85-126:
With C1, continuing with Alpine St Patt as established, work Rows 3-6 of Alpine St Patt.
Fasten off.
Left Shoulder
Row 1 (WS):
Count and sk 20 sts to the left of Right Front, with C3 join with sl st in next st, SC 26 (30, 34, 38, 42)
(46, 50, 54, 58) sts turn. | 26 (30, 34, 38, 42) (46, 50, 54, 58) sts
Row 2 (RS):
Stsc in first st, *DC in next st, (FPDC around next st) 1 row below; rep from * to last st, DC in last st, turn.
Rows 3-6:
Rep Rows 3-6 for Alpine St Patt, PM (marker 2) on the far left (Sleeve) side of Row 6.
Note: This marker denotes the top of the shoulder
Left Front
Rows 1-42:
Rep Rows 3-6 for Alpine St Patt.
Rows 43-84:
With C2, continuing with Alpine St Patt as established, work Rows 3-6 for Alpine St Patt.
Rows 85-126:
With C1, continuing with Alpine St Patt as established, work Rows 3-6 for Alpine St Patt.
Fasten off.

Sizing Tips
- Desiring a looser fit for the cardigan? Opt for a size larger than your bust measurement to incorporate additional ease. This will result in a more oversized sweater, providing comfortable room to move. The Gemstone Granny Stitch Cardigan is perfect as an oversized wearable!
- Customizing the length of the cardigan to fit your body is a simple process. Adjust by chaining more or fewer stitches for the body section of the cardigan. Ensure an equal number of stitches on both the left and right sides of the arm for symmetry. This will also determine the number of chains to skip when working on the second sleeve. Check out the Diamond Cardigan – you can make yours long or short!
Sleeves
Setup Row: With the RS facing and working along side edge of garment, PM (marker 3 and marker 4) approx. 7 (7.5, 8, 8.5, 9) (9.5, 10, 10.5, 11) inches on each side of marker 1, or marker 2. Join C3 in marker 3, sl st 56 (60, 64, 68, 72) (76, 80, 84, 88) sts to marker 4, turn. | 56 (60, 64, 68, 72) (76, 80, 84, 88) sts
Work in Alpine St Patt, changing colors every 18 rows, starting with C3, then C2, then C1, until there are a total of 54 rows while also working the decreases below.
Dec Row on RS:
Sk first st, Stsc in next st, *DC in next st, FPDC around DC sts from previous DC row; rep from * until last 2 sts, sk next st, DC in last st, turn.
Dec Row on the WS:
SC2tog, SC in each st across until last 2 sts, SC2tog, turn.
Non-Dec Row:
Stsc in first st; if next st 2 rows below is FPDC work a DC st; if next st is DC st work (FPDC around DC) 2 rows below; work row in Alpine St Patt, turn.
Size XS Only
Dec 1 st each side every 4th row 12 times, then dec 1 st each side every 2nd row 3 times. | 26 sts
Size S Only
Dec 1 st each side every 4th row 10 times, then dec 1 st each side every 2nd row 7 times. | 26 sts
Size M Only
Dec 1 st each side every 4th row 8 times, then dec 1 st each side every 2nd row 11 times. | 26 sts
Size L Only
Dec 1 st each side every 4th row 7 times, then dec 1 st each side every 2nd row 13 times. | 28 sts
Size 1X Only
Dec 1 st each side every 4th row 5 times, then dec 1 st each side every 2nd row 17 times. | 28 sts
Size 2X Only
Dec 1 st each side every 4th row 3 times, then dec 1 st each side every 2nd row 21 times. | 28 sts
Size 3X Only
Dec 1 st each side every 4th row 1 time, then dec 1 st each side every 2nd row 25 times. | 28 sts
Size 4X Only
Dec 1 st each side every 2nd row 27 times. | 30 sts
Size 5X Only
Dec 1 st each side every 2nd row 25 times, then dec 1 st each side every row 4 times. | 30 sts
Rep for 2nd sleeve.
Seaming
Block. Fold in half with the RS facing and WS together. With yarn needle and preferred seaming method, sew Front and Back together beg at bottom hem, seam up to the Sleeve, then across Sleeve. Rep for 2nd side.
Hem Ribbing
Row 1:
With C1, join with sl st in bottom corner of Left Front, ch 8, SC in 2nd ch from hook and across back towards body edge, sl st in next 2 sts on bottom edge of body, turn. | 7 SC, 2 sl sts
Row 2:
Sk 2 sl sts, SC blo in next 7 sts, turn. | 7 SC
Row 3:
Ch 1 (does not count as a st here and throughout), SC blo in next 7 sts, sl st in next 2 sts on body, turn. | 7 SC, 2 sl sts
Rep Rows 2-3 around bottom edge.
Fasten off.

Cuff Ribbing
Row 1:
With C1, join with sl st in sleeve seam, ch 8, SC in 2nd ch from hook and across back towards sleeve, sl st in next 2 sts of sleeve, turn. | 7 SC, 2 sl sts
Row 2:
Sk 2 sl sts, SC blo in next 7 sts, turn. | 7 SC
Row 3:
Ch 1, SC blo in next 7 sts, sl st in next 2 sts on Sleeve, turn.
Rep Rows 2-3 for ribbing around Sleeve.
Last Row:
Join edges together, either seam beg and last rows together with a yarn needle, or SC working through blo of st from first and last rnd together at the same time.
Fasten off.
Neck Ribbing
Note: Work 2 sl sts in DC edge rows and 1 slst in SC edge rows.
Row 1:
With smaller hook and C1, join withsl st in bottom corner of Right Front, ch 12,SC in the 2nd ch from hook and across, sl st in next 2 sts on Right Front, turn. | 11 sts, 2 sl sts
Row 2:
Sk 2 sl sts, SC blo in next 11 sts, turn.
Row 3:
Ch 1, SC blo in next 11 sts, sl st in next 2 sts along Front, turn.
Rep Rows 2-3 for ribbing around Fronts and Neck edge, changing colors to match the color on body.
Fasten off.
Subscribe to my youtube channel
Finishing
Weave in all ends, wash, and lightly block if desired.
Embrace your unique style, and enjoy wearing your gorgeous duster wherever you go! As you step out, be prepared to receive compliments on your unique and trendy look! The gorgeous texture of this design catches the eye, making it a standout piece in your wardrobe.
To care for your Robin Crochet Duster, made with a wool yarn blend and the alpine stitch, gentle handling is key to maintaining its texture and shape. Hand-wash the duster in cold water with a wool-safe detergent, avoiding any harsh scrubbing to preserve the stitch definition.
After washing, gently squeeze out excess water without wringing, and lay it flat on a clean towel to air-dry, reshaping as needed. Avoid hanging, as the length and weight can stretch the fabric.
For storage, fold the duster neatly and keep it in a breathable cotton bag or a drawer to protect it from dust while allowing airflow, preventing moths or moisture damage.
Planning your next project? If you loved the texture of this stitch, check out the Alpine Blanket or the Totally Textured Blanket!
Cheers, and happy crocheting!
Well That Was Fun! What’s Next?
📌 PIN THIS POST – Don’t lose this project; save it to your Pinterest crochet board so you can quickly come back to it again.
💌 SHARE – Share your yarn choice, in-progress, or finished projects on Facebook or Instagram and use the hashtag #brianakdesigns
🥂 JOIN – Join the kindest crafters in the Briana K Designs Community Group on Facebook. We love yarny friends!
🔗 RAVELRY LINK -Link and share your project on Ravelry. Having inspirational photos can help crafters.