Easy Stitch Crochet Cardi Pattern
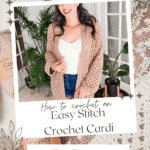
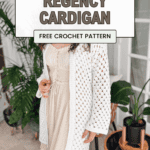


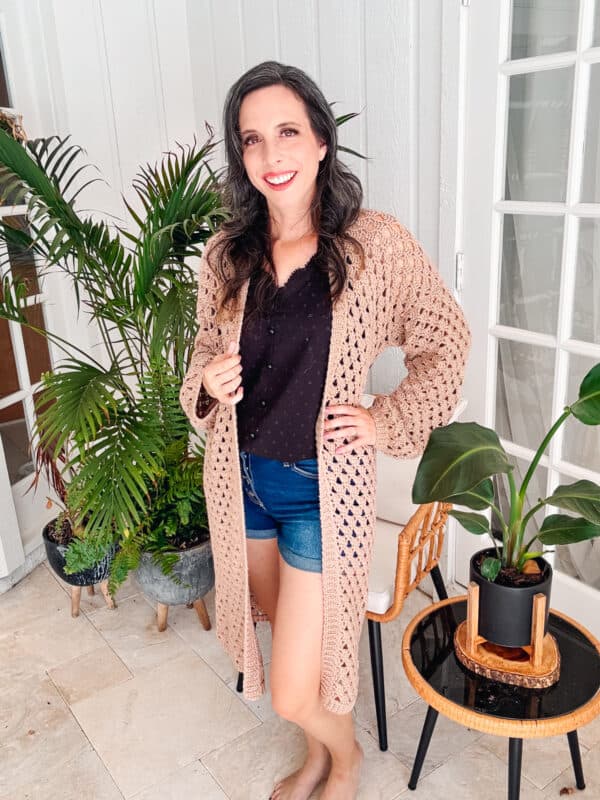
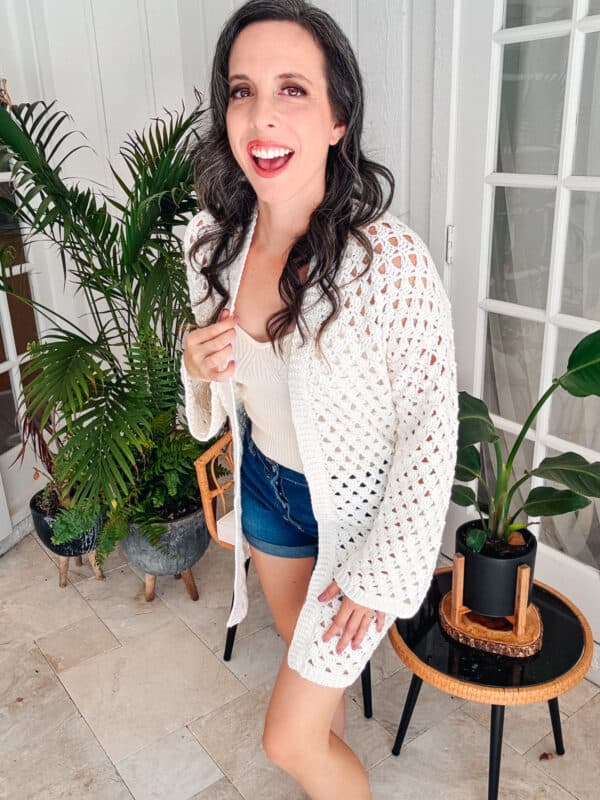
Simplicity often unveils extraordinary beauty, and the Regency Triangle Flat Crochet Cardigan perfectly embodies this truth. This long and lacy cardi is crocheted flat and features an open lace design, making it both stylish and simple to create. Love open stitches? Check out the Hummingbird Crochet Cardigan.

Disclosure: This post contains affiliate links. Please read my disclosure for more info.
With its airy fabric and beautiful drape, this cardigan is more than just a piece of clothing; it’s a wearable love letter to the brilliance of crochet and the beauty of handmade garments. If you like the look of long cardigans, you’ll love the Long Summer Duster and the Whimsical Crochet Cardigan Dress.
What you’ll love about this adult cardigan pattern.
🩶 Easy Seams – This crochet cardi is crocheted flat and then seamed along the shoulders & sleeves.
🩶 Adjustable Length – Crochet this cardigan in a cropped style, or a long duster style; adjusting the length is simple.
🩶 Fun Stitch Repeat – The 4-row repeat uses simple stitches to create a lacy fabric, perfect for year-round wear.
🩶 Size-Inclusive – The Adult-size crochet pattern is available in sizes X-Small to plus size 5X.

How to Style this Cardigan
This type of cardigan can be dressed up with a nice pair of pants and heels (or even cute flats). But it can also be casual with a pair of jeans and boots (or even sneakers).
This easy-stitch cardi is a diverse garment to have in your wardrobe, and is perfect for wearing all year long. And the Just A Crochet Rectangle Bag pairs nicely with this cardigan as a cute accessory in a solid or striped bag.
The Summer House Crochet Tank pairs well with this cardigan; layering is always stylish.

Crochet Supplies
Yarn
WeCrochet Comfy Sport
75% Pima Cotton, 25% Acrylic; 136yds/50g
Yarn Quantities
1450 (1550, 1775, 1975, 2150) (2350, 2500, 2700, 2800) yds
11 (12, 14, 15, 16) (18, 19, 20, 21) balls
This is for the longest length; shorter lengths will use less yarn.
Yarn Substitutions
Brava Sport – 100% Premium Acrylic; 340yds/100g
Heatherly Sport – 80% Acrylic, 20% Merino Wool; 328yds/100g
Shine Sport – 60% Pima Cotton, 40% Modal Natural Beech Wood Fiber; 110yds/50g
Galileo – 50% Merino Wool, 50% Viscose from Bamboo; 131yds/50g
Remember always to check the gauge and drape when substituting yarns.
Crochet Hook
Size US G (4.0mm) Crochet Hook or hook to obtain gauge.
Notions
Scissors
Yarn Needle
Removable Stitch Marker
Skill Level
Advanced Beginner
Sizing
XS (S, M, L, 1X) (2X, 3X, 4X, 5X)
To fit chest:
32 (34, 38, 42, 46) (50, 54, 58, 62)
Actual measurements are in the schematic.
Ease
This garment is meant to be worn with a 3-5 inch positive ease.
Abbreviations
blo – back loop only
ch – chain
dc – double crochet
flo – front loop only
RS – right side
sc – single crochet
sl st – slip stitch
st(s) – stitch(es)
Stsc – Stacked Single Crochet
WS – wrong side
Gauge
18 sts and 14 rows = 4″ by 4″ unblocked.
How to Crochet A Gauge Swatch
Working a gauge swatch will let you know if you will have the correct sizing for this pattern. It will also help you practice the stitches used in this project and improve your stitch work for a flawless look.
Are you struggling to match the gauge? Check out the blog post on What is Crochet Gauge and How To Fix It
Gauge Swatch Instructions:
Row 1:
Ch 26, sc in the 2nd ch from the hook, sc in the next, ch 5, skip 3, *sc 3, ch 5, skip 3; repeat from * until the last 2 sts, sc in the last 2 sts, turn. | 25 sts
Row 2:
Stsc, dc 1, *ch 1, sc in ch-5 space, ch 1, dc 3, repeat from * until the last 5 sts, ch 1, sc in ch-5 space, ch 1, dc 2, turn.
Row 3:
Stsc, ch 3, skip the next st, sc in ch-1 space, sc in next, sc in ch-1 space, *ch 5, skip 3, sc in ch-1 space, sc in next, sc in ch-1 space repeat from * until the last 2 sts, ch 3, skip the next st, dc in last, turn.
Row 4:
Ch 1 (does not count as a stitch), sc in first, ch 1, skip the ch-space, *dc 3, ch 1, sc in ch-5 space, ch 1; repeat from * until the last 5 sts, dc 3, ch 1, skip the ch-space, sc in last, turn.
Construction
This crochet cardigan features an open lace design, making it both stylish and simple to create. Crafted flat using basic stitches, it is then seamed along the arms and sides, with ribbing added around the front opening. It’s an ideal project for beginners looking to explore new techniques.
Love this style of Construction? You might also enjoy the Seabird Mosaic Crochet Cardi Pattern or the Autumn Wheat Beginner Crochet Cardigan.

Special Stitches
Stacked Single Crochet (Stsc): Do NOT chain, insert hook into next stitch, yo, pull up a loop, yo and pull through both loops, insert hook in the vertical bar below, yo, pull up a loop, yo and pull through both loops on the hook.
Pattern Notes
- This pattern substitutes a traditional chain 2 on the edges for a Stacked Single Crochet.
A ch 1 at the beginning of a single crochet row is unnecessary.
- Using a stitch marker at the beginning of each row is recommended.
- The instructions and stitch counts are given for the smallest size, with the larger sizes in brackets ( ).
- Before you dive into your project, take a moment to identify the stitch and row counts that match the size you’re making. By highlighting or marking them, you’ll save time and effort later on. Trust us, this small step will make a big difference in your crochet journey!
Subscribe & Like
Video Tutorial for An Easy Stitch Crochet Cardi
Relax & Crochet
Upgrade to the Printable PDF
Beautifully formatted to print and relax while crocheting. The paid pattern includes:
The Ad-Free PDF can be purchased on Etsy or Ravelry.
Click the box below to unlock this exclusive subscriber content for free. Add your email and create a password. If you are having trouble, reset your password or login to the Grow Portal.
I’m thrilled to share this amazing crochet pattern with you! Please don’t copy, paste, or distribute this pattern. Prefer an ad-free experience? Purchase a digital PDF file for a small fee from one of my online stores. I appreciate your support and readership. You are why I can keep doing what I love and sharing it with others. Thank you from the bottom of my heart.
Written Crochet Pattern Instructions
Join The Kindest Community
Join our vibrant community of crafters on Facebook today. Whether you enjoy crafting with others or simply have burning questions, we’ve got you covered – join us now!
Bottom Body Panel
Please Note: When working Row 1 for the first time, work all the sts in the flo. On repeats work as normal.
Rows 1-4 are the established st pattern.
Row 1 (WS):
Ch 1, sc in the first 2 sts, ch 5, skip 3, *sc 3, ch 5, skip 3; repeat from * until the last 2 sts, sc in the last 2 sts, turn. | 163 (175, 187, 211, 223) (247, 271, 289, 301) sts – please note, each chain 5 space counts as 3 sts.
Row 2 (RS):
Stsc, dc 1, *ch 1, sc in ch-5 space, ch 1, dc 3, repeat from * until the last 5 sts, ch 1, sc in ch-5 space, ch 1, dc 2, turn.
Row 3:
Stsc, ch 3, skip the next st, sc in ch-1 space, sc in next, sc in ch-1 space, *ch 5, skip 3, sc in ch-1 space, sc in next, sc in ch-1 space repeat from * until the last 2 sts, ch 3, skip the next st, dc in last, turn.
Row 4:
Ch 1 (does not count as a stitch), sc in first, ch 1, skip the ch-space, *dc 3, ch 1, sc in ch-5 space, ch 1; repeat from * until the last 5 sts, dc 3, ch 1, skip the ch-space, sc in last, turn.
Repeat Rows 1-4 until there are 72 total rows (22 inches from underarm), or in multiples of 4 rows until the desired length. Do not fasten off.
For a crop top, crochet 20 rows for approx. 6 inches from underarm.
For a hip length, crochet 46 rows for approx. 14 inches from underarm.
Style Tip
- Want to make the length of the cardigan shorter or longer? Simply crochet fewer or more rows on the Bottom Body Panel.
First Front Panel
Before starting this row, count to the 37 (43, 43, 49, 55) (61, 67, 67, 73) stitch in the row and mark it.
Row 1 (WS):
Ch 1, sc in the first 2 sts, ch 5, skip 3, *sc 3, ch 5, skip 3; repeat from * until 2 sts before the st marker, sc in the last 2 sts, leave the remaining sts unworked, turn. | 37 (43, 43, 49, 55) (61, 67, 67, 73) sts
Rows 2-24 (26, 28, 30, 30) (32, 34, 36, 36):
Continue in the established stitch pattern, ending on an even row, fasten off.
Back Panel
Skip 5 (2, 6, 5, 2) (2, 2, 6, 3) sts over from the First Front Panel and then place marker in the next st. | Total of 5 (2, 6, 5, 2) (2, 2, 6, 3) skipped sts.
Next mark the 73 (85, 85, 97, 109) (121, 133, 133, 145) st from the first st marker.
Row 1 (WS):
Join yarn to the first st marked, continue in the established stitch pattern repeat, turn. | 73 (85, 85, 97, 109) (121, 133, 133, 145) sts
Tip:
For some sizes the stitch repeat will be 6+4, an additional chart has been provided to help you keep on track.
Rows 2-24 (26, 28, 30, 30) (32, 34, 36, 36):
Continue in the established stitch pattern, ending on an even row, fasten off.
Second Front Panel
Skip 5 (2, 6, 5, 2) (2, 2, 6, 3) sts over from the First Front Panel and join yarn in the next st. | Total of 5 (2, 6, 5, 2) (2, 2, 6, 3) skipped sts.
Row 1 (WS):
Join yarn to the first st marked, continue in the established stitch pattern repeat, turn. | 37 (43, 43, 49, 55) (61, 67, 67, 73) sts
Rows 2-24 (26, 28, 30, 30) (32, 34, 36, 36):
Continue in the established stitch pattern, ending on an even row, fasten off.
Blocking & Seaming the Body
Wash and block by pinning to blocking mats or a towel on a bed. Fold the First and Second Panels inward, matching up the outer shoulder stitches.
With yarn needle and preferred seaming method sew the shoulder seams at top, leaving 5 (0, 4, 4, 0) (0, 0, 4, 4) sts at the back neck between the panels.
Front & Neck Ribbing
Setup:
With the RS facing, join with sl st to the bottom left corner of the front opening, sl st evenly around the opening, sl 1 st per sc row, and 2 sts per Stsc (or dc) row, making sure the sl sts are not tight or bunching, turn.
Row 1:
Ch 6, sc in the 2nd ch from hook and across back towards the cardigan body, sl st in next 2 sts in the flo, turn. | (5 sts)
Row 2:
Sk 2 sl sts, blo sc 5, turn.
Row 3:
Ch 1, blo sc 5, sl st in next 2 sts in the flo, turn.
Next Rows:
Rep Rows 2-3 for ribbing around Neck.
Tip:
On the corners of the neck, skip some edge stitches to reduce the amount of rows so it lays nicely. See video.
Join last row to beginning row by slip stitching through blo of first and last row at the same time.
Fasten off.
Sleeve Style
Although originally designed with a long sleeve, you can easily make this a short puff sleeve by crocheting less rows and then working the ribbing. Since our upper arm circumference will be larger than our wrists, skip less rows when crocheting the ribbing.

Sleeves (Make 2)
Row 1 (WS):
Ch 68 (74, 77, 80, 86) (92, 95, 101, 102), sc in the second ch from the hook, sc in next, ch 5, skip 3, *sc 3, ch 5, skip 3; repeat from * until the last 2 sts, sc in the last 2 sts, turn. | 67 (73, 76, 79, 85) (91, 94, 100, 103) sts
Rows 2-50:
Continue in the established stitch pattern, ending on an even row, do not fasten off if using the sl st seam. Fasten off leaving a long tail if sewing the arm seam.
Tip:
To adjust the length of the sleeve, crochet more or fewer rows, ending on an even row.
Seaming
Wash and block the sleeves before seaming.
Fold the fabric in half length-wise. The starting chains will be where the cuff is worked later, the last row will be what is sewn to the arm opening.
Use pins if necessary and line up the top of the sleeve to the arm opening.
Sleeve Cuff
Please Note: These instructions create a puff sleeve. If you would like a wide sleeve, do not skip any sts when sl stitching along the sleeve edge.
Attach your yarn to the sleeve opening next to the underarm seam.
Row 1:
Ch 6, sc in the 2nd ch from hook and across back towards the cardigan body, sl st in the st from the edge of the sleeve, sk 1, sl st in the next, turn. | (5 sts)
Row 2:
Sk 2 sl sts, blo sc 5, turn.
Row 3:
Ch 1, blo sc 5, sl st in the st from the edge of the sleeve, sk 1, sl st in the next, turn.
Next Rows:
Rep Rows 2-3 around the sleeve opening for cuff ribbing.
Join last row to beginning row by slip stitching through blo of first and last row at the same time, fasten off and weave in ends.
Finishing
Weave in any ends and block again if necessary.
Wear and enjoy your Regency Triangle Cardigan, and congratulate yourself on a job well done. You just created a timeless garment that will be treasured for years.
And to ensure that your handmade cardigan withstands the test of time, pay attention to how you care for your project. Gentle handwashing in lukewarm water with mild detergent is often the best method, followed by laying flat to dry to maintain the shaping.
Avoiding harsh chemicals and excessive agitation or twisting of the fabric is crucial, as is storing them properly. Fold your cardigan neatly, or hang it on a padded hanger to prevent stretching. Regular maintenance, such as occasional airing and gentle fluffing, keeps fibers fresh and vibrant.
Crocheting garments, such as cardigans and sweaters, is a passion of mine. Check out the Get Comfy Cardigan and the Diamond Crochet Cardigan to find your next project!
Cheers, and happy crocheting!
Well That Was Fun! What’s Next?
📌 PIN THIS POST – Don’t lose this project; save it to your Pinterest crochet board so you can quickly come back to it again.
💌 SHARE – Share your yarn choice, in-progress, or finished projects on Facebook or Instagram and use the hashtag #brianakdesigns
🥂 JOIN – Join the kindest crafters in the Briana K Designs Community Group on Facebook. We love yarny friends!
🔗 RAVELRY LINK -Link and share your project on Ravelry. Having inspirational photos can help crafters.