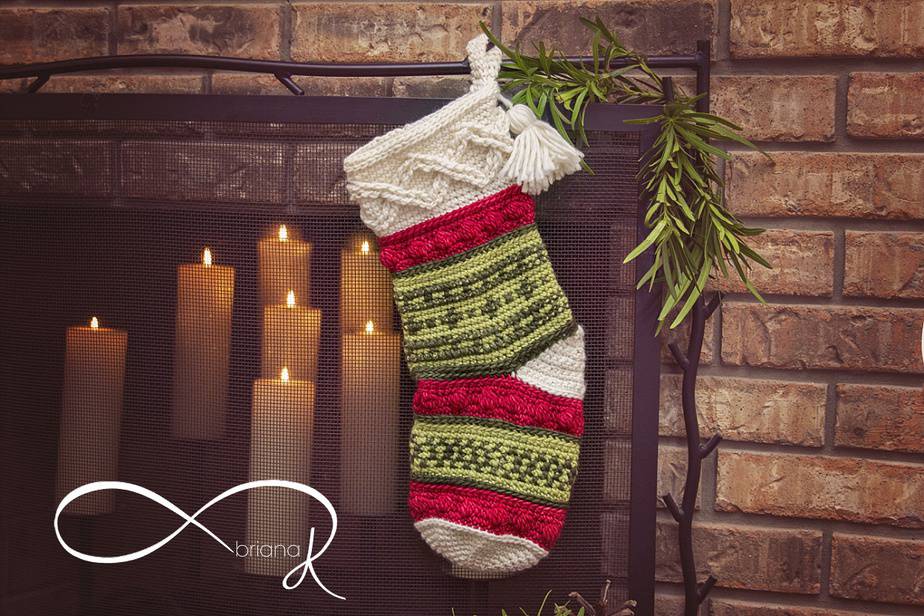
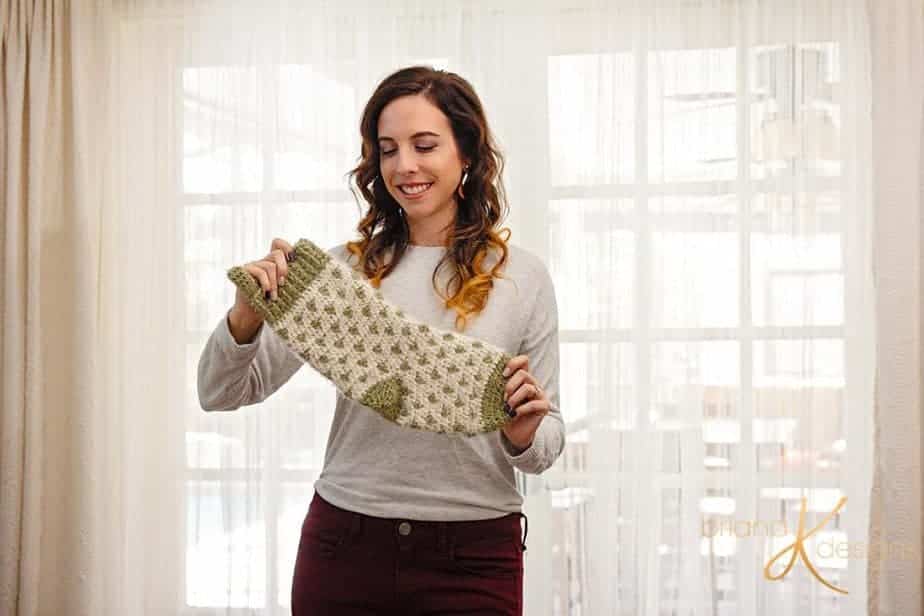
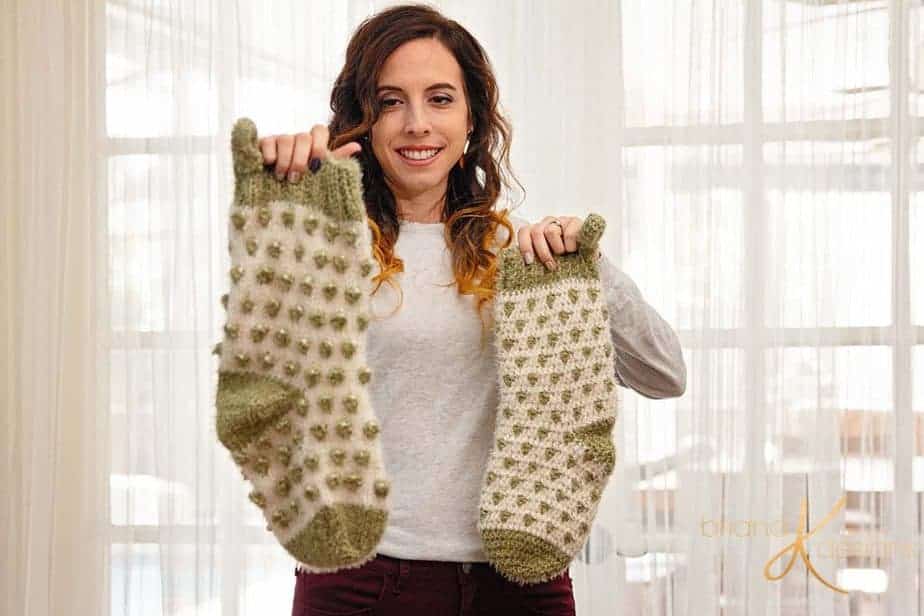
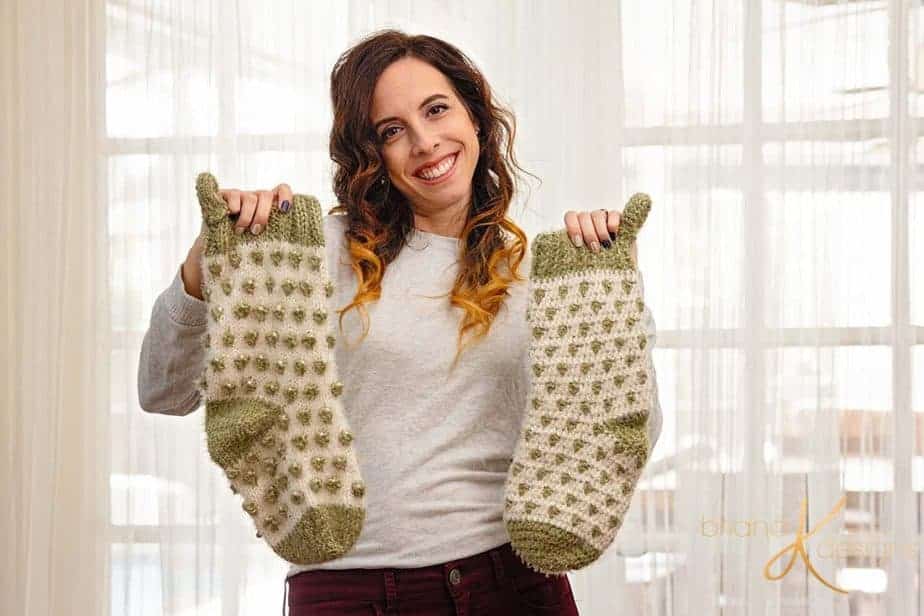
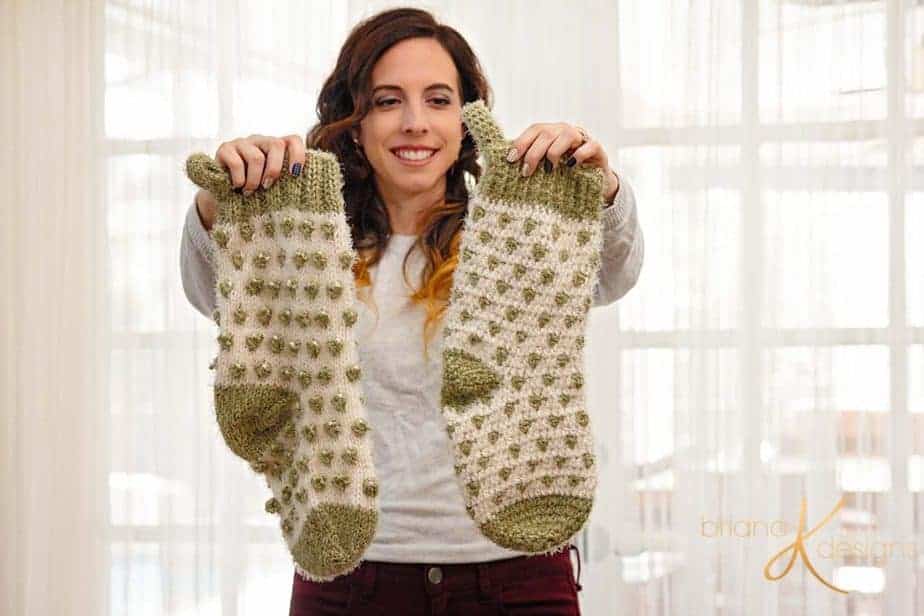
Polka Dot Crochet Christmas Stocking Free Pattern
I can't wait for you to try out the Polka Dot Crochet Christmas Stocking Free Pattern. It's a simple holiday stocking pattern that's quick to work up and works well with lots of styles of holiday decor.
Disclosure: This post contains affiliate links, meaning I get a commission if you decide to make a purchase through my links, at no cost to you.
Handmade Stockings Are a Tradition
One of my son's teachers asked this question, and I had to pause. We don't do elf on the shelf. Sometimes we bake and decorate cookies. However, some years we run out of time.
However, my husband reminded me we have lots of traditions. The main one is all of the stockings that I make each year. He feels like it’s become a tradition for me to add a new handmade stocking even though there is no more room by the fire.
Looking for the Knit Version? Get the Polka Dot Knit Stocking
I told him it’s going to keep happening, so he better start putting some nails in the walls for future years lol.
Want an Ad-Free PDF Download of this pattern?
This pattern is available in my shops:
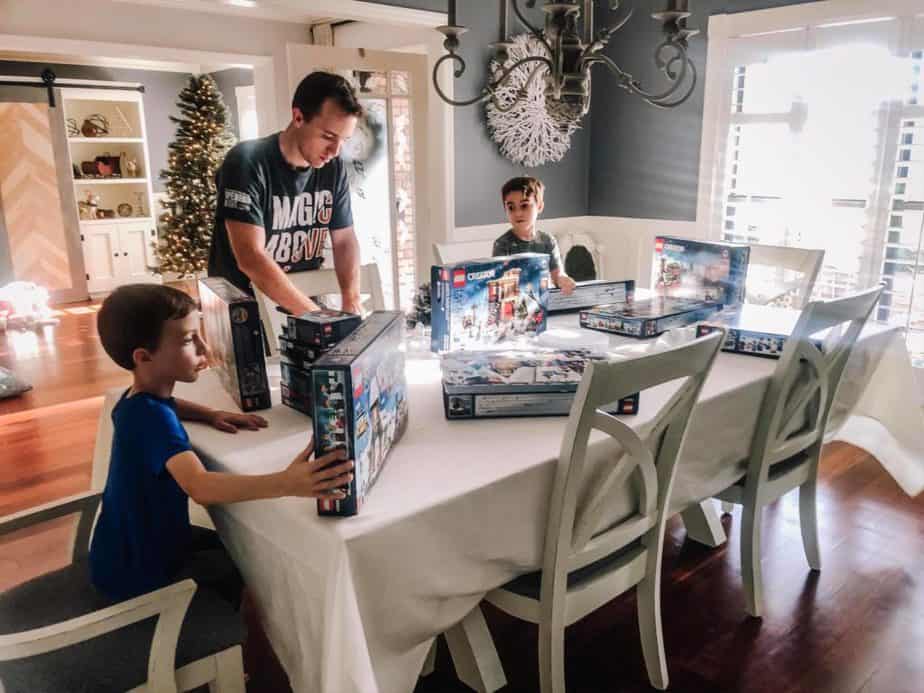
Lego Christmas Village, Another Tradition
I don't know if my kids think of our Christmas stockings as our tradition, yet. Instead, by far, I think our children will always see Lego Christmas Village as their tradition.
It all began years ago, but the real story was even before that. Roll the memories back to my college days. The first Christmas my husband and I were dating, we found ourselves at a craft store. I mean, he knew from the start who he was dating, and that regular craft store trips were part of the deal, haha.
As we were walking the isles, he saw the porcelain winter houses and said someday he wanted to do that. I responded with an ‘Excuse me, grandma? Ummm, no. You better find a new girlfriend.’
The next thing we knew, an older lady was giggling as she listened to our argument of why I was not on board with a glass village. I was a nanny at the time to anything breakable was my worst nightmare; it doesn’t work with children. A crochet Christmas stocking free pattern was way more my pace.

Arguably, I mentioned it’s just a dust collector. I already had too many gifts people thought I would like that became dust collectors.
I think he was just shocked; how was I not on board? It was the craft store, and I should like anything and everything there, right?
Fast forward to the year we had our son and visited Disney Springs to see the holiday decor. And then we wandered into the Lego store, and he saw the set of his dreams. A winter holiday village but in Legos. And instantly I knew this was my future.
He was so excited, and I was cool with it. So, each year since we take the kids down to Disney Springs and get the newest edition in the set. It’s become one of the best traditions the whole family enjoys. It’s unique and special, and my boys think the whole thing rocks. While I tend to sit back, enjoy the view, and snack with wine while everyone else builds, I’m known to help put a few things together. Better than the glass you can’t play with or touch.
Whatever your traditions are, enjoy every single moment. I already feel like each season goes by too fast, and the traditions help us slow down and remember to take time to enjoy those we love. That’s why traditions are important, even if it’s just building Legos. Or using a crochet Christmas stocking free pattern to make more stockings than your family will ever need.
When I tell people this has become our tradition, I get a few more questions on how to get the Legos. It is hard to come across previous sets. However, it’s never too late to start building. Lego has released a train twice now (we weren’t collecting yet when they did the first one). And it never disappoints.
So you do not need to go to a Lego store, it is on Amazon, but it is essential to get it while it’s there. Once it’s gone, it’s gone and difficult to find ever again.
Time for Our Crochet Christmas Stocking Free Pattern
I hope that you enjoyed my story. And that it has you thinking about your own Christmas traditions. But, of course, you're here for the Crochet Christmas Stocking Free Pattern.
Before you get started, though, take a moment to hop on over to this post. This will show you about the different ways to do crochet color-work, which will be helpful when you work with this crochet Christmas Stocking free pattern.
However, you'll also want to pop over there for a freebie! The printable Sheep Yarn Bobbins are super helpful and also cute. You can even cut them out on a cutting machine!
Polka Dot Crochet Christmas Stocking Supplies:
• Crochet Hook 6 mm (J), I highly recommend Furls Hook (affiliate link), or Clover, or a Tulip Etimo Crochet Hook (link below). I love all of these.
• Yarn Needle
• Scissors
Yarn:
• Red Heart Hygge (affiliate link)
in colorways Pearl and Ivy
Yardage:
• 175 Yards (160 meters)
If gauge is met, other yarns of the same weight can be substituted:
Red Heart Super Saver
Bernat Super Value
Lion Brand Vanna’s Choice
Premier Yarns Everyday Worsted
Gauge:
• 16 sts and 9 rows = 4” (10 cm)
in background fabric pattern
Measurements:
• Length: 16” (41 cm)
• Width: 6” (15 cm)
Abbreviations:
• ch – chain
• Cluster Stitch*
• hdc – half double crochet
• hdc2tog – half double crochet two together
• MR – Magic Ring (Magic Circle)
• st(s) – stitch(es)
• yo – yarn over
Skill Level:
• Advanced Beginner
Many of the supplies can be found at the affiliate links below:
Notes:
The bobble stocking is worked in the round, from toe to top. The bobbles are worked in a second color, but the stocking can also be worked in one solid color.
Chain 2 at the beginning of the round does not count as a stitch.
Using the hook over, versus yarn over, the method will lessen a traveling seam.
Special Stitches:
BLO– work stitch in the back loop only
Half Double Crochet– Yo, insert hook into stitch, yo and draw up a loop, yarn over and draw through all three loops on hook.
Cluster Stitch– Yo, insert hook into stitch, yo, pull up a loop, yo, draw yarn through two loops on the hook; repeat * three times (5 loops on hook), yo and draw yarn through 5 loops on hook.
Magic Ring/Circle Video:

Polka Dot Crochet Christmas Stocking Free Pattern Instructions:
Crochet Christmas Stocking Toe:
| Round | Description | Stitch Count |
| 1 | With Ivy color yarn, hdc 8 inside MR, join. | 8 |
| 2 | Ch 2, 2hdc in each stitch around, join. | 16 |
| 3 | Ch 2, *2hdc in first, hdc 1; repeat * around, join. | 24 |
| 4 | Ch 2, *2hdc in first, hdc 2; repeat * around, join. | 32 |
| 5 | Ch 2, *2hdc in first, hdc 3; repeat * around, join. | 40 |
| 6 | Ch 2, hdc in each stitch around, join. | 40 |
Crochet Christmas Stocking Body:
| Round | Description | Stitch Count |
| 7 | With Pearl Color Yarn, ch 2, hdc in each stitch around, join. | 40 |
| 8 | Ch 2, *with Pearl Color Yarn, hdc 3, with Ivy Color Yarn, cluster 1; repeat * around, join. | 40 |
| 9 | With Pearl Color Yarn, ch 2, hdc in each stitch around, join. | 40 |
| 10 | Ch 2, *with Pearl Color Yarn, hdc 2, with Ivy Color Yarn, cluster 1, with Pearl Color Yarn, hdc 1; repeat * around, join. | 40 |
| 11 | With Pearl Color Yarn, ch 2, hdc in each stitch around, join. | 40 |
| 12 | Ch 2, *with Pearl Color Yarn, hdc 1, with Ivy Color Yarn, cluster 1, with Pearl Color Yarn, hdc 2; repeat * around, join. | 40 |
| 13 | With Pearl Color Yarn, ch 2, hdc in each stitch around, join. | 40 |
| 14 | Ch 2, *, with Ivy Color Yarn, cluster 1, with Pearl Color Yarn, hdc 3; repeat * around, join. | 40 |
| 15 | With Pearl Color Yarn, ch 2, hdc in each stitch around, join. | 40 |
| 16 | Ch 2, *with Pearl Color Yarn, hdc 3, with Ivy Color Yarn, cluster 1; repeat * around, join. | 40 |
| 17 | With Pearl Color Yarn, ch 2, hdc in each stitch around, join. | 40 |
| 18 | Ch 2, *with Pearl Color Yarn, hdc 2, with Ivy Color Yarn, cluster 1, with Pearl Color Yarn, hdc 1; repeat * around, join. | 40 |
| 19 | Ch 2, * with Pearl Color Yarn, foundation hdc 18, skip 18 stitches, hdc 22, join. | 40 |
| 20-26 | Repeat rows 12-18 | 40 |
| 27-33 | Repeat rows 11-17 | 40 |
| 34 | With Ivy Color Yarn ch 2, hdc in each stitch around, join. | 40 |
| 35-40 | Ch 2, *FPhdc in first, BPhdc in next; repeat * around, join. | 40 |
Crochet Christmas Stocking Heel:
| Round | Description | Stitch Count |
| 1 | With Ivy Color Yarn, attach with a slip stitch to one corner of the heel and ch 2, *hdc2tog, hdc 4; repeat * around heel stitches (see image), join. | 30 |
| 2 | Ch 2, *hdc2tog, hdc 3; repeat * around heel stitches (see image), join. | 24 |
| 3 | Ch 2, *hdc2tog, hdc 2; repeat * around heel stitches (see image), join. | 18 |
| 4 | Ch 2, *hdc2tog, hdc 1; repeat * around heel stitches (see image), join. | 12 |
| Fasten off, Using a tapestry need sew up remaining hole on heel and any holes on the corners of heel. Weave in all ends. |
Stocking Tab:
| Round | Description | Stitch Count |
| 1 | With Ivy Color Yarn ch 6, join. | 6 |
| 2-18 | Working continuously without joining, sc in each stitch around. Fasten off and sew tab to the top heel side of socking, hang and enjoy! | 6 |
Crochet & Tag
I hope you have enjoyed making the Polka Dot Crochet Christmas Stocking Free Pattern!
If you have made this, please share it on social media. Above all I love to see the projects created with my patterns and also share your beautiful work.
Please use #brianakdesigns or @brianakdesigns
It is much appreciated and adored!