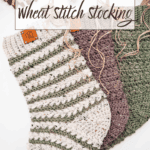
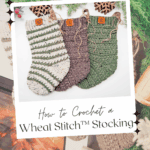
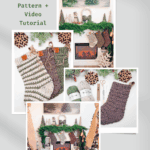
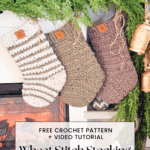
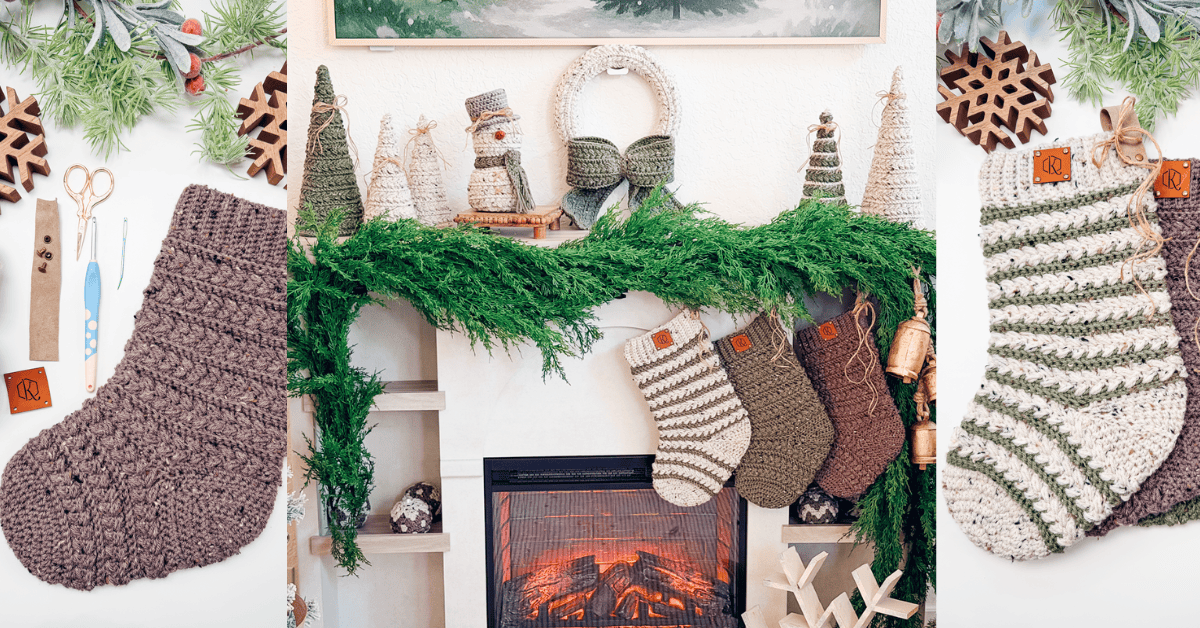
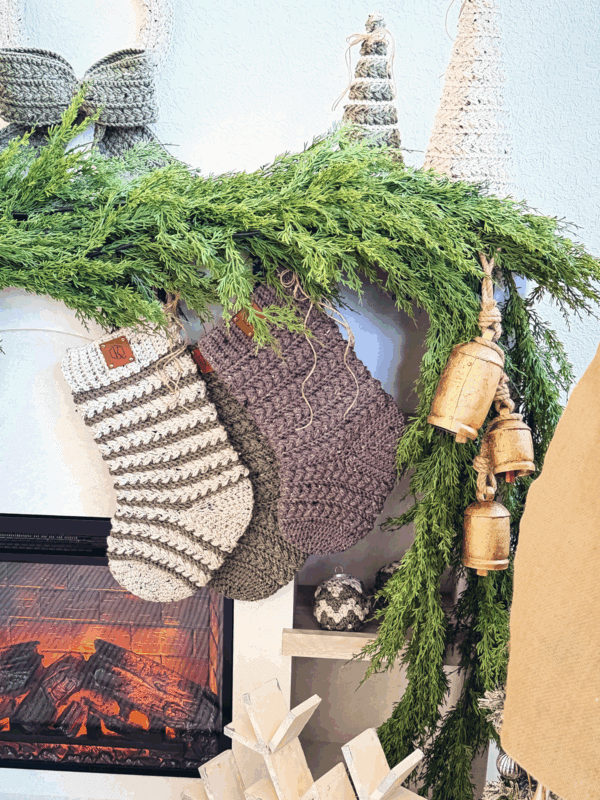
Give your holiday decorating a cozy, heirloom-worthy upgrade with the Wheat Stitch™ Crochet Stocking pattern — a festive toe-up design worked in gorgeous horizontal Wheat Stitch™ texture for a polished, seamless finish. Whether you’re crocheting for gift-giving, mantel styling, or creating a full matching family set, this stocking brings handmade charm to every corner of your holiday home.
Disclosure: This post contains affiliate links. Please read my disclosure for more info.
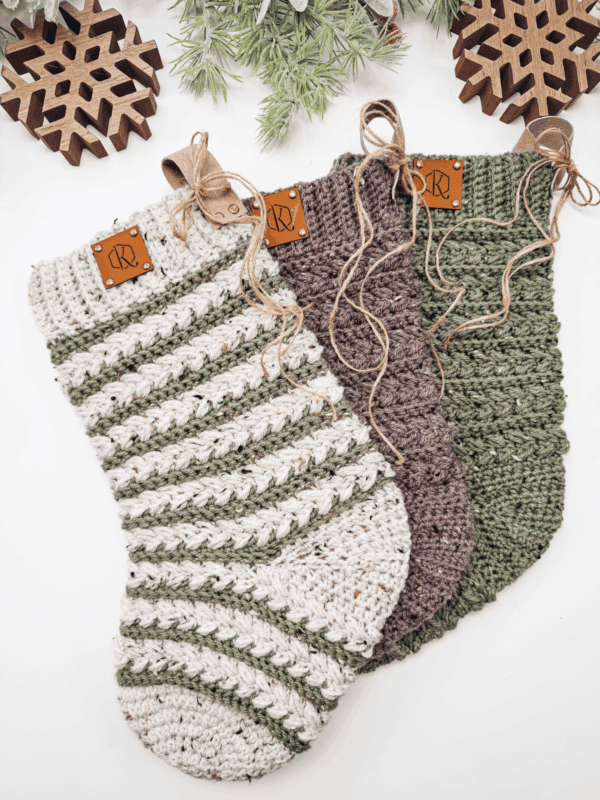
If you’re looking for a Christmas stocking that feels classic, cozy, and beautifully textured, the Wheat Stitch™ Crochet Stocking pattern checks every holiday box. Worked from the toe up, this stocking creates a smooth, continuous texture that wraps around the foot and body like magic. The pattern is approachable for confident beginners and exciting for seasoned crocheters — and yes, it’s absolutely gifting-friendly, decorating-friendly, and “I’ll just make one more” friendly.
This stunning stocking pairs beautifully with my other festive Wheat Stitch designs, such as the Wheat Stitch Trees, Wheat Stitch Wreaths, and the Wheat Stitch Mini Stockings!
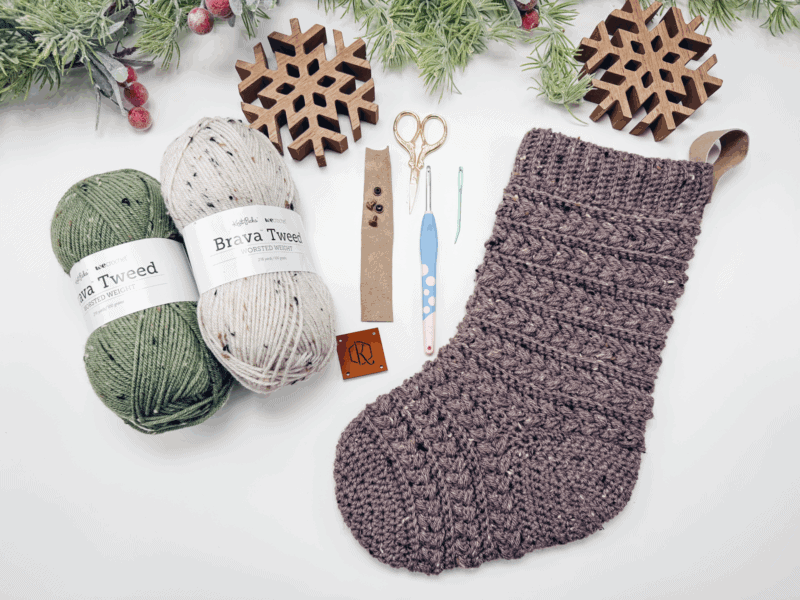
Wheat Stitch™ Crochet Stocking Pattern Crochet Supplies
Yarn
Brava Tweed
100% Premium Acrylic, 218yds/100g
Herrschners Holiday Sparkle
92% Acrylic, 8% Polyester, 489yds/226g
Yarn Quantities
Solid Color: 230 yds
2 Colors: yardage will depend on personal preference
Yarn Substitutions
Mighty Stitch Worsted – 80% Acrylic, 20% Superwash Wool, 208yds/100g
Mary Maxim Starlette Sparkle – 198% Acrylic, 2% Polyester, 196yds/100g
Herrschners Worsted 8 Heathers – 100% Acrylic, 489yds/226g
Malabrigo Rios – 100% Superwash Merino Wool, 210yds/100g
Lion Brand Heartland – 100% Acrylic, 251yds/142g
Remember always to check the gauge and drape when substituting yarns.
Crochet Hook
Size US G+/7 (4.5mm) Crochet Hook or hook to obtain gauge.
Notions
Scissors
Yarn Needle
Removable Stitch Marker
Rivets
Burlap Ribbon
or Leather Fabric
Wooden Tags
Skill Level
Advanced Beginner
What you’ll love about this pattern.
? A relaxing, rhythmic project for confident beginners and experienced makers alike. Once you settle into those Wheat Stitch rounds, it’s “just one more row…” all the way to the mantel.
? Perfect for customizing. Add tassels, bells, pom-poms, ribbons, or keep it clean and timeless — it’s your stocking, your style!
? Ideal for gifting or creating matching family sets. Handmade stockings feel magical — especially when you’ve crocheted every stitch with love (and maybe a cookie in hand).
One Size
Stocking measures 16″ by 6.5″ without hanging tab.
Abbreviations
blo – back loop only
ch – chain
hdc – half double crochet
hdc2tog – half double crochet 2 together
RS – right side
sc – single crochet
sl st – slip stitch
st(s) – stitch(es)
Stsc – stacked single crochet
WS – wrong side
Gauge
15 sts and 13 rows = 4″ by 4″ in wheat stitch pattern, not blocked.
How to Crochet A Gauge Swatch
Working a gauge swatch will let you know if you will have the correct sizing for this pattern. It will also help you practice the stitches used in this project and improve your stitch work for a flawless look.
Are you struggling to match the gauge? Check out the blog post on What is Crochet Gauge and How To Fix It
Construction
The Wheat Stitch™ Crochet Stocking is constructed from the toe up, creating a smooth and seamless finish:
1. Start with the Toe.
2. Work the Foot in Joined & Turned Rounds of horizontal Wheat Stitch texture.
3. Crochet the Stocking Body & Heel.
4. Add a Clean, Stretchy, Join-as-You-Go Ribbed Cuff.
5. Attach the Hanging Tab and Any Other Embellishments.
Love making stockings? The Hexagon Granny Stocking, the Holiday Colorwork Stocking, and the Gift Card Holder Stocking are perfect for you!
Special Stitches
Puff Stitch: Yarn over and insert your hook into the stitch/space; yarn over again and pull up a long loop; yarn over and insert your hook into the same stitch/space; yarn over again and pull up a long loop (5 loops on the hook); yarn over and pull through the first 4 loops; yarn over and pull through remaining loops.
Stacked Single Crochet (Stsc): Do NOT chain, insert hook into next stitch, yo, pull up a loop, yo, and pull through both loops, insert hook in the vertical bar below, yo, pull up a loop, yo, and pull through both loops on hook.
Pattern Notes
- A ch 1 at the beginning of a row is not counted as a stitch.
- The starting chains at the beginning of the Toe are replaced with Stacked Single Crochet sts. See Special Stitches.
- Using a stitch marker at the beginning of each row is recommended.
- This Pattern Uses Standard US Terminology. I use affiliate links and follow GPSR
Compliance: privacy & disclosure policy here.
? FAQs for the Wheat Stitch™ Crochet Stocking
Is this the same as the Festive Wheat Stitch™ Stocking?
Nope! This year’s version is worked in horizontal rounds, while the Festive Wheat Stitch Stocking is worked in vertical rows. Both are textured and beautiful, just with different constructions and appearances.
Is this pattern beginner-friendly?
Confident beginners can absolutely make this! If you’re new to the Wheat Stitch, start by checking out the tutorial, which breaks down each step: How to Crochet the Wheat Stitch.
Can I customize the size?
Yes! Adjusting hook size, yarn weight, or number of repeats can help you create smaller, larger, or extra-roomy stockings.
What yarn works best?
Any worsted-weight yarn works beautifully. Choose classic holiday colors or coordinate a whole family palette.
Can I sell items made from this pattern?
Absolutely — handmade sellers are always welcome! Please credit Briana K Designs as the designer.
Subscribe & Like
Video Tutorial for the Wheat Stitch™ Crochet Stocking Pattern – Part 1
Relax & Crochet
Upgrade to the Printable PDF
Beautifully formatted to print and relax while crocheting. The paid pattern includes:
The Ad-Free PDF can be purchased on Etsy or Ravelry.
Click the box below to unlock this exclusive subscriber content for free. Add your email and create a password. If you are having trouble, reset your password or log in to the Grow Portal.
I’m thrilled to share this amazing crochet pattern with you! Please don’t copy, paste, or distribute this pattern. Prefer an ad-free experience? Purchase a digital PDF file for a small fee from one of my online stores. I appreciate your support and readership. You are why I can keep doing what I love and sharing it with others. Thank you from the bottom of my heart.
Wheat Stitch™ Crochet Stocking Written Pattern Instructions
Stocking Toe
Rnd 1 (RS):
With color of choice for Toe, and working in a Magic Ring, ch 1, Stsc, hdc 7, pull tightly closed, join. | 8 sts
Rnd 2:
Stsc in first, hdc in same, 2 hdc in each st around, join. | 16 sts
Rnd 3:
Stsc in first, hdc in same, hdc in next, *2 hdc in next st, hdc in next; repeat from * around, join. | 24 sts
Rnd 4:
Stsc in first, hdc in same, hdc in next 2 sts, *2 hdc in next st, hdc in next 2 sts; repeat from * around, join. | 32 sts
Rnd 5:
Join The Kindest Community
Join our vibrant community of crafters on Facebook today. Whether you enjoy crafting with others or simply have burning questions, we’ve got you covered – join us now!
Stocking Foot
Note: If using two colors, change to color of choice for the Foot. Or change colors for every puff stitch round (Rnds 3-4).
Rnds 8-9:
Ch 1, blo sc in each st around, join and turn. | 48 sts
Rnds 10-11:
Ch 1, skip the first st, sc in next, work a puff st into the skipped st, *skip the next st, sc in next, work a puff st into the skipped st; repeat from * around, join and turn.
Rnds 12-19:
Repeat Rnds 8-11 of the Stocking Foot 2 more times (12 total Rnds for the Foot).

Video Tutorial for the Wheat Stitch™ Crochet Stocking Pattern – Part 2
Split for Heel
Rnd 20 (WS):
Ch 1, blo sc 26, ch 22, skip remaining stitches, join and turn. | 26 sts + 22 chains
Rnd 21 (RS):
Ch 1, sc in 22 sts (chs), blo sc in remaining 26 sts, join and turn. | 48 st
Sizing Tip
Changing yarn weight and hook size will affect the finished size of your stocking. While gauge isn’t critical for this type of design, it’s essential to note that your finished stocking may end up larger (or smaller) than the listed dimensions.
Stocking Leg
Rnds 22-23:
Ch 1, skip the first st, sc in next, work a puff st into the skipped st, *skip the next st, sc in next, work a puff st into the skipped st; repeat from * around, join and turn.
Rnds 24-25:
Ch 1, blo sc in each st around, join and turn.
Rnds 26-45:
Repeat Rnds 22-25 five (5) more times. Do NOT turn at the end of Rnd 45.
Top Ribbing
Note: If using two colors, change to color of choice for the Ribbing to match the Toe. This section will be worked as join-as-you-go ribbing in rows.
Row 1:
With color of choice, ch 10 (or 25 for a foldover cuff), in blo sc in second chain from hook and across to Leg, sl st 2 sts on the Leg (these do not count as sts), turn. | 9 (24) sts
Row 2:
Skip the two sl sts from the body, blo sc in each st across, turn. | 9 (24) sts
Row 3:
Ch 1, blo sc in each st across, sl st 2 sts on the body, turn.
Repeats:
Repeat Rows 2-3 around the top of the stocking Leg. Join last row to beginning row by slip stitching through blo of first and last row at the same time with the WS facing.
Subscribe to my youtube channel
Heel
Tip: See video for working the corners and reducing holes.
Rnd 1:
Attach color of choice for Heel to the edge of the stitch from Rnd 12 on a corner, ch 1, *hdc2tog by working into the edge stitch and the first st of the rnd, hdc 18, hdc2tog by working into the next st and the edge stitch; repeat from * by working around the other side of the heel and decreasing on the corners, join and turn. | 40 sts
Rnd 2:
Ch 1, [hdc2tog, hdc 16, hdc2tog] twice, join and turn. | 36 sts
Rnd 3:
Ch 1, [hdc2tog, hdc 14, hdc2tog] twice, join and turn. | 32 sts
Rnd 4:
Ch 1, [hdc2tog, hdc 12, hdc2tog] twice, join and turn. | 28 sts
Rnd 5:
Ch 1, [hdc2tog, hdc 10, hdc2tog] twice, join and turn. | 24 sts
Fasten off, leaving a long tail, fold the opening of the Heel in half from top to bottom,
and seam the opening closed. Weave in ends.
Finishing
Weave in all ends, wash, and lightly block if desired.
Using some ribbon and rivets, attach a tab to the top of the stocking for hanging. Other hanging options include crocheting a tab or using leather and a hole punch, as shown in the video.
Or make an i-cord hanging loop: https://brianakdesigns.com/how-to-crochet-an-icord/
Wooden tags can add a personal touch and even more charm.
Cutting cardboard into the shape of a stocking and placing it inside will sharpen the look when used for decor.
Now, give your stocking a good fluff, hang it by the fireplace, and let it wait for Santa in style — this stocking’s too cute to get coal! ?
Looking for more festive decor?
?❄️ Polar Bear Stroll Stocking
Cheers, and happy crocheting!
Well, That Was Fun! What’s Next?