I’ve finally picked up a Tunisian Crochet Hook (aka Afghan Hook) and tried my hand at the basic Tunisian stitch by making a cozy!
By the way, it was easier than I imagined it would be, and the dense yet flexible fabric has a beautiful texture.
Disclosure: This post contains affiliate links. Please read my disclosure for more info.
So don’t hold back, grab a hook and a medium weight yarn, and try this beginner cozy out. It’s a quick project perfect for practicing this intro stitch, and when finished, it’s stinking adorable on any cup!

I promise you will love it! I see more Tunisian stitches in the future.
(Yarn in example is Malabrigo Worsted)
Tunisian Crochet Stitch Tutorial

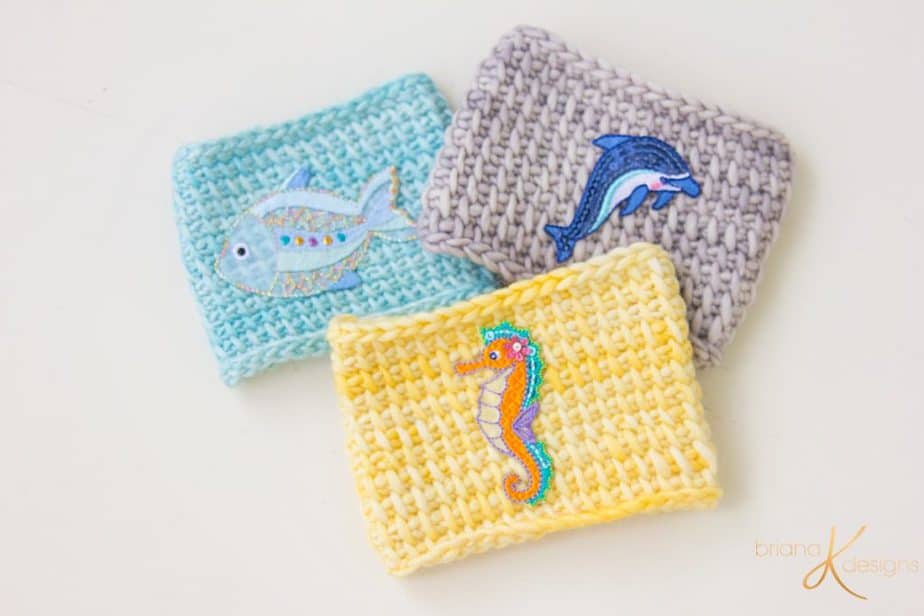
Tunisian Crochet Cozy
The cozy is a very forgiving project and is fun for trying out the Tunisian stitch for the very first time.
Follow the video tutorial above or written and picture instructions below.
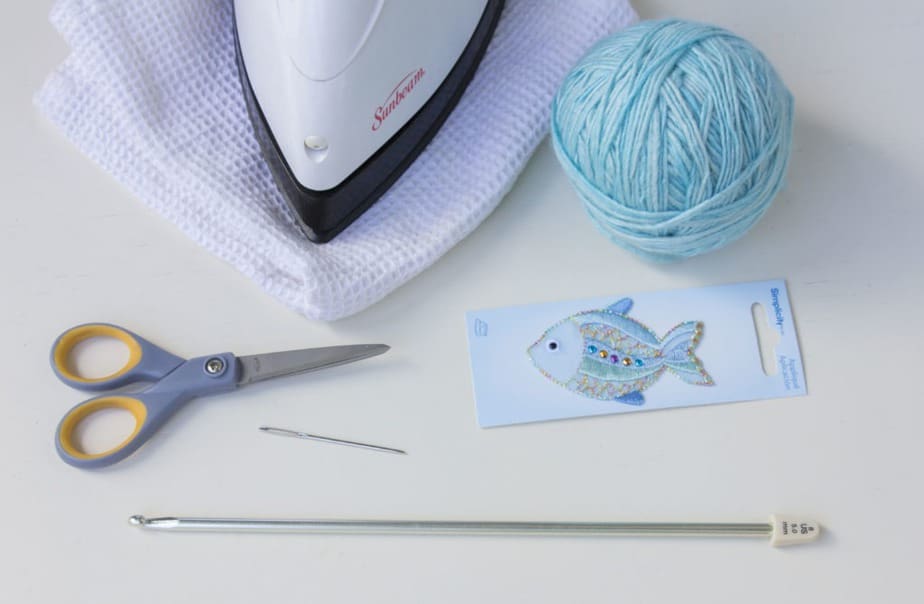
Supplies
• Afghan Crochet Hook 5 mm (H), A regular metal crochet hook can also work.
• Yarn Needle to weave in ends
• Scissors
Yarn:
4 Worsted Weight Yarn
• Malabrigo Worsted is shown, but any worsted weight yarn in your stash will do.
Yardage:
• S/M: 20 yds (18m)
Measurements:
• Approximately 2.5 inches tall and 8-13 inches wide.
Skill Level:
• Easy/Beginner
Iron on Patch Embellishment if desired.
Notes for the Tunisian Crochet Cozy
The Tunisian Crochet Cozy pattern will be worked in rows and joined once you have the desired length to fit around a cup of your choice.
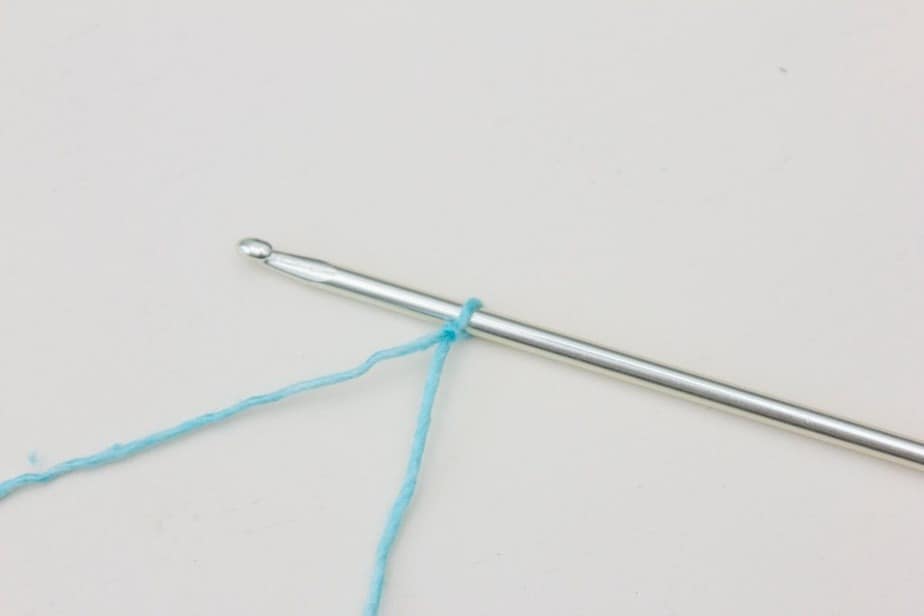
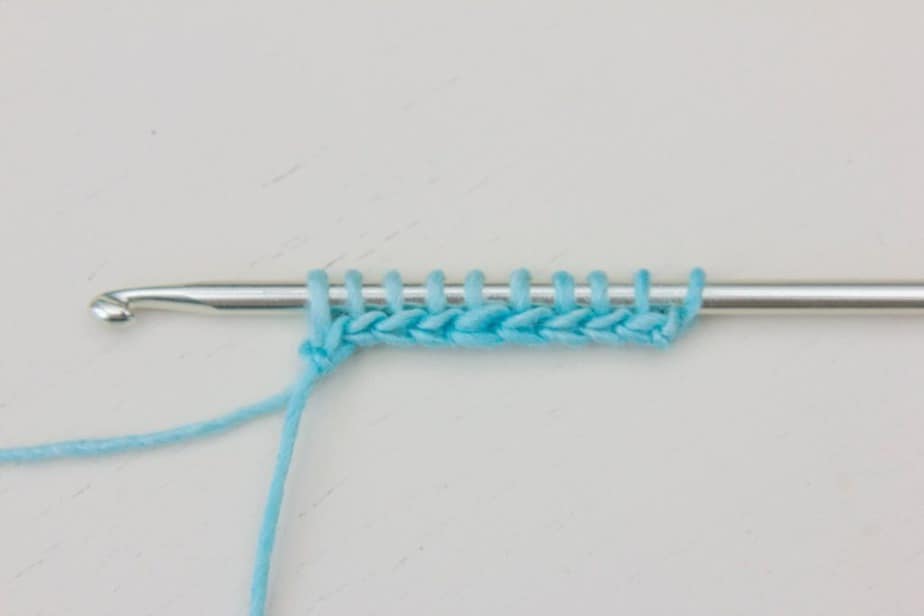
Step 1:
Place slip knot onto hook and chain 10 for these practice instructions. (For the cup cozy chain 35 or amount that fits around the cup.)
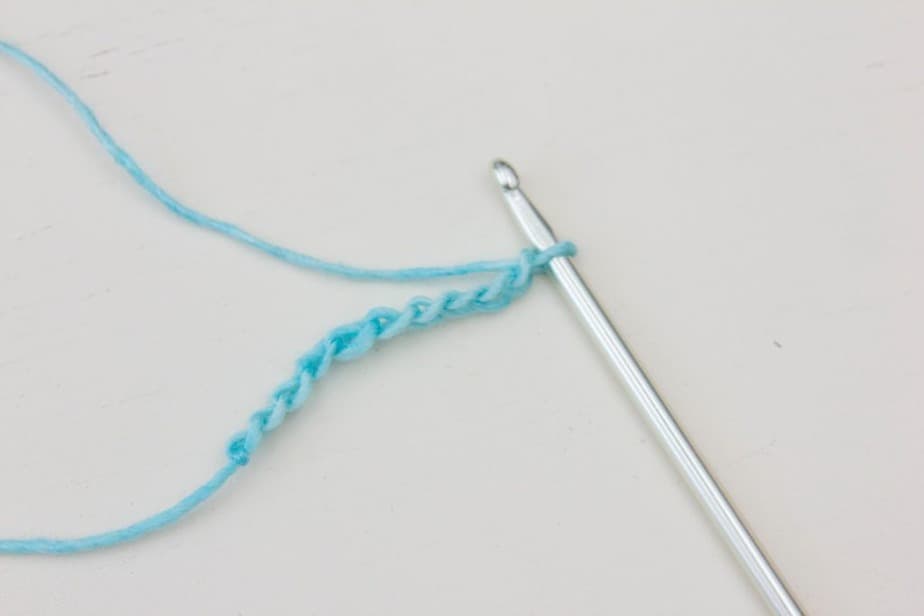
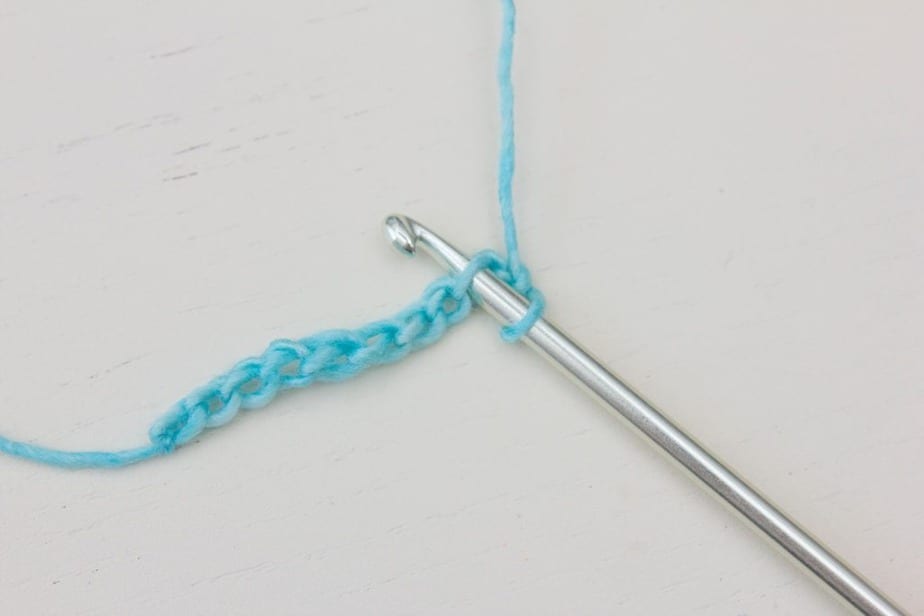
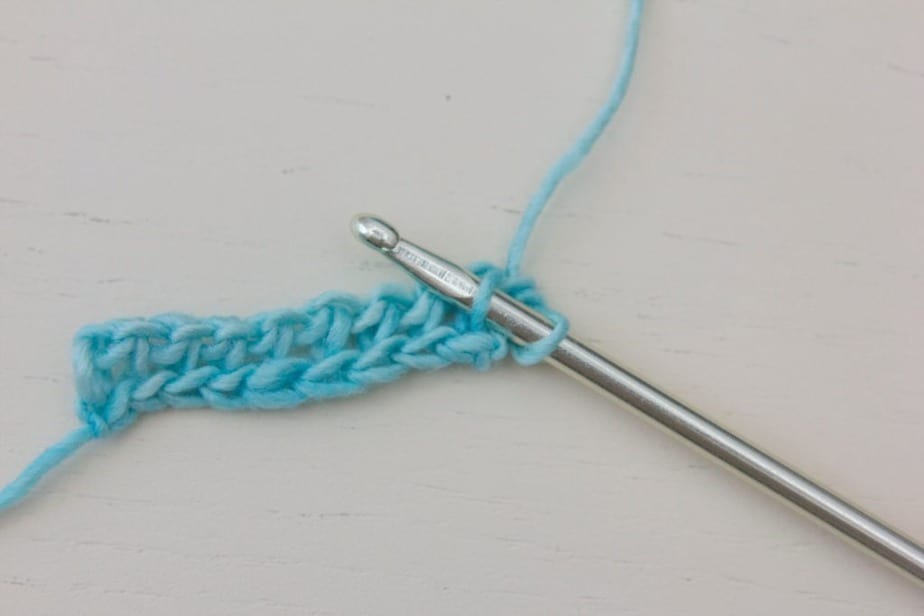
Step 2:
Now insert the hook into the back bump of the second chain from hook. Yarn over and pull through.
Leave the loop on hook and continue with each chain bump to the end of the row. There will be 10 loops on the hook.

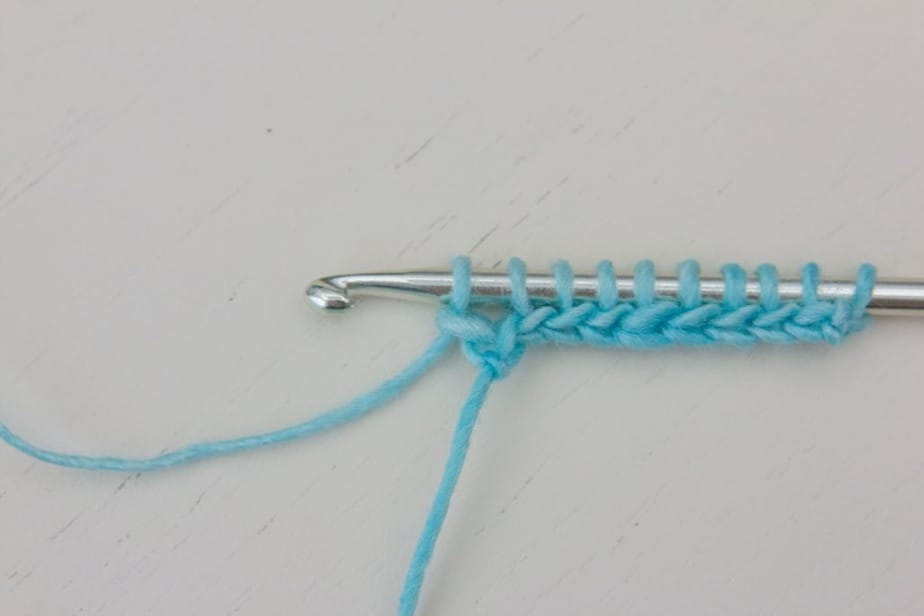
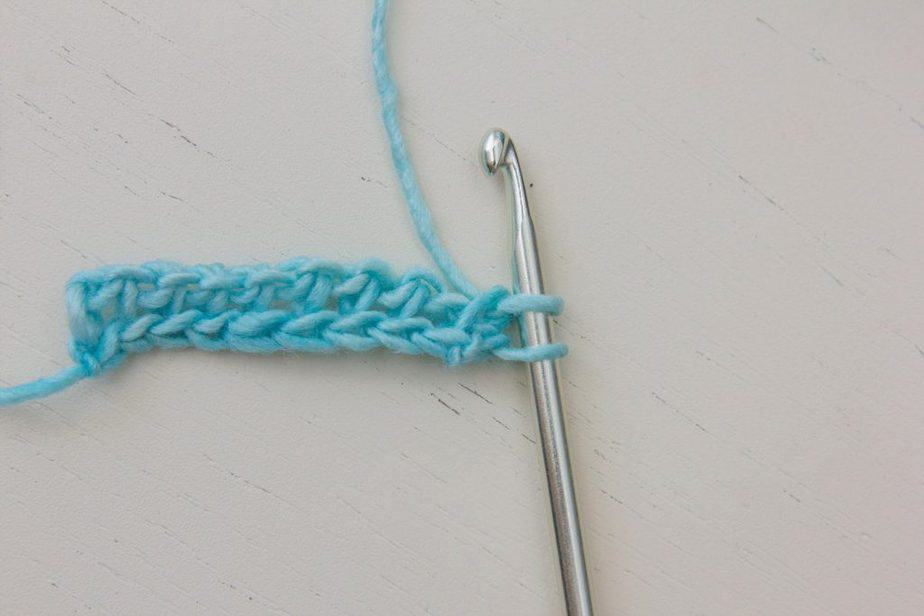
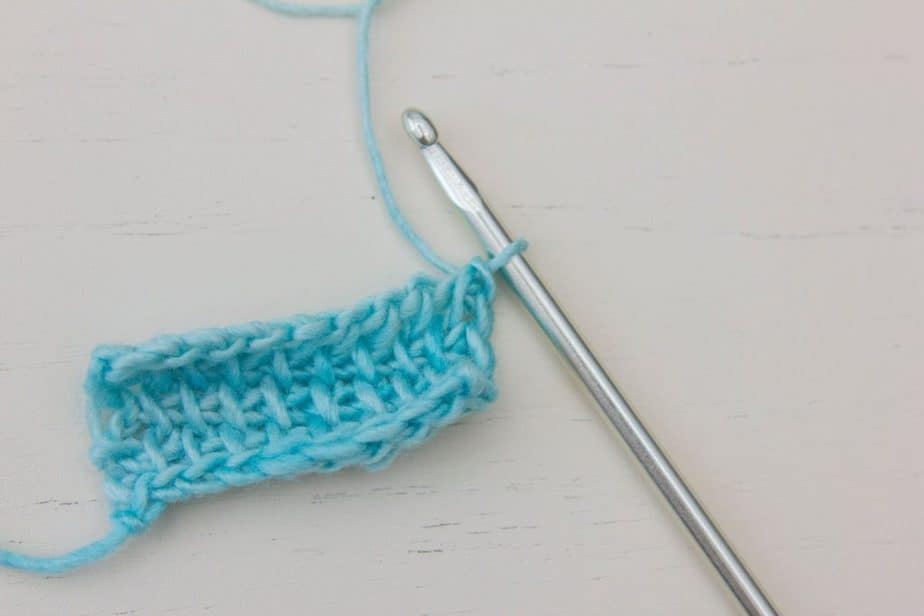
Step 3 RETURN ROW:
Do not turn work, continue to work on the side facing you to create this fabric.
Chain 1. Yarn over and pull through 2 loops on hook. Then continue to yarn over and pull through 2 loops on the hook until one stitch remains.
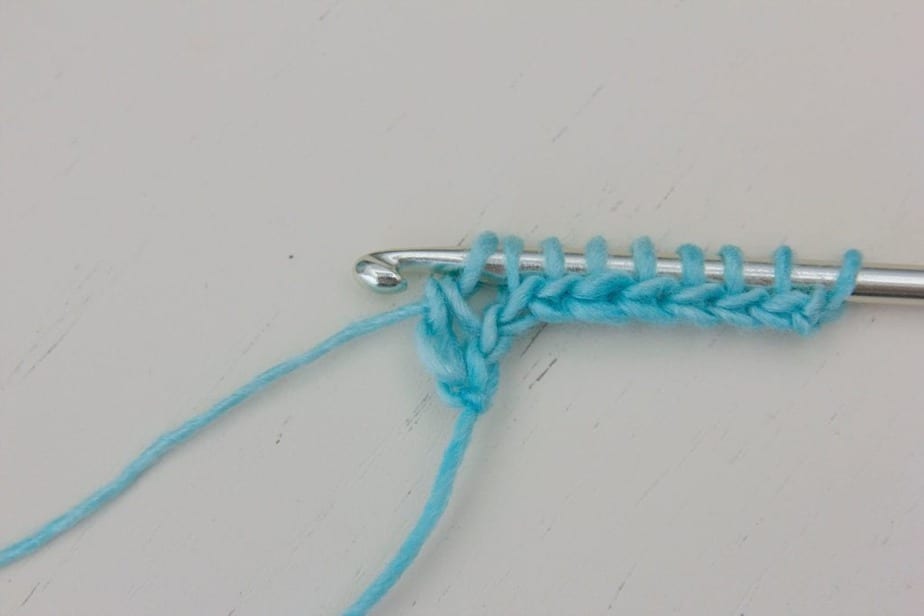
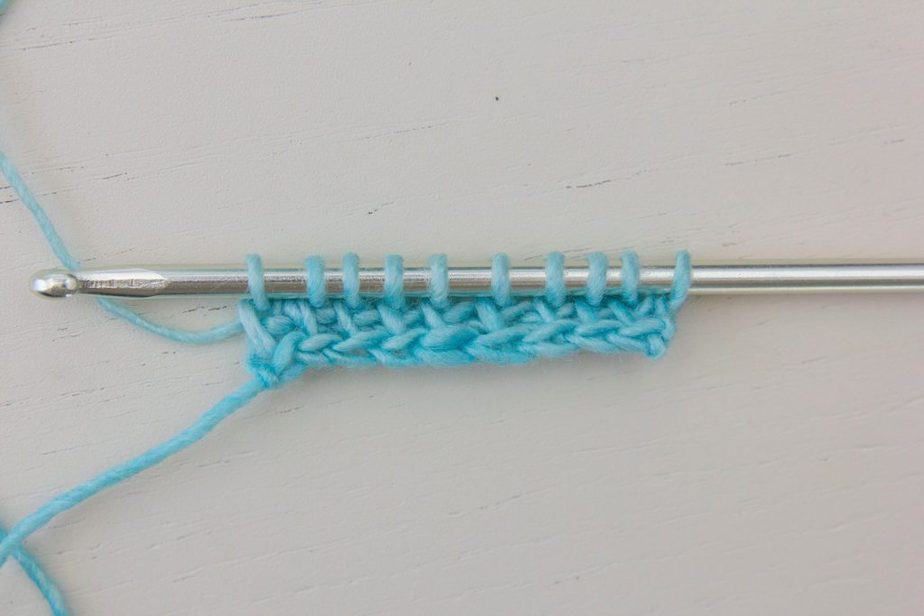
Step 4 FORWARD ROW:
Insert hook into verticle strand from the previous row, yarn over, and pull through. Repeat this step across.
Continue to work the Return and Forward rows to create the basic Tunisian fabric of desired height. End on a Return Row and go to the next step.
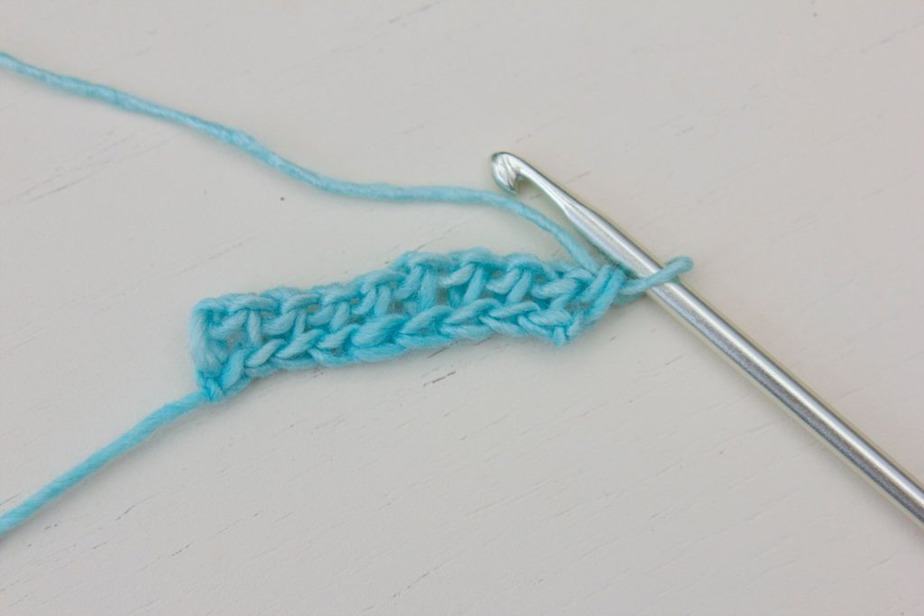
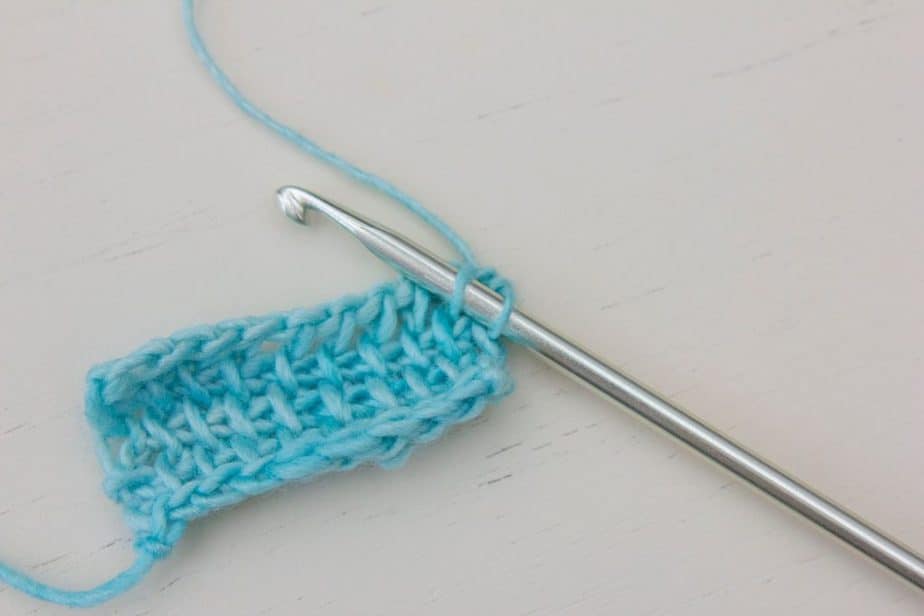
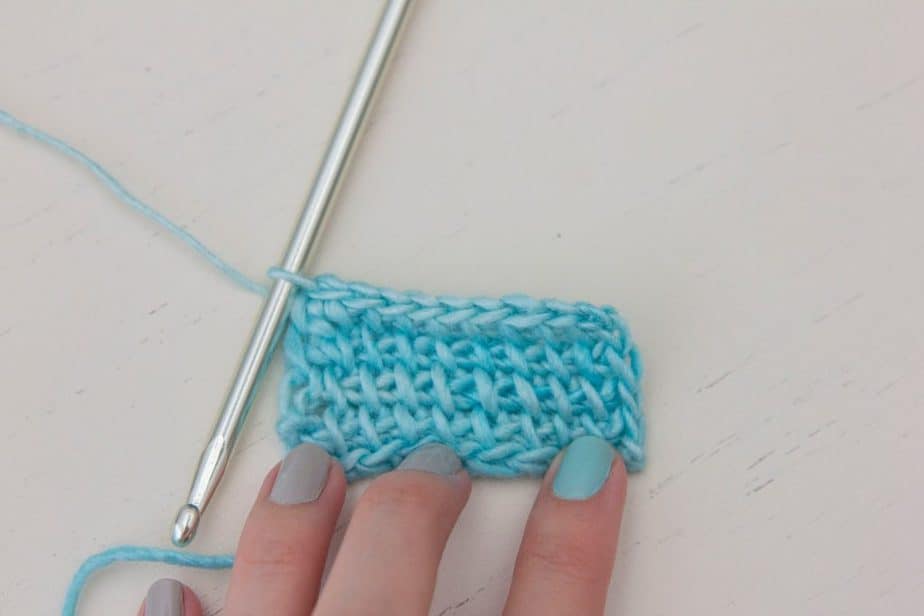
Step 5 FINISHING:
Next, insert hook into verticle strand from the previous row, yarn over and pull through the two loops on hook. Repeat this step across, fasten off and weave in ends. (For cup cozy join ends and seam closed)

Embellishments
Of course, I found these really cute iron-on embellishments that were so simple to use.
As expected, the cozies work best on cotton yarn, but if you are careful and use a low setting, they can be placed onto the front of the Tunisian cup cozy.
Place a piece of fabric between the iron and your project to protect the yarn. If your iron is too hot or you hold it on for too long it can felt the yarn.
What do you think of the basic Tunisian Crochet Stitch? Love it or no?
Well, That Was Fun! What’s Next?