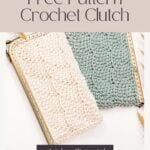
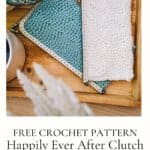
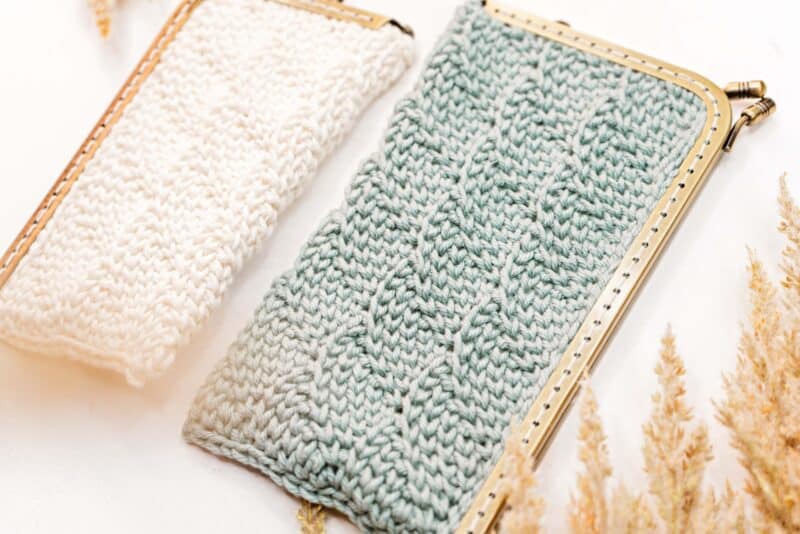
I think the name of the Happily Ever After Crochet Clutch Pattern says it all. After experiencing this quick and small project, you will be so happy with the results. This crochet clutch features a unique stitch, similar to what we used for the Journey Under The Sea Crochet Bag, and it’s a crochet mimic to a knit stitch pattern. We will also be using a technique called Steeking, and I’ll walk you through each step. Curious about other types of Magical Crochet Stitches? Check out the Swirls on the Water Crochet Bag or the If The Slipper Fits Crochet Floor Pouf.
Disclosure: This post contains affiliate links. Please read my disclosure for more info.
Can Magical Crochet Stitches be worked in rows?
With the Happily Ever After Crochet Clutch Pattern, I show you how to create flat fabric. But because of the nature of the ssc stitch, it doesn’t look great working in rows. It’s absolutely fabulous in rounds. So the solution is a unique and fun one. We are going to do some crochet seeking. But if you want to work this stitch on another project that doesn’t have steeking, check out the Enchanted Poncho and the Enchanted Crochet Hat Pattern, or check out the easy stitches on the Juniper Knit-Look Crochet Hat. You might also love the Magical Stitches Holiday Edition Stockings!
What is Crochet Steeking?
Steeking is something we more commonly see in knit, but it absolutely can be done in crochet. We will create an area of fabric, mainly chain stitches, that we will reinforce and then cut. Yes, cut.
But before you have a panic attack, know this is an easy and stress-free crochet technique. Your fabric is not just going to fall apart on you. And the results are well worth the experience.
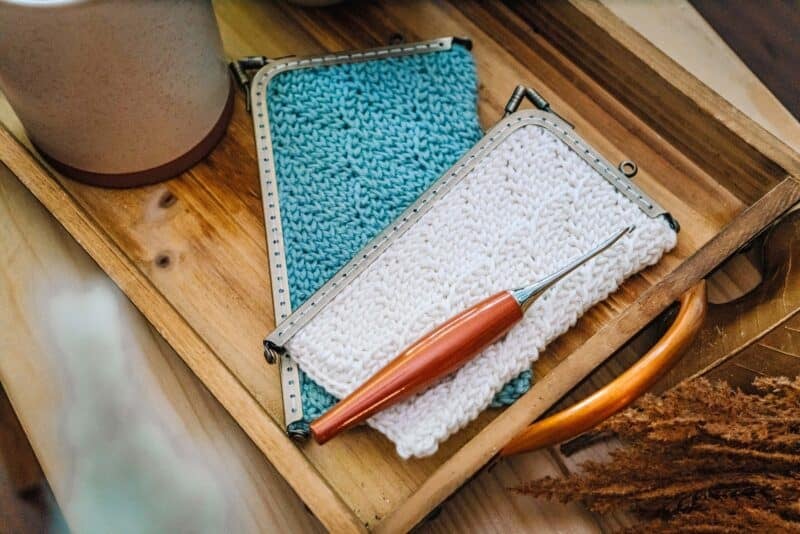
Happily Ever After Crochet Clutch Pattern Supplies
Crochet Hook:
Size G (4mm) Hook
Notions:
Removable stitch marker
Yarn needle to weave in ends
Scissors
Metal Clutch Frames
Blocking Mat & Pins

Yarn & Yardage:
WeCrochet Dishie
100% Cotton, 190yds/100g
Colorways shown: Inlet & Swan
Yardage is approx 100 yds (92m)
Yarn Substitutions:
Premiere Home Cotton Yarn
Lilly Sugar’n Cream Yarn
Cascade Yarns Nifty Cotton
Abbreviations/Stitches:
ch – chain
rnd- round
sc – single crochet
ssc – split single crochet
sl st – slip stitch
st(s) – stitch(es)
Gauge:
16 sts x 18 rows = 4×4 inches in ssc
Measurements/Sizes:
Finished clutches that is closed, including hardware:
Width: 3, 3 1/2, 3 1/2 , 4 inches
Height: 5, 6, 7 1/2, 8 1/2 inches
Skill Level:
Intermediate
Crochet Pattern Notes
The instructions are for the 4 sizes of hardware I found on Amazon. But this can be adjusted as more of a sleeve if you do not want to cut the fabric and use hardware. The starting chains are in multiples of 6 + 4 for the steeking stitches. So do follow the instructions inside the asterisks only, and ignore the steeking section, chain in multiples of 6.
Special Stitches:
Split Single Crochet (ssc), also known as the waistcoat stitch.
This stitch is worked as single crochet but where the hook is inserted is the only difference. The hook will be inserted between the ‘V’ of the stitch.
Insert hook between the legs of the stitch (on the back of work the hook should be under the horizontal bar and between the upside-down ‘V’ shape as well), yarn over, pull up a loop to the height of a single crochet, yarn over, pull through both loops on hook. Keep your hands loose and comfortable. If your hands are starting to hurt, then the tension of the stitch is too tight. When entering the stitch, pull up the loop a bit more than you normally would, it will give the ‘V’ more space for the next round and make working the ssc comfortable.
Can’t get enough of these style of stitch? I have more unique patterns like the Royal Antler Crochet Mock Cable Bag or the Mock Cable Crochet Socks!
With the Magical Crochet Stitches Course, you not only learn the techniques in the Happily Ever After Crochet Clutch Pattern but many more! This course will teach you how to get the knit look with the crochet hook. Each pattern is accompanied by not only written instructions but video tutorials as well.
Video Tutorial

The Happily Ever After Crochet Clutch Pattern is now available for purchase outside the Magical Stitches course on Ravelry & Etsy
Click the box below to unlock this exclusive subscriber content for free. Add your email and create a password. If you are having trouble, reset your password or log in to the Grow Portal.
I’m thrilled to share this amazing crochet pattern with you! Please don’t copy, paste, or distribute this pattern. Prefer an ad-free experience? Purchase a digital PDF file for a small fee from one of my online stores. I appreciate your support and readership. You are why I can keep doing what I love and sharing it with others. Thank you from the bottom of my heart.
Clutch Written Pattern
Repeats: Repeat Rnds 1-5 until the desired height of the fabric, do not fasten off. If you are using hardware, it’s best to measure the length needed for that specific hardware. The approx. amount of rows in the 5-row repeat will be 22, 27, 30, 35 rows.
Join The Kindest Community
Join our vibrant community of crafters on Facebook today. Whether you enjoy crafting with others or simply have burning questions, we’ve got you covered – join us now!
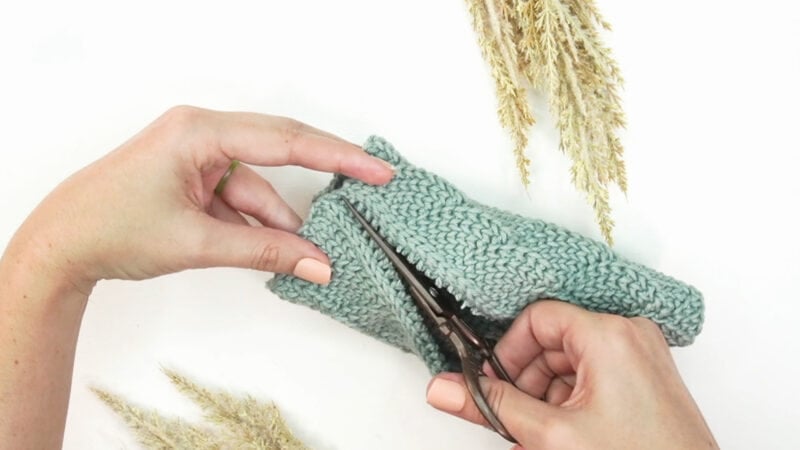
Steeking the Crochet Fabric
Set up: Rotate the fabric to the right. Next, we will lock in some stitches before we get to the cutting part. Starting in the first stitch of the round, sl stitch through the center of the stitch. Then sl st through all the first stitches in the row, working downwards. This will require pulling up the yarn from the back to the front of the fabric and grabbing the yarn from underneath your work, see video. Fasten off.
Attach yarn into the center of the ssc stitches after the chain 2 space. Slip stitch down the fabric into the center of these stitches just as we did with the stitches before the ch 2 space. Fasten off and weave in all the ends. It’s important to weave them in now, you don’t want to accidentally cut them with the next step.
Please note another option for securing the stitches is to stitch down these stitches with sewing thread or a sewing machine.
Here comes the exciting part. With your scissors, cut right down the center of the chain space. Yep, don’t have a heart attack here; you can do it.
Trim the ends without cutting the edge of the fabric, you may have some short strands that come out, which is normal.
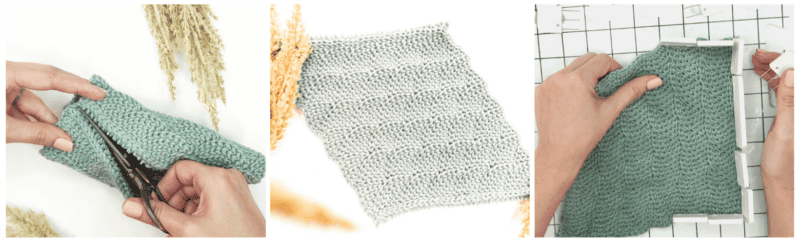
Blocking The Fabric
An aggressive block is required for this fabric because of the aggressive lean. I highly recommend a wet block with a blocking mat and pins. This might require a bit of pinning, then shifting and re-pinning to get it as square as possible.
Want an easier blocking experience? Get a block combs for getting a clean sharp look.
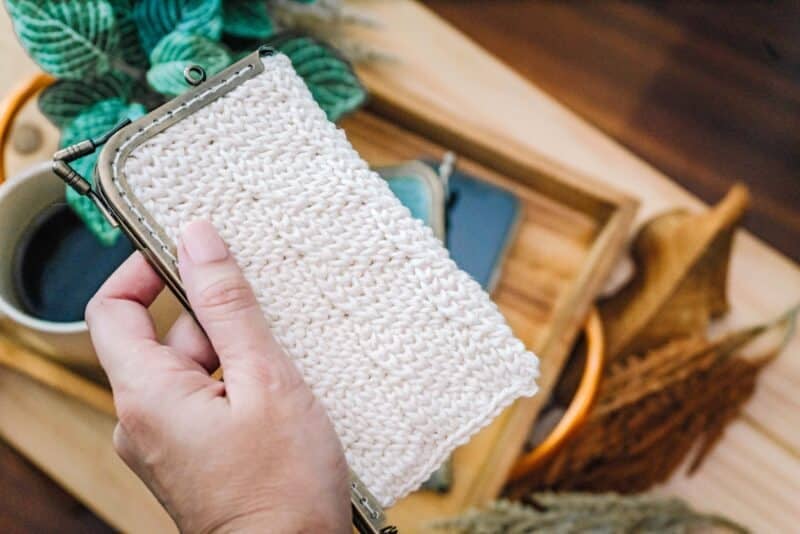
Sewing to the Hardware
Tip: use the instructions at the end of this post if you want to add a fabric lining before attaching to the hardware.
Using the hardware for the clutch, grab your sewing thread and needle and get ready to do some hand sewing. Once the fabric is sewn to the hardware, it will be folded in half. Start by placing one long fabric side into the hardware groove with the hardware open.
Start stitching the crochet fabric to the hardware with your needle at the longest edge of the ‘L’ shape. Sew the fabric in place by working up through the small hole and down the next hole. I like to secure it in place by sewing between the holes 2-3 times.
Work around the curve and across the short side, and then with your fabric folded in half, start working around the opposite side of the hardware until the other end. See the video for a visual of the sewing.
Seaming one end: For the one side of the fabric, farthest away from the closure, we will need to seam it closed. One option is to use your yarn and yarn needle to stitch along the edge, or you can use slip stitches with your crochet hook.
If slip stitching the fabric together, join the yarn and work through the outside loops (grabbing the front loop from the closest side and the back loop from the side farthest away) and slip stitch the fabric together. Fasten off and weave in ends and enjoy!
If you love this crochet accessory, you might also enjoy the Clutch Project Bag Pattern or the Herringbone Crochet Clutch Pattern. Want to really step it up and try these stitches on a garment? Check out the Lovely Lace Crochet Sweater or the Lovely Lace Collection.
Now that you’ve crafted your very own knit-look crochet clutch, it’s time to take it out on the town! This is a great accessory and small enough to take to sporting events.
Want to add a fabric lining?
Adding a fabric lining not only enhances the durability of your clutch but also provides a polished finish to your handcrafted creation. For a successful lining process, here are some helpful tips:
Choose the Right Fabric: Opt for a lightweight fabric that complements the yarn color and texture of your crochet clutch. Cotton or satin fabrics are popular choices for lining crochet projects due to their smooth texture and ease of sewing.
Measure Carefully: Take accurate measurements of your crochet clutch to determine the dimensions of the lining pieces. Remember to account for seam allowances to ensure a snug fit inside the clutch. Cut the fabric slightly smaller than the clutch size, or if the edges will fray, cut slightly larger and roll the edges and sew them.
Preparing the Fabric: Before cutting your fabric, prewash and iron it to prevent any shrinkage or wrinkles. Then, using your measurements, carefully cut out the lining pieces, making sure to match any pattern or grain lines if applicable.
Sewing Techniques: Use a sewing machine if attaching the fabric before adding the metal hardware, or hand stitch the lining pieces together according to your preferred method. Consider adding interfacing to stiffen the fabric if you desire added structure for your clutch.
Attaching the Lining: Once your lining is ready, carefully place it inside the crochet clutch, ensuring that it fits smoothly without any wrinkles or bulges. Secure the lining in place by hand stitching or using fabric glue along the edges of the clutch.
By following these tips, you can easily line your crochet clutch with fabric, adding both functionality and finesse to your handmade accessory. Happy crocheting!
Well, That Was Fun! What’s Next?