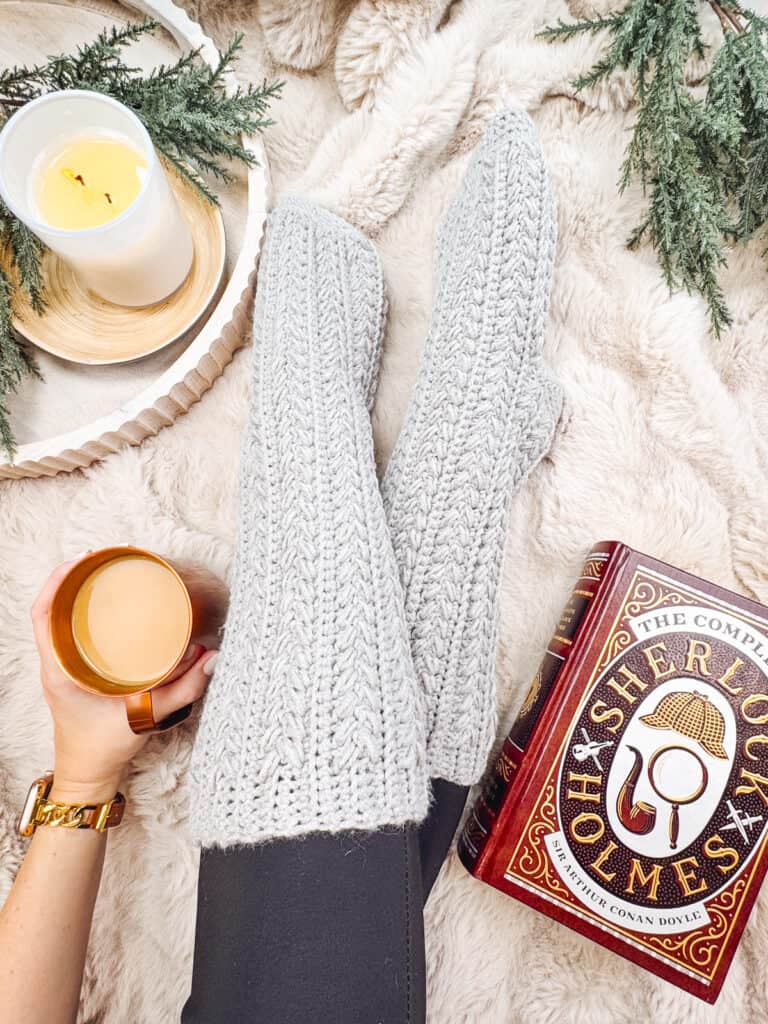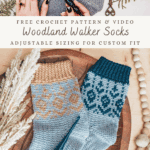
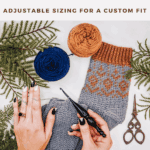
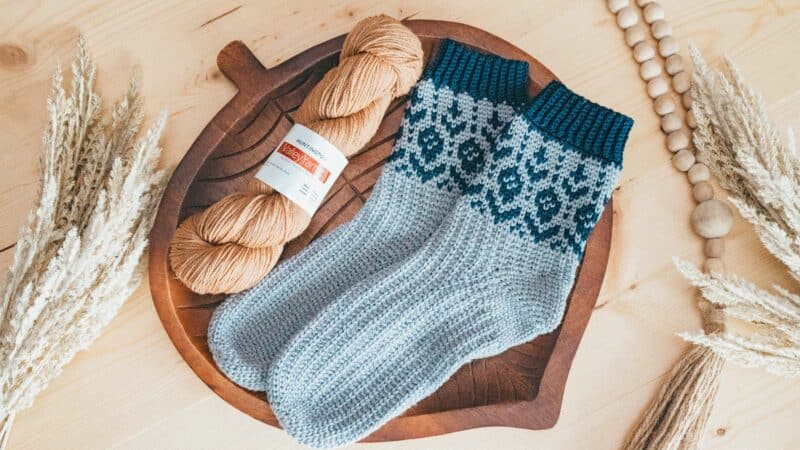
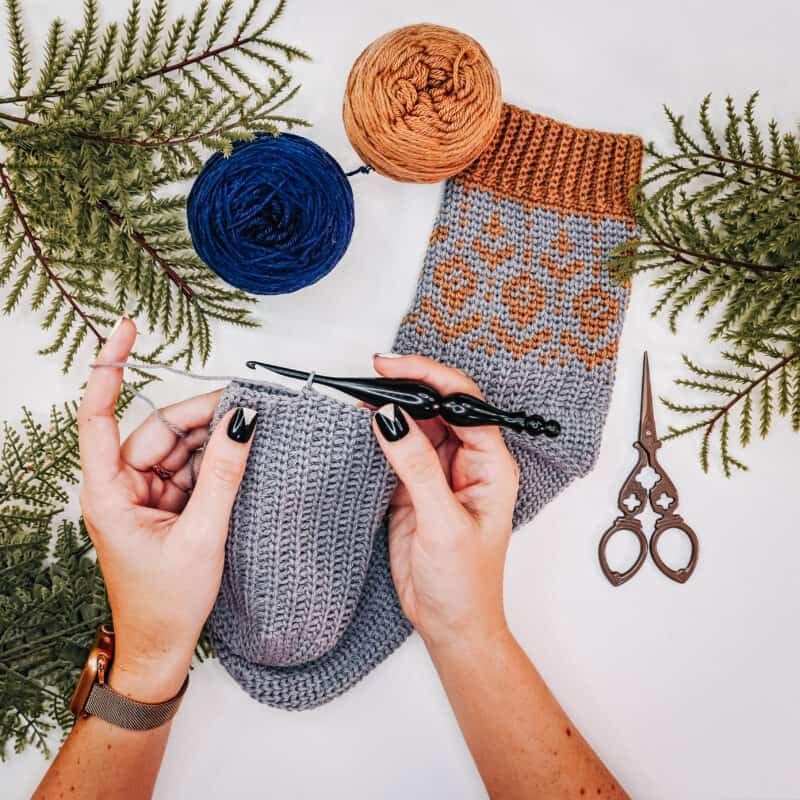
Why should knitters have all the fun with handmade socks? The Woodland Walker Crochet Socks prove that crocheters can create cozy, stylish, and perfectly fitting socks as well. Designed with comfort and wearability in mind, these socks are made with an easy formula that allows you to customize sizing for everyone in the family—from babies to adults.
Disclosure: This post contains affiliate links. Please read my disclosure for more info.
Unlike many crochet sock patterns that can feel bulky or awkward inside shoes, the Woodland Walker Socks are sleek, comfortable, and ideal for everyday wear. They’re a wonderful way to combine the satisfaction of crochet with the practicality of handmade wardrobe pieces.
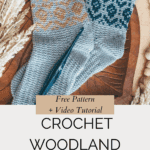
Whether you’re new to sock-making or ready to level up with some fun colorwork, this free pattern is the perfect place to start. And if you have never made socks, don’t worry! I have two great patterns to get you started if you’ve never made socks. The Felici Crochet Socks Free Beginner Pattern gets you started with the basic single crochet stitch, and the Simple And Best Crochet Sock – Free Pattern is a knit-look, simple sock without colorwork. This is also a great one to experiment with the size and length of a crochet sock. If you are digging the colorwork of the Woodland Walker Socks, check out the Vine Colorwork Crochet Sock – Free Pattern for a different crochet colorwork pattern.
FAQs About Crochet Socks
Q: Can beginners make the Woodland Walker Crochet Socks?
A: Yes! If you’ve never made socks before, this pattern is a gentle introduction. Plus, I recommend starting with my Felici Crochet Socks Beginner Pattern for the basics, then moving into these.
Q: What makes these socks different from other crochet socks?
A: Many crochet socks end up bulky and uncomfortable inside shoes. The Woodland Walker Socks are designed to be slim, smooth, and wearable all day long.
Q: What yarn should I use?
A: Choose a soft, durable yarn with some elasticity. Sock-weight yarns or blends with nylon are great for comfort and longevity.
Q: Can I customize the length of the socks?
A: Absolutely! Adjust the number of rows in the foot and leg sections to make ankle socks, crew socks, or even knee-highs.
Q: Do these socks stretch?
A: Yes—they have natural give and can be tailored to any size with the included measuring formula.
Woodland Walker Crochet Socks Video Tutorial:

Get the Fireside Crochet Collection!
In the Fireside Collection Course & eBook there are printable charts to color in your own choices. It’s a great way to visualize different colors. That way you can pick yarn from your stash, or decide on the yarn you really want a reason to purchase. Plus, you get all the other patterns in the collection as well! It’s a win-win.
If you don’t want to wait for each release, you can get the entire collection at an amazing price. Inside the course, there are extra goodies (like the color your own chart) that won’t be available on the blog. The printable eBook is ad-free and easy for on-the-go.
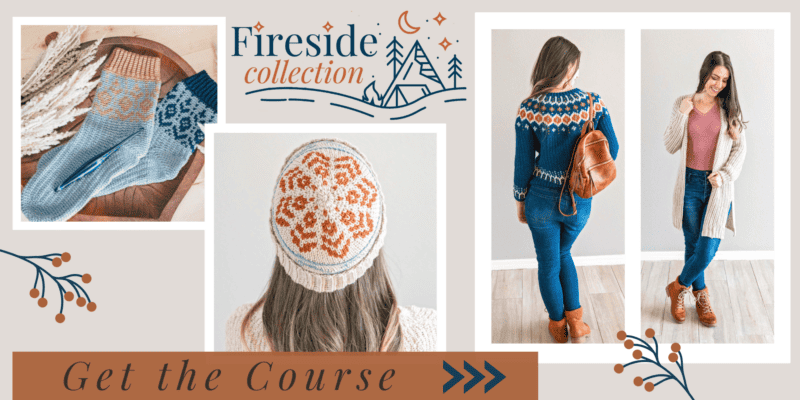
**Other patterns in the Fireside Crochet Collection include:
Forest Brooks Beanie
Fawning Over You Crochet Sweater
Campside Crochet Cardi
Woodland Walker Crochet Socks Supplies:
Crochet Hook:
Size E (3.5mm) hook
Size C (2.5mm) hook, or size needed to get gauge.
Notions:
2 Removable stitch markers if needed
Yarn needle to weave in ends
Scissors
Yarn:
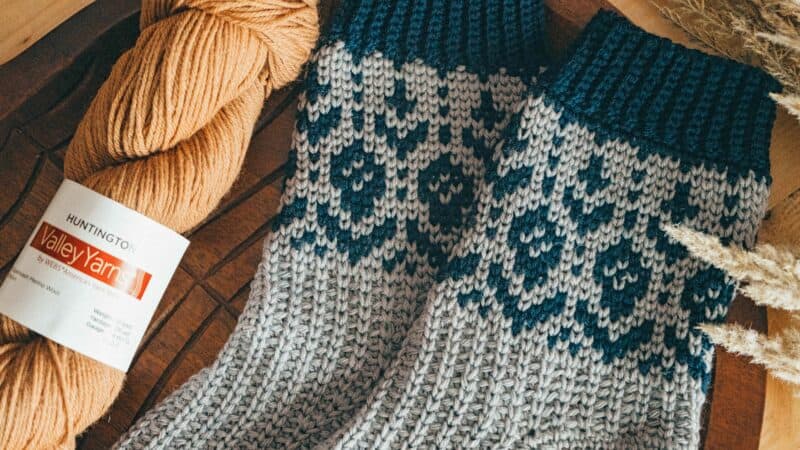
Valley Yarns Huntington (75% Merino Wool 25% Nylon), 50 g/218 yds.
Suggested Yarn Substitute: WeCrochet Stroll Fingering
Yardage:
MC: 2 skeins (Seagull) 370 yds
CC: 1 skein (Navy or Brown Sugar), 100 yds
Abbreviations/Stitches:
blo: work in back loop only
ch: chain
dec’d: decreased
est st patt: established stitch pattern
inc’d: increased
pm: place marker
rep: repeat
rnd(s): round(s)
sc: single crochet
ssc: split single crochet
ssc2tog: split single crochet 2 sts together
sl st: slip stitch
st(s): stitch(es)
Gauge:
20 sts and 25 rnds = 4″ in Split Rib Pattern with larger hook.
Skill Level:
Intermediate
Sizes:
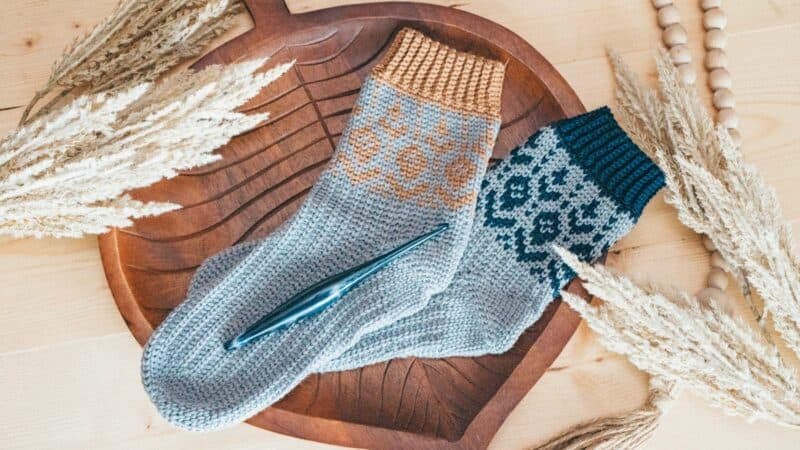
Adults. Mid-calf height is shown.
Finished Measurements:
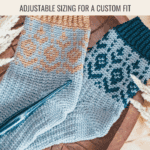
This sock is meant to be crocheted for a custom fit to your foot. This sock can be tried on and adjusted as you go. The colorwork portion is an 8-stitch repeat. Instructions are for adult women’s sizes. For a helpful chart of sock sizes visit the blog here.
Notes for the Woodland Walker Crochet Socks:
The socks are worked continuously in the round from the toe up.
The heel is an ‘afterthought heel’, where we create an opening for the heel area and come back to work the heel last.
Special Stitches:
Split Single Crochet (ssc): Insert hook between the legs of the stitch (on the back of work the hook should be under the horizontal bar and between the upside-down ‘V’ shape as well), yarn over, pull up a loop to the height of a single crochet, yarn over, pull through both loops on hook. Tip: Keep a loose tension so the stitches are easily worked. https://brianakdesigns.com/split-single-crochet-round-flat/
Split Single Crochet 2 Together (ssc2tog):
[Insert hook between the legs of the next st, yarn over, pull up a loop to the height of a single crochet] two times, yarn over, pull through all 3 loops on hook.
The Video Tutorial and the written pattern use an example sock for stitch counts. This example sock will fit a foot circumference of 8”. Adjust your measurements and stitch counts as needed.
Join The Kindest Community
Join our vibrant community of crafters on Facebook today. Whether you enjoy crafting with others or simply have burning questions, we’ve got you covered – join us now!
Purchase this pattern on Etsy, Ravelry, or LoveCrafts.
Click the box below to unlock this exclusive subscriber content for free. Add your email and create a password. If you are having trouble, reset your password or log in to the Grow Portal.
I’m thrilled to share this amazing crochet pattern with you! Please don’t copy, paste, or distribute this pattern. Prefer an ad-free experience? Purchase a digital PDF file for a small fee from one of my online stores. I appreciate your support and readership. You are why I can keep doing what I love and sharing it with others. Thank you from the bottom of my heart.
Colorwork Sock Chart Instructions

Colorwork Sock Written Instructions
Toe of Sock & Instep
Rnd 1:
Using larger size hook and MC, working inside the Magic Ring, sc 8, pull ring closed, do not join as this will be worked continuously. Place a marker in first st and move it up each rnd. 8 sts
Rnd 2:
2 ssc in each st around. 16 sts.
Rnd 3:
Ssc in each st around.
Rnd 4:
2 ssc in first st, ssc in next, *2 ssc in next, ssc in next st; rep from * around. 24 sts.
Rnd 5:
Ssc in each st around. If making a baby/child size skip to Rnd 10.
Rnd 6:
2 ssc in first st, ssc in next 2 sts, *2 ssc in next, ssc in next 2 sts; rep from * around. 32 sts.
Rnd 7:
Ssc in each st around. For smaller foot circumferences increasing may stop here, or increase fewer
sts on the next round.
Rnd 8:
2 ssc in first st, ssc in next 3 sts, 2 ssc in next, ssc in next 3 sts; rep from * around. 8 sts inc’d.
Rnd 9:
Ssc in each st around.
Rnd 10:
Ssc in first st, sc-blo in next st, ssc in next, sc-blo in next; rep from * around.
This round establishes the Split Rib Pattern
Rep Rnd 10 until the sock reaches about 1½” from the back of the heel. It’s best to try it on and add or remove rnds if needed. This creates the Instep measurement D.
Please Note:
This is a great time to customize the sock to your foot size. This example is for a foot circumference of 8”. Remember, these will stretch a little as worn so it should be a little snug, but if it starts to feel too tight, add increases by placing 3 ssc into one stitch on each side. Don’t be afraid to change the stitch count for the instep of your foot.
Gusset
Note: This gusset is following the stitch counts from the example sock in the video. It’s okay if your gusset stitch count is different.
Rnd 1:
3 ssc in first, work 19 sts in est st patt (or half the stitches in the round); rep from * around; 4 sts inc’d. 44 sts.
Rnds 2–3:
Work est st patt in each st around.
Rnd 4:
*3 ssc in first, work 21 sts in est st patt (or half the stitches in the round) *; rep from * around; 4 sts
inc’d. 48 sts.
Rnds 5–6:
Work in the est st patt around. It’s perfectly fine if your stitch count is more or less, it simply needs to be an even number of stitches.
Split For Heel
This round will make space for the heel to be worked later.
Ch 24 (or half the stitch count), skip 24 (or half the stitch count), and work the remaining sts in est st patt. 48 sts.
Top of Sock & Colorwork
Rnd 1:
Work in est st patt around, working sc in each ch across the heel opening. If you have increased or decreased the number of sts in the instep, adjust the stitch count to result in a multiple of 8. 48 sts.
Rnds 2–5:
Work in est st part.
Tips For Colorwork:
When crocheting the colorwork, the yarn will be carried along the back in the fair isle style. Try not to carry a color for more than 3 stitches, so your floats aren’t too long. You can catch/trap the yarn behind a stitch to keep the floats consistent. To read more about colorwork, please visit: https://brianakdesigns.com/ways-to-colorwork-in-crochet/
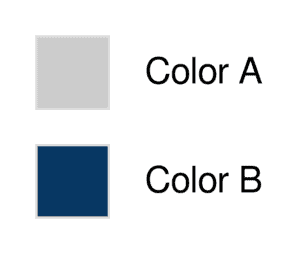
8 Stitch Repeat for Colorwork
The rest of the stitches for the colorwork portion will be worked as SSC, not in the established stitch pattern. The following instructions will be for an 8-stitch repeat.
Rnd 1:
(A) x 8
Rnd 2:
(B) x 1, (A) x 2, (B) x 1, (A) x 2, (B) x 1, (A) x 1
Rnd 3:
(A) x 2, (B) x 3, (A) x 2, (B) x 1
Rnd 4:
(A) x 1, (B) x 2, (A) x 1, (B) x 2, (A) x 2
Rnd 5:
(B) x 2, (A) x 3, (B) x 2, (A) x 1
Rnd 6:
(B) x 1, (A) x 2, (B) x 1, (A) x 2, (B) x 1, (A) x 1
Rnd 7:
(A) x 2, (B) x 3, (A) x 3
Rnd 8:
(A) x 2, (B) x 3, (A) x 3
Rnd 9:
(A) x 1, (B) x 2, (A) x 1, (B) x 2, (A) x 1, (B) x 1
Rnd 10:
(A) x 1, (B) x 1, (A) x 1, (B) x 1, (A) x 1, (B) x 1, (A) x 2
Rnd 11:
(A) x 1, (B) x 2, (A) x 1, (B) x 2, (A) x 1, (B) x 1
Rnd 12:
(A) x 2, (B) x 3, (A) x 3
Rnd 13:
(A) x 3, (B) x 1, (A) x 3, (B) x 1
Rnd 14:
(B) x 1, (A) x 5, (B) x 2
Rnd 15:
(B) x 2, (A) x 1, (B) x 1, (A) x 1, (B) x 2, (A) x 1
Rnd 16:
(A) x 1, (B) x 1, (A) x 1, (B) x 1, (A) x 1, (B) x 1, (A) x 2
Rnd 17:
(A) x 7, (B) x 1
Rnd 18:
(B) x 1, (A) x 2, (B) x 1, (A) x 2, (B) x 2
Rnd 19:
(A) x 7, (B) x 1
Rnd 20:
(A) x 3, (B) x 1, (A) x 3, (B) x 1
Rnd 21:
(A) x 8
Rnd 22:
(A) x 3, (B) x 1, (A) x 3, (B) x 1
Ribbed Cuff
Change to smaller hook.
Row 1:
Ch 11, sc-blo in the second ch from the hook, sc -blo in next 9 sts, sl st in next 2 sts on top edge of the sock, turn. (10 sts)
Row 2:
Skip 2 sl sts, sc-blo in each st across cuff, turn.
Row 3:
Ch 1, sc-blo in each st across sl st in next 2 sts on sock, turn.
Rep Rows 2–3 all the way around the top of the sock to create the ribbing. Either slip stitch in the blo of the last row to the loops of the first row to join, or fasten off and seam with a tapestry needle.
Heel
Rnd 1:
Using larger hook, attach yarn to one of the corner sts, ssc in first st, pm in this stitch, ssc in each stitch across to next corner (half of the heel sts), rotate and continue working in the top of the heel sts, ssc in first st and pm, ssc in remaining sts around.
Rnd 2:
Ssc in next st, move up the marker, ssc2tog, ssc to 2 sts before next marker, ssc2tog; rep from * around; 4 sts dec’d.
Rep Rnd 2 until 10–14 sts remain.
Fasten off and seam remaining sts together.
Finishing the Woodland Walker Crochet Socks
Weave in any remaining ends. If there are gaps by the heel corners, use tail ends to close the holes. Block your socks if needed by laying flat or using a sock blocker.
The Woodland Walker Crochet Socks show that crochet socks can be just as wearable, stylish, and customizable as knit ones. With a simple formula, endless size options, and a smooth finish, they’re the perfect handmade addition to your wardrobe—or a thoughtful gift for the whole family.
Ready to make your first pair? Grab your yarn, measure those feet, and start crocheting your own woodland-inspired socks today.
Well, That Was Fun! What’s Next?