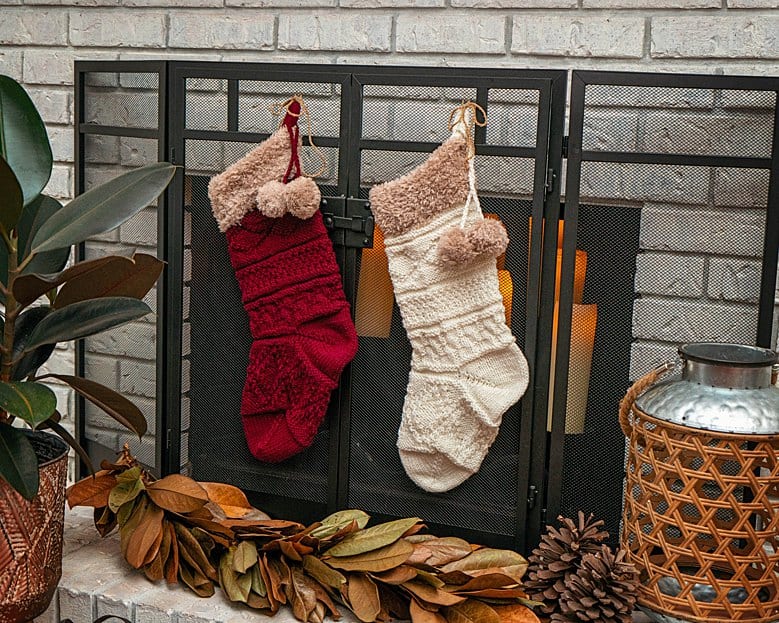
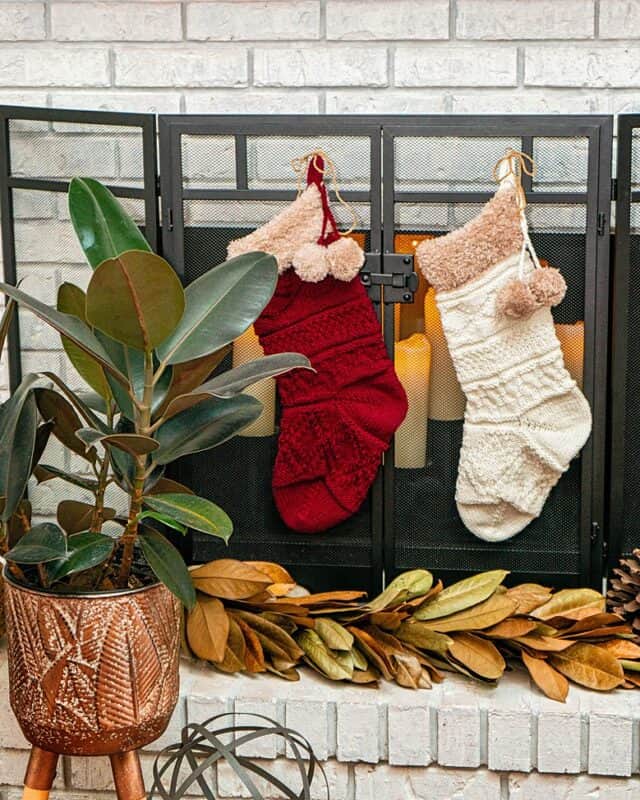
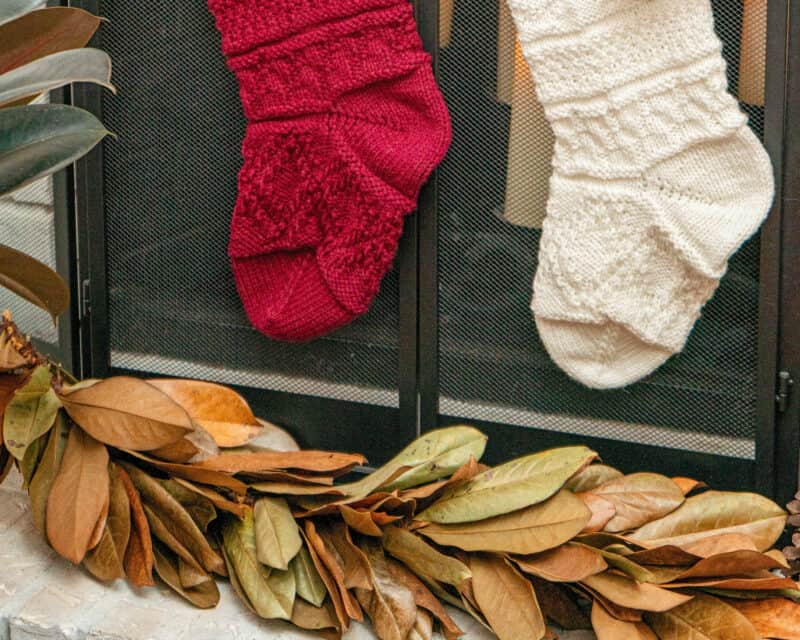
Beginner Textured Stitch Christmas Knit Stocking Free Pattern
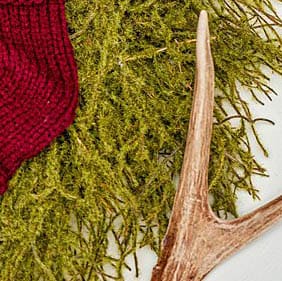
Learn how to knit your very first stocking with this beginner-friendly pattern. Whether you're new to knitting or a seasoned pro, you'll love creating this festive holiday decor with its stunning textured stitches.
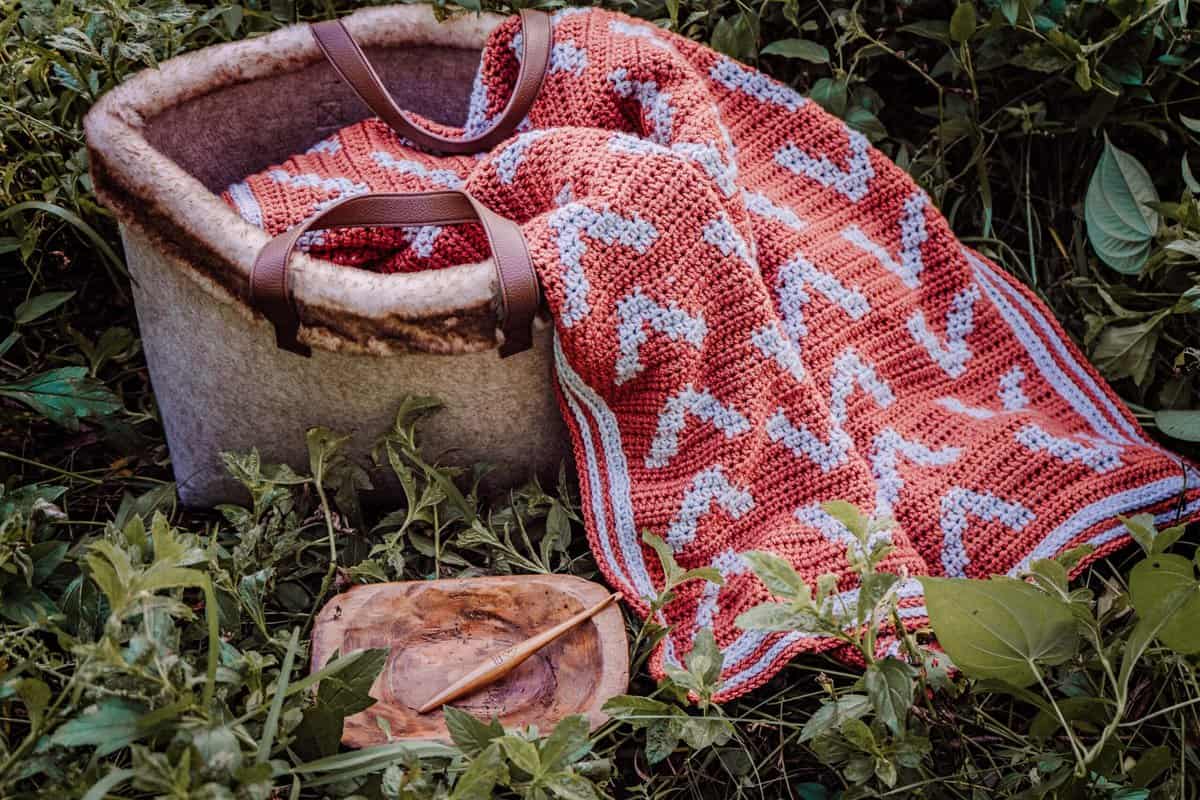
If you are looking for the crochet version be sure to click on over to Marly Bird's Stocking so you can get that crochet hook flying.
Disclosure: This post contains affiliate links. Please read my disclosure for more info.
This pattern is free on this blog and also available for purchase on RAVELRY.
Want to try a Fair Isle Stocking? Check out the White Spruce Knit Stocking Pattern.
Want an Ad-Free PDF Download of this pattern?
This pattern is available in my shops:
Can I just tell you how excited I am? I know I keep saying that, but it's really hard to express through a screen. I am smiling from ear to ear as I pour another cup of coffee and sit down to a craft-cation! That's right. It's kind of like a stay-cation but only with yarn. Which makes is lovely.

Gift Ideas for Knitters

Stocking Stuffers for Knitters
Want some ideas for what to put into a knit stocking for your crafty friend? Here are some great gift suggestions.
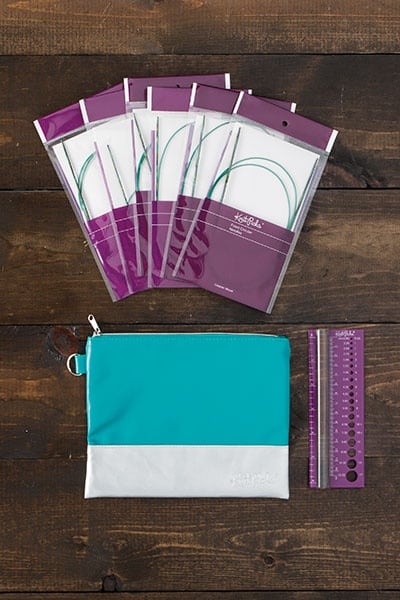
Knit Christmas Stocking Supplies
Knitting Needle:
• Size US 6 (4.0mm) and US 5 (3.75)
Circular knitting needles with a min. 24” cord OR DPN’s
Notions:
- Removable stitch markers (2)
- Scissors
- Yarn needle to weave in ends
- Small amount of waste yarn
- Tape Measure
- Size US H (5.0mm) crochet hook
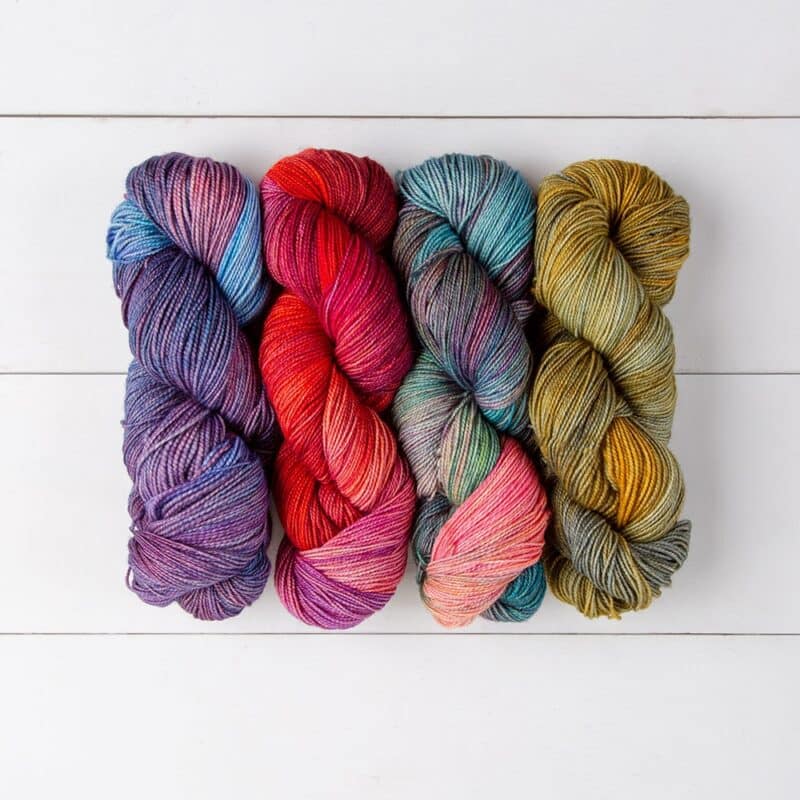
Yarn:
Main Color (MC)
• Worsted Weight Yarn
Red Heart With Love In colorway Eggshell
Or WeCrochet Brava in Red
Contrast Color (CC)
• Bulky Fur Yarn
Yardage:
• 240 yards (220 m) of main color
• 65 yards (60 m) of contrast color
Abbreviations/Stitches:
- k - knit
- Kf&b - knit front and back of st
- k2tog- knit two together
- p - purl
- pm - place marker
- st(s) - stitch(es)
- ssk - slip slip knit
- yo – yarn over
• 17 sts and 26 rows = 4” (10 cm)
in stockinette with US 6 (4.0mm) Needle
Measurements/Sizes:
When laid flat:
• Length: 19” (48 cm)
• Width: 7 ” (18 cm)
Skill Level:
• Advanced Beginner
Christmas Stocking Notes:
This Christmas Knit Stocking is worked from top-down with a German short row heel. To begin, a provisional cast-on is used so the fur cuff to be worked later. If another cast-on method is preferred stitches can be picked up later. The textured stitches are a combination of knit and purl stitches.
Special Stitches
k2tog - knit two together: place right-hand needle under the second and then the first stitch of the left needle as if to knit, knit the two stitches together and pull them off the left needle.
ssk - slip, slip, knit: slip the first stitch on the left-hand needle as if to knit, repeat with the second stitch on the left-hand needle, insert the left-hand needle into the front loops of these stitches from left to right, wrap yarn around right-hand needle and knit the two slipped stitches together.
Video Links for All Stocking Sections
Part 1: https://youtu.be/zXlvknqp7s8
Part 2: https://youtu.be/S2S47UNaKeE
Part 3: https://youtu.be/5KHaA6tf15Y
Part 4: https://youtu.be/xPVNvBV3U8w
Part 5: https://youtu.be/MYgz3KDwmOE
Part 6: https://youtu.be/PXHtjTI6QBU
Christmas Stocking Make-Along Knit
Top of Stocking
Setup: With scrap yarn: Using the provisional cast-on method and size 6 (4.0mm) needles, cast-on 60 sts. The stitch count for the body of the stocking will always be 60 sts and we will be working in the round.
Rnds 1-3: With your main color worsted yarn: Knit
Rnds 4-5: Purl
Rnds 6-8: Knit
Rnds 9-10: Purl
Rnds 11-12: (p5, k3, p4) five times
Rnd 13: (p4, k1, p1, k3, p3) five times
Rnd 14: (p3, k3, p1, k3, p2) five times
Rnd 15: (p2, k3, p3, k3, p1) five times
Rnd 16: (p1, k3, p5, k3) five times
Rnd 17: (k3, p7, k1, p1) five times
Rnd 18: (k2, p9, k1) five times
Rnd 19: (k1, p1, k1, p7, k2) five times
Rnd 20: (p1, k3, p5, k3) five times
Rnd 21: (p2, k3, p3, k3, p1) five times
Rnd 22: (p3, k3, p1, k3, p2) five times
Rnd 23: (p4, k1, p1, k3, p3) five times
Rnd 24: (p5, k3, p4) five times
Rnd 25: (p5, k3, p4) five times
Rnds 26-27: Purl
Rnds 28-30: Knit
Rnds 31-32: Purl
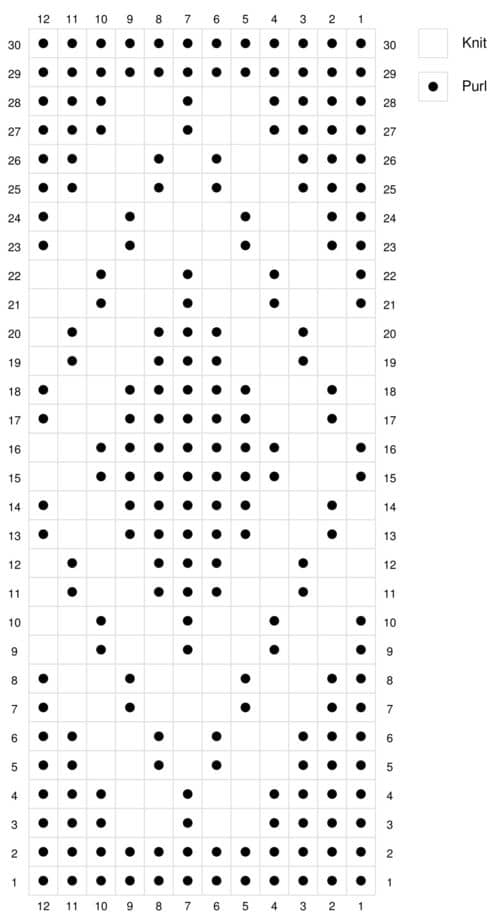
Top of Stocking Chart:
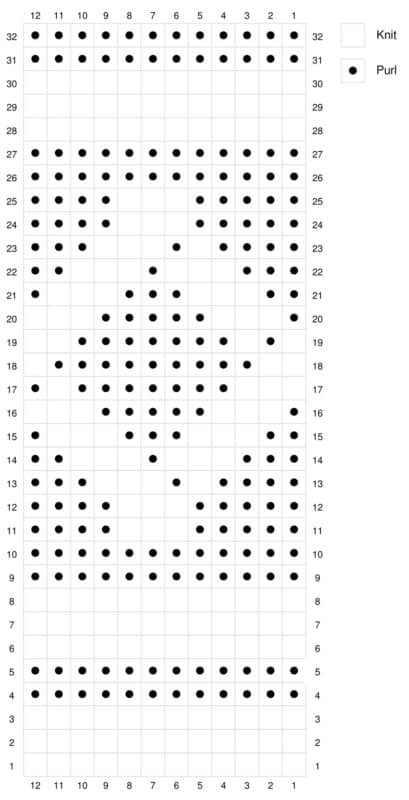
Next Stocking Section
Rnds 33-34: (p1, k1) repeat around
Rnds 35-36: (k1, p1) repeat around
Rnds 37-38: (p1, k1) repeat around
Rnds 39-40: (k1, p1) repeat around
Rnds 41-42: Purl
Rnds 43-45: Knit
Rnds 46-47: Purl
Rnds 48-51: (k4, p2) repeat around
Rnds 52-55: (k2, p2, k4, p2, k2) five times
Rnds 56-59: (p2, k4) repeat around
Rnds 60-61: Purl
Next Stocking Section Chart:
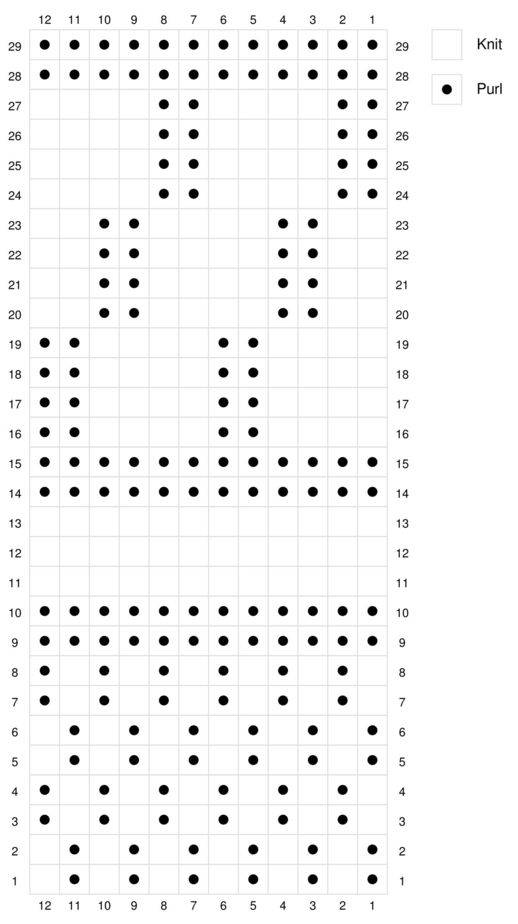
First Part of the Knit Heel
Row 1 (RS): k8, pm, k14, pm, k8 (We will not be working all of the stitches in the round, only the first 30 and then working in rows across those stitches. Turn your work after each row for the heel.) 30 sts
Row 2 (WS) : With the yarn in front slip one stitch from the left needle to the right needle purlwise. Pull the yarn over the top of the needle to the back of the work (this creates a double stitch).
Bring the yarn to the front between the needles and purl to end of the row.
Row 3: Bring the yarn to the front between the needles. With the yarn in front slip the first stitch from the left needle to the right needle purlwise. Pull the yarn over the top of the needle to the back of the work (this creates a double stitch).
Knit across and stop before the previous double stitch.
Row 4: With the yarn in front slip one stitch from the left needle to the right needle purlwise. Pull the yarn over the top of the needle to the back of the work (this creates a double stitch).
Bring the yarn to the front between the needles and purl to end of the row.
Repeat the last two steps until all the stitches on the left and the right markers are worked. The stitch count remains the same because of the double stitches.
After working the last double stitch on the right side of the work, continue to knit across the row until the next set of double stitches. After the second stitch marker, knit each double stitch together. Then continue to work in the round and knit until the beginning of the round.
Second Part of the Knit Heel
Row 1(RS): Knit across the heel stitches until the second stitch marker, work one stitch past the stitch marker, and turn.
Row 2: Make a double stitch, purl to the next stitch marker, work one past the stitch marker and turn. If you are able to easily identify your double stitches, feel free to remove the markers.
Row 3: Make a double stitch, knit to the next double stitch, knit the double stitch together, knit one more stitch and turn.
Row 4: Make a double stitch, purl to the next double stitch, purl the double stitch together, purl one more stitch and turn.
Repeat the last two steps until all the stitches to the left and the right of the double stitches have been worked.
After creating the last double stitch on the RS row, continue to knit one round while also knitting the double stitch on the left of the heel (there is still one more double stitch remaining).
Knit the double stitch together then continue to knit the remainder of the round. The heel is complete!
Stocking Instep Instructions:
Rnds 1-2: Purl
Rnds 3-4: (p4, k2, p1, k2, p3) five times
Rnds 5-6: (p3, k2, p1, k1, p1, k2, p2) five times
Rnds 7-8: (p2, k2, p1, k3, p1, k2, p1) five times
Rnds 9-10: (p1, k2, p1, k2, p1, k2, p1, k2) five times
Rnds 11-12: (k2, p1, k2, p3, k2, p1, k1) five times
Rnds 13-14: (k1, p1, k2, p5, k2, p1) five times
Rnds 15-16: (p1, k2, p7, k2) five times
Rnds 17-18: Repeat rows 13-14
Rnds 19-20: Repeat rows 11-12
Rnds 21-22: Repeat rows 9-10
Rnds 23-24: Repeat rows 7-8
Rnds 25-26: Repeat rows 5-6
Rnds 27-28: Repeat rows 3-4
Rnds 29-30: Purl
Instep Chart:
Stocking Toe Instructions:
Rnd 1: (ssk, k26, k2tog) two times (56 sts)
Rnd 2: Knit (this will be every even round for the toe) (56 sts)
Rnd 3: (ssk, k24, k2tog) two times (52 sts)
Rnd 5: (ssk, k22, k2tog) two times (48 sts)
Rnd 7: (ssk, k20, k2tog) two times (44 sts)
Rnd 9: (ssk, k18, k2tog) two times (40 sts)
Rnd 11: (ssk, k16, k2tog) two times (36 sts)
Rnd 13: (ssk, k14, k2tog) two times (32 sts)
Rnd 15: (ssk, k12, k2tog) two times (28 sts)
Rnd 17: (ssk, k10, k2tog) two times (24 sts)
Rnd 18: Knit, fasten off leaving a long tail for grafting. (24 sts)
With the stitches divided equally between the back and front needles, use the kitchener stitch to graft the remaining sts together. Weave in ends.
For the Kitchener Stitch Video Tutorial:
Knit Stocking Pattern Part 6
From the bottom of my heart I want to say thank you for joining me and knitting this stocking.
I'm so new at this and I plan on getting better as I go, so thanks for joining me on this ride as I learn new skills. I know with everything I do the first few times are a little bumpy but trying is what matters. Just like learning to knit right? Our first projects were not perfect, but still an awesome accomplishment.
Top Cuff:
Rnd 1: Using US 5 (3.75) needle, place the top held stitches from the provisional cast-on back onto the needles. Or pick up all stitches around the top if a different cast-on method was used. With CC yarn work in rib (k1, p1) around. Continue to work in rib stitches until the top cuff length is 7 inches. Use the traditional bind-off and weave in ends. Fold the in half over the top of the stocking.
Tab:
Row 1: With US 5 (3.75 mm) needles and MC color yarn, cast on 6 (6 sts)
Rows 2-30: Working in rows use stockinette stitch for a total of 30 rows
Fasten off leaving a tail and sew tab to stocking on the top inside of the cuff on the heel side.
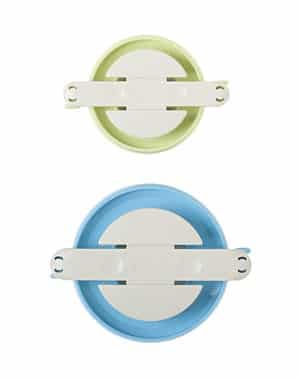
Knit Pompom Ball
Setup: Cast on 6 sts and work in the round. (6 sts)
Rnd 1: Kf&b in each stitch (12 sts)
Rnd 2: Knit (for every even row in this section) (12 sts)
Rnd 3: *Kf&b, k1*; repeat from * to * around (18 sts)
Rnd 5: *Kf&b, k2*; repeat from * to * around (24 sts)
Rnd 7: *Kf&b, k3*; repeat from * to * around (30 sts)
Rnds 8-10: Knit (30 sts)
Rnd 11: *k2tog, k3*; repeat from * to * around (24 sts)
Rnd 13: *k2tog, k2*; repeat from * to * around (18 sts)
Rnd 15: *k2tog, k1*; repeat from * to * around (stuff with fiberfill or yarn scraps) (12 sts)
Rnd 17: k2tog around (6 sts)
Fasten off and use the tail end to weave through the remaining stitches and close the top opening. Use the beginning tail to close any opening from the cast on edge. Weave in all ends.
Finishing:
Using a crochet hook, tie a slip knot and place it on the hook. Insert the hook through the top of the fur ball and yarn over, pull the yarn through the ball and the loop on the hook. Chain for approx. 12 inches and then repeat from * to * for the second ball.
Fasten off and weave in ends. Using a larks-head knot, tie the chain strand to the stocking tab. Weave in any missed ends and enjoy.
Well That Was Fun! What's Next?
📌 PIN THIS POST - Don't lose this project; save it to your Pinterest crochet board so you can quickly come back to it again.
💌 SHARE - Share your yarn choice, in-progress, or finished projects on Facebook or Instagram and use the hashtag #brianakdesigns
🥂 JOIN - Join the kindest crafters in the Briana K Designs Community Group on Facebook. We love yarny friends!
🔗 RAVELRY LINK -Link and share your project on Ravelry. Having inspirational photos can help crafters.