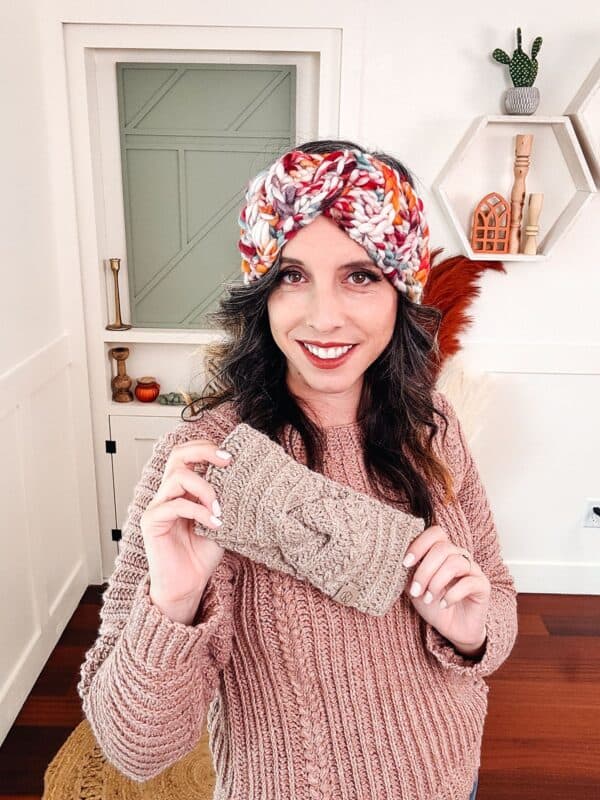
Are you ready to make the cutest and coziest accessory ever!? Join me as I show you how to crochet an ear warmer to keep your ears nice and warm all season long. We start off by crocheting a flat rectangle – once we’re done, I’ll show you how to join the edges with a twisted seam.

Disclosure: This post contains affiliate links. Please read my disclosure for more info.
The Autumn Wheat Ear Warmer makes a great gift and works up fast!
Why You Will Enjoy Crocheting The Twisted Ear Warmer

Can I make the crochet ear warmer with any yarn?
Yes! When you purchase the ad-free pdf, or the Autumn Wheat Collection E-book, it comes with a guide on how to crochet this ear warmer with any weight of yarn.
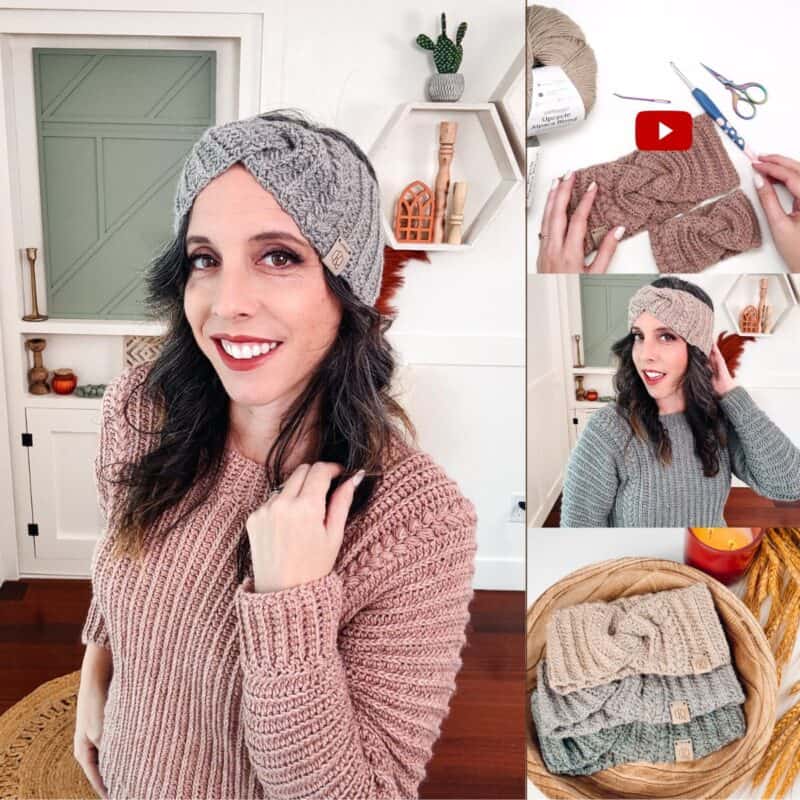
Plus, keep scrolling down for a video tutorial that’s a great visual on the construction of this crochet headband.

Get the Autumn Wheat Pattern Collection
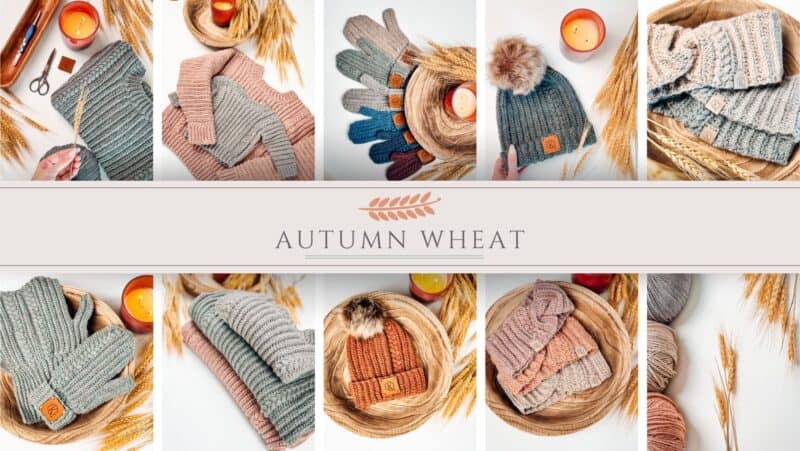
Join in on the crochet along happening now! Either view this pattern right here on the blog, or grab the individual pattern on Ravelry or Etsy. Or you can purchase the entire Autumn Wheat Collection.
What Crafty Crochet Supplies You Will Need
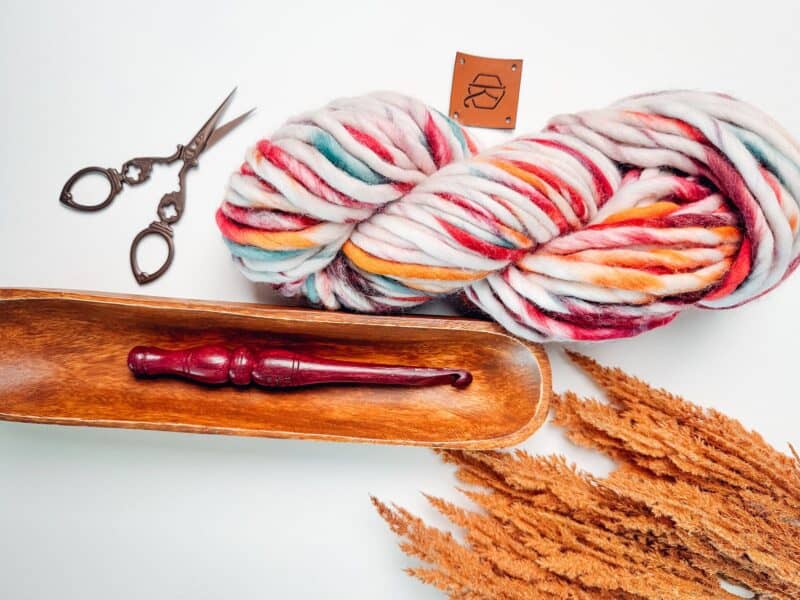
Yarn
WeCrochet Upcycle Worsted
Yarn Weight: Worsted Weight Yarn
33% Alpaca, 34% Wool, 33% Acrylic, 219yds/100g. Colorway Shown: Sage
The yarn shown in the image above is Alla Prima in a super bulky weight, use the guide from the Autumn Wheat Collection to make this ear warmer with any weight yarn.
Yarn Quantities
25 (35,55,70,80) (90, 100, 115) yds
1 ball for all sizes
A Note On The Yarn & Substitutes
Please note, other weights can work as WeCrochet Upcycle varies per ball and tends to be on the thinner side, be sure to check gauge.
Yarn Substitutions
Heatherly Sport (shown in images) – 80% Acrylic, 20% Merino Wool, 328yds/100g
Brava Worsted – 100% Premium Acrylic, 218yds/100g
Mighty Stitch – 80% Acrylic/20% Superwash Wool, 208yds/100g
Swish DK – 100% Fine Superwash Merino Wool, 110yds/50g
Crochet Hook
Size H (5.0mm) Crochet Hook, or hook to obtain gauge.
Notions
Scissors
Yarn Needle
Removable Stitch Marker
Skill Level
Advanced Beginner
Sizing
Newborn (Baby, Toddler, Child, Teen) (Adult Small, Medium, Large)
To fit head circumference: 12-14 (14-16, 16-18, 18-20, 20-22) (21-22, 22-23, 23-24). Actual measurements are in schematic.
Ease: This crochet headband is meant to be worn with a negative 2 inch ease.
Abbreviations
ch – chain
blo – back loop only
flo – front loop only
hdc – half double crochet
Puff sts – puff stitch
rem – remaining
RS – right side
sc – single crochet
sl st – slip stitch
st(s) – stitch(es)
Stsc – stacked single crochet
WS – wrong side
Special Crochet Stitches
Half Double Crochet In The Third Loop: What’s really cool about half double crochet is that there’s a third loop on the back of your stitch. If you work hdc into the third loop, you get a totally different, knit-like fabric.
For this pattern, we are going to be working in rows, which means we will work on the row below in the third loop on the front of our work. Need a visual? Watch the video tutorial of this stitch.

Puff Stitch: Yarn over and insert your hook into the stitch/space. Yarn over again and pull up a long loop. (Yarn over and insert your hook into the same stitch/space. Yarn over again and pull up a long loop) two more times (7 loops on the hook). Yarn over and pull through the first 6 loops, yarn over and pull through remaining loops.
Stacked Single Crochet (Stsc): Do NOT chain, insert hook into next stitch, yo, pull up a loop, yo and pull through both loops, insert hook in the vertical bar below, yo, pull up a loop, yo and pull through both loop on hook.
Gauge
17 sts and 11 rows = 4″ by 4″ in half double crochet worked in the third loop, blocked.
How to Crochet A Gauge Swatch
Working a gauge swatch will let you know if you will have the correct sizing for this pattern. A gauge swatch helps you practice the stitches used in this project and improve your stitch work for a flawless look.
Are you struggling to match gauge? Check out the blog post on What is Crochet Gauge and How To Fix It
Gauge Swatch Instructions:
Row 1: Ch 21, hdc in the 2nd ch from the hook and in the remaining sts across, turn.
Row 2: Ch 1 (does not count as a st), hdc in the third loop in each st across, turn.
Repeat Row 2 until there are 14 rows. Measure your swatch and adjust as needed.
Notes for the
- The yarn suggested in this pattern can vary in thickness depending on the color. It’s very important to keep checking gauge to make sure the sizing is correct.
- There is no need to ch 1 at the beginning of the rows since we will be using a stacked single crochet.
- Using a stitch marker at the beginning of each row is recommended.
- The instructions and stitch counts are given for the smallest size, with the larger sizes in brackets ( ).
- Before you dive into your project, take a moment to identify the stitch and row counts that match the size you’re making. By highlighting or marking them, you’ll save time and effort later on. Trust us, this small step will make a big difference in your crochet journey!
- When brackets are used, [….] repeat the instructions inside the brackets as indicated.
- This Pattern Uses Standard US Terminology
Video Tutorial:
Watch how easy and beginner-friendly it is to work up the ear warmer with a video tutorial.

How to Make an Easy Crochet Ear Warmer
To Unlock Exclusive Subscriber Content click the Box below and join for free! Grow will pop up so you can subscribe to my Blog. Enter your email and create a password. Every time you see Exclusive Content on my Blog, log in to your account!
Row 1:
Ch 12 (14, 16, 16, 18) (18, 18, 18), Stsc in the first st, hdc in the remaning sts across, turn. | 12 (14, 16, 16, 18) (18, 18, 18) sts
Rows 2-6:
Stsc in the first st, third loop hdc until the last st, hdc in the last, turn.
Rows 7-8:
Stsc in the first st, [skip the next st, sc in next, work a puff st into the skipped st] work until the last st, hdc in the last, turn.
Row 9:
Stsc in the first st, third loop hdc in the remaining across, turn.
Rows 10- 32 (36, 42, 48, 50) (54, 56, 58):
Stsc in the first st, third loop hdc until the last st, hdc in the last, turn.
Fasten off leaving a long tail for seaming.
Quick Tip
Before seaming the ear warmer, hold it around your head to check the fit. The twisted seams will make it a little bit tighter, but it should feel fitted.
Seaming
We are going to do a seam that creates the twist in the ear warmer. While this fabric is reversible, start by laying the ear warmer in front of you with the right side facing.
Then, in your left-hand, create a ‘C’ with the left end side of the ear warmer. With your right-hand, create a backward ‘C’ with the right side of the ear warmer.

Now join the ‘C’ shapes together as shown below.

Next, using your tapestry needle, seam through all ear warmer edge layers, securing tightly. Once seamed, weave in end, then flip inside out.

Autumn Wheat Ear Warmer – Free Crochet Pattern
Save the Crochet Pattern on Ravelry
Pin this Free Crochet Sweater Pattern for Later.
Join The Kindest Community
Join our vibrant community of crafters on Facebook today. Whether you enjoy crafting with others or simply have burning questions, we’ve got you covered – join us now!
Finishing
Weave in any ends, block if needed. Wear and enjoy!
How To Care For Your Crochet Ear Warmer
Crochet ear warmers are a great way to keep your ears warm and stylish during the cold months. With proper care, you can ensure that your crochet ear warmer will last for many winters to come. Here are some tips on how to care for your crochet ear warmer:
1. Hand wash with lukewarm water and gentle soap. Never use harsh detergents or bleaches when washing your crochet ear warmer as it can damage the fibers of the yarn. Gently knead out excess moisture before laying flat on a dry towel to air dry.
2. Avoid hanging the ear warmer to dry as this may cause stretching or sagging in the shape of the accessory.
3. Store in a cool, dry place.
Well, That Was Fun! What’s Next?