

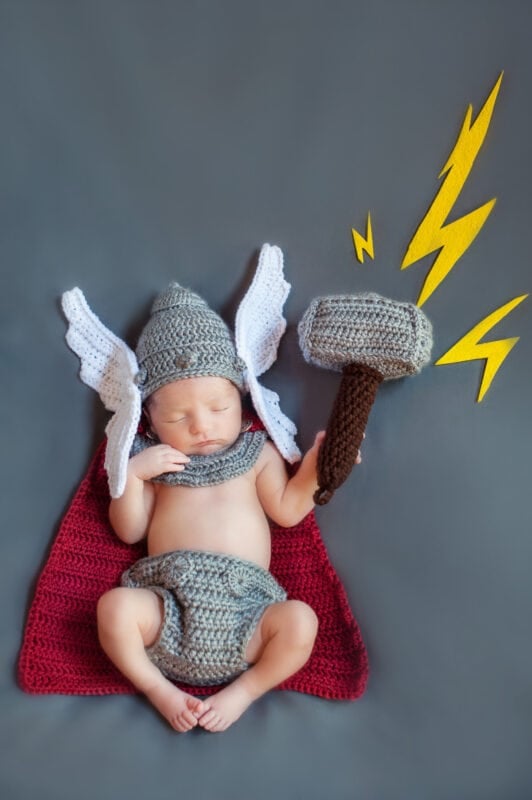
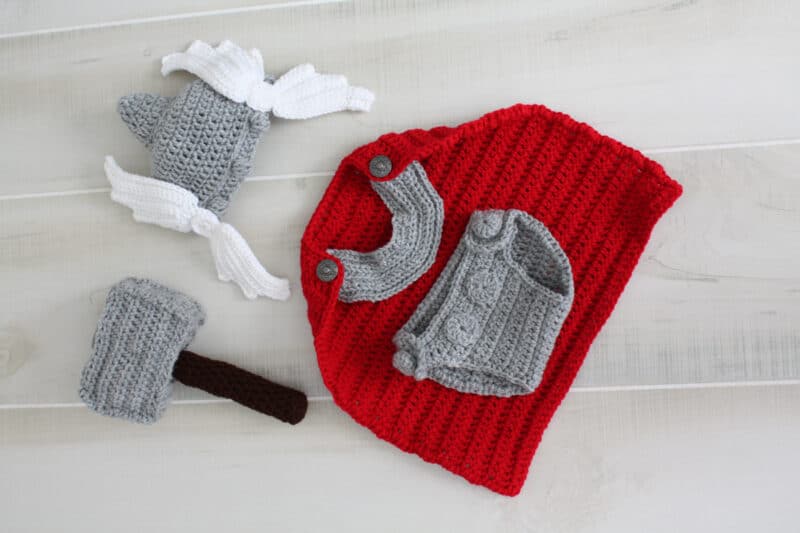
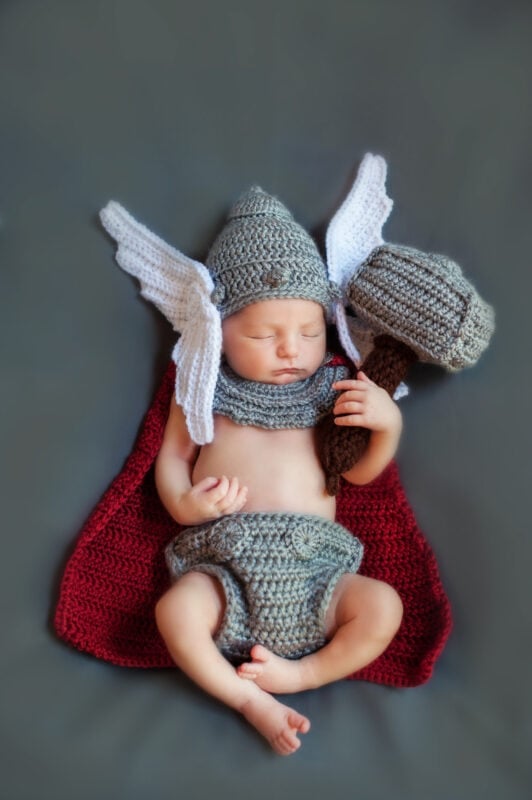
A classic Norse Mythology Character, Thor the God of Thunder is a cute addition to every newborn that comes into this world with a bang. Just imaging your own little one dressing up in this Newborn Crochet Thor Outfit. This crochet baby outfit is cute for a newborn photography session or for Halloween. Want to know what baby crochet patterns are popular on my blog? Check out the Top 10 Crochet Baby Outfit Patterns.
Disclosure: This post contains affiliate links. Please read my disclosure for more info.
Welcoming a newborn into the world is a momentous occasion filled with love, joy, and cherished memories. And what better way to cherish this moment than to crochet a keepsake.
This free crochet pattern not only is a cute for baby boy crochet, but it also speaks to a strong personality. Handcrafting an outfit for your baby means it can be kept as for years to remember when your baby was that little. If you love crocheting for little ones, you might also like the The Cutest Baby Crochet Pants Free Pattern or the Logan Overall Free Crochet Pattern.
Crochet Supplies
Crochet Hook:
5.0mm (H hook), or hook to obtain gauge
Notions:
4 Silver Buttons
Scissors
Sewing Needle
Stitch Markers
Polyester Fiberfill (Batting) to stuff inside of Hammer and top of hat.
Yarn:
Red Heart Love Pewter (discontinued)
Red Heart Love Holly Berry (discontinued)
Red Heart Super Saver Coffee
Red Heart Super Saver White Yarn
Yarn Substitutions
Brava Worsted 100% Premium Acrylic, 218yds/100g
Yardage:
125 Yards for Cape
100 Yards for Hat & Diaper Cover
Abbreviations/Stitches:
MC- Magic Circle
BLO – Back Loops Only
Ch- Chain
SC- Single Crochet
SC2tog- Single Crochet 2 Together
HDC- Half Double Crochet
DC- Double Crochet
DC2tog- Double Crochet 2 Together
Sl St- Slip Stitch
DC Cluster- Double Crochet Cluster
FLO – Front Loops Only
Gauge:
14 sts by 9 rows in DC = 4×4 inches
Skill Level:
Intermediate
Size:
Newborn

Join The Kindest Community
Join our vibrant community of crafters on Facebook today. Whether you enjoy crafting with others or simply have burning questions, we’ve got you covered – join us now!
Important Notes
In both rounds and rows, the beginning chain does not count as a stitch.
Number in ( ) indicates total number of stitches in the round or row.
DC Cluster:
Begin by making a DC but only pull through first two loops and leave two loops on hook. Yarn over, insert hook into same stitch, yarn over and pull through first two on hook (you should be left with two loops on the hook). *Yarn over, insert hook in same stitch, yarn over and pull through bringing up to height of other loops on hook, yarn over and pull through two (you should now have three loops on hook). Repeat * until you have 7 loops on hook. Yarn over and pull through all loops. Push the cluster to the outside of the work.
Relax & Crochet
Upgrade to the Printable PDF
Beautifully formatted to print and relax while crocheting. The paid pattern includes:
The Ad-free PDF can be purchased on Etsy or Ravelry.
Click the box below to unlock this exclusive subscriber content for free. Add your email and create a password. If you are having trouble, reset your password or log in to the Grow Portal.
I’m thrilled to share this amazing crochet pattern with you! Please don’t copy, paste, or distribute this pattern. Prefer an ad-free experience? Purchase a digital PDF file for a small fee from one of my online stores. I appreciate your support and readership. You are why I can keep doing what I love and sharing it with others. Thank you from the bottom of my heart.
Baby Crochet Pattern Written Instructions
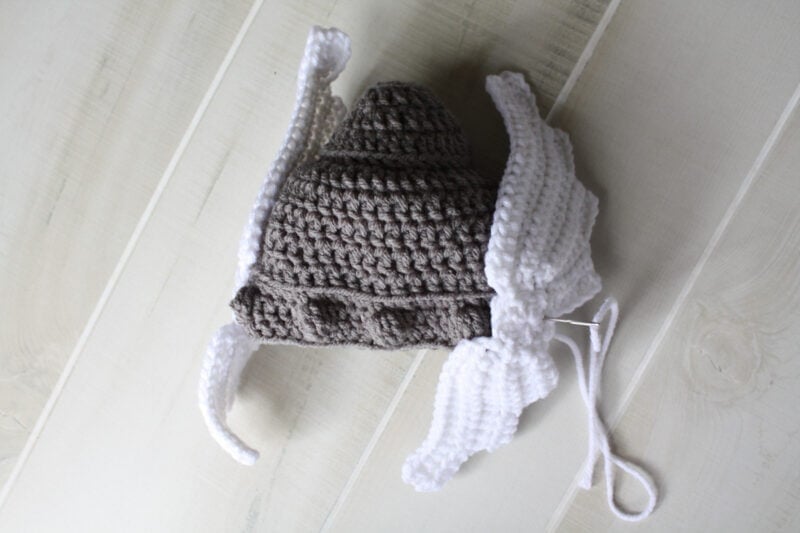
Baby Helmet
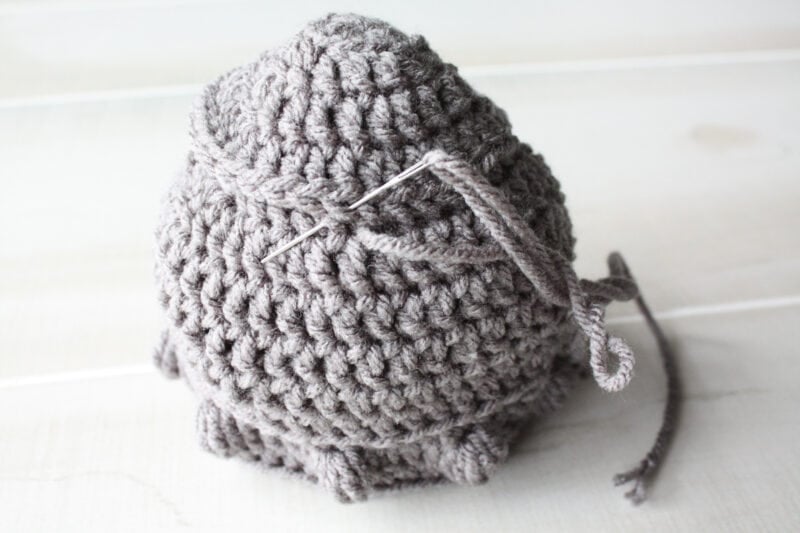
Point on Top of Helmet
Rnd 1: MC, chain 2, DC 10 inside Magic Circle, close circle and join at the top of first DC, chain 2. (10 sts)
Rnd 2: Working in Back Loops Only for this round, DC 2 in first stitch, Dc in next, repeat around, join and chain 2. (15 sts)
Rnd 3: DC 2 in first stitch, Dc in next 2, repeat around, join and chain 2. (20 sts)
Rnd 4: DC 2 in first stitch, Dc in next, repeat around, join. (30 sts)
Leave a long tail for attaching onto top of hat and fasten off.
Attach hat along the outside edge of the third row on hat. Stuff toward the end, finish around, and weave in end.
Small Lower Wings (make 2)
Setup: MC, chain 2, DC 10 in Magic Circle, join and chain 6.
Row 1: HDC in 3rd chain from hook and in next 3, SC into next stitch on circle, chain 1 and turn.
Row 2: HDC in the SC of the previous row and in next 4, chain 6 and turn.
Row 3: HDC in 3rd chain from hook and across, HDC in next stitch on circle, chain 1 and turn.
Row 4: HDC in 10 stitches from the previous row, chain 6 and turn.
Row 5: HDC in 3rd chain from hook and across, HDC in next stitch on circle, chain 1 and turn.
Row 6: HDC in 15 from the previous row.
Fasten off and weave in ends.
Large Upper Wings (make 2)
Leave a long tail to use later to attach small wing to large wing.
MC, chain 2, DC 10 in Magic Circle, join and chain 6.
Follow Row 1-5 of Small Lower Wing.
Row 6: HDC in 15 from previous row, chain 6 and turn.
Row 7: HDC in 2nd chain from hook and across, HDC in next stitch on circle, chain 1 and turn.
Row 8: HDC in 20 from previous row.
Fasten off.
If you would like your wings longer or shorter, you can increase or decrease the number of chains in Rows 2, 4, and 6.
Using your sewing needle place the large wing on top of the small wing so the circles match. Stitch together and then stitch onto each side of hat on row 10. You can tack the large wing to the hat to keep it from flopping over.
Cape
Using red yarn and working in rows, chain 30.
Row 1: DC in 3rd chain from hook and across, turn and chain 2. (28 sts)
Rows 2-3: DC in each stitch across, turn and chain 2. (28 sts)
Row 4: DC 2 in first stitch, DC in next 26, DC 2 in last stitch, turn and chain 2. (30 sts)
Row 5-7: DC in each stitch across, turn and chain 2. (30 sts)
Row 8: DC 2 in first stitch, DC in next 28, DC 2 in last stitch, turn and chain 2. (32 sts)
Rows 9-11: DC in each stitch across, turn and chain 2. (32 sts)
Row 12: DC 2 in first stitch, DC in next 30, DC 2 in last stitch, turn and chain 2. (34 sts)
Rows 13-15: DC in each stitch across, turn and chain 2. (34 sts)
Row 16: DC 2 in first stitch, DC in next 32, DC 2 in last stitch, turn and chain 2. (36 sts)
Rows 17-19: DC in each stitch across, turn and chain 2. (36 sts)
Row 20: DC 2 in first stitch, DC in next 34, DC 2 in last stitch, turn and chain 2. (38 sts)
Rows 21-23: DC in each stitch across, turn and chain 2. (38 sts)
Row 24: DC 2 in first stitch, DC in next 36, DC 2 in last stitch, turn and chain 2. (40 sts)
Rows 25-27: DC in each stitch across, turn and chain 2. (40 sts)
Row 28: DC 2 in first stitch, DC in next 38, DC 2 in last stitch, turn and chain 2. (42 sts)
SC around entire cape adding an extra SC on the corners.
Fasten off and weave in ends.
Neck Cuff of Cape
Using grey yarn and working in rows, chain 31.
Row 1: HDC in 3rd chain from hook and across, turn and chain 2 (29)
Row 2: HDC in Font Loops Only for this row. HDC 2 in first stitch, HDC 4, HDC 2 in next stitch, HDC 8, HDC 2 in next stitch, HDC 8, HDC 2 in next stitch, HDC 4, HDC 2 in last stitch, turn and chain 2. (34 sts)
Row 3: HDC in BLO for this row. HDC 2 in first stitch, HDC 32, HDC 2 in last stitch, turn and chain 2. (36 sts)
Row 4: HDC in FLO for this row. HDC 2 in first stitch, HDC 6, HDC 2 in next stitch, HDC 5, HDC 2 in next stitch, HDC 8, HDC 2 in next stitch, HDC 5, HDC 2 in next stitch, HDC 6, HDC 2 in last stitch, turn and chain 2. (42 sts)
Row 5: HDC in BLO for this row. HDC 2 in first stitch, HDC 7, HDC 2 in next stitch, HDC 6, HDC 2 in next stitch, HDC 10, HDC in next stitch, HDC 6, HDC 2 in next stitch, HDC 7, HDC 2 in last. (48 sts)
SC around outer edge of neck cuff adding an extra SC on the corners.
Fasten off and weave in ends.
Attach a button to both sides of neck cuff on row 3. Button cape onto neck cuff.
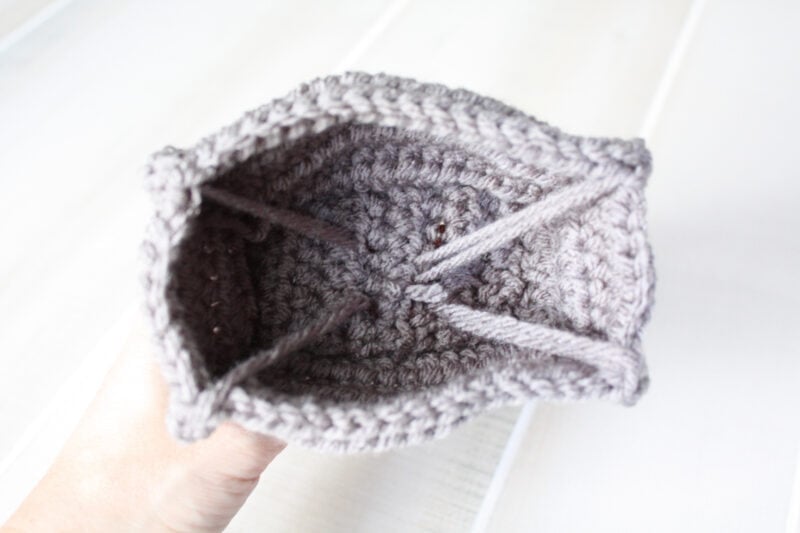
Diaper Cover
Chain 37
Row 1: SC in 2nd chain from hoot and across, turn and chain 2. (36 sts)
Row 2: DC across, turn and chain 1. (36 sts)
Row 3: SC across, turn.
Row 4: Slip Stitch in next 7, Chain 2, DC in same stitch and in next 23, turn and chain 1. (24 sts)
Row 5: SC across, turn and chain 2.
Row 6: DC across, turn and chain 1.
Row 7: SC across, turn and chain 2.
Row 8: DC2tog, DC 22, DC2tog, turn and chain 1. (22 sts)
Row 9: SC across, turn and chain 2.
Row 10: DC2tog, DC 18, DC2tog, turn and chain 1. (20 sts)
Row 11: SC across, turn and chain 2. (20 sts)
Row 12: DC2tog, DC 16, DC2tog, turn and chain 1. (18 sts)
Row 13: SC2tog, SC 14, SC2tog, turn and chain 2. (16 sts)
Row 14: DC2tog, DC 12, DC2tog, turn and chain 1. (14 sts)
Row 15: SC2tog, SC 10, SC2tog, turn and chain 2. (12 sts)
Row 16: DC across, turn and chain 1. (12 sts)
Row 17: SC across, turn and chain 2. (12 sts)
Rows 18-21: Repeat rows 16 and 17 two more times. (12 sts)
Row 22: DC 2 in first stitch, DC 10, DC 2 in last stitch, turn and chain 1. (14 sts)
Row 23: SC across, turn and chain 2. (14 sts)
Row 24: DC 2 in first stitch, DC 12, DC 2 in last stitch, chain 6 and turn. (16 sts)
Row 25: Sl St in 2nd chain from hook and remaining 4 chains, SC 16, chain 7 and turn. (28 including all ch stitches)
Row 26: DC in 3rd ch from hook and across. (26 sts)
Alternate Row 26 if you would like DC Clusters on front to match hat: DC in 3rd Ch from hook, DC in next 4, DC Cluster, DC 4, repeat * three more times, DC in last stitch.
SC evenly around diaper cover, adding two stitches on corners.
Fasten off and weave in ends
*If you prefer the two round medallion accent pieces made from yarn on the front of the diaper cover then do not do the alternate Row 26. Make 2: DC 12 into a MC, join, fasten off, and stitch onto front of diaper cover.
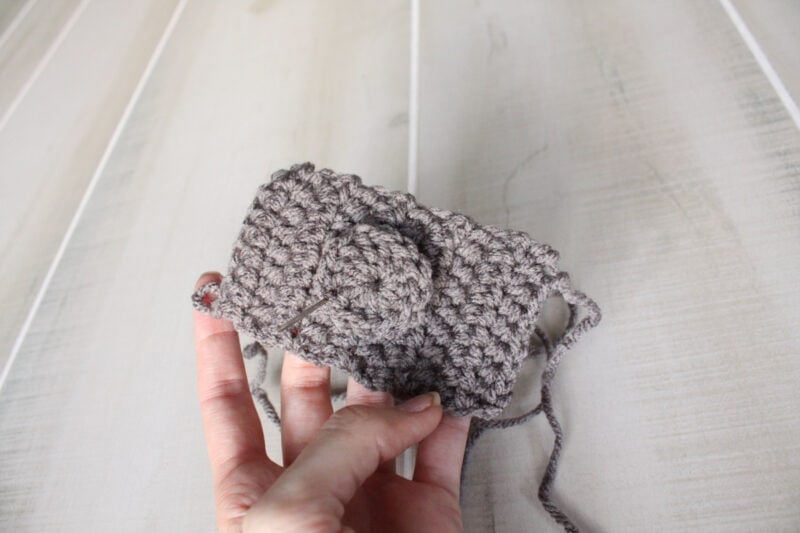
Handle of Hammer
MC, DC 12 into MC, join and Ch 1.
(Working in BLO for the next 12 stitches) SC in first, HDC in rest around.
Continue to work in rounds until the handle measures 5-6 inches. Stuff the handle with batting as you go. Fasten off and leave a long tail for sewing onto the hammer; set aside until assembly.
Hammer Head
Ch 55.
Row 1: HDC in 3rd chain from hook and across, turn and ch 2. (53 sts)
Rows 2-6: HDC in each stitch across, turn and ch 2. (53 sts)
Row 7: HDC in each stitch across.
Place short ends together and Sl St 8 across. Weave in ends and set aside.
Top and Bottom of Hammer (make 2):
Ch 10.
Row 1: HDC in 3rd Chain from hook and across, turn and ch 2. (8 sts)
Row 2-9: HDC across, turn and Ch 2. (8 sts)
Row 10: HDC across, fasten off and leave a long tail for sewing hammer together. (8 sts)
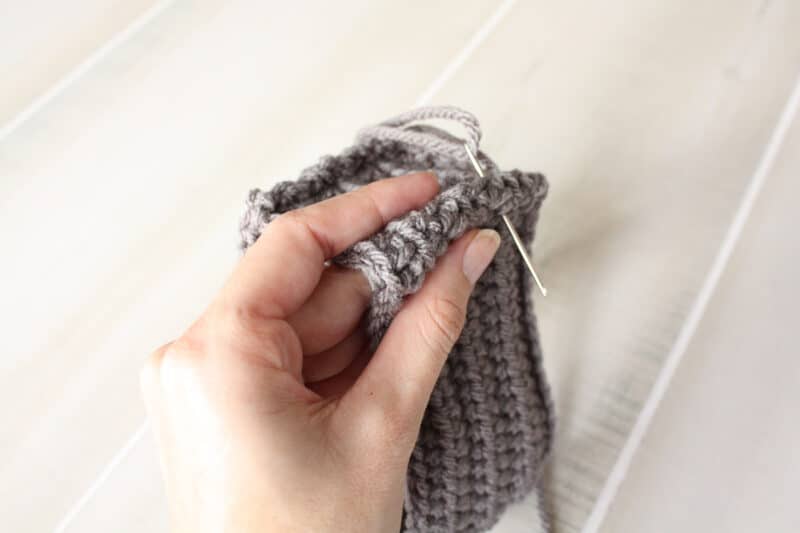
Hammer Assembly
Now you are going to make the corners more prominent on the main part of the hammer. Set your first hammer piece on a surface and shape it into a square.
To make sure you are getting your proportions correct use one of the top or bottom pieces as a guide. The shape should match up to the same rectangle dimensions of the top or bottom hammer.
With your sewing needle and grey yarn, pinch each corner and stitch across.
Place the bottom hammer piece on one of the opening sides of the hammer. Use needles or stitch markers if necessary to hold it in place. Sew it together around the outside edge. Fasten off and weave in ends.
Place the handle onto the middle of the bottom hammer piece and using your sewing needle stitch around and attach.
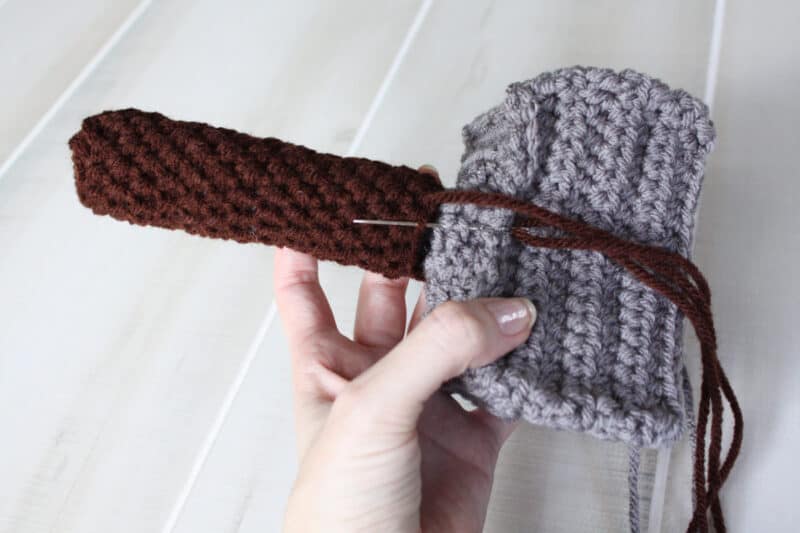
If you would like a clean look and to hide your stitches where you attached the hammer, loosely Ch 14 and fasten off, wrap around the hammer handle where it meets the hammer head and stitch on. Fasten off weave in ends.
If you would like your hammer to be a bit more stable you can stitch an X on the inside before stuffing. To do this use a needle and thread and stitch through the center bottom and then tack to one of the top corners. Tie off.
Before putting the top hammer piece onto the hammer head, make the round accent by DC 12 into a MC, join and fasten off. Use the long tail to stitch onto the middle of the top piece.
Stuff the hammer and place the top piece on top of the hammer head. Use stitch markers or needles to hold in place if necessary. Stitch around outer edge to close hammer.
Optional Bottom on handle:
If you would like the loop at the bottom of the handle, Ch 14 and attach the loop to each side of the bottom of the hammer handle.
Looking for baby crochet gift ideas? If you want something less themed, try the Alpine Stitch Textured Baby Crochet Blanket Free Pattern or the Autumn Wheat – Crochet An Easy Hat Pattern.
As we welcome new members to our family, it’s natural to seek ways to preserve the fleeting moments of infancy. The idea of storing a newborn baby outfit as a keepsake resonates deeply, serving as a tangible reminder of the precious early days and the overwhelming love that surrounds our little ones.
Just as Thor’s hammer symbolizes strength and protection, so too does this tiny outfit represent the immense bond between parent and child. With each delicate stitch and soft fabric, we are reminded of the profound connection we share with our little gods of thunder.
Storing heirloom crochet outfits requires special care to preserve their beauty and integrity for generations to come. Here are some tips to ensure they remain in excellent condition:
Cleanliness: Before storing, ensure the outfits are clean and free from any stains or debris. Follow the care instructions provided for the specific yarn or thread used in the crochet.
Proper Folding: Avoid hanging crochet garments as it can cause stretching or distortion over time. Instead, gently fold the outfits along natural lines to prevent creasing.
Acid-Free Tissue Paper: Place acid-free tissue paper between layers of folded garments to provide cushioning and prevent friction between delicate fibers.
Storage Containers: Choose a storage container that is clean, dry, and free from pests. Opt for acid-free archival boxes or storage bins to protect against yellowing or deterioration caused by acidic materials.
Avoid Plastic: Avoid storing crochet outfits in plastic bags or containers as they can trap moisture and promote mildew growth. Instead, use breathable fabric storage bags or containers to allow air circulation.
Climate Control: Store the outfits in a cool, dry environment away from direct sunlight, extreme temperatures, and humidity. Fluctuations in temperature and humidity can cause fibers to weaken and degrade over time.
Moth Prevention: Place cedar blocks or lavender sachets in the storage container to deter moths and other pests that may damage the delicate crochet.
Regular Inspection: Periodically inspect stored garments for any signs of damage or pests. If any issues are found, take immediate action to address them to prevent further deterioration.
By following these tips, you can ensure that heirloom crochet outfits remain in pristine condition, allowing future generations to enjoy their beauty and craftsmanship. Happy Crocheting!
Well, That Was Fun! What’s Next?