
A temperature blanket tells a year’s story in color. You crochet one stripe a day, and each stripe’s color comes from that day’s high temperature. By the end, the whole year is wrapped up in one blanket.
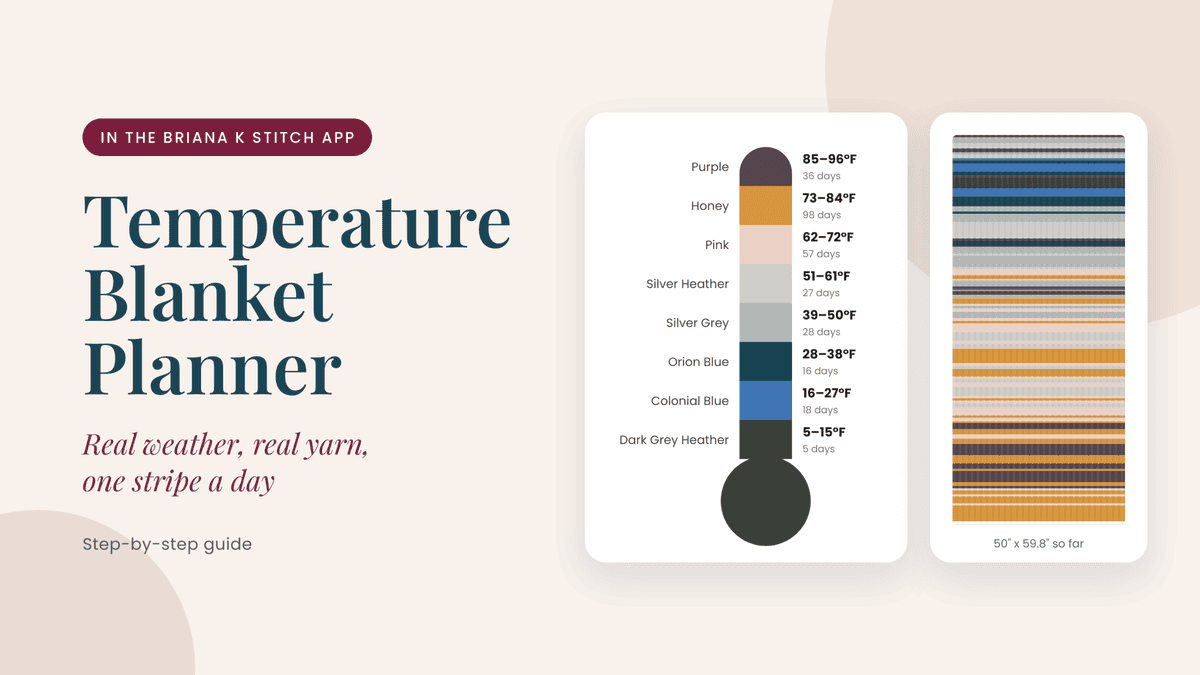
The Temperature Blanket Planner in the Briana K Stitch app does the tracking part for you. Type in your city and dates, and it pulls the real daily high for every day and colors each one. You can match your colors to actual yarn you can buy, see how big the blanket’s getting, and check off each day as you finish it. No spreadsheets, no weather sites, and no guessing which color comes next. It’s one of the Deluxe Tools in the app, a $6.50 unlock, so you won’t find it on the blog.
Here’s how to use it, one step at a time.
Where to find it
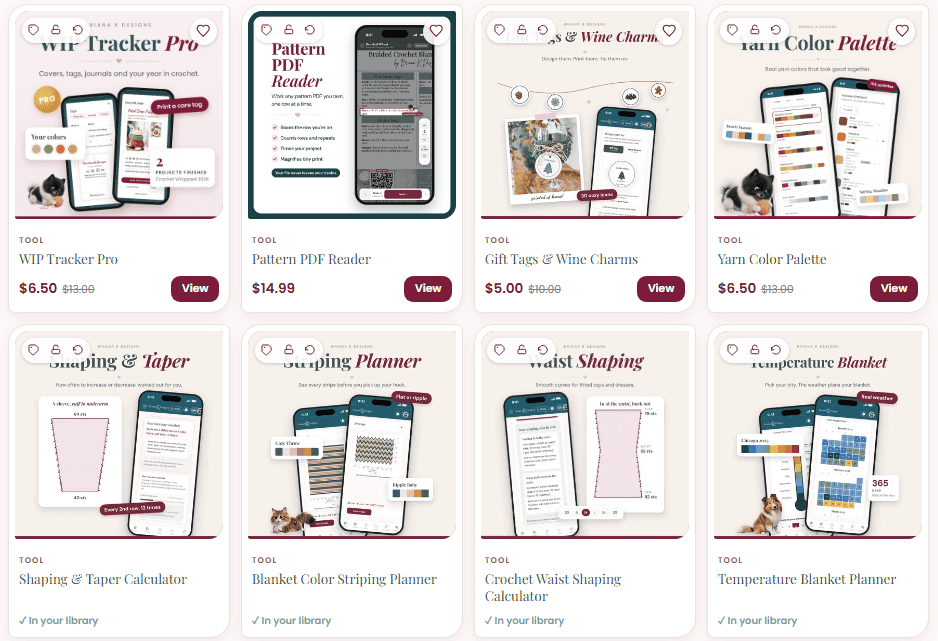
Open the Briana K Stitch app and tap Tools. Scroll down to Deluxe Tools, find Temperature Blanket Planner, and tap View to get it for $6.50. Once it’s yours, the tile says In your library, and you just tap it to open the planner.
Step 1: Set up your blanket
Start at the top, in order:
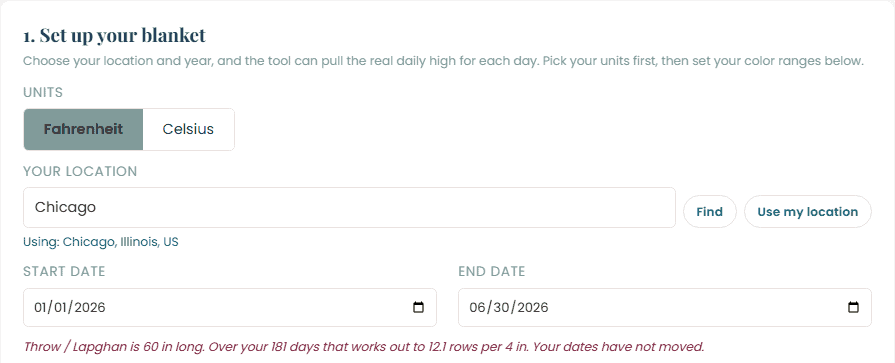
- Units. Pick Fahrenheit or Celsius first. This sets the scale for your color ranges, so it’s easiest to choose it before anything else.
- Your location. Type your city and tap Find. You’ll see a little line underneath, like Using: Chicago, Illinois, US, confirming the place it found. You can also tap Use my location and let your device fill it in.
- Start date and End date. These set the span of your blanket. Most people do a full calendar year, but you can pick any range you like.
Once you have a location and both dates, the planner pulls your weather. You’ll see a line under your city confirming the place it’s using, and Step 3 fills in on its own.
Pick your size and gauge
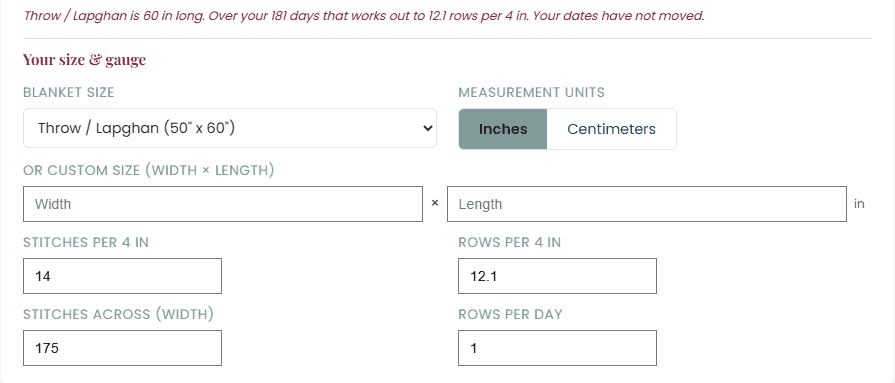
Right below that is Your size & gauge.
- Blanket size. Choose anything from a Lovey (14″ x 14″) up to a King (108″ x 100″). Or skip the list and type your own width and length under Or custom size. You can also switch between inches and centimeters. Not sure which size you want? The free Blanket Size Calculator lays them all out.
- Stitches per 4 in and Rows per 4 in. These come from your gauge swatch.
- Stitches across (width). How many stitches wide you’re starting.
- Rows per day. Usually 1. More rows per day means a longer blanket in fewer days.
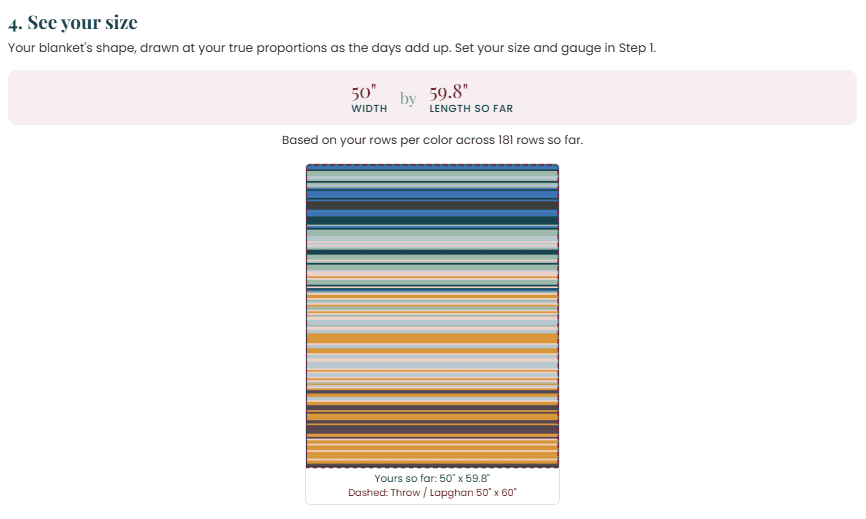
If your dates are already set when you pick a size, the planner keeps your dates and works out how many rows per 4 inches you’d need to hit that length. It tells you right under the dates. In our example, a Throw is 60 inches long, and over 181 days, that works out to 12.1 rows per 4 inches.
Step 2: Choose your colors
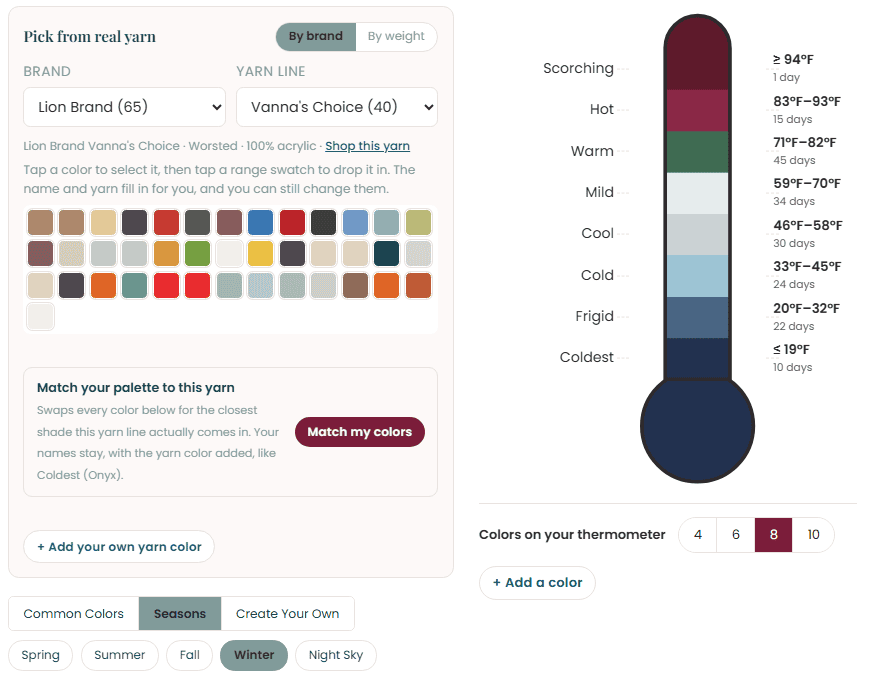
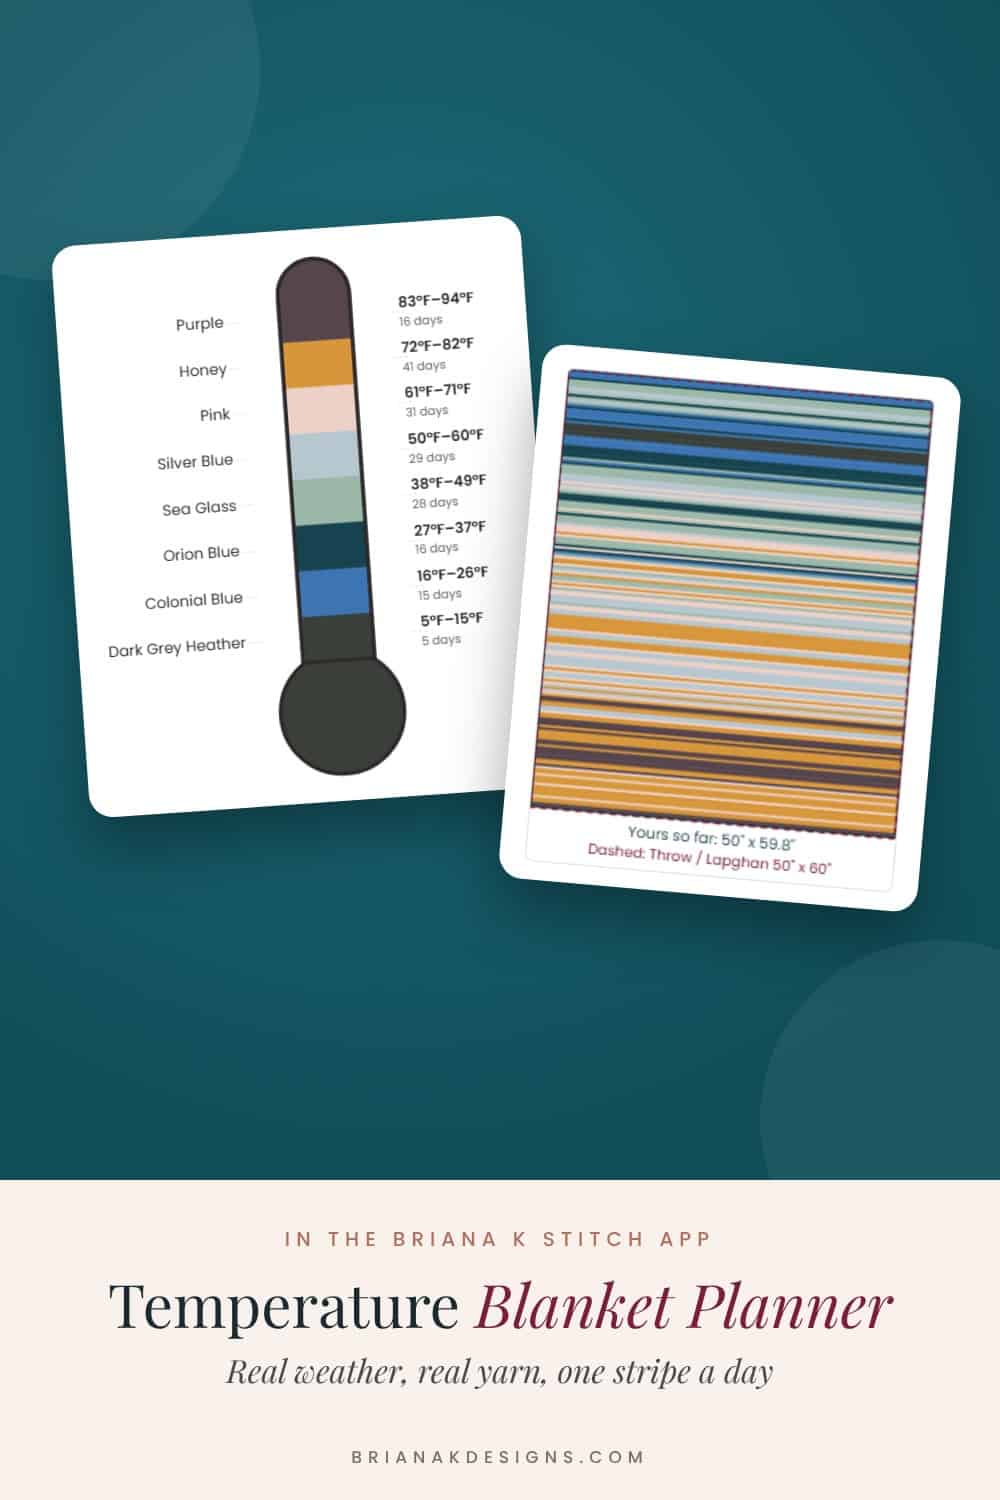
This is the fun part. The thermometer on the right shows your temperature bands, with a color for each one and how many days landed in it. The planner spreads your bands across the temperatures you actually had, so every color gets used. You don’t have to set the numbers yourself.
Want a head start? Right under the yarn picker, tap Common Colors for the classic temperature blanket look, with red for the hottest days down to purple for the coldest. Or tap Seasons and pick a ready-made palette: Spring, Summer, Fall, Winter, or Night Sky. Create Your Own is where your saved palettes live, so you can load one again anytime. Under the thermometer, Colors on your thermometer lets you choose 4, 6, 8, or 10 colors, and + Add a color gives you one more. You’ll find + Add a range right under the palettes. To change one color by hand, tap its swatch on the thermometer.
Pick from real yarn
If you already know what yarn you want to use, this saves you a lot of squinting at color cards.
- Choose by brand or by weight, depending on how you like to shop.
- Pick a brand, then a yarn line. Every color that yarn comes in shows up underneath.
- Tap a color to select it, then tap a band on the thermometer to drop it in.
- Can’t find your yarn? Tap + to add your own yarn color and type it in.
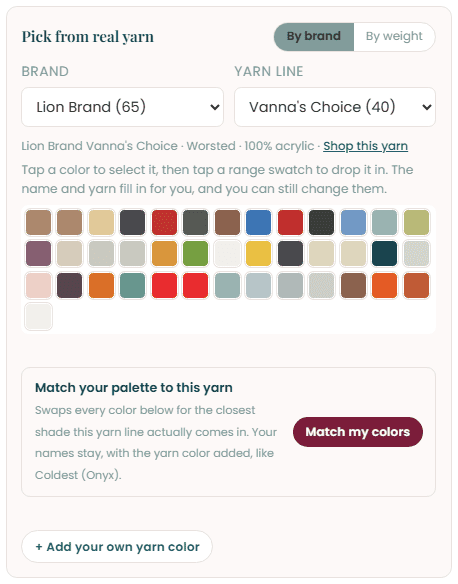
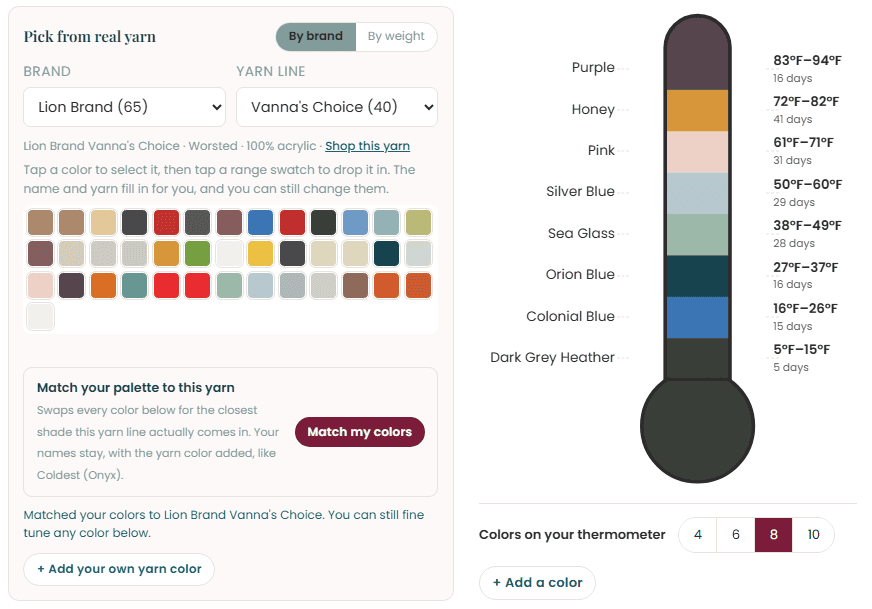
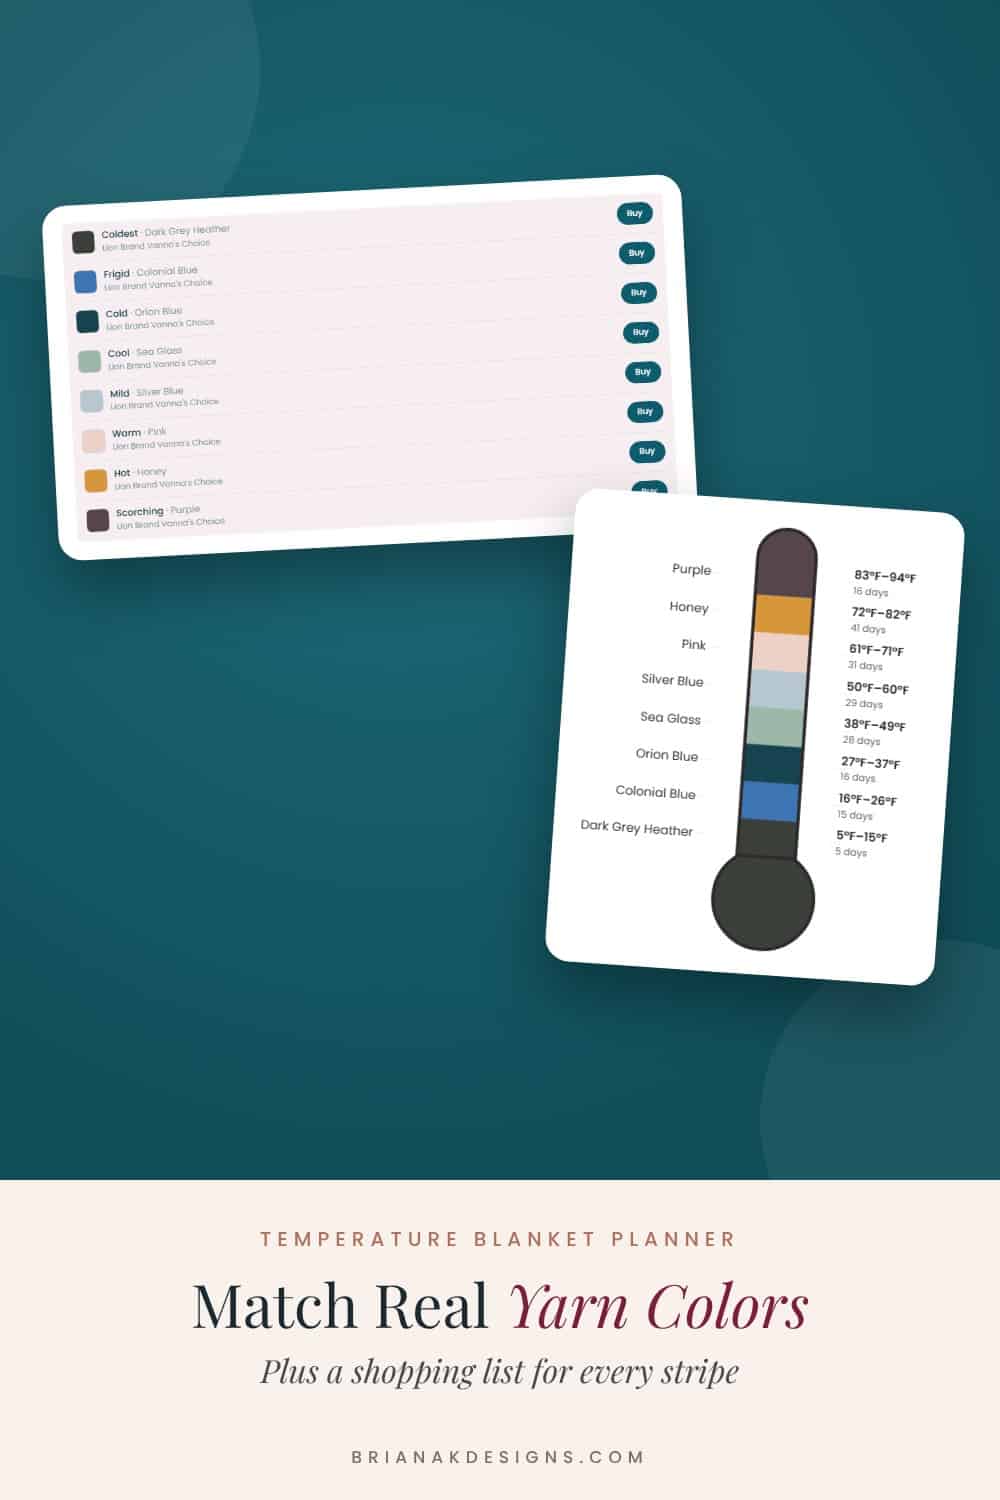
Or let the planner do it all at once. Tap Match my colors, and it swaps every band for the closest shade that yarn actually comes in. You can still change any of them afterward.
Your yarn shopping list
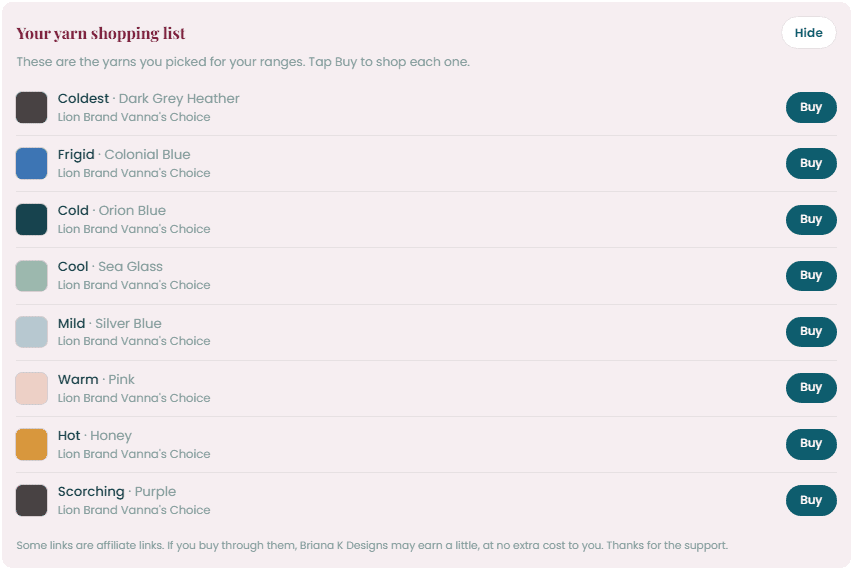
Once your colors are set, scroll down to Your yarn shopping list. Every band is listed in one place with the yarn color you picked for it, like Coldest · Dark Grey Heather, and a Buy button next to each one. Tap Hide if you don’t need it right now. Wondering how many skeins of each color to grab? The free Yarn Amount Calculator can help.
Some of these are affiliate links. If you buy through them, Briana K Designs may earn a little, at no extra cost to you.
Step 3: Track your year
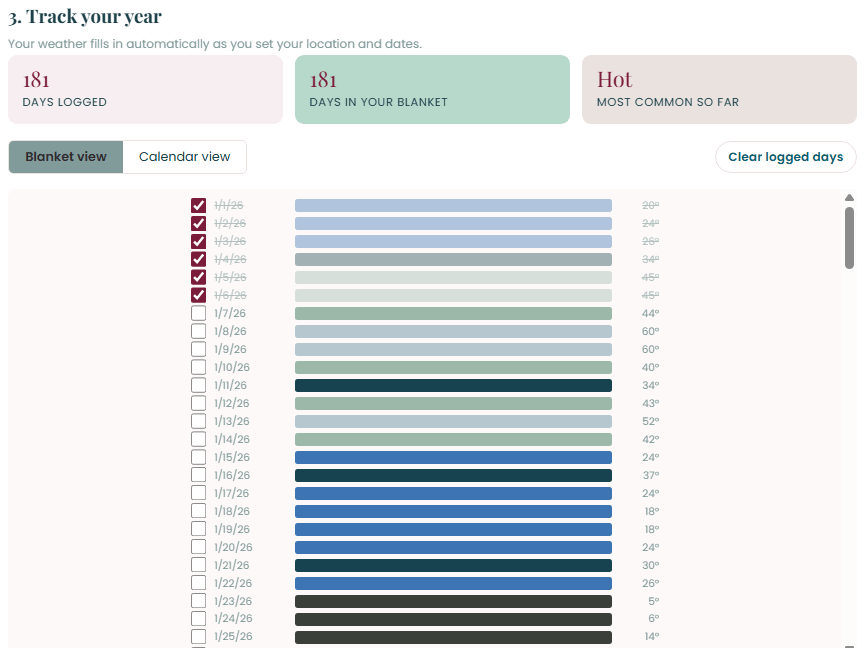
Your weather fills in automatically. At the top of this section you’ll see:
- Days logged: how many days have a temperature filled in.
- Days in your blanket: how many days your dates cover.
- Most common so far: which band shows up the most.
Blanket view lists every day as a stripe, in order, with its temperature. Tick the box next to a day once you’ve crocheted it. Finished days fade and get crossed out, so you always know exactly where you left off.
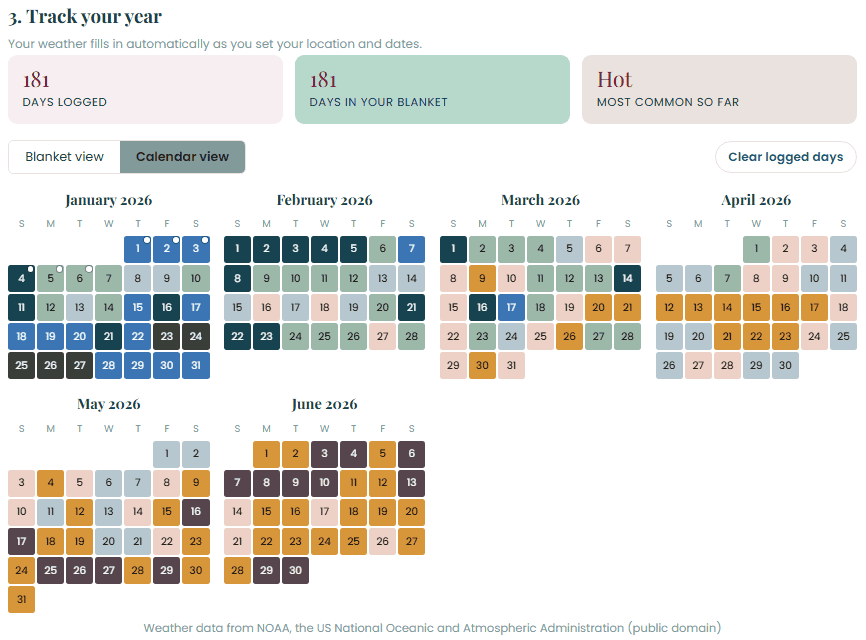
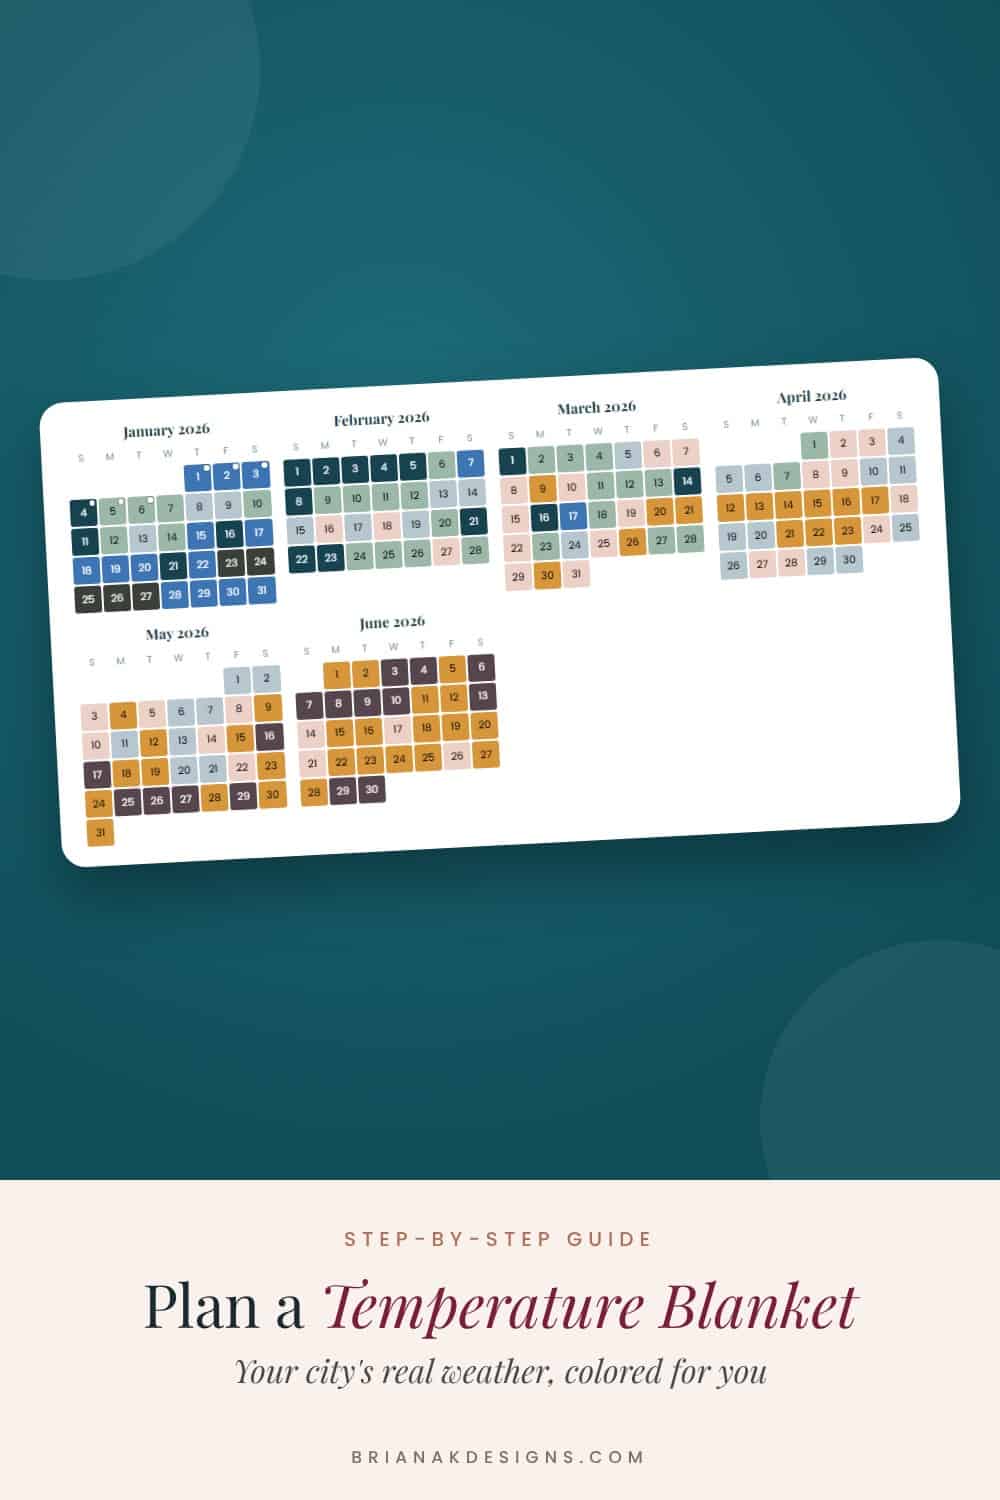
Calendar view lays the same days out month by month, so you can see your whole year at a glance.
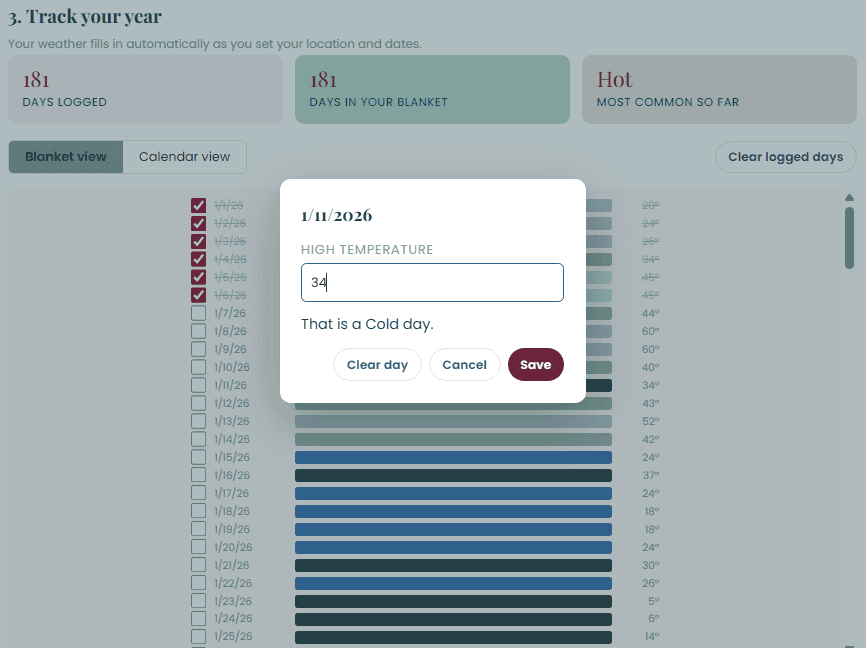
Need to fix a day, or fill one in yourself? Tap it. You can type a different high temperature and the planner tells you which band it falls in. Tap Save, or Clear day to empty it.
The weather comes from NOAA, the US weather service, so it works best for US locations and needs an internet connection. If the nearest station is missing a day or two, the planner fills those in from the closest day that has data.
Step 4: See your size
The last section draws your blanket at its true proportions, using your gauge. It shows the width and the length so far, and a dashed outline of the size you picked, so you can see how close you are to the finish line.
A few tips
- Print a copy. Tap Print at the top for a clean paper version to keep in your project bag.
- Stay signed in. Your blanket saves to your account, so sign in with the same account you used to get the planner, and your blanket will be right where you left it.
- Need a refresher? Open How to use the Temperature Blanket Planner at the bottom of the tool for a quick walkthrough right inside the app.
- Want a paper tracker too? The free temperature blanket printables are part of the Crochet Smarter Starter Pack.
FAQ
Where do I find the Temperature Blanket Planner?
You can only find it in the Briana K Stitch app. It’s one of the Deluxe Tools, so it isn’t on the blog. Here’s how to get the app on your phone or tablet: brianakdesigns.com/get-the-app/. Once you’re in, go to Tools, then Deluxe Tools, and get the planner for $6.50.
Do I need to know the weather ahead of time?
No. The planner pulls the real daily high for every day in your date range that’s already happened.
Does it work outside the US?
It uses NOAA weather data, so it works best for US locations. If the closest station is far away, the planner tells you the numbers are approximate. You can always tap a day and type the temperature in yourself.
Can I use my own yarn?
Yes. Pick it from the brand list, or tap + Add your own yarn color if it isn’t there.
How many rows do I crochet each day?
Usually one. You can change Rows per day in Step 1, and the size preview updates to match.
Ready to start your year?
Open the Briana K Stitch app, go to Tools, and try the Temperature Blanket Planner.
Pin This Temperature Blanket Planner for Later
Save your favorite to your temperature blanket board so it’s right there when you’re ready to start your year.
More Crochet Goodies To Love
We’ve got tools, games, patterns, tutorials…it’s all here waiting for you!
🥂 Cheers, and happy crocheting!
Want more? See all my free crochet games, or try my crochet tools and calculators.

What should you make next?
Keep the hook movingReaders Are Loving

 Best Beginner Hooks
 Mosaic for Beginners
 How to Tie Slip Knot
 Twisted Fringe