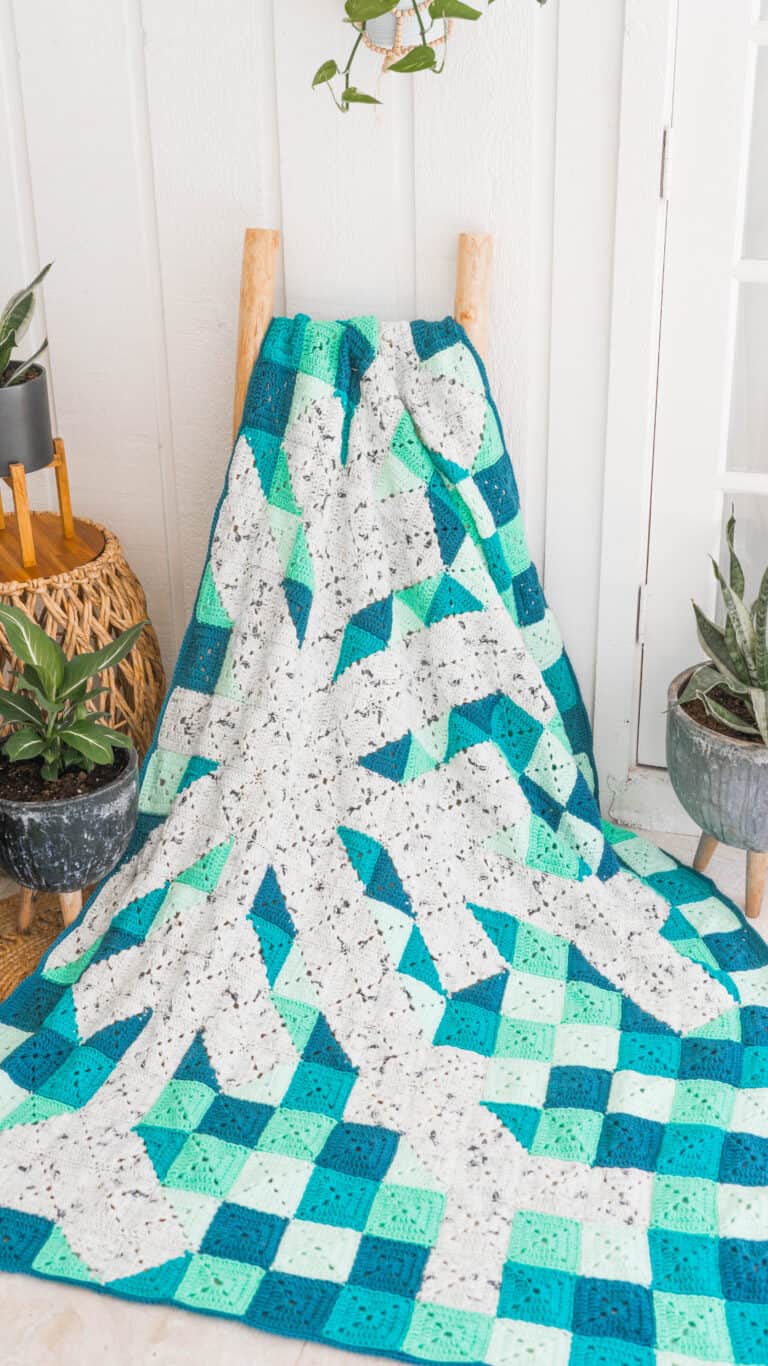
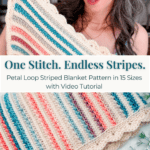
The Petal Loop Stitch Blanket has a solid following, and the questions that come in about it are pretty consistent. Can I make it with one strand instead of two? Can I do it in stripes? Both are good questions, and this striped crochet blanket pattern answers both.
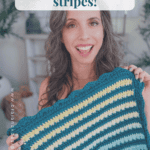
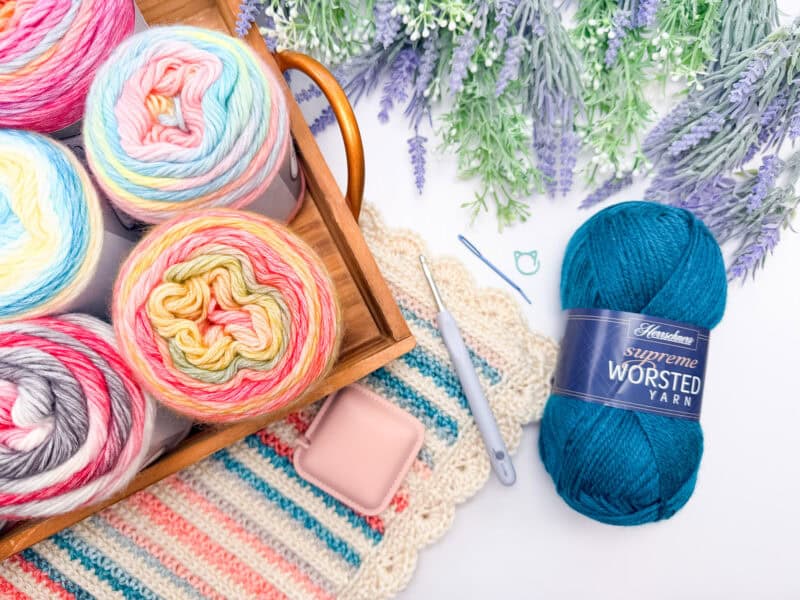
I grabbed a cream skein of Herrschners Supreme Worsted in Porcelain and a ball of Soho Playful in Borealis and just started playing. Two colors, one stitch, and somewhere around row twelve I realized this was going to be a whole new pattern. Honestly? I think I like it even more than the solid version! The loops read completely differently when they’re striped — there’s a contrast and a dimension to them that makes the texture really sing.

If you haven’t worked the Petal Loop Stitch before, here is what you need to know: it is a 4-row repeat, it uses one strand of yarn, and it is easier than it looks. If you have ever tried the Star Stitch and found it fiddly, the Petal Loop is a friendlier version of that same loopy texture. Once you get through your first full repeat, the rhythm clicks and you won’t need to count anymore.
The Small Throw size (50 x 60 inches) is free right here on the blog. If you want the full collection of 15 sizes, from a 12×12-inch Lovey up to a 100×108-inch King, they are available in the ad-free PDF on Etsy and Ravelry. A full step-by-step video tutorial is included either way.
Disclosure: This post contains affiliate links. Please read my disclosure for more info.
Before You Hook: Crochet Pattern Details
🧶 Yarn Used: Herrschners Supreme Worsted— 100% Acrylic, 169yds/100g + Soho Playful— 65% Acrylic / 35% Cotton, 218yds/100g
⚖️ Yarn Weight: Worsted Weight
🧵 Featured Stitch: Petal Loop Stitch
🪝 Hook Size: US H (5.0mm) Crochet Hook, or hook to obtain gauge
📏 Sizes: Small Throw—50×60″(14 additional sizes (Lovey through King) in the ad-free PDF on Etsy and Ravelry)
🩷🩷🩷🤍 Difficulty level: Intermediate
🕐 Approx Crochet Time: Small Throw: approximately 20 to 25 hours
🏷️ Project Type: A textured striped crochet blanket worked flat in rows, ideal for home decor, couch throws, baby gifts, and bed-sized heirlooms
Save for Later • Get a Summary • Pick Up Where You Left Off
Why You’ll Love This Striped Petal Loop Crochet Blanket
Most striped crochet blanket patterns use a single, flat stitch so the stripes do the visual heavy lifting. This one flips that. The Petal Loop Stitch creates soft dimensional loops across the fabric that look and feel like real texture, and when you run two colors through that repeat, the contrast makes the loops pop in a way that feels a little more heirloom than your average striped throw.
Here is what makes it stand out from other striped blanket patterns:
- Texture you can feel. The Petal Loop Stitch creates raised loops across every row, making this blanket noticeably different from flat-stitch stripe patterns.
- No fastening off between color changes. Both yarns stay attached throughout. You carry the unused color up the side and swap every two rows. Fewer ends, cleaner edges, much less weaving.
- 15 sizes in one pattern. From a quick Lovey for a newborn to a full King for a bed, the complete sizing table is in the full ad-free pattern PDF with stitch counts, row counts, and yardage for every size.
- A shell border that finishes the edges beautifully. Three rounds of clean single crochet, followed by a shell round, give this blanket a polished look that elevates the whole piece.
- A full video tutorial is included for every stage of the pattern.
Striped Petal Loop Blanket Pattern Supplies
Yarn
Color A: Herrschners Supreme Worsted — 100% Acrylic, 169yds/100g. Shown in Porcelain.
Color B: Soho Playful — 65% Acrylic / 35% Cotton, 218yds/100g. Shown in Borealis.
Yarn Quantities
Small Throw Total Yardage: 3,542 yds
Color A: 1,174 yds
Color B: 2,368 yds
See the full sizing table in the pattern PDF for yardage for 14 additional sizes. Quantities are listed separately for Color A and Color B, so you can plan your purchase before you start.
Crochet Hook
Size US H (5.0mm) Crochet Hook or hook to obtain gauge.
Notions
Scissors
Yarn Needle
Removable Stitch Marker
Be sure to check out the full pattern tips below
Yarn Substitutions
Any worsted weight yarn with good stitch definition will work in this pattern. The Petal Loop Stitch works best with a yarn that has some structure. Avoid anything too fuzzy, as the loop texture can get lost. Good alternatives:
- Brava Worsted — 100% Premium Acrylic, 218yds/100g
- Mary Maxim Maximum Value — 100% Acrylic, 474yds/227g
- Herrschners Worsted Stripes — 100% Acrylic, 743yds/340g
- Herrschners Be-Stripey — 100% Acrylic, 227yds/141g
Remember always to check the gauge and drape when substituting yarns.
Skill Level
You should be comfortable with basic stitches (sc, hdc, dc) and color changes. The Petal Loop Stitch is fully explained in the pattern PDF and video, so if you’ve never tried it before, start with the tutorial video before you cast on. It clicks fast once you see it in action.
Sizing Guide: Which Size Is Right for You?
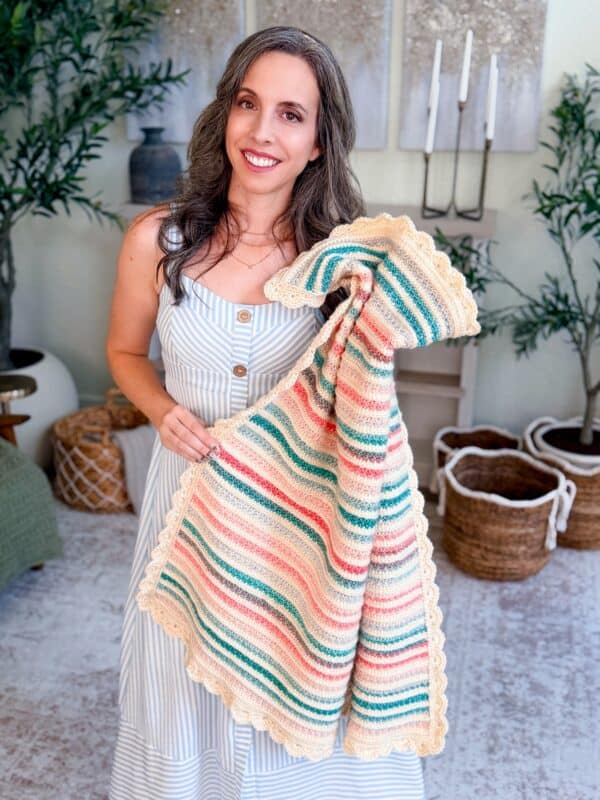
The Small Throw (50 x 60 inches) is the free size available on this page. It is the size I made first and the one draped over the back of my couch right now.
If you want any of the other 14 sizes, from a Lovey to a King, they are all in the ad-free PDF, which includes a complete sizing table with finished dimensions, stitch counts, row counts, and Color A/Color B yardage for each size.
Here is a quick overview of what each size range is best for, so you can decide which PDF sizes are worth grabbing:
Baby and Nursery Gifts (PDF only)
- Lovey (12×12 in) — The fastest make in the chart. Perfect for attaching to a stuffed animal or using as a comfort cloth. Under 200 yards total.
- Security (15×16 in) — A small blanket that still functions as a real lap cover for a baby. Great for car seats and strollers.
- Small Cradle / Large Cradle (15×28 in, 18×32 in) — Sized to fit a standard cradle or bassinet.
- Stroller (30×36 in) — The most versatile baby shower size. Covers a baby in a stroller, doubles as a tummy time mat, and stays useful through toddlerhood.
- Receiving (36×36 in) and Crib (36×52 in) — Receiving is a classic square for swaddles and playmats. Crib fits a standard crib mattress.
Free Size: Small Throw (50×60 in)
This is the size on this page, and it is also the one I recommend if you want to see how the stitch pattern and stripe sequence look at a real scale before committing to a bed-sized blanket. It works up to a finished piece that is genuinely useful as a couch throw or a lap blanket for an adult.
Additional Throw and Lap Sizes (PDF only)
- Lapghan (36×42 in) — The sweet spot for a dedicated lap blanket. Smaller and faster than the Small Throw.
- Toddler (40×50 in) — Big enough to cover a toddler on the couch, small enough to finish in a reasonable timeframe.
- Large Throw (60×70 in) — The one you reach for every single night. A step up from the free size with noticeably more coverage.
Bed Sizes (PDF only)
- Twin (60×82 in), Full (75×90 in), Queen (90×100 in), King (100×108 in) — Bed-sized blankets in this stitch are a commitment, but the result is something that genuinely looks like an heirloom piece.
Fit tip: Measurements are taken before adding the border. The three-round shell border adds roughly 1 to 2 inches per side depending on your tension, so the finished piece will be slightly larger than the chart dimensions.
Abbreviations
ch – chain
dc – double crochet
hdc – half double crochet
RS/WS – Right Side/Wrong Side
sc – single crochet
sl st – slip stitch
st(s) – stitch(es)
Stsc – stacked single crochet
Gauge
15 sts and 12 rows = 4″ by 4″ yarn held double in single crochet.
Gauge is not critical for this blanket — your finished size may vary slightly — but it does affect yardage, so it’s worth a quick swatch if you’re planning a specific size.
Tips
How to Crochet A Gauge Swatch
- Working a gauge swatch will let you know if you will have the correct sizing for this pattern. It will also help you practice the stitches used in this project and improve your stitch work for a flawless look.
- Are you struggling to match the gauge? Check out the blog post on What is Crochet Gauge and How To Fix It
Special Stitches Used in This Pattern
The featured stitch is the Petal Loop Stitch, a signature Briana K Designs construction that creates soft dimensional loops across the fabric. It is worked using a combination of a Stacked Single Crochet and a two-row sequence of petal stitches. The full stitch is explained step by step in the pattern PDF, and the video tutorial walks through every row in real time.
The pattern uses three special stitch variations:
- 3-Loop-Petal: The main Petal Loop construction. Worked across Row 3 of every repeat.
- 2-Loop-Petal: An edge variation used at the beginning and end of Row 3 to keep the stitch count even.
- Clean Sc: Used for the side edge treatment in Round 1 of the border. It gives the edges a neater appearance than a standard sc worked into the row ends. See the full tutorial here.
The pattern also uses the Stacked Single Crochet (Stsc) at the beginning of each right-side row. It creates a clean, even edge stitch that blends into the pattern.

Important Pattern Notes
How the Striped Petal Loop Blanket is Made
The blanket is worked flat in rows from the bottom up using a 4-row Petal Loop Stitch repeat. You start with a foundation chain — the length of the chain sets the width of your blanket.
Rows 1 and 2 are worked in Color A. Rows 3 and 4 are worked in Color B. You repeat this 4-row sequence for the full length of the blanket, then work one more repeat of Rows 1 and 2 before beginning the border. This keeps both color sequences balanced at the cast-on and bind-off edges.
The stitch pattern is extremely rhythmic once you get the first full repeat under your fingers. Row 3 is the one that requires your attention — it is the row that forms the petal loops. Row 4 is single crochet with a skip pattern that is easy to memorize. Rows 1 and 2 are straightforward. A gauge swatch is strongly recommended before starting, especially for bed-sized blankets where a small gauge difference adds up across hundreds of rows.
The border is three rounds worked around the entire blanket after the body is complete. Round 1 uses the Clean Sc stitch to create an even edge. Round 2 is a basic single crochet round. Round 3 is the shell round: single crochet, skip 2, 6 double crochets into the next stitch, skip 2, repeat. It creates scalloped shells that give the finished blanket a polished, finished look. Corner adjustments are explained in the pattern for when the shell repeat does not land perfectly at a corner.
How to Change Colors and Carry Yarn for Clean Stripes
This is the question I get most often about any striped blanket pattern, and the method in this pattern is specifically designed to minimize the number of ends you need to weave in.
The short version: you do not fasten off between color changes. Both Color A and Color B stay attached to the blanket for the entire body. You simply carry the unused yarn up the side and pick it back up when you need it.
Here is how the color change works row by row:
- At the end of Row 2 (the last row worked in Color A), yarn over with Color B when making the very last stitch of the row. This sets up Color B for Row 3.
- Work Rows 3 and 4 in Color B.
- At the end of Row 4 (the last row worked in Color B), yarn over with Color A when making the very last stitch of the row.
- Both strands stay attached to the blanket throughout. Drape the unused strand up the back of the blanket as you work. It will be covered by the border when you finish.
Tension matters when you carry the yarn up the side. Too tight and the edges will pull in. Too loose and you will see loose loops on the sides. The goal is for the carried strand to lie flat along the edge without distorting the rows. The border will cover the yarn carry, so small imperfections will not show in the finished blanket.
Note: custom sizing works in multiples of 2. Any even number chain will give you a valid stitch count for this pattern.
Choosing Your Color Palette for a Two-Color Striped Blanket
The combination shown in the pattern is Porcelain (a warm cream) and Borealis (a teal-green-blue mix). It is a palette that works in almost any room because it reads as neutral from a distance and has color when you look closely. But two-color striped blankets are extremely forgiving when it comes to color choices, and this is a good place to experiment.
High Contrast vs Low Contrast
High-contrast pairings (cream and navy, white and charcoal, ivory and deep burgundy) make the Petal Loop texture more visible because the loops accentuate the color difference. This is the choice if you want the stitch detail to really read.
Low-contrast pairings (two shades of the same color family, such as tan and warm brown or blush and dusty rose) create a subtler, more tonal effect. The texture is still there, but the overall look is softer and more blended. This works well for nurseries or bedrooms where you want the blanket to feel understated.
Variegated and Self-Striping Yarn
If you use a variegated or self-striping yarn as one of your two colors (as the Borealis colorway already does), keep the second color solid. Two variegated yarns tend to compete visually. One variegated against a solid is a classic combination that lets the variegated yarn’s color movement carry the visual interest.
Color Placement
Color A is used for Rows 1 and 2 (the single crochet and hdc foundation rows); Color B is used for Rows 3 and 4 (the petal and single crochet rows). This means Color B will always be the color that makes the loop texture. If you want the petal loops to be your dominant color, assign your more saturated or darker color to Color B.
Striped Petal Loop Blanket FAQs
How do I know which size to make?
The Small Throw (50×60 in) is the free size on this page and a great starting point. If you want a different size, the full PDF on Etsy and Ravelry includes all 15 sizes, along with a complete sizing table listing finished dimensions, stitch counts, row counts, and Color A/Color B yardage separately for each size. For baby shower gifts, the Stroller size (30×36 in) is the most versatile because it stays useful from infancy through toddlerhood. For bed sizes, measure your mattress and add the drop on the sides if you want the blanket to hang over the edges.
Do I need to fasten off and rejoin for every color change?
No, and this is one of the biggest time-savers in this pattern. Both yarns stay attached throughout the entire blanket body. You carry the unused color up the back of the blanket and pick it up when you need it. This means you only have a small number of ends to weave in at the very end, which is a significant improvement over striped patterns that require you to cut and rejoin every two rows.
Can I make this blanket in a different size than what is listed?
Yes. The pattern notes that custom sizing works in multiples of 2. Chain any even number to set your desired width, then work rows until the blanket reaches your desired length. The gauge swatch will help you estimate how many stitches and rows you need for a specific finished measurement.
What yarn is best for this pattern?
Any worsted weight yarn with good stitch definition works well. The pattern was designed with Herrschners Supreme Worsted and Soho Playful, both of which have some structure and hold their shape well. Avoid very fuzzy or bouclé yarns because the texture of the loops can get lost in a yarn with too much halo. For baby blankets, look for machine-washable options. For throws, a soft acrylic or an acrylic-cotton blend gives good drape and washes easily.
How long does it take to crochet this blanket?
The free Small Throw size (50×60 in) typically takes around 20 to 25 hours depending on working speed. The stitch pattern is rhythmic once you get the first full repeat under your fingers, and Rows 1, 2, and 4 are quick anchor rows that move fast. For the other sizes in the PDF: baby sizes from Lovey through Receiving typically run 3 to 8 hours; the Lapghan and Toddler sizes land in the 12 to 18 hour range; and bed sizes from Twin through King range from around 40 to 80 hours or more.
Is there a video tutorial for this pattern?
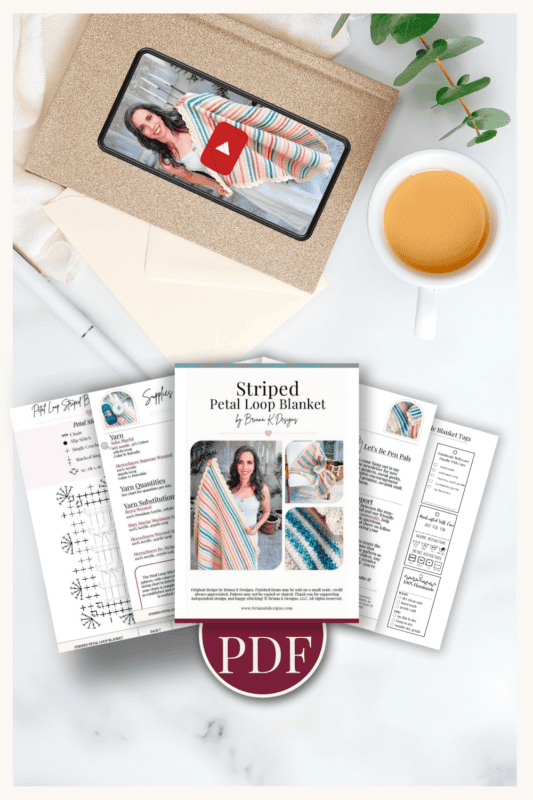
Yes! A full step-by-step video tutorial is included with the pattern. You can watch it at https://youtu.be/noE2mshUxXM. For a standalone tutorial on the Petal Loop Stitch itself, visit https://youtu.be/YGPbGGlRO4s.
How do I get clean edges on a striped blanket?
The main thing that keeps the edges clean in this pattern is the Stacked Single Crochet (Stsc) worked at the beginning of every right-side row. It creates a taller, neater edge stitch than a turning chain. The border also helps enormously: the Clean Sc in Round 1 of the border evens out any slight inconsistencies along the side edges. If you want to read more about keeping edges straight in crochet, this tutorial on crocheting a straight edge covers the technique in detail.
Subscribe, Like & Watch on YouTube
Relax & Crochet with NO Ads
Upgrade to the Printable PDF
Beautifully formatted to print and take with you anywhere. The paid pattern includes:
Click the box below to unlock this exclusive subscriber content for free. Add your email and create a password. If you are having trouble, reset your password or log in to the Grow Portal.
I’m thrilled to share this amazing crochet pattern with you! Please don’t copy, paste, or distribute this pattern. Prefer an ad-free experience? Purchase a digital PDF file for a small fee from one of my online stores. I appreciate your support and readership. You are why I can keep doing what I love and sharing it with others. Thank you from the bottom of my heart.
Striped Petal Loop Blanket Written Instructions
With Color B
Row 3:
Stsc in first, insert your hook into the loop on the back of the Stsc, yo and pull up a loop, insert your hook into the next st, yo and pull up a loop, insert into the next st, yo and pull up a loop (4 loops on the hook), yo and pull through all the loops on the hook, ch 1, *insert into the loop on the back of the previous st, yo and pull up a loop, [insert your hook into the next st, yo and pull up a loop] twice (4 loops on the hook), yo and pull through all the loops on the hook, ch 1; repeat from * across until last st, insert into the loop on the back of the previous st, yo and pull up a loop, insert your hook into the next st, yo and pull up a loop (3 loops on the hook), yo and pull through all the loops on hook, turn.
Row 4:
Ch 1, sc in the first, 2 sc in the next st, *skip 1, 2 sc in the next; repeat from * across until the last 2 sts, skip 1, sc in the last, turn.
Join The Kindest Community
Join our vibrant community of crafters on Facebook today. Whether you enjoy crafting with others or simply have burning questions, we’ve got you covered – join us now!
Repeats
Rows 5-180:
Repeat Rows 1-4, changing colors every two rows, per the Row Count on the Sizing Chart, or until desired length is reached.
Rows 181-182:
Repeat Rows 1-2 one more time before going to the Border. Leave the desired color attached for the border, fasten off other color.
Border
This will be worked around the outer edges of the blanket.
Rnd 1:
Working one stitch per edge row along the sides, ch 1, sc in first (place a stitch marker in this st to mark the first st of the round). *Insert your hook into the left bar of the sc just made, then insert into the next space on the edge of the blanket. Yarn over, then pull a loop through the blanket fabric and through one loop on the hook. Yarn over and pull through two loops on the hook. Repeat from * evenly all the way around the edges of the blanket while also placing (sc 1, ch 1, sc 1) sts on each corner.
For a detailed look at this clean sc stitch, visit: How to Crochet a Straight Edge
Rnd 2:
Ch 1, sc in each st around the edges of the blanket while placing (sc, ch 1, sc) in each corner.
Rnd 3:
Ch 1, sc in first, skip the next 2 sts, *6 dc in next st, skip the next 2 sts, sc in next, skip the next 2 sts; repeat from * around the entire blanket, working 6 dc into the ch-1 of each corner. Fasten off and weave in ends.
A note on corners: Depending on your blanket’s stitch count, the shell repeat may not line up perfectly as you approach a corner. That’s okay! To keep the corner shells looking clean and balanced, feel free to skip 1 stitch instead of 2 (or 3 instead of 2) on the stitches leading into or out of a corner. The goal is to land a shell in each corner so the corners flare nicely — small adjustments to the skip count on either side won’t be noticeable in the finished border.
Finishing
Fasten off and weave in all ends, securing them neatly along the back of the blanket for a clean, seamless look. Lightly block the blanket if desired to help relax the stitches and allow the Petal Loop texture to fully bloom.
For more information about how to block your crochet projects, visit this post: How to Block Crochet: Wet, Steam & Spray Methods for Any Yarn
Once complete, cozy up and enjoy your Petal Loop Stitch Striped Blanket. A soft, timeless piece designed to be loved, gifted, and used for years to come.
More Crochet Patterns You’ll Love
If you enjoyed this pattern, here are a few more from the Briana K Designs studio that coordinate beautifully with a summer wardrobe:
🥂 Cheers, and happy crocheting!
Well, That Was Fun! What’s Next?