







This crochet witch hat pattern is a real, wearable Wheat Stitch witch hat in eight sizes, from newborn photo prop to Adult Large, and all eight sizes are free right here on the blog. It started with a very official design meeting, which is to say I was sitting there with my hook and thought, huh, what if I turned the Wheat Stitch into a witch hat? Would that be cool?
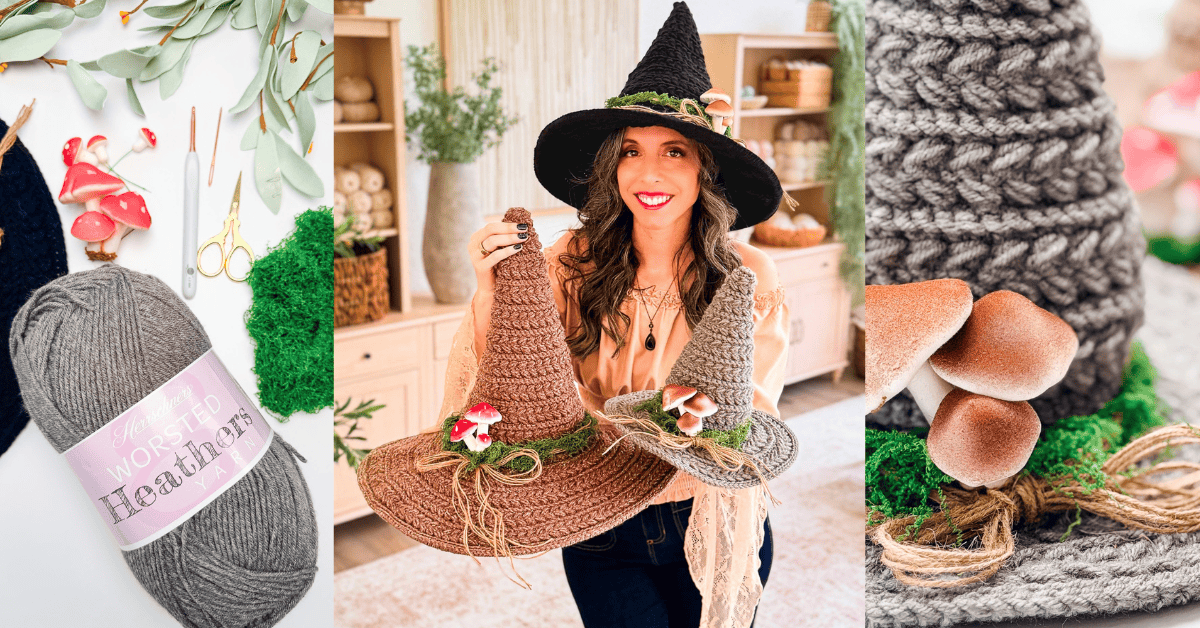
Yep. It sure is. And honestly, it came together like magic. The Wheat Stitch already has that braided, woven texture, and once it started climbing up into a tall cone, it looked like something a very stylish witch would buy at a fall market.
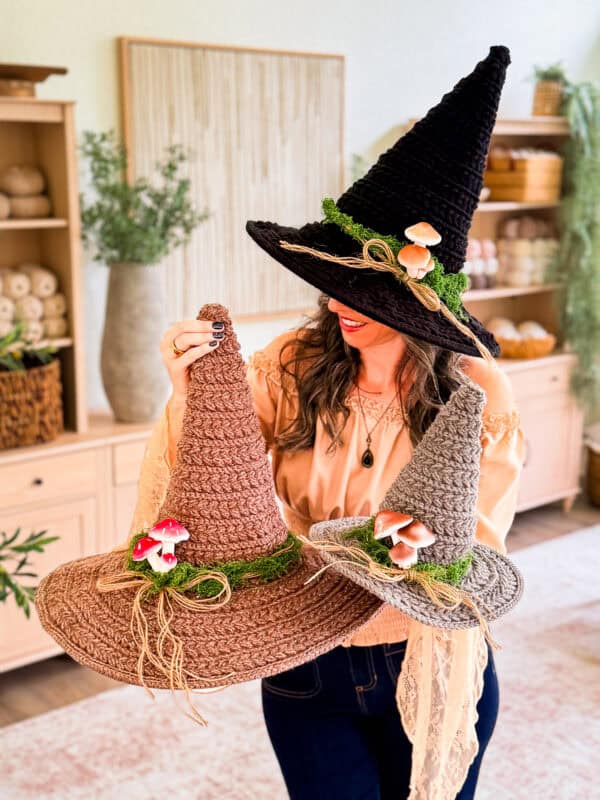
I made the adult hat in Herrschners Worsted 8 in Black, and the Newborn and Teen samples in the Herrschners Worsted 8 Heathers in Woodland and Timber. What surprised me most was the brim. I crocheted the last round right over a ring of memory wire (or drip tubing for the bigger sizes), and now the brim holds any shape I bend it into, floppy and dramatic or crisp and flat.
Disclosure: This post contains affiliate links. Please read my disclosure for more info.
Before You Hook: Crochet Pattern Details
🧶 Yarn Used: Herrschners Worsted 8 and Herrschners Worsted 8 Heathers (100% acrylic, 489yds/226g)
⚖️ Yarn Weight: #4 Worsted Weight
🧵 Featured Stitch: Wheat Stitch™
🪝 Hook Size: F (3.75mm) or G (4.0mm) Crochet Hook, or hook to obtain gauge
📏 Sizes: 8 sizes, Newborn through Adult Large, and all eight are free here on the blog
🩷🩷🩷🤍 Difficulty level: Intermediate
🕐 Approx Crochet Time: About 2 hours for Newborn, up to about 8 hours for Adult Large
🏷️ Project Type: A wearable crochet witch hat for Halloween costumes and fall dress-up, sized for the whole family with a brim that holds its shape
Save for Later • Get a Summary • Pick Up Where You Left Off
- All eight sizes are free here on the blog: Newborn, Baby, Toddler, Child, Teen, Adult Small, Adult Medium, and Adult Large.
- Want an ad-free, printable copy? Grab the PDF in my Etsy shop, on Ravelry, or in the Briana K Shop.
- New to the stitch? Start with my step-by-step Wheat Stitch™ tutorial, then come back here.
- Looking for a tiny decor version instead? My mini crochet witch hats are palm sized and made for the mantel.
Why You’ll Love This Crochet Witch Hat Pattern
- Eight sizes, one pattern. Make matching hats for the baby, the kids, and yourself. Everyone in the family gets to be a witch this year.
- All eight sizes are free. The full pattern for each size is on the blog.
- The brim holds its shape. A ring of memory wire or tubing is crocheted into the last round, so you can bend the brim however you like and it stays.
- No seams. It’s worked in one piece from the point down, so you don’t have to sew anything together at the end.
- The texture does the work. The Wheat Stitch™ gives it that woven, rustic look without any colorwork.
- It’s washable. Both brim supports handle a gentle machine wash.
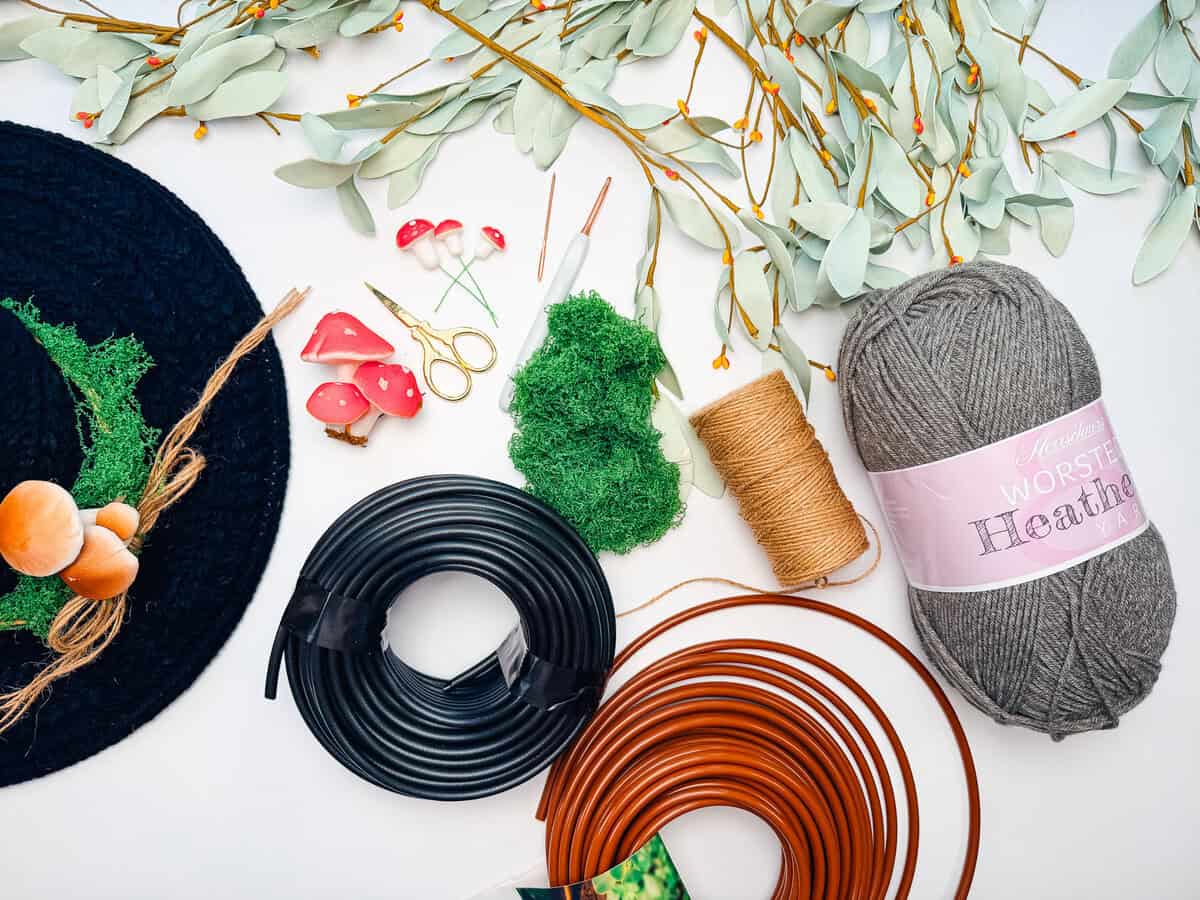
Wheat Stitch Witch Hat Pattern Supplies
Yarn
Herrschners Worsted 8, 100% Acrylic, 489yds/226g, #4 Worsted Weight. Shown in Black (Adult).
Herrschners Worsted 8 Heathers, 100% Acrylic, 489yds/226g, #4 Worsted Weight. Shown in Woodland (Newborn) and Timber (Teen).
Yarn Quantities
By size: 260 (300, 450, 500, 610) (835, 885, 945) yards
1 (1, 1, 2, 2) (2, 2, 2) balls of Herrschners Worsted 8
Yardage includes a 10% buffer.
Crochet Hook
F (3.75mm) or G (4.0mm) crochet hook, whichever gives gauge
Notions
Scissors
Yarn Needle
Removable Stitch Markers
Be sure to check out the full pattern tips below
Brim Support
- BENECREAT Nylon Memory Wire for Newborn through Child
- Rain Bird 1/4″ Drip Tubing for Teen and adult sizes
- 3/16″ wooden dowel to join the tubing
- Pliers
Decorating Supplies (Optional)
- Jute twine
- Preserved moss
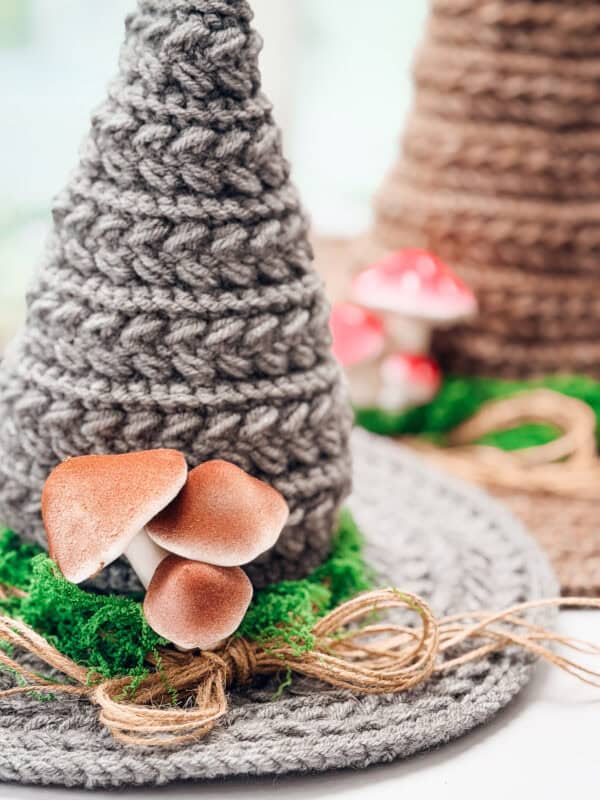
- Mini mushrooms for Newborn through Child
- Larger mushrooms for Teen and the adult sizes: option 1 or option 2
Yarn Substitutions
- Brava Worsted by WeCrochet, 100% Acrylic, 218yds/100g, #4 Worsted Weight
- Starlette by Mary Maxim, 100% Acrylic, 180yds/100g, #4 Worsted Weight
- Pound of Love by Lion Brand, 100% Acrylic, 1,020yds/454g, #4 Worsted Weight
I went with acrylic on purpose. It holds a crisp point, it’s washable, and it doesn’t stretch out over a night of trick-or-treating.
Skill Level
The shaping is a steady repeat, but you’ll work in the back loop, join and turn every round, work puff stitches into skipped stitches, and crochet over a brim support at the end. The video tutorial walks you through everything, including the brim support round.
Witch Hat Sizes and Measurements
Pick your size by head measurement. The hat is worked with about 2″ of negative ease at the opening, and there’s no ribbed band, so it sits on the head instead of gripping it.
| Size | To Fit Head | A: Opening | B: Cone Height | C: Brim Width | D: Brim Diameter |
|---|---|---|---|---|---|
| Newborn | 12 to 14″ | 12″ | 9.5″ | 2.5″ | 8.5″ |
| Baby | 14 to 16″ | 14.25″ | 10.75″ | 2.5″ | 9.25″ |
| Toddler | 16 to 18″ | 16″ | 12″ | 3.5″ | 12.25″ |
| Child | 18 to 20″ | 17.75″ | 13.25″ | 3.5″ | 12.75″ |
| Teen | 20 to 21″ | 18.75″ | 13.25″ | 4.75″ | 15.5″ |
| Adult Small | 21 to 22″ | 20″ | 14.5″ | 6″ | 18.25″ |
| Adult Medium | 22 to 23″ | 21.25″ | 15.5″ | 6″ | 18.75″ |
| Adult Large | 23 to 24″ | 22.75″ | 16.75″ | 6″ | 19.25″ |
Abbreviations
- blo: back loop only
- ch: chain
- clean sc: clean single crochet (see Special Stitches)
- puff st: puff stitch (see Special Stitches)
- rnd(s): round(s)
- RS: right side
- sc: single crochet
- sl st: slip stitch
- st(s): stitch(es)
- WS: wrong side
This pattern uses standard US terminology.
Gauge
18 sts and 13 rows = 4″ by 4″ in the Wheat Stitch pattern repeat, unblocked, on a 4.0mm hook.
Gauge really matters on this one. The cone height comes straight from your row gauge, so a swatch that’s right across but off in the rows will make a hat that’s too tall or too short. Don’t block your swatch, since the pattern is written for unblocked gauge.
Tips
How to Crochet the Gauge Swatch
- Row 1 (RS): Ch 31, sc in the 2nd ch from the hook and in each ch across, turn. | 30 sts
- Rows 2 to 3: Ch 1 (turning ch does not count as a st throughout), blo sc in each st across, turn. | 30 sts
- Rows 4 to 5: Ch 1, skip the first st, sc in next, work a puff st into the skipped st, *skip the next st, sc in next, work a puff st into the skipped st; repeat from * across, turn. | 30 sts
- Rows 6 to 21: Repeat Rows 2 to 5 four more times. | 30 sts
- Fasten off. The finished swatch should measure about 6.75″ wide and 6.25″ tall. Lay it flat without stretching and measure across the middle, not the edges, which pull in.
- If your gauge is off: too many stitches in 4″ means your stitches are too small, so go up a hook size. Too few means they’re too big, so go down a hook size. For a full walkthrough, here’s my guide to crochet gauge and how to fix it.
Special Stitches Used in This Pattern
Puff Stitch (puff st)
Yarn over and insert your hook into the stitch. Yarn over again and pull up a long loop. Yarn over and insert your hook into the same stitch. Yarn over again and pull up a long loop (5 loops on hook). Yarn over and pull through the first 4 loops, yarn over and pull through the remaining loops.
Clean Single Crochet (clean sc)
Worked with the right side facing, over the brim support. Ch 1, sc in the first st. *Insert your hook into the left bar of the sc st, then into the next st, yarn over and pull up a loop, then pull through the first loop on the hook. Yarn over and pull through the remaining 2 loops; repeat from * around.
This gives the brim edge a clean, straight finish. You can see it worked up close in my guide on how to get a clean, straight edge on your crochet.
Wheat Stitch™
The Wheat Stitch™ is the skip one, single crochet, puff back into the skipped stitch repeat you’ll see in Rnds 3 to 4 and every puff round after. If you’ve made my Wheat Stitch™ Crochet Pumpkin Trio, you already know it. If not, my Wheat Stitch™ photo and video tutorial is the place to start.

Important Pattern Notes
How This Crochet Witch Hat Is Made
The hat is made in one piece, top down, with no seams. Start at the point with a magic ring, then repeat the same 4-round Wheat Stitch repeat all the way down: two back-loop single crochet rounds, then two puff rounds, joined and turned every round.
The cone grows slowly to stay tall and pointy, then the brim flares out quickly. Most single crochet rounds add 4 stitches on the cone and 18 on the brim, so check your count at the end of every round. The very last round is worked over a ring of memory wire or tubing, which lets the brim hold whatever shape you give it.

How the Brim Holds Its Shape
A lot of crochet witch hats have a brim that flops, or they lean on fabric stiffener that washes out. This one has a support crocheted right into the edge.
- Newborn through Child: nylon memory wire. It’s light, flexible, and joins into a ring with brass crimp tubes.
- Teen and adult sizes: 1/4″ drip tubing. The bigger brims need a little more backbone. A short piece of wooden dowel pushed into the cut ends holds the ring closed.
- Bend it any way you want. Wavy, flipped up on one side, or flat and dramatic. It holds the shape wet or dry, and you can reshape it as often as you like.
Neither support will rust or stain, so the whole hat stays washable.
Watch the Video Tutorial
If you’d like to crochet along with me, the full video tutorial walks through the Wheat Stitch, the cone, the brim, and the brim support round.
Printable Version
This pattern is free to read here on the blog. The ad-free printable PDF is available in the Briana K Designs shop on Etsy and Ravelry.
brianakdesigns.com
Subscribe, Like & Watch on YouTube
Get the Wheat Stitch Witch Hat Pattern
Relax & Crochet with NO Ads
Upgrade to the Printable PDF
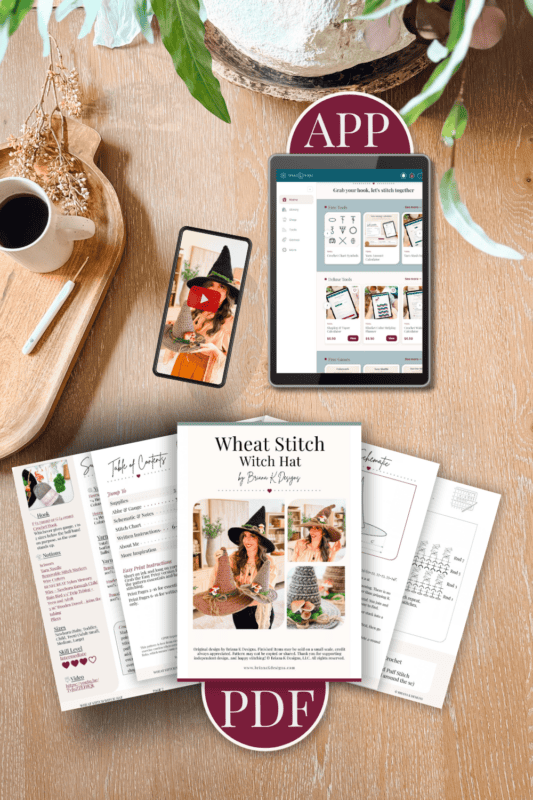
Beautifully formatted to print and take with you anywhere. The paid pattern includes:
All eight sizes are free below. If you’d rather have an ad-free printable PDF with every size and the stitch chart, you can grab it on Etsy, Ravelry, or in the Briana K Shop.
This pattern is also in the Briana K app, so you can keep your place, track your rounds, and have it right on your phone while you crochet.

Add your email in the box below to unlock this pattern to view on the blog for free. I’m thrilled to share this amazing crochet pattern with you! Please don’t copy, paste, or distribute this pattern. Prefer an ad-free experience? Purchase a digital PDF file for a small fee from one of my online stores. I appreciate your support and readership. You are why I can keep doing what I love and sharing it with others. Thank you from the bottom of my heart.
Wheat Stitch Witch Hat Free Crochet Pattern (All 8 Sizes)
Sizes: Newborn (Baby, Toddler, Child, Teen) (Adult Small, Medium, Large). Rnds 1 to 24 are the same for every size, then jump to your size.
Rnd 6: Ch 1, *2 blo sc in next st, blo sc in the next 3 sts; repeat from * around, join and turn. | 20 sts
Rnds 7 to 8: Repeat Rnds 3 to 4. | 20 sts
Rnd 9: Ch 1, blo sc 2, 2 blo sc in next st, blo sc 4, 2 blo sc in next st, blo sc 4, 2 blo sc in next st, blo sc 4, 2 blo sc in next st, blo sc 2, join and turn. | 24 sts
Rnd 10: Ch 1, *2 blo sc in next st, blo sc in the next 5 sts; repeat from * around, join and turn. | 28 sts
Rnds 11 to 12: Repeat Rnds 3 to 4. | 28 sts
Rnd 13: Ch 1, blo sc 3, 2 blo sc in next st, blo sc 6, 2 blo sc in next st, blo sc 6, 2 blo sc in next st, blo sc 6, 2 blo sc in next st, blo sc 3, join and turn. | 32 sts
Rnd 14: Ch 1, *2 blo sc in next st, blo sc in the next 7 sts; repeat from * around, join and turn. | 36 sts
Rnds 15 to 16: Repeat Rnds 3 to 4. | 36 sts
Rnd 17: Ch 1, blo sc 4, 2 blo sc in next st, blo sc 8, 2 blo sc in next st, blo sc 8, 2 blo sc in next st, blo sc 8, 2 blo sc in next st, blo sc 4, join and turn. | 40 sts
Rnd 18: Ch 1, *2 blo sc in next st, blo sc in the next 9 sts; repeat from * around, join and turn. | 44 sts
Rnds 19 to 20: Repeat Rnds 3 to 4. | 44 sts
Rnd 21: Ch 1, blo sc 5, 2 blo sc in next st, blo sc 10, 2 blo sc in next st, blo sc 10, 2 blo sc in next st, blo sc 10, 2 blo sc in next st, blo sc 5, join and turn. | 48 sts
Rnd 22: Ch 1, *2 blo sc in next st, blo sc in the next 11 sts; repeat from * around, join and turn. | 52 sts
Rnds 23 to 24: Repeat Rnds 3 to 4. | 52 sts
Continue to your size below.
Join The Kindest Community
Join our vibrant community of crafters on Facebook today. Whether you enjoy crafting with others or simply have burning questions, we’ve got you covered – join us now!
Newborn Hat
Increasing
Work Rnds 1 to 24 of the Hat Body, then:
Rnd 25: Ch 1, *2 blo sc in next st, blo sc in the next 25 sts; repeat from * around, join and turn. | 54 sts
Rnd 26: Ch 1, blo sc in each st around, join and turn. | 54 sts
Rnds 27 to 28: Repeat Rnds 3 to 4. | 54 sts
Rnds 29 to 30: Ch 1, blo sc in each st around, join and turn. | 54 sts
Rnds 31 to 32: Repeat Rnds 3 to 4. | 54 sts
The cone should measure approx. 12″ around and 9.5″ tall.
Brim
Stay in the same 4-round repeat, continuing the round numbering. The brim measures approx. 2.5″ out from the hat. Stop at the end of any complete 4-round repeat for a shallower brim.
Rnd 33: Ch 1, blo sc in the first st, *2 blo sc in next st, blo sc in the next 2 sts; repeat from * to the last 2 sts, 2 blo sc in next st, blo sc in the last st, join and turn. | 72 sts
Rnd 34: Ch 1, *2 blo sc in next st, blo sc in the next 3 sts; repeat from * around, join and turn. | 90 sts
Rnds 35 to 36: Repeat Rnds 3 to 4. | 90 sts
Rnd 37: Ch 1, blo sc in the first 2 sts, *2 blo sc in next st, blo sc in the next 4 sts; repeat from * to the last 3 sts, 2 blo sc in next st, blo sc in the last 2 sts, join and turn. | 108 sts
Rnd 38: Ch 1, *2 blo sc in next st, blo sc in the next 5 sts; repeat from * around, join and turn. | 126 sts
Rnds 39 to 40: Repeat Rnds 3 to 4. | 126 sts
Go to Brim Support.
Baby Hat
Increasing
Work Rnds 1 to 24 of the Hat Body, then:
Rnd 25: Ch 1, blo sc 6, 2 blo sc in next st, blo sc 12, 2 blo sc in next st, blo sc 12, 2 blo sc in next st, blo sc 12, 2 blo sc in next st, blo sc 6, join and turn. | 56 sts
Rnd 26: Ch 1, *2 blo sc in next st, blo sc in the next 13 sts; repeat from * around, join and turn. | 60 sts
Rnds 27 to 28: Repeat Rnds 3 to 4. | 60 sts
Rnd 29: Ch 1, blo sc 7, 2 blo sc in next st, blo sc 14, 2 blo sc in next st, blo sc 14, 2 blo sc in next st, blo sc 14, 2 blo sc in next st, blo sc 7, join and turn. | 64 sts
Rnd 30: Ch 1, blo sc in each st around, join and turn. | 64 sts
Rnds 31 to 32: Repeat Rnds 3 to 4. | 64 sts
Rnds 33 to 34: Ch 1, blo sc in each st around, join and turn. | 64 sts
Rnds 35 to 36: Repeat Rnds 3 to 4. | 64 sts
The cone should measure approx. 14.25″ around and 10.75″ tall.
Brim
Stay in the same 4-round repeat, continuing the round numbering. The brim measures approx. 2.5″ out from the hat. Stop at the end of any complete 4-round repeat for a shallower brim.
Rnd 37: Ch 1, *2 blo sc in next st, blo sc in the next 7 sts; repeat from * around, join and turn. | 72 sts
Rnd 38: Ch 1, *2 blo sc in next st, blo sc in the next 3 sts; repeat from * around, join and turn. | 90 sts
Rnds 39 to 40: Repeat Rnds 3 to 4. | 90 sts
Rnd 41: Ch 1, blo sc in the first 2 sts, *2 blo sc in next st, blo sc in the next 4 sts; repeat from * to the last 3 sts, 2 blo sc in next st, blo sc in the last 2 sts, join and turn. | 108 sts
Rnd 42: Ch 1, *2 blo sc in next st, blo sc in the next 5 sts; repeat from * around, join and turn. | 126 sts
Rnds 43 to 44: Repeat Rnds 3 to 4. | 126 sts
Go to Brim Support.
Toddler Hat
Increasing
Work Rnds 1 to 24 of the Hat Body, then:
Rnd 25: Ch 1, blo sc 6, 2 blo sc in next st, blo sc 12, 2 blo sc in next st, blo sc 12, 2 blo sc in next st, blo sc 12, 2 blo sc in next st, blo sc 6, join and turn. | 56 sts
Rnd 26: Ch 1, *2 blo sc in next st, blo sc in the next 13 sts; repeat from * around, join and turn. | 60 sts
Rnds 27 to 28: Repeat Rnds 3 to 4. | 60 sts
Rnd 29: Ch 1, blo sc 7, 2 blo sc in next st, blo sc 14, 2 blo sc in next st, blo sc 14, 2 blo sc in next st, blo sc 14, 2 blo sc in next st, blo sc 7, join and turn. | 64 sts
Rnd 30: Ch 1, *2 blo sc in next st, blo sc in the next 15 sts; repeat from * around, join and turn. | 68 sts
Rnds 31 to 32: Repeat Rnds 3 to 4. | 68 sts
Rnd 33: Ch 1, blo sc 8, 2 blo sc in next st, blo sc 16, 2 blo sc in next st, blo sc 16, 2 blo sc in next st, blo sc 16, 2 blo sc in next st, blo sc 8, join and turn. | 72 sts
Rnd 34: Ch 1, blo sc in each st around, join and turn. | 72 sts
Rnds 35 to 36: Repeat Rnds 3 to 4. | 72 sts
Rnds 37 to 38: Ch 1, blo sc in each st around, join and turn. | 72 sts
Rnds 39 to 40: Repeat Rnds 3 to 4. | 72 sts
The cone should measure approx. 16″ around and 12″ tall.
Brim
Stay in the same 4-round repeat, continuing the round numbering. The brim measures approx. 3.5″ out from the hat. Stop at the end of any complete 4-round repeat for a shallower brim.
Rnd 41: Ch 1, *2 blo sc in next st, blo sc in the next 3 sts; repeat from * around, join and turn. | 90 sts
Rnd 42: Ch 1, blo sc in the first 2 sts, *2 blo sc in next st, blo sc in the next 4 sts; repeat from * to the last 3 sts, 2 blo sc in next st, blo sc in the last 2 sts, join and turn. | 108 sts
Rnds 43 to 44: Repeat Rnds 3 to 4. | 108 sts
Rnd 45: Ch 1, *2 blo sc in next st, blo sc in the next 5 sts; repeat from * around, join and turn. | 126 sts
Rnd 46: Ch 1, blo sc in the first 3 sts, *2 blo sc in next st, blo sc in the next 6 sts; repeat from * to the last 4 sts, 2 blo sc in next st, blo sc in the last 3 sts, join and turn. | 144 sts
Rnds 47 to 48: Repeat Rnds 3 to 4. | 144 sts
Rnd 49: Ch 1, *2 blo sc in next st, blo sc in the next 7 sts; repeat from * around, join and turn. | 162 sts
Rnd 50: Ch 1, blo sc in the first 4 sts, *2 blo sc in next st, blo sc in the next 8 sts; repeat from * to the last 5 sts, 2 blo sc in next st, blo sc in the last 4 sts, join and turn. | 180 sts
Rnds 51 to 52: Repeat Rnds 3 to 4. | 180 sts
Go to Brim Support.
Child Hat
Increasing
Work Rnds 1 to 24 of the Hat Body, then:
Rnd 25: Ch 1, blo sc 6, 2 blo sc in next st, blo sc 12, 2 blo sc in next st, blo sc 12, 2 blo sc in next st, blo sc 12, 2 blo sc in next st, blo sc 6, join and turn. | 56 sts
Rnd 26: Ch 1, *2 blo sc in next st, blo sc in the next 13 sts; repeat from * around, join and turn. | 60 sts
Rnds 27 to 28: Repeat Rnds 3 to 4. | 60 sts
Rnd 29: Ch 1, blo sc 7, 2 blo sc in next st, blo sc 14, 2 blo sc in next st, blo sc 14, 2 blo sc in next st, blo sc 14, 2 blo sc in next st, blo sc 7, join and turn. | 64 sts
Rnd 30: Ch 1, *2 blo sc in next st, blo sc in the next 15 sts; repeat from * around, join and turn. | 68 sts
Rnds 31 to 32: Repeat Rnds 3 to 4. | 68 sts
Rnd 33: Ch 1, blo sc 8, 2 blo sc in next st, blo sc 16, 2 blo sc in next st, blo sc 16, 2 blo sc in next st, blo sc 16, 2 blo sc in next st, blo sc 8, join and turn. | 72 sts
Rnd 34: Ch 1, *2 blo sc in next st, blo sc in the next 17 sts; repeat from * around, join and turn. | 76 sts
Rnds 35 to 36: Repeat Rnds 3 to 4. | 76 sts
Rnd 37: Ch 1, blo sc 9, 2 blo sc in next st, blo sc 18, 2 blo sc in next st, blo sc 18, 2 blo sc in next st, blo sc 18, 2 blo sc in next st, blo sc 9, join and turn. | 80 sts
Rnd 38: Ch 1, blo sc in each st around, join and turn. | 80 sts
Rnds 39 to 40: Repeat Rnds 3 to 4. | 80 sts
Rnds 41 to 42: Ch 1, blo sc in each st around, join and turn. | 80 sts
Rnds 43 to 44: Repeat Rnds 3 to 4. | 80 sts
The cone should measure approx. 17.75″ around and 13.25″ tall.
Brim
Stay in the same 4-round repeat, continuing the round numbering. The brim measures approx. 3.5″ out from the hat. Stop at the end of any complete 4-round repeat for a shallower brim.
Rnd 45: Ch 1, *2 blo sc in next st, blo sc in the next 7 sts; repeat from * around, join and turn. | 90 sts
Rnd 46: Ch 1, blo sc in the first 2 sts, *2 blo sc in next st, blo sc in the next 4 sts; repeat from * to the last 3 sts, 2 blo sc in next st, blo sc in the last 2 sts, join and turn. | 108 sts
Rnds 47 to 48: Repeat Rnds 3 to 4. | 108 sts
Rnd 49: Ch 1, *2 blo sc in next st, blo sc in the next 5 sts; repeat from * around, join and turn. | 126 sts
Rnd 50: Ch 1, blo sc in the first 3 sts, *2 blo sc in next st, blo sc in the next 6 sts; repeat from * to the last 4 sts, 2 blo sc in next st, blo sc in the last 3 sts, join and turn. | 144 sts
Rnds 51 to 52: Repeat Rnds 3 to 4. | 144 sts
Rnd 53: Ch 1, *2 blo sc in next st, blo sc in the next 7 sts; repeat from * around, join and turn. | 162 sts
Rnd 54: Ch 1, blo sc in the first 4 sts, *2 blo sc in next st, blo sc in the next 8 sts; repeat from * to the last 5 sts, 2 blo sc in next st, blo sc in the last 4 sts, join and turn. | 180 sts
Rnds 55 to 56: Repeat Rnds 3 to 4. | 180 sts
Go to Brim Support.
Teen Hat
Increasing
Work Rnds 1 to 24 of the Hat Body, then:
Rnd 25: Ch 1, blo sc 6, 2 blo sc in next st, blo sc 12, 2 blo sc in next st, blo sc 12, 2 blo sc in next st, blo sc 12, 2 blo sc in next st, blo sc 6, join and turn. | 56 sts
Rnd 26: Ch 1, *2 blo sc in next st, blo sc in the next 13 sts; repeat from * around, join and turn. | 60 sts
Rnds 27 to 28: Repeat Rnds 3 to 4. | 60 sts
Rnd 29: Ch 1, blo sc 7, 2 blo sc in next st, blo sc 14, 2 blo sc in next st, blo sc 14, 2 blo sc in next st, blo sc 14, 2 blo sc in next st, blo sc 7, join and turn. | 64 sts
Rnd 30: Ch 1, *2 blo sc in next st, blo sc in the next 15 sts; repeat from * around, join and turn. | 68 sts
Rnds 31 to 32: Repeat Rnds 3 to 4. | 68 sts
Rnd 33: Ch 1, blo sc 8, 2 blo sc in next st, blo sc 16, 2 blo sc in next st, blo sc 16, 2 blo sc in next st, blo sc 16, 2 blo sc in next st, blo sc 8, join and turn. | 72 sts
Rnd 34: Ch 1, *2 blo sc in next st, blo sc in the next 17 sts; repeat from * around, join and turn. | 76 sts
Rnds 35 to 36: Repeat Rnds 3 to 4. | 76 sts
Rnd 37: Ch 1, blo sc 9, 2 blo sc in next st, blo sc 18, 2 blo sc in next st, blo sc 18, 2 blo sc in next st, blo sc 18, 2 blo sc in next st, blo sc 9, join and turn. | 80 sts
Rnd 38: Ch 1, *2 blo sc in next st, blo sc in the next 19 sts; repeat from * around, join and turn. | 84 sts
Rnds 39 to 40: Repeat Rnds 3 to 4. | 84 sts
Rnds 41 to 42: Ch 1, blo sc in each st around, join and turn. | 84 sts
Rnds 43 to 44: Repeat Rnds 3 to 4. | 84 sts
The cone should measure approx. 18.75″ around and 13.25″ tall.
Brim
Stay in the same 4-round repeat, continuing the round numbering. The brim measures approx. 4.75″ out from the hat. Stop at the end of any complete 4-round repeat for a shallower brim.
Rnd 45: Ch 1, *2 blo sc in next st, blo sc in the next 13 sts; repeat from * around, join and turn. | 90 sts
Rnd 46: Ch 1, blo sc in the first 2 sts, *2 blo sc in next st, blo sc in the next 4 sts; repeat from * to the last 3 sts, 2 blo sc in next st, blo sc in the last 2 sts, join and turn. | 108 sts
Rnds 47 to 48: Repeat Rnds 3 to 4. | 108 sts
Rnd 49: Ch 1, *2 blo sc in next st, blo sc in the next 5 sts; repeat from * around, join and turn. | 126 sts
Rnd 50: Ch 1, blo sc in the first 3 sts, *2 blo sc in next st, blo sc in the next 6 sts; repeat from * to the last 4 sts, 2 blo sc in next st, blo sc in the last 3 sts, join and turn. | 144 sts
Rnds 51 to 52: Repeat Rnds 3 to 4. | 144 sts
Rnd 53: Ch 1, *2 blo sc in next st, blo sc in the next 7 sts; repeat from * around, join and turn. | 162 sts
Rnd 54: Ch 1, blo sc in the first 4 sts, *2 blo sc in next st, blo sc in the next 8 sts; repeat from * to the last 5 sts, 2 blo sc in next st, blo sc in the last 4 sts, join and turn. | 180 sts
Rnds 55 to 56: Repeat Rnds 3 to 4. | 180 sts
Rnd 57: Ch 1, *2 blo sc in next st, blo sc in the next 9 sts; repeat from * around, join and turn. | 198 sts
Rnd 58: Ch 1, blo sc in the first 5 sts, *2 blo sc in next st, blo sc in the next 10 sts; repeat from * to the last 6 sts, 2 blo sc in next st, blo sc in the last 5 sts, join and turn. | 216 sts
Rnds 59 to 60: Repeat Rnds 3 to 4. | 216 sts
Go to Brim Support.
Adult Small Hat
Increasing
Work Rnds 1 to 24 of the Hat Body, then:
Rnd 25: Ch 1, blo sc 6, 2 blo sc in next st, blo sc 12, 2 blo sc in next st, blo sc 12, 2 blo sc in next st, blo sc 12, 2 blo sc in next st, blo sc 6, join and turn. | 56 sts
Rnd 26: Ch 1, *2 blo sc in next st, blo sc in the next 13 sts; repeat from * around, join and turn. | 60 sts
Rnds 27 to 28: Repeat Rnds 3 to 4. | 60 sts
Rnd 29: Ch 1, blo sc 7, 2 blo sc in next st, blo sc 14, 2 blo sc in next st, blo sc 14, 2 blo sc in next st, blo sc 14, 2 blo sc in next st, blo sc 7, join and turn. | 64 sts
Rnd 30: Ch 1, *2 blo sc in next st, blo sc in the next 15 sts; repeat from * around, join and turn. | 68 sts
Rnds 31 to 32: Repeat Rnds 3 to 4. | 68 sts
Rnd 33: Ch 1, blo sc 8, 2 blo sc in next st, blo sc 16, 2 blo sc in next st, blo sc 16, 2 blo sc in next st, blo sc 16, 2 blo sc in next st, blo sc 8, join and turn. | 72 sts
Rnd 34: Ch 1, *2 blo sc in next st, blo sc in the next 17 sts; repeat from * around, join and turn. | 76 sts
Rnds 35 to 36: Repeat Rnds 3 to 4. | 76 sts
Rnd 37: Ch 1, blo sc 9, 2 blo sc in next st, blo sc 18, 2 blo sc in next st, blo sc 18, 2 blo sc in next st, blo sc 18, 2 blo sc in next st, blo sc 9, join and turn. | 80 sts
Rnd 38: Ch 1, *2 blo sc in next st, blo sc in the next 19 sts; repeat from * around, join and turn. | 84 sts
Rnds 39 to 40: Repeat Rnds 3 to 4. | 84 sts
Rnd 41: Ch 1, blo sc 10, 2 blo sc in next st, blo sc 20, 2 blo sc in next st, blo sc 20, 2 blo sc in next st, blo sc 20, 2 blo sc in next st, blo sc 10, join and turn. | 88 sts
Rnd 42: Ch 1, *2 blo sc in next st, blo sc in the next 43 sts; repeat from * around, join and turn. | 90 sts
Rnds 43 to 44: Repeat Rnds 3 to 4. | 90 sts
Rnds 45 to 46: Ch 1, blo sc in each st around, join and turn. | 90 sts
Rnds 47 to 48: Repeat Rnds 3 to 4. | 90 sts
The cone should measure approx. 20″ around and 14.5″ tall.
Brim
Stay in the same 4-round repeat, continuing the round numbering. The brim measures approx. 6″ out from the hat. Stop at the end of any complete 4-round repeat for a shallower brim.
Rnd 49: Ch 1, blo sc in the first 2 sts, *2 blo sc in next st, blo sc in the next 4 sts; repeat from * to the last 3 sts, 2 blo sc in next st, blo sc in the last 2 sts, join and turn. | 108 sts
Rnd 50: Ch 1, *2 blo sc in next st, blo sc in the next 5 sts; repeat from * around, join and turn. | 126 sts
Rnds 51 to 52: Repeat Rnds 3 to 4. | 126 sts
Rnd 53: Ch 1, blo sc in the first 3 sts, *2 blo sc in next st, blo sc in the next 6 sts; repeat from * to the last 4 sts, 2 blo sc in next st, blo sc in the last 3 sts, join and turn. | 144 sts
Rnd 54: Ch 1, *2 blo sc in next st, blo sc in the next 7 sts; repeat from * around, join and turn. | 162 sts
Rnds 55 to 56: Repeat Rnds 3 to 4. | 162 sts
Rnd 57: Ch 1, blo sc in the first 4 sts, *2 blo sc in next st, blo sc in the next 8 sts; repeat from * to the last 5 sts, 2 blo sc in next st, blo sc in the last 4 sts, join and turn. | 180 sts
Rnd 58: Ch 1, *2 blo sc in next st, blo sc in the next 9 sts; repeat from * around, join and turn. | 198 sts
Rnds 59 to 60: Repeat Rnds 3 to 4. | 198 sts
Rnd 61: Ch 1, blo sc in the first 5 sts, *2 blo sc in next st, blo sc in the next 10 sts; repeat from * to the last 6 sts, 2 blo sc in next st, blo sc in the last 5 sts, join and turn. | 216 sts
Rnd 62: Ch 1, *2 blo sc in next st, blo sc in the next 11 sts; repeat from * around, join and turn. | 234 sts
Rnds 63 to 64: Repeat Rnds 3 to 4. | 234 sts
Rnd 65: Ch 1, blo sc in the first 6 sts, *2 blo sc in next st, blo sc in the next 12 sts; repeat from * to the last 7 sts, 2 blo sc in next st, blo sc in the last 6 sts, join and turn. | 252 sts
Rnd 66: Ch 1, *2 blo sc in next st, blo sc in the next 13 sts; repeat from * around, join and turn. | 270 sts
Rnds 67 to 68: Repeat Rnds 3 to 4. | 270 sts
Go to Brim Support.
Adult Medium Hat
Increasing
Work Rnds 1 to 24 of the Hat Body, then:
Rnd 25: Ch 1, blo sc 6, 2 blo sc in next st, blo sc 12, 2 blo sc in next st, blo sc 12, 2 blo sc in next st, blo sc 12, 2 blo sc in next st, blo sc 6, join and turn. | 56 sts
Rnd 26: Ch 1, *2 blo sc in next st, blo sc in the next 13 sts; repeat from * around, join and turn. | 60 sts
Rnds 27 to 28: Repeat Rnds 3 to 4. | 60 sts
Rnd 29: Ch 1, blo sc 7, 2 blo sc in next st, blo sc 14, 2 blo sc in next st, blo sc 14, 2 blo sc in next st, blo sc 14, 2 blo sc in next st, blo sc 7, join and turn. | 64 sts
Rnd 30: Ch 1, *2 blo sc in next st, blo sc in the next 15 sts; repeat from * around, join and turn. | 68 sts
Rnds 31 to 32: Repeat Rnds 3 to 4. | 68 sts
Rnd 33: Ch 1, blo sc 8, 2 blo sc in next st, blo sc 16, 2 blo sc in next st, blo sc 16, 2 blo sc in next st, blo sc 16, 2 blo sc in next st, blo sc 8, join and turn. | 72 sts
Rnd 34: Ch 1, *2 blo sc in next st, blo sc in the next 17 sts; repeat from * around, join and turn. | 76 sts
Rnds 35 to 36: Repeat Rnds 3 to 4. | 76 sts
Rnd 37: Ch 1, blo sc 9, 2 blo sc in next st, blo sc 18, 2 blo sc in next st, blo sc 18, 2 blo sc in next st, blo sc 18, 2 blo sc in next st, blo sc 9, join and turn. | 80 sts
Rnd 38: Ch 1, *2 blo sc in next st, blo sc in the next 19 sts; repeat from * around, join and turn. | 84 sts
Rnds 39 to 40: Repeat Rnds 3 to 4. | 84 sts
Rnd 41: Ch 1, blo sc 10, 2 blo sc in next st, blo sc 20, 2 blo sc in next st, blo sc 20, 2 blo sc in next st, blo sc 20, 2 blo sc in next st, blo sc 10, join and turn. | 88 sts
Rnd 42: Ch 1, *2 blo sc in next st, blo sc in the next 21 sts; repeat from * around, join and turn. | 92 sts
Rnds 43 to 44: Repeat Rnds 3 to 4. | 92 sts
Rnd 45: Ch 1, blo sc 11, 2 blo sc in next st, blo sc 22, 2 blo sc in next st, blo sc 22, 2 blo sc in next st, blo sc 22, 2 blo sc in next st, blo sc 11, join and turn. | 96 sts
Rnd 46: Ch 1, blo sc in each st around, join and turn. | 96 sts
Rnds 47 to 48: Repeat Rnds 3 to 4. | 96 sts
Rnds 49 to 50: Ch 1, blo sc in each st around, join and turn. | 96 sts
Rnds 51 to 52: Repeat Rnds 3 to 4. | 96 sts
The cone should measure approx. 21.25″ around and 15.5″ tall.
Brim
Stay in the same 4-round repeat, continuing the round numbering. The brim measures approx. 6″ out from the hat. Stop at the end of any complete 4-round repeat for a shallower brim.
Rnd 53: Ch 1, *2 blo sc in next st, blo sc in the next 7 sts; repeat from * around, join and turn. | 108 sts
Rnd 54: Ch 1, *2 blo sc in next st, blo sc in the next 5 sts; repeat from * around, join and turn. | 126 sts
Rnds 55 to 56: Repeat Rnds 3 to 4. | 126 sts
Rnd 57: Ch 1, blo sc in the first 3 sts, *2 blo sc in next st, blo sc in the next 6 sts; repeat from * to the last 4 sts, 2 blo sc in next st, blo sc in the last 3 sts, join and turn. | 144 sts
Rnd 58: Ch 1, *2 blo sc in next st, blo sc in the next 7 sts; repeat from * around, join and turn. | 162 sts
Rnds 59 to 60: Repeat Rnds 3 to 4. | 162 sts
Rnd 61: Ch 1, blo sc in the first 4 sts, *2 blo sc in next st, blo sc in the next 8 sts; repeat from * to the last 5 sts, 2 blo sc in next st, blo sc in the last 4 sts, join and turn. | 180 sts
Rnd 62: Ch 1, *2 blo sc in next st, blo sc in the next 9 sts; repeat from * around, join and turn. | 198 sts
Rnds 63 to 64: Repeat Rnds 3 to 4. | 198 sts
Rnd 65: Ch 1, blo sc in the first 5 sts, *2 blo sc in next st, blo sc in the next 10 sts; repeat from * to the last 6 sts, 2 blo sc in next st, blo sc in the last 5 sts, join and turn. | 216 sts
Rnd 66: Ch 1, *2 blo sc in next st, blo sc in the next 11 sts; repeat from * around, join and turn. | 234 sts
Rnds 67 to 68: Repeat Rnds 3 to 4. | 234 sts
Rnd 69: Ch 1, blo sc in the first 6 sts, *2 blo sc in next st, blo sc in the next 12 sts; repeat from * to the last 7 sts, 2 blo sc in next st, blo sc in the last 6 sts, join and turn. | 252 sts
Rnd 70: Ch 1, *2 blo sc in next st, blo sc in the next 13 sts; repeat from * around, join and turn. | 270 sts
Rnds 71 to 72: Repeat Rnds 3 to 4. | 270 sts
Go to Brim Support.
Adult Large Hat
Increasing
Work Rnds 1 to 24 of the Hat Body, then:
Rnd 25: Ch 1, blo sc 6, 2 blo sc in next st, blo sc 12, 2 blo sc in next st, blo sc 12, 2 blo sc in next st, blo sc 12, 2 blo sc in next st, blo sc 6, join and turn. | 56 sts
Rnd 26: Ch 1, *2 blo sc in next st, blo sc in the next 13 sts; repeat from * around, join and turn. | 60 sts
Rnds 27 to 28: Repeat Rnds 3 to 4. | 60 sts
Rnd 29: Ch 1, blo sc 7, 2 blo sc in next st, blo sc 14, 2 blo sc in next st, blo sc 14, 2 blo sc in next st, blo sc 14, 2 blo sc in next st, blo sc 7, join and turn. | 64 sts
Rnd 30: Ch 1, *2 blo sc in next st, blo sc in the next 15 sts; repeat from * around, join and turn. | 68 sts
Rnds 31 to 32: Repeat Rnds 3 to 4. | 68 sts
Rnd 33: Ch 1, blo sc 8, 2 blo sc in next st, blo sc 16, 2 blo sc in next st, blo sc 16, 2 blo sc in next st, blo sc 16, 2 blo sc in next st, blo sc 8, join and turn. | 72 sts
Rnd 34: Ch 1, *2 blo sc in next st, blo sc in the next 17 sts; repeat from * around, join and turn. | 76 sts
Rnds 35 to 36: Repeat Rnds 3 to 4. | 76 sts
Rnd 37: Ch 1, blo sc 9, 2 blo sc in next st, blo sc 18, 2 blo sc in next st, blo sc 18, 2 blo sc in next st, blo sc 18, 2 blo sc in next st, blo sc 9, join and turn. | 80 sts
Rnd 38: Ch 1, *2 blo sc in next st, blo sc in the next 19 sts; repeat from * around, join and turn. | 84 sts
Rnds 39 to 40: Repeat Rnds 3 to 4. | 84 sts
Rnd 41: Ch 1, blo sc 10, 2 blo sc in next st, blo sc 20, 2 blo sc in next st, blo sc 20, 2 blo sc in next st, blo sc 20, 2 blo sc in next st, blo sc 10, join and turn. | 88 sts
Rnd 42: Ch 1, *2 blo sc in next st, blo sc in the next 21 sts; repeat from * around, join and turn. | 92 sts
Rnds 43 to 44: Repeat Rnds 3 to 4. | 92 sts
Rnd 45: Ch 1, blo sc 11, 2 blo sc in next st, blo sc 22, 2 blo sc in next st, blo sc 22, 2 blo sc in next st, blo sc 22, 2 blo sc in next st, blo sc 11, join and turn. | 96 sts
Rnd 46: Ch 1, *2 blo sc in next st, blo sc in the next 23 sts; repeat from * around, join and turn. | 100 sts
Rnds 47 to 48: Repeat Rnds 3 to 4. | 100 sts
Rnd 49: Ch 1, *2 blo sc in next st, blo sc in the next 49 sts; repeat from * around, join and turn. | 102 sts
Rnd 50: Ch 1, blo sc in each st around, join and turn. | 102 sts
Rnds 51 to 52: Repeat Rnds 3 to 4. | 102 sts
Rnds 53 to 54: Ch 1, blo sc in each st around, join and turn. | 102 sts
Rnds 55 to 56: Repeat Rnds 3 to 4. | 102 sts
The cone should measure approx. 22.75″ around and 16.75″ tall.
Brim
Stay in the same 4-round repeat, continuing the round numbering. The brim measures approx. 6″ out from the hat. Stop at the end of any complete 4-round repeat for a shallower brim.
Rnd 57: Ch 1, blo sc in the first 8 sts, *2 blo sc in next st, blo sc in the next 16 sts; repeat from * to the last 9 sts, 2 blo sc in next st, blo sc in the last 8 sts, join and turn. | 108 sts
Rnd 58: Ch 1, *2 blo sc in next st, blo sc in the next 5 sts; repeat from * around, join and turn. | 126 sts
Rnds 59 to 60: Repeat Rnds 3 to 4. | 126 sts
Rnd 61: Ch 1, blo sc in the first 3 sts, *2 blo sc in next st, blo sc in the next 6 sts; repeat from * to the last 4 sts, 2 blo sc in next st, blo sc in the last 3 sts, join and turn. | 144 sts
Rnd 62: Ch 1, *2 blo sc in next st, blo sc in the next 7 sts; repeat from * around, join and turn. | 162 sts
Rnds 63 to 64: Repeat Rnds 3 to 4. | 162 sts
Rnd 65: Ch 1, blo sc in the first 4 sts, *2 blo sc in next st, blo sc in the next 8 sts; repeat from * to the last 5 sts, 2 blo sc in next st, blo sc in the last 4 sts, join and turn. | 180 sts
Rnd 66: Ch 1, *2 blo sc in next st, blo sc in the next 9 sts; repeat from * around, join and turn. | 198 sts
Rnds 67 to 68: Repeat Rnds 3 to 4. | 198 sts
Rnd 69: Ch 1, blo sc in the first 5 sts, *2 blo sc in next st, blo sc in the next 10 sts; repeat from * to the last 6 sts, 2 blo sc in next st, blo sc in the last 5 sts, join and turn. | 216 sts
Rnd 70: Ch 1, *2 blo sc in next st, blo sc in the next 11 sts; repeat from * around, join and turn. | 234 sts
Rnds 71 to 72: Repeat Rnds 3 to 4. | 234 sts
Rnd 73: Ch 1, blo sc in the first 6 sts, *2 blo sc in next st, blo sc in the next 12 sts; repeat from * to the last 7 sts, 2 blo sc in next st, blo sc in the last 6 sts, join and turn. | 252 sts
Rnd 74: Ch 1, *2 blo sc in next st, blo sc in the next 13 sts; repeat from * around, join and turn. | 270 sts
Rnds 75 to 76: Repeat Rnds 3 to 4. | 270 sts
Go to Brim Support.
Brim Support (All Sizes)
Don’t cut the memory wire or tubing yet. Leave it on the roll so you have plenty to work around.
Rnd 41 (45, 53, 57, 61) (69, 73, 77) (RS): Hold the wire against the top of the last round. Ch 1, clean sc in each st around, enclosing the wire as you go. Stop a few sts before the end. See the video.
Trim the wire to fit and join the ends into a smooth ring. For the nylon, use brass crimp tubes. For the tubing, push a short piece of 3/16″ wooden dowel halfway into one cut end, then press the other end on over it. The dowel sits inside and holds the join closed.
Clean sc over the join to finish the round. Invisible join or sl st to join. Fasten off. | 126 (126, 180, 180, 216) (270, 270, 270) sts
If you stopped your brim early, this is just your next round, and your count stays the same as your last round.
Finishing
Weave in all ends. Shape the point, and bend the brim however you like. It will hold.
Style Tip
The samples are styled with a moss and mushroom band tied on with jute twine. It takes a few minutes, it comes off before washing, and the tips are below.
How to Decorate Your Witch Hat
The samples are styled with a moss and mushroom band, and it’s easier than it looks.
- Tie on the twine. Wrap jute twine loosely around the cone’s base and finish with a bow. It should sit on the hat, not cinch it.
- Tuck in the moss. Work preserved moss up under the twine a little at a time, all the way around, until the twine mostly disappears.
- Add mushrooms. Pin them on, or wrap the wire stems around the twine. Use mini mushrooms on Newborn through Child to keep them in scale, and larger ones on Teen and adult sizes.
- Build it up unevenly. A heavier cluster on one side with a few stragglers trailing off looks more grown than arranged.
Want to keep it simple? A contrast band at the base of the cone, a crocheted flower with leaves, or a charm and chain all look great too. My Wheat Stitch Mushrooms make a sweet handmade topper if you’d rather crochet your own.
Washing and Caring for Your Crochet Witch Hat
- Machine wash cold on a gentle cycle, or hand wash.
- Lay flat to dry. Don’t put it in the dryer. Heat permanently relaxes acrylic, and the cone will lose its point.
- Reshape while damp. Smooth the brim flat on a towel, stand the cone upright, and leave it alone until it’s dry.
- Don’t iron or steam it. Heat flattens the puff stitches for good and can soften the brim support, causing it to lose its shape.
- Store it upright or on a shelf, not stacked under other things. A crushed cone will need to be rewet and reshaped.
If you decorated it, take the mushrooms and moss off before washing.
Crochet Witch Hat FAQs
How much yarn do you need to crochet a witch hat?
It depends on the size. The Newborn takes about 260 yards, the Child about 500 yards, and the Adult Large about 945 yards, all with a 10% buffer built in. In Herrschners Worsted 8, that’s one ball for Newborn through Toddler and two balls for Child through Adult Large. The brim uses a big share of the yarn, so if you’re short, you can stop the brim early at the end of any complete 4-round repeat.
What size crochet witch hat should I make?
Measure around the head where the hat will sit and pick the size whose “to fit head” range includes that number. The opening is about 2″ smaller than the head on purpose, so the hat stays put without a tight band. If someone is between sizes, go up for a looser, slouchier fit or down for a snugger one.
How do you stiffen a crochet witch hat brim?
This pattern crochets a support right into the last round. Newborn through Child use nylon memory wire, and Teen and adult sizes use 1/4″ drip tubing joined with a small piece of dowel. Both hold the brim in whatever shape you bend them, and both are washable, which is why I like them better than fabric stiffener for a hat someone will actually wear.
How do you keep the point of a crochet witch hat standing up?
Tension is the big one. The pattern uses an F or G hook, which is smaller than the ball band calls for, so the fabric is firm enough to hold the cone. Acrylic yarn helps too. Avoid heat, since the dryer, an iron, or steam will relax the stitches and the point will droop. If you’d like the tip to lean, shape it while the hat is damp and let it dry that way.
Can you wash a crochet witch hat with wire in the brim?
Yes. Both the nylon memory wire and the drip tubing are washable and won’t rust or stain. Machine wash cold on gentle or hand wash, then lay the hat flat to dry with the cone standing up. Skip the dryer completely. Remove any moss or mushrooms before washing.
Is this crochet witch hat pattern good for beginners?
It’s rated Intermediate. Nothing in it is hard on its own, but you’ll be counting stitches every round, working in the back loop, and crocheting over the brim support at the end. A confident beginner can do it with the video open. I’d suggest practicing with my Wheat Stitch tutorial first and starting with a smaller size, since it has fewer rounds.
How long does it take to crochet a witch hat?
The Newborn takes about 2 hours, the Child size about 5 hours, and the Adult Large about 8 hours. The brim rounds get long on the bigger sizes, so that’s where most of your time goes. Your first few repeats will be slower while you get the Wheat Stitch rhythm down.
I hope this hat makes it into your Halloween plans, whether it’s for a costume, a fall photo shoot, or a whole family of little witches. If you make one, I’d love to see how you styled it.
More Crochet Patterns You’ll Love
If you’re in a spooky season mood, here are a few more projects to make next:
🥂 Cheers, and happy crocheting!
Hook down? Not so fast…
I’d Love to See Yours!
You made something beautiful. Here’s how to keep it, show it off, and inspire the next maker.

What should you make next?
Keep the hook movingReaders Are Loving
 Reed Crossover Stitch
 The Odyssey Baby Gift
 Wheat Stitch Reindeer
 Willow Mesh Bag