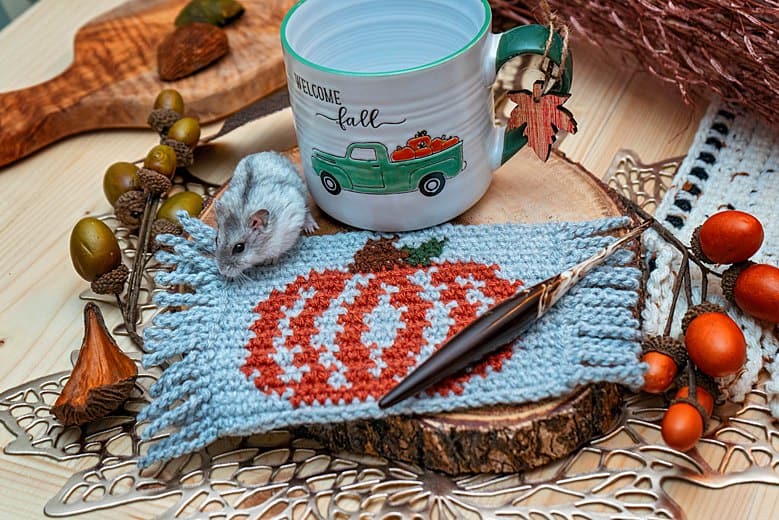
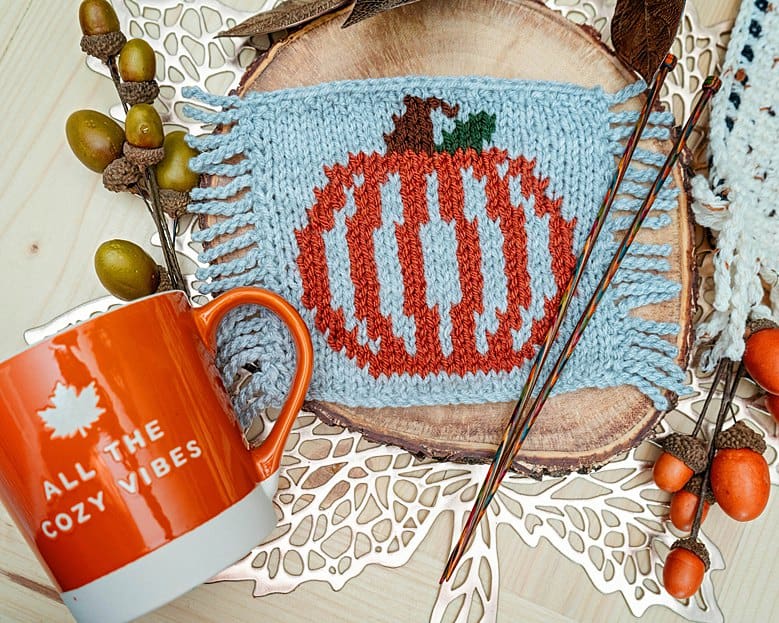
So while yes, the Pumpkin Mug Rug Patterns are super cute for your hot or cold drink, I think I might give one to my hamster, Marlo. He likes to run across them, and it could be an area rug for his home. I have to admit; this little critter has sure made his way into my heart. And I feel like he is just as much into the pumpkin spice and fall home decor just as much as I am.
Want an Ad-Free PDF Download of this pattern?
This pattern is available in my shops:
When we first decided to get him as a back to school pet for the kids, I was so happy hamsters didn’t have a long lifespan. Short commitment seemed reasonable. But dang it, now I’m mad they have such a short lifespan! He has become my cute little crochet and knit buddy.
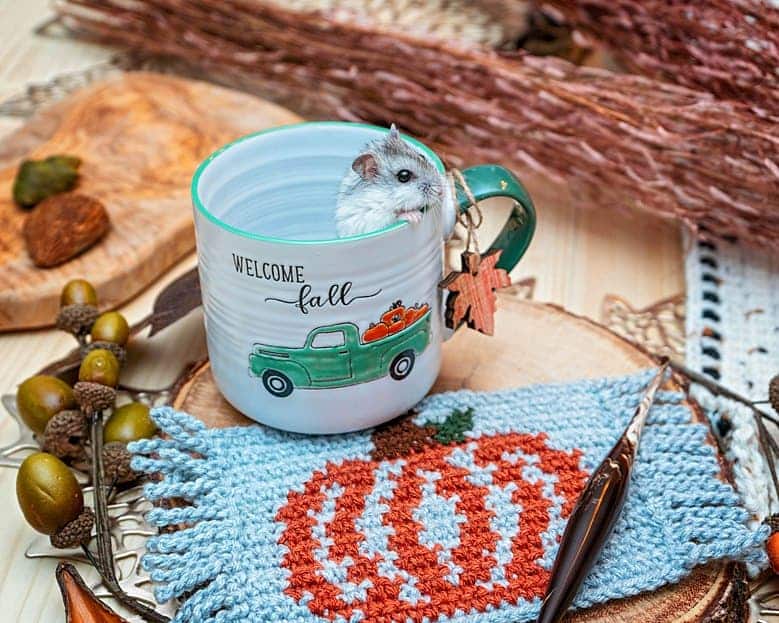
How can I not just fall in love with him? And this is as big as he gets. When we took him home from the pet store we were told he is full grown. I’ve had hamsters before, but not one as nice as Marlo. He doesn’t yet sit next to me while I craft, but we are working on it. And he seems to love the fall home decor just as much as I do.
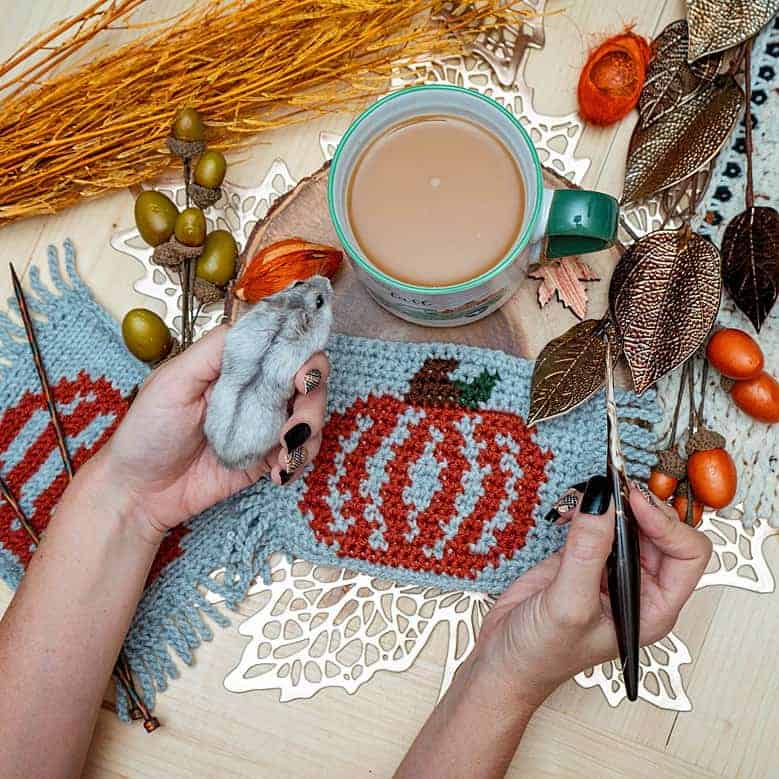
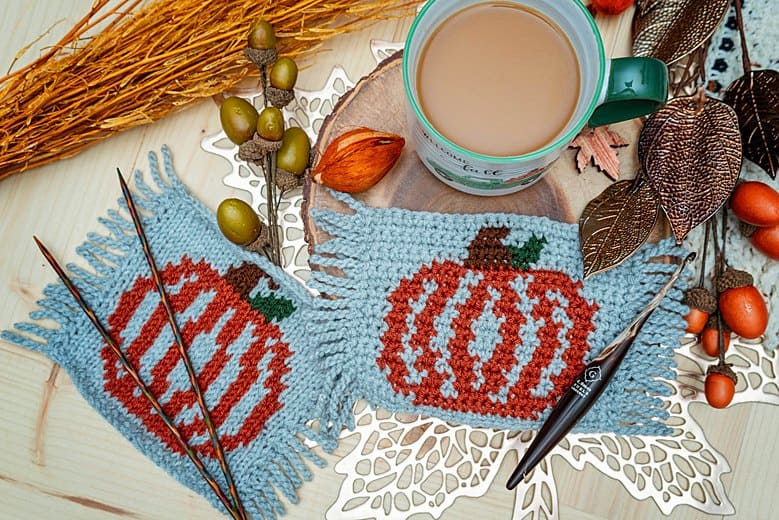
Pretty soon I’m going to introduce him to pumpkin season. I did an internet search and turns out he can have small amounts of pumpkin flesh. And I feel like I should make some cute crochet and knit items just for him. This is going to happen. But for today, let’s get back to the DIY crochet & knit pumpkin coasters.

Disclosure: To cover the cost of publishing my blog and bringing you awesome content, this page may contain affiliate links. Should you choose to make a purchase, at no additional cost to you, I may earn a small percentage of the sale.
Supplies for either crochet or knit:
Notions:
Yarn Needle
Scissors
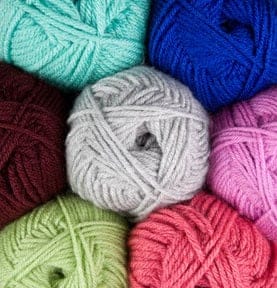
Yarn:
Brava Worsted Yarn
-Persimmon
-Dove Heather
-Sienna
-Dublin
Check out the mini packs HERE
Yardage:
Approx. 30 Yards [28 meters]
Skill Level:
Advanced Beginner
Crochet Details:

Crochet Hook:
4.0 mm (G), I highly recommend


Abbreviations/Stitches:
ch- Chain
RS- Right Side
sc- Single Crochet
sl st- Slip Stitch
sts- Stitches
WS- Wrong Side
Measurements/Sizes:
6 inches (15 cm) wide
5 inches (13 cm) tall
Without fringe
Gauge:
18 sc sts and 16 rows =
4” [10 cm] with G-hook
Knit Details:
Knitting Needles:
4.0 mm (6), Knit Picks Needles
Abbreviations/Stitches:
k- knit
p- purl
RS- Right Side
WS- Wrong Side
Measurements/Sizes:
6 inches (15 cm) wide
5.5 inches (14 cm) tall
Without fringe
Gauge:
• 19 sts and 22 rows = 4” [10 cm]
Many of the supplies can be found at the affiliate links below:

Notes:
- Please note, matching gauge both horizontal and vertical can be difficult. Extra rows can be added at the top if needed. So it is more important to match the stitch gauge versus the row gauge.
- This pattern is worked from the bottom up in rows.
- After the end of each row turn and ch 1. The ch 1 does not count as a stitch.
- Since there are a wrong side and a right side to the mug rugs, I used a combination of intarsia and carrying yarn across the back for the colorwork. Experiment and see what works best for you.
- Please visit https://brianakdesigns.com/ways-to-colorwork-in-crochet/ for a full tutorial on colorwork. As well as a FREE Sheep Yarn Bobbin Printable to assist you with this project. No one loves tangles.


Crochet Pumpkin Mug Rug Instructions:
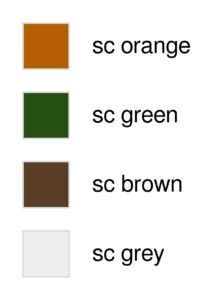
→ Row 1 [WS]: (sc grey) x 27
← Row 2 [RS]: (sc grey) x 7, (sc orange) x 13, (sc grey) x 7
→ Row 3 [WS]: (sc grey) x 5, (sc orange) x 5, (sc grey) x 2, (sc orange) x 3, (sc grey) x 2, (sc orange) x 5, (sc grey) x 5
← Row 4 [RS]: (sc grey) x 4, (sc orange) x 2, (sc grey) x 2, (sc orange) x 2, sc grey, (sc orange) x 2, sc grey, (sc orange) x 2, sc grey, (sc orange) x 2, (sc grey) x 2, (sc orange) x 2, (sc grey) x 4
→ Row 5 [WS]: (sc grey) x 3, (sc orange) x 3, sc grey, (sc orange) x 2, (sc grey) x 2, (sc orange) x 2, sc grey, (sc orange) x 2, (sc grey) x 2, (sc orange) x 2, sc grey, (sc orange) x 3, (sc grey) x 3
← Row 6 [RS]: (sc grey) x 3, (sc orange) x 2, (sc grey) x 2, (sc orange) x 2, sc grey, (sc orange) x 3, sc grey, (sc orange) x 3, sc grey, (sc orange) x 2, (sc grey) x 2, (sc orange) x 2, (sc grey) x 3
→ Row 7 [WS]: (sc grey) x 3, (sc orange) x 2, sc grey, (sc orange) x 2, (sc grey) x 2, (sc orange) x 2, (sc grey) x 3, (sc orange) x 2, (sc grey) x 2, (sc orange) x 2, sc grey, (sc orange) x 2, (sc grey) x 3
← Row 8 [RS]: (sc grey) x 3, (sc orange) x 2, sc grey, (sc orange) x 2, (sc grey) x 2, (sc orange) x 2, (sc grey) x 3, (sc orange) x 2, (sc grey) x 2, (sc orange) x 2, sc grey, (sc orange) x 2, (sc grey) x 3
→ Row 9 [WS]: (sc grey) x 3, (sc orange) x 2, sc grey, (sc orange) x 2, (sc grey) x 2, (sc orange) x 2, (sc grey) x 3, (sc orange) x 2, (sc grey) x 2, (sc orange) x 2, sc grey, (sc orange) x 2, (sc grey) x 3
← Row 10 [RS]: (sc grey) x 3, (sc orange) x 2, sc grey, (sc orange) x 2, (sc grey) x 2, (sc orange) x 2, (sc grey) x 3, (sc orange) x 2, (sc grey) x 2, (sc orange) x 2, sc grey, (sc orange) x 2, (sc grey) x 3
Halfway there!

→ Row 11 [WS]: (sc grey) x 3, (sc orange) x 2, (sc grey) x 2, (sc orange) x 2, sc grey, (sc orange) x 3, sc grey, (sc orange) x 3, sc grey, (sc orange) x 2, (sc grey) x 2, (sc orange) x 2, (sc grey) x 3
← Row 12 [RS]: (sc grey) x 3, (sc orange) x 3, sc grey, (sc orange) x 2, (sc grey) x 2, (sc orange) x 2, sc grey, (sc orange) x 2, (sc grey) x 2, (sc orange) x 2, sc grey, (sc orange) x 3, (sc grey) x 3
→ Row 13 [WS]: (sc grey) x 4, (sc orange) x 2, (sc grey) x 2, (sc orange) x 2, sc grey, (sc orange) x 2, sc grey, (sc orange) x 2, sc grey, (sc orange) x 2, (sc grey) x 2, (sc orange) x 2, (sc grey) x 4
← Row 14 [RS]: (sc grey) x 5, (sc orange) x 5, (sc grey) x 2, (sc orange) x 3, (sc grey) x 2, (sc orange) x 5, (sc grey) x 5
→ Row 15 [WS]: (sc grey) x 7, (sc orange) x 13, (sc grey) x 7
← Row 16 [RS]: (sc grey) x 10, (sc green) x 2, (sc brown) x 5, (sc grey) x 10
→ Row 17 [WS]: (sc grey) x 11, (sc brown) x 4, (sc green) x 3, (sc grey) x 9
← Row 18 [RS]: (sc grey) x 9, (sc green) x 2, (sc grey) x 2, (sc brown) x 3, (sc grey) x 11
→ Row 19 [WS]: (sc grey) x 12, (sc brown) x 3, (sc grey) x 12
← Row 20 [RS]: (sc grey) x 27
-Fasten off and weave in ends.
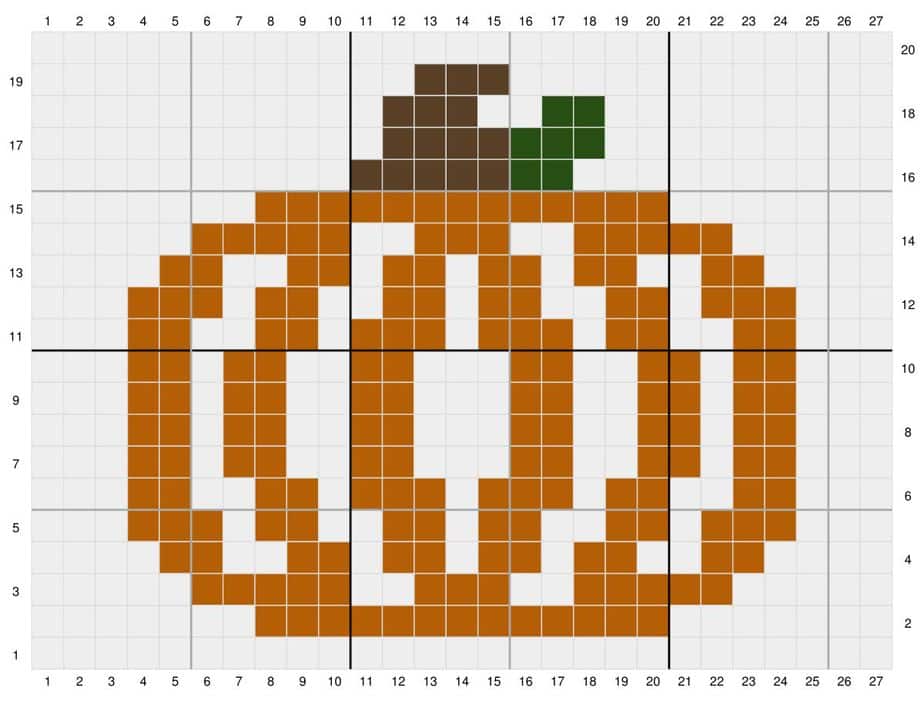
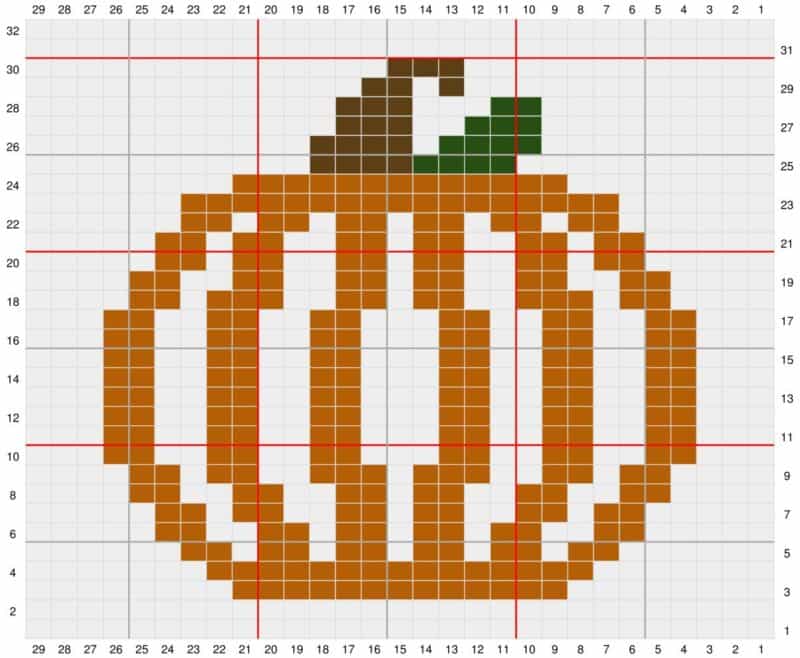
Crochet Pumpkin Mug Rug Chart:
Twisted Fringe:
To create a twisted fringe, visit this blog post or view the video at the end of the pattern: https://brianakdesigns.com/how-to-make-twisted-fringe/
Knit Pumpkin Mug Rug Instructions:
To Begin: Cast on 29 stitches with the long tail or cable cast on.
← Row 1 [RS]: (k grey) x 29
→ Row 2 [WS]: (p grey) x 29
← Row 3 [RS]: (k grey) x 8, (k orange) x 13, (k grey) x 8
→ Row 4 [WS]: (p grey) x 7, (p orange) x 15, (p grey) x 7
← Row 5 [RS]: (k grey) x 6, (k orange) x 2, k grey, (k orange) x 2, k grey, (k orange) x 2, k grey, (k orange) x 2, k grey, (k orange) x 2, k grey, (k orange) x 2, (k grey) x 6
→ Row 6 [WS]: (p grey) x 5, (p orange) x 2, (p grey) x 2, (p orange) x 2, p grey, (p orange) x 2, p grey, (p orange) x 2, p grey, (p orange) x 2, (p grey) x 2, (p orange) x 2, (p grey) x 5
← Row 7 [RS]: (k grey) x 5, (k orange) x 2, k grey, (k orange) x 2, (k grey) x 2, (k orange) x 2, k grey, (k orange) x 2, (k grey) x 2, (k orange) x 2, k grey, (k orange) x 2, (k grey) x 5
→ Row 8 [WS]: (p grey) x 4, (p orange) x 2, (p grey) x 2, (p orange) x 2, (p grey) x 2, (p orange) x 2, p grey, (p orange) x 2, (p grey) x 2, (p orange) x 2, (p grey) x 2, (p orange) x 2, (p grey) x 4
← Row 9 [RS]: (k grey) x 4, (k orange) x 2, k grey, (k orange) x 2, (k grey) x 2, (k orange) x 3, k grey, (k orange) x 3, (k grey) x 2, (k orange) x 2, k grey, (k orange) x 2, (k grey) x 4
→ Row 10 [WS]: (p grey) x 3, (p orange) x 2, (p grey) x 2, (p orange) x 2, (p grey) x 2, (p orange) x 2, (p grey) x 3, (p orange) x 2, (p grey) x 2, (p orange) x 2, (p grey) x 2, (p orange) x 2, (p grey) x 3
← Row 11 [RS]: (k grey) x 3, (k orange) x 2, (k grey) x 2, (k orange) x 2, (k grey) x 2, (k orange) x 2, (k grey) x 3, (k orange) x 2, (k grey) x 2, (k orange) x 2, (k grey) x 2, (k orange) x 2, (k grey) x 3
→ Row 12 [WS]: (p grey) x 3, (p orange) x 2, (p grey) x 2, (p orange) x 2, (p grey) x 2, (p orange) x 2, (p grey)
x 3, (p orange) x 2, (p grey) x 2, (p orange) x 2, (p grey) x 2, (p orange) x 2, (p grey) x 3
← Row 13 [RS]: (k grey) x 3, (k orange) x 2, (k grey) x 2, (k orange) x 2, (k grey) x 2, (k orange) x 2, (k grey) x 3, (k orange) x 2, (k grey) x 2, (k orange) x 2, (k grey) x 2, (k orange) x 2, (k grey) x 3
→ Row 14 [WS]: (p grey) x 3, (p orange) x 2, (p grey) x 2, (p orange) x 2, (p grey) x 2, (p orange) x 2, (p grey) x 3, (p orange) x 2, (p grey) x 2, (p orange) x 2, (p grey) x 2, (p orange) x 2, (p grey) x 3
← Row 15 [RS]: (k grey) x 3, (k orange) x 2, (k grey) x 2, (k orange) x 2, (k grey) x 2, (k orange) x 2, (k grey) x 3, (k orange) x 2, (k grey) x 2, (k orange) x 2, (k grey) x 2, (k orange) x 2, (k grey) x 3
→ Row 16 [WS]: (p grey) x 3, (p orange) x 2, (p grey) x 2, (p orange) x 2, (p grey) x 2, (p orange) x 2, (p grey) x 3, (p orange) x 2, (p grey) x 2, (p orange) x 2, (p grey) x 2, (p orange) x 2, (p grey) x 3
Halfway there!
← Row 17 [RS]: (k grey) x 3, (k orange) x 2, (k grey) x 2, (k orange) x 2, (k grey) x 2, (k orange) x 2, (k grey) x 3, (k orange) x 2, (k grey) x 2, (k orange) x 2, (k grey) x 2, (k orange) x 2, (k grey) x 3
→ Row 18 [WS]: (p grey) x 4, (p orange) x 2, p grey, (p orange) x 3, (p grey) x 2, (p orange) x 2, p grey, (p orange) x 2, (p grey) x 2, (p orange) x 3, p grey, (p orange) x 2, (p grey) x 4
← Row 19 [RS]: (k grey) x 4, (k orange) x 2, (k grey) x 2, (k orange) x 2, (k grey) x 2, (k orange) x 2, k grey, (k orange) x 2, (k grey) x 2, (k orange) x 2, (k grey) x 2, (k orange) x 2, (k grey) x 4
→ Row 20 [WS]: (p grey) x 5, (p orange) x 2, p grey, (p orange) x 2, (p grey) x 2, (p orange) x 2, p grey, (p orange) x 2, (p grey) x 2, (p orange) x 2, p grey, (p orange) x 2, (p grey) x 5
← Row 21 [RS]: (k grey) x 5, (k orange) x 2, k grey, (k orange) x 2, (k grey) x 2, (k orange) x 2, k grey, (k orange) x 2, (k grey) x 2, (k orange) x 2, k grey, (k orange) x 2, (k grey) x 5
→ Row 22 [WS]: (p grey) x 6, (p orange) x 2, p grey, (p orange) x 2, p grey, (p orange) x 2, p grey, (p orange) x 2, p grey, (p orange) x 2, p grey, (p orange) x 2, (p grey) x 6
← Row 23 [RS]: (k grey) x 6, (k orange) x 17, (k grey) x 6
→ Row 24 [WS]: (p grey) x 8, (p orange) x 13, (p grey) x 8
← Row 25 [RS]: (k grey) x 10, (k green) x 4, (k brown) x 4, (k grey) x 11
→ Row 26 [WS]: (p grey) x 11, (p brown) x 4, p grey, (p green) x 4, (p grey) x 9
← Row 27 [RS]: (k grey) x 9, (k green) x 3, (k grey) x 2, (k brown) x 3, (k grey) x 12
→ Row 28 [WS]: (p grey) x 12, (p brown) x 3, (p grey) x 3, (p green) x 2, (p grey) x 9
← Row 29 [RS]: (k grey) x 12, k brown, k grey, (k brown) x 2, (k grey) x 13
← Row 31 [RS]: (k grey) x 29
→ Row 32 [WS]: (p grey) x 29
-Bind off with grey off and weave in ends.
Twisted Fringe:
To create a twisted fringe, visit this blog post or view the video below: https://brianakdesigns.com/how-to-make-twisted-fringe/
Knit Pumpkin Mug Rug Chart:

Twisted Fringe Video:

Crochet, Knit, & Tag
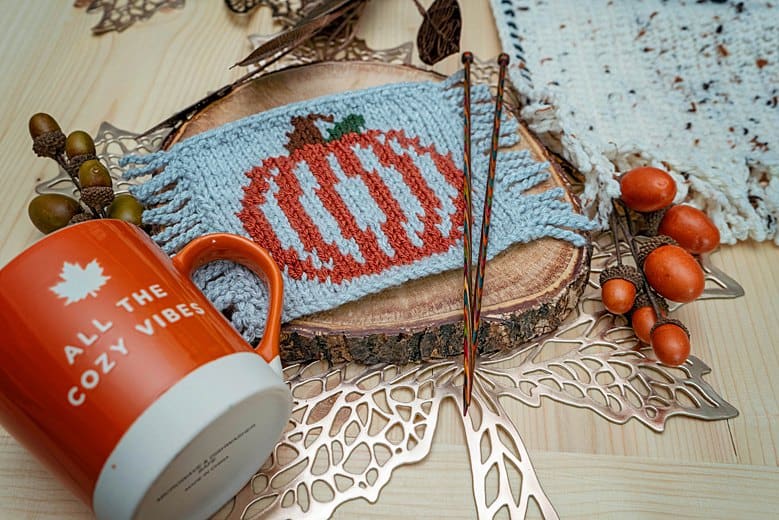
I hope you have enjoyed making the Pumpkin Knit & Crochet Mug Rug Pattern!
If you have made this, please share it on social media. Above all I love to see the projects created with my patterns and also share your beautiful work.
Please use #brianakdesigns or @brianakdesigns
It is much appreciated and adored!