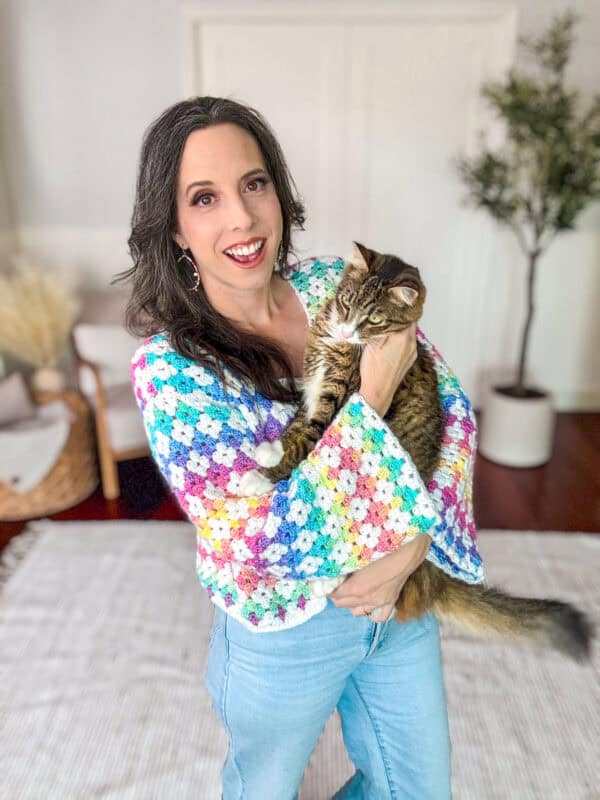
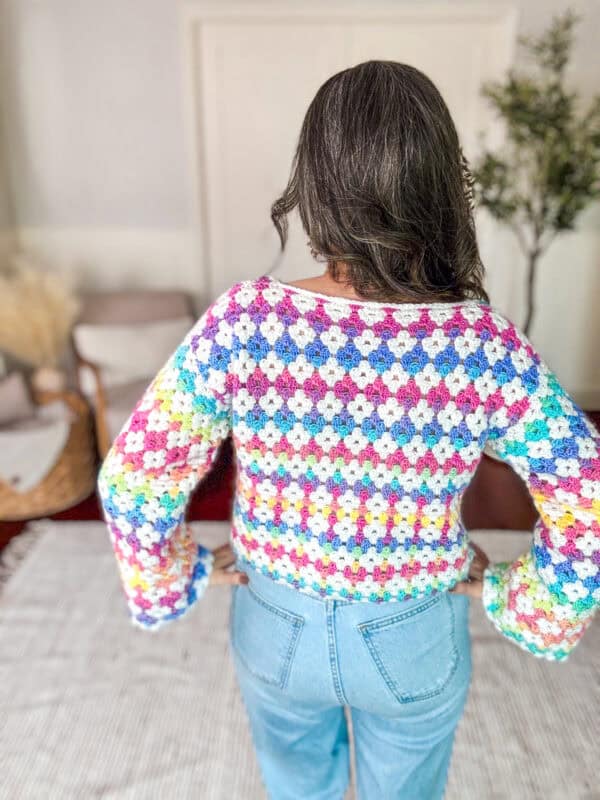
Rainbow Hues Granny Stitch Cardigan Pattern


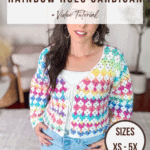

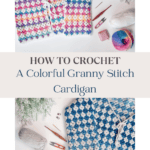
The Rainbow Hues Crochet Cardigan is a burst of happiness in yarn form! Perfectly cozy and effortlessly stylish, this size-inclusive and easy-to-make cardigan wraps you in a joyful spectrum of warmth, making every day feel a little brighter and a lot more fun. It’s a true celebration of color and comfort worked in rows from the bottom up with a granny stitch colorwork pattern repeat. Also check out the matching Granny Stitch Crochet Clutch Pattern.

Disclosure: This post contains affiliate links. Please read my disclosure for more info.
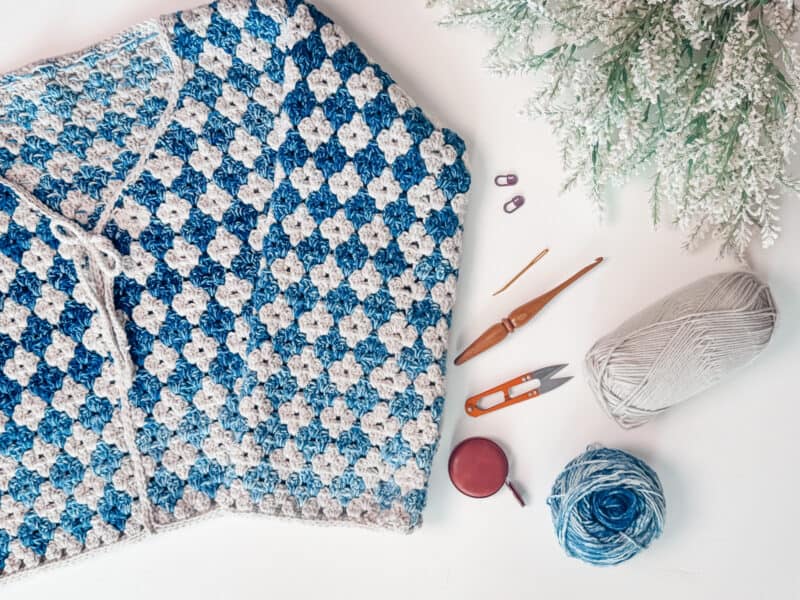
Despite its dazzling array of colors, this cardigan is crafted using just two colorways of yarn, making it a fun and affordable project that looks far more complex than it is. Complete your ensemble with a coordinating Seven Hexi Granny Square Bag or Herringbone Clutch!
Crochet Supplies
Yarn
Lion Brand Color Theory
100% Acrylic, 246 yds/100g;
Colorway: Moonbeam
AND
Lion Brand Mandala Ombre
100% Acrylic, 344 yds/ 150g;
Colorway: Harmony
ALSO SHOWN IN
Mary Maxim Mellowspun DK
100% Acrylic, 284 yds/100g;
Colorway: White
AND
Mary Maxim Prism DK
100% Acrylic, 290yds/100g;
Colorway: Rainbow
Yarn Quantities
Total Yardage:
1320 (1450, 1570, 1685, 1800) (1860, 1915, 1980, 2040)
Main Color Yardage:
715 (780, 850, 910, 975) (1005, 1035, 1070, 1100)
Yardage for Each Diamond Accent Color:
605 (670, 720, 775, 825) (855, 880, 910, 940)
Yarn Substitutions
WeCrochet Brava
100% Premium Acrylic, 218 yds/100g
Mary Maxim Starlette Worsted
100% Ultra Soft Acrylic, 180 yds/100g
Remember always to check the gauge and drape when substituting yarns.
Crochet Hook
Size US H (5.0mm) Crochet Hook or hook to obtain gauge.
Notions
Scissors
Yarn Needle
Removable Stitch Marker
Skill Level
Intermediate
What you'll love about this pattern.
🩶 Stunning Colors - This cardigan only needs TWO colors of yarn! By using color-changing yarn, you can create the color palette of your choice!
🩶 Effortless Style - The v-neck design, combined with a tie-front closure, creates a flattering and casual silhouette that’s perfect for layering over your favorite outfits.
🩶 Quick & Unique Trim - The cardigan features a unique and quick trim edging that adds a polished finish without the fuss, making it a joy to crochet from start to finish.
🩶 Versatile & Fun - Whether you’re new to crochet or an experienced maker, this pattern is designed to be both approachable and enjoyable, allowing you to create a piece that’s as fun to wear as it is to make.
If you love the granny stitch and cardigans, the Gemstone Granny Crochet Cardigan Pattern uses some colorwork pops as well, and has a hood.
Sizes
XS (S, M, L, 1X) (2X, 3X, 4X, 5X)
To fit chest:
32 (34, 38, 42, 46) (50, 54, 58, 62)
Actual measurements:
37.25 (40.5, 43.75, 50, 53) (56.5, 59.75, 66, 69.25)
This garment has an oversized relaxed fit and is meant to be worn with a 5-7 inch ease. For a more fitted look, go down a size.
Abbreviations
blo - back loop only
ch - chain
dc - double crochet
rnd - round
sc - single crochet
sl st - slip stitch
sp(s) - space(s)
st(s) - stitch(es)
Stsc - stacked single crochet
Gauge
15 sts and 9 rows = 4" x 4" worked in the granny stitch
How to Crochet A Gauge Swatch
Working a gauge swatch will let you know if you will have the correct sizing for this pattern. It will also help you practice the stitches used in this project and improve your stitch work for a flawless look.
Are you struggling to match the gauge? Check out the blog post on What is Crochet Gauge and How To Fix It
Construction
This cardigan is worked with a bottom-up construction. We will start the body working in rows with a granny stitch colorwork pattern repeat. Next, we'll divide the piece into front
panels and a back panel, then seam
the shoulders together, and add a trim
around the neckline. The sleeves will be crocheted separately from the bottom up and attached to the body. The final touch will be an
i-cord tie for the center.
Want to add more caridgans to your wardrobe? The Get Comfy Cardigan and Snugglepuff Cardi are perfect for the changing seasons!
Special Stitches
Stacked Single Crochet (Stsc): Do NOT chain, insert hook into next stitch, yo, pull up a loop, yo and pull through both loops, insert hook in the vertical bar below, yo, pull up a loop, yo and pull through both
loops on the hook.
Subscribe & Like
Pattern Notes
- A stitch marker at the beginning of the row or round is recommended.
- The instructions and stitch counts are given for the smallest size, with the larger sizes in
brackets ( ). - Before you dive into your project, take a moment to identify the stitch and row counts that
match the size you're making. By highlighting or marking them, you'll save time and effort
later on. Trust us, this small step will make a big difference in your knitting or crochet journey! - When doing colorwork, always carry your yarn on the wrong side of the work.
Video Tutorial for the Rainbow Hues Granny Stitch Cardigan
Relax & Crochet
Upgrade to the Printable PDF
Beautifully formatted to print and relax while crocheting. The paid pattern includes:
The Ad-Free PDF can be purchased on Etsy or Ravelry.
Harvest Hues Crochet Collection
Click the box below to unlock this exclusive subscriber content for free. Add your email and create a password. If you are having trouble, reset your password or login to the Grow Portal.
I'm thrilled to share this amazing crochet pattern with you! Please don't copy, paste, or distribute this pattern. Prefer an ad-free experience? Purchase a digital PDF file for a small fee from one of my online stores. I appreciate your support and readership. You are why I can keep doing what I love and sharing it with others. Thank you from the bottom of my heart.
Written Crochet Pattern Instructions
Repeat Rows 2-5.
Customization Tip:
You can adjust the length as needed. I've provided the row count for the sample, but feel free to add
or remove rows. Measure from under your arm down your side to find the best fit.
Join The Kindest Community
Join our vibrant community of crafters on Facebook today. Whether you enjoy crafting with others or simply have burning questions, we've got you covered - join us now!
First Front Panel
Row 1:
Stsc in first, skip next space and 3 dc in next 9 (10, 11, 13, 14) (15, 16, 18, 19) spaces, dc in next space, turn. | 32 (35, 38, 44, 47) (50, 53, 59, 62) sts; 10 (11, 12, 14, 15) (16, 17, 19, 20) granny groups + 2 sts.
Row 2:
Stsc in first, 2 dc in first space, *3 dc in next space between the granny st groups; repeat until the last 4 sts of the row, skip 3 sts, dc in last, turn.
Row 3:
Stsc in first, skip the next space and *3 dc in next space between the granny st groups; repeat until the last 3 sts of the row, skip 2 sts, dc in last, turn.
Rows 4 - 12 (12, 12, 12, 14) (14, 16, 16, 16):
Repeat Rows 2-3, ending on a Row 2. | 16 (19, 22, 28, 28) (31, 31, 37, 40) sts.
Non-Decreasing Repeats:
Repeat in pattern (instructions below) for 5 (6, 7, 8, 7) (8, 7, 8, 8) more rows:
Stsc in first, 2 dc in first space, *3 dc in next space between the granny st groups; repeat until the last 3 sts of the row, skip 2 sts, dc in last, turn.
There are 17 (18, 19, 20, 21) (22, 23, 24, 24) total rows for the first panel. Fasten off.

Style
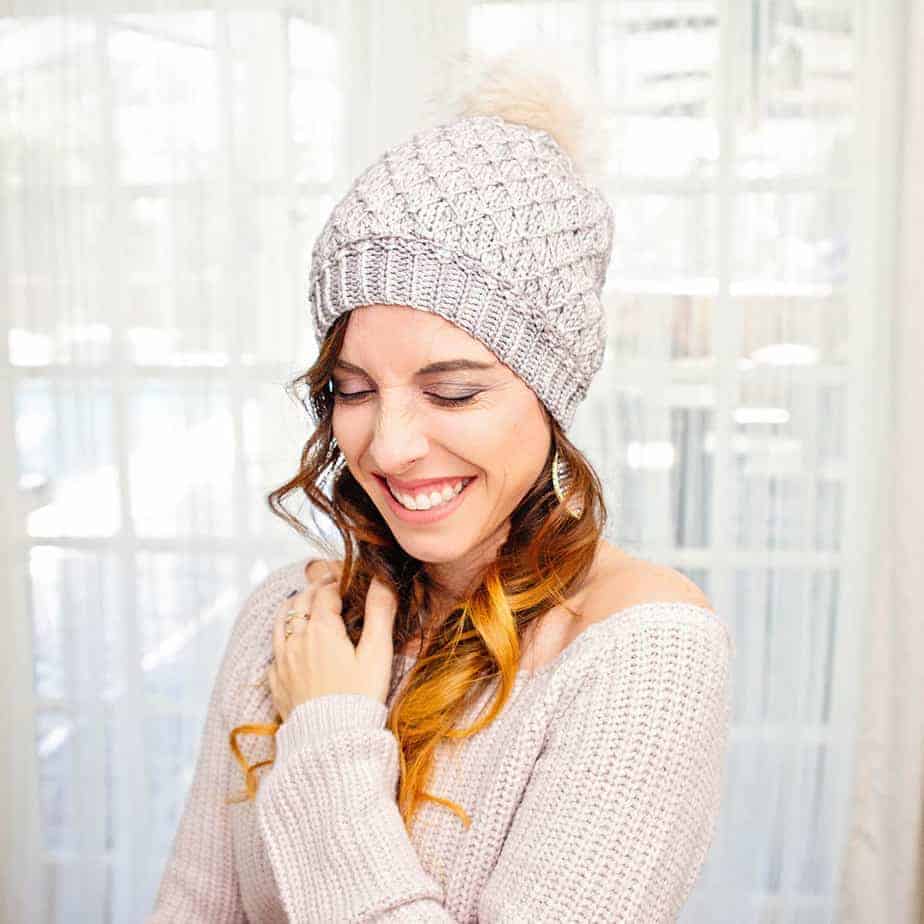
Style your Rainbow Hues Cardigan with a variety of outfits. For a casual look, pair the cardigan with a simple tank top or fitted tee. Wear high-waisted jeans or shorts and top it off with sandals. Layer over a flowy blouse with a wide-leg pant and ankle boots for a Bohemian vibe. Use the cardigan as a layering piece over a fitted turtleneck or a long-sleeve button-up shirt. Pair with skinny jeans or leggings and top off with stylish loafers. Use your leftover yarn to make a soft and squishy Cozy Beanie or some Knit-Look Mittens to make your outfit winter-ready!
Back Panel
Row 1:
Join yarn to the space next to the First Panel row. Stsc and 2 dc in the space, *3 dc in next 21 (23, 25, 29, 31) (33, 35, 39, 42) spaces, dc in next space, turn. | 67 (73, 79, 91, 97) (103, 109, 121, 127) sts; 22 (24, 26, 30, 32) (34, 36, 40, 42) granny groups + 1 sts.
Row 2:
Stsc in first, 2 dc in first space, *3 dc in next space between the granny st groups; repeat until the last 3 sts of the row, skip 2 sts, dc in last, turn.
Repeats:
Repeat Row 2 until there are 17 (18, 19, 20, 21) (22, 23, 24, 24) total rows for the back panel. Fasten off.
Customization Tips
- Want a crop top cardigan? Simply work fewer rows before splitting for the panels. Or create a long duster by crocheting more rows. Remember, both of these options will change the total yardage.
- The sleeve length can be adjusted before seaming to the cardigan. It's best to pin the sleeve in place before seaming to see if more rounds are needed or if rounds should be taken out.
Second Front Panel
Row 1:
Join yarn to the space next to the Back Panel row. Stsc and 2 dc in the space, *3 dc in next space between the granny st groups; repeat until the last 3 sts of the row, skip 2 sts, dc in last, turn. | 34 (37, 40, 46, 49) (52, 55, 61, 64) sts; 11 (12, 13, 15, 16) (17, 18, 20, 21) granny groups + 1 sts.
Row 2:
Stsc in first, skip the next space and *3 dc in next space between the granny st groups; repeat until the last 3 sts of the row, skip 2 sts, dc in last, turn.
Row 3:
Stsc in first, 2 dc in the first space, *3 dc in next space between the granny st groups; repeat until the last 4 sts of the row, skip 3 sts, dc in last, turn.
Rows 4 - 13 (13, 13, 13, 15) (15, 17, 17, 17):
Repeat Rows 2-3. | 16 (19, 22, 28, 28) (31, 31, 37, 40) sts.
Non-Decreasing Repeats:
Repeat in pattern (instructions below) for 4 (5, 6, 7, 6) (7, 6, 7, 7) more rows:
Stsc in first, 2 dc in the first space, *3 dc in next space between the granny st groups; repeat until the last 3 sts of the row, skip 2 sts, dc in last, turn.
There are 17 (18, 19, 20, 21) (22, 23, 24, 24) total rows for the first panel. Fasten off.
Seaming the Shoulders
Pin the top of the front panels evenly to the back panel. With your yarn needle, use the tail ends to seam across at each shoulder.
Body Trim
We will be creating an edging all the way around the bottom, up the front, and around the neckline, then back down the front and around the bottom to where we started. This will use a unique stitch to create a nice edge in one round.
Attach your yarn to the bottom side of the cardigan body, sc in same space. *Insert your hook into the left bar of the sc st, then insert into the next space on the body of the cardigan. Yarn over and pull a loop through the body fabric and also through one loop on the hook. Yarn over and pull through two
loops on the hook. Repeat from * all the way around the edges of the body, placing two sts per row along the side of the neck and front edges. Join and fasten off, weave in ends.
See video for a visual.
Sleeves
These will be worked in the round.
Setup:
Starting with Color A if following the color chart, ch 54 (60, 66, 72, 72) (78, 78, 84, 84), join.
Rnd 1:
Working in the same st as joined, Stsc, 2 dc in same st, skip 2 sts, *3 in next st, skip 2 sts; repeat from * around, join to Stsc with Color B, turn. | 54 (60, 66, 72, 72) (78, 78, 84, 84) sts.
Rnd 2:
Working into the first space, Stsc, 2 dc in same space, *with Color A 3 dc in next space, with Color B 3 dc in next space; repeat from * around until the last space, with Color A 3 dc in last space, join to Stsc
with Color B, turn.
Rnd 3:
Working into the first space, Stsc, 2 dc in same space, *3 dc in next space; repeat from * around, join to Stsc with Color A, turn.
Rnd 4:
Working into the first space, Stsc, 2 dc in same space, *with Color B 3 dc in next space, with Color A 3 dc in next space; repeat from * around until the last space, with Color B 3 dc in last space, join to Stsc with Color A, turn.
Rnd 5:
Working into the space to the right of the join, Stsc, 2 dc in same space, *3 dc in next space; repeat from * around, join to Stsc with Color B.
Rnds 6-39:
Repeat Rnds 2-5.
Tip:
Work more or fewer Rnds to adjust the sleeve length.
Seaming the Sleeves
To attach the sleeve, first use stitch markers or sewing pins to secure the top of the sleeve opening to the armhole of the body. Then, using a yarn needle and the tail end of your yarn, sew the sleeve in place.

Front Tie
For a tie on the front of the cardigan, here are three options to create a tie approx 13-15 inches long on each side:
- A quick and easy crochet i-cord that doesn't require any special tools can be found at
this video tutorial.
2. For instructions on how to use the Lucet Fork to create an i-cord, visit the video tutorial.
3. Attach your yarn to the front, chain approx 13-15 inches, starting in the second ch from the hook, sc in each ch across. Fasten off and weave in ends.
Finishing
Subscribe to my youtube channel
Weave in any ends, block the garment if needed, and wear out to your next adventure!
Remember to treat your handmade garments with the love they deserve by always folding and laying them flat instead of hanging them up. This simple act helps preserve their shape, keeping them as beautiful as the day you made them.
And now that your Rainbow Hues Cardi is all done, it’s time to make your next project! If you’re still feeling the granny stitch, make a matching Granny Rectangle Bag, and if you’re still on a cardigan kick, try the Finch V-Neck Cardi.
Cheers, and happy crocheting!
Well That Was Fun! What's Next?
📌 PIN THIS POST - Don't lose this project; save it to your Pinterest crochet board so you can quickly come back to it again.
💌 SHARE - Share your yarn choice, in-progress, or finished projects on Facebook or Instagram and use the hashtag #brianakdesigns
🥂 JOIN - Join the kindest crafters in the Briana K Designs Community Group on Facebook. We love yarny friends!
🔗 RAVELRY LINK -Link and share your project on Ravelry. Having inspirational photos can help crafters.