Shades of Diamonds Crochet Pullover Pattern
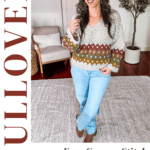

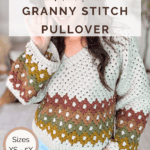

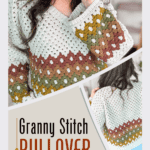
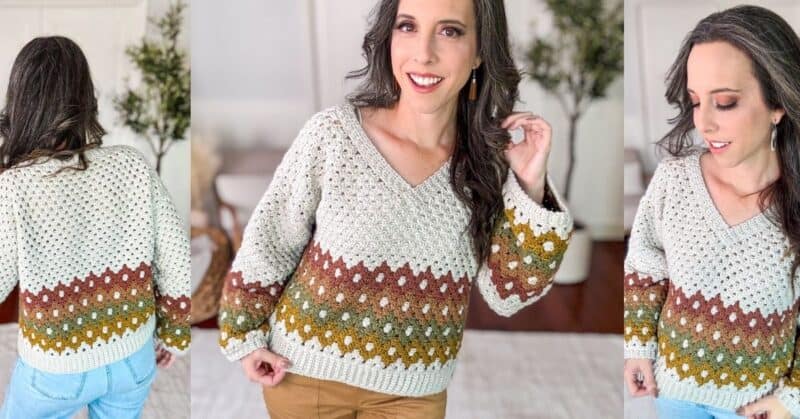
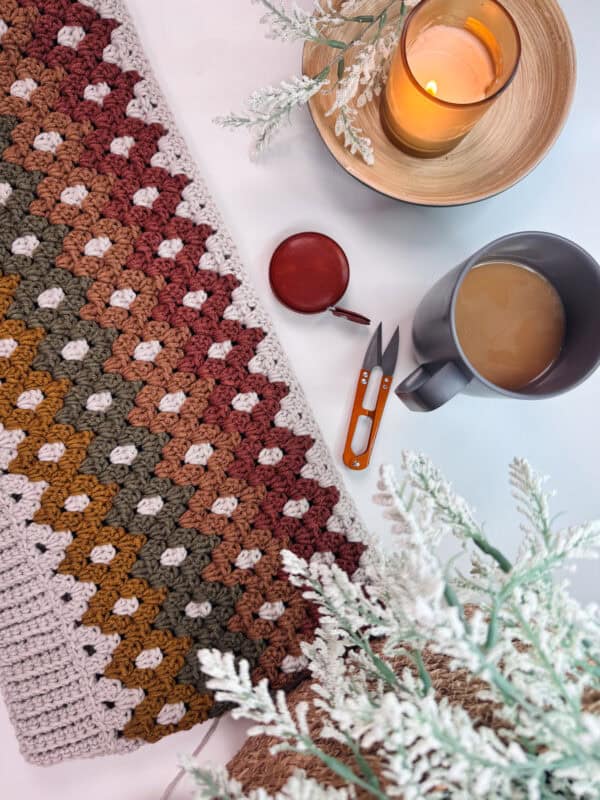
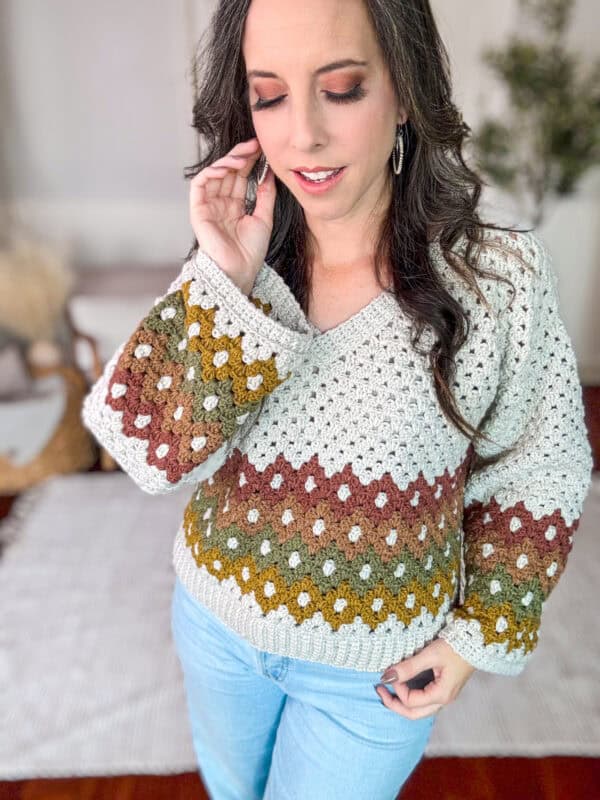
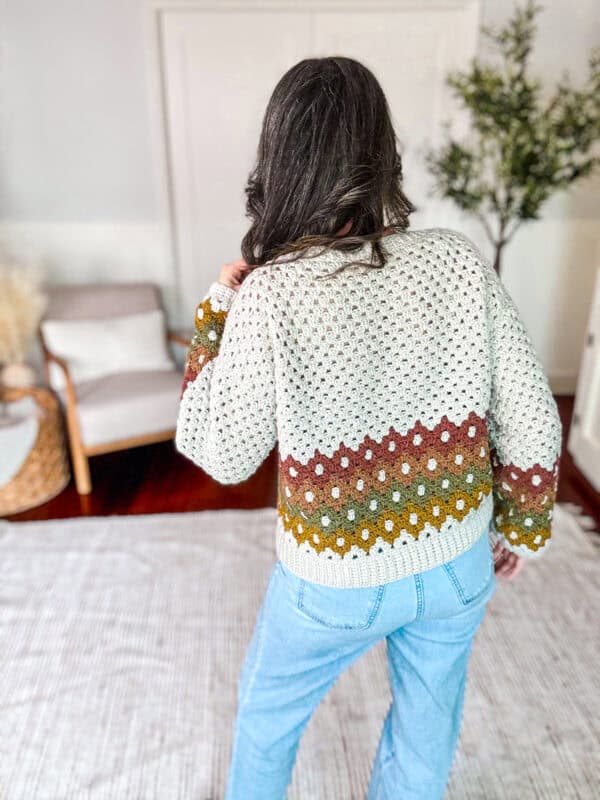
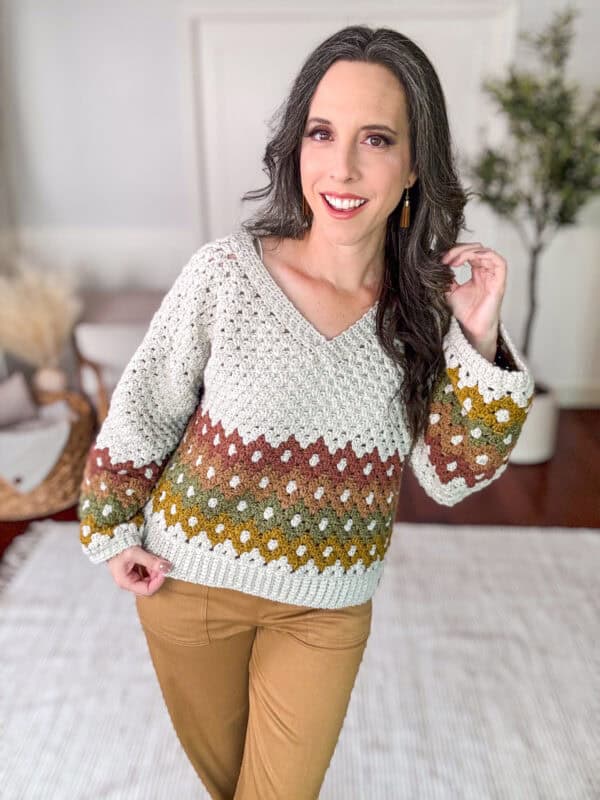
Introducing the Shades of Diamonds Crochet Pullover—a cozy, chic, and intricately designed sweater that’s perfect for the fall season. This pullover effortlessly blends comfort with style, making it a must-have addition to your handmade wardrobe. The modern v-neck adds a flattering touch to the simple and classic granny stitch colorwork design.
Disclosure: This post contains affiliate links. Please read my disclosure for more info.
Easy to follow, this size-inclusive pattern is ideal for crocheters of all skill levels and comes with a detailed video tutorial. Whether you’re looking to stay warm on chilly days or want a trendy layering piece, this pullover will keep you comfortable and fashionable. If you love simple sweaters, check out the Dove Pullover and the Autumn Wheat Sweater (both available in 9 different sizes)!
Harvest Hues Crochet Collection
Crochet Supplies
Yarn
Lion Brand Color Theory
100% Acrylic, 246 yds/100g
Color A: Moonbeam; Color B: Dijon; Color C: Peacock; Color D: Nutmeg; Color E: Canyon
Yarn Quantities
Total Yardage:
1500 (1650, 1785, 1925, 2050) (2115, 2180, 2250, 2315)
Main Color Yardage:
1020 (1130, 1225, 1325, 1410) (1455, 1500, 1550, 1595); 5 (5, 5, 6, 6, 6, 7, 7, 7) Skeins
Yardage for Each DiamondAccent Color:
120 (130, 140, 150, 160) (165, 170, 175, 180); 1 skein each color
Yarn Substitutions
WeCrochet Swish
100% Fine Superwash Merino Wool 110yds/50g
WeCrochet Brava
100% Premium Acrylic, 218 yds/100g
Hobbii Kind Feather
100% Premium Acrylic, 257 yds / 3.5oz
Mary Maxim Starlette Worsted
100% Ultra Soft Acrylic, 180 yds/100g
Remember always to check the gauge and drape when substituting yarns.
Crochet Hook
Size US H (5.0mm) Crochet Hook or hook to obtain gauge.
Notions
Scissors
Yarn Needle
Removable Stitch Marker
Skill Level
Intermediate
What you’ll love about this pattern.
🩶 Stunning Diamond Pattern: The pullover features a unique diamond pattern created with the classic granny stitch, adding a touch of sophistication and texture to your look.
🩶 Flattering V-Neck Design: The v-neckline offers a modern and flattering silhouette, making this pullover easy to pair with your favorite jeans, skirts, or even layered over dresses.
🩶 Seamless Construction: Crocheted from the bottom up, this pattern ensures a smooth and seamless finish. The diamond colorwork is done in the round, allowing you to enjoy the process while achieving a beautiful gradient effect.
🩶 Perfect for Layering: With its comfortable fit and eye-catching design, this pullover is perfect for layering, keeping you warm and stylish as the temperatures drop.
Sizes
XS (S, M, L, 1X) (2X, 3X, 4X, 5X)
To fit chest:
32 (34, 38, 42, 46) (50, 54, 58, 62)
Actual measurements:
38.5 (41.5, 45, 48, 55.5) (57.5, 60.75, 64, 67)
This garment has an oversized relaxed fit and is meant to be worn with a 4-6 inch ease. For a more fitted look, go down a size.
Abbreviations
blo – back loop only
ch – chain
dc – double crochet
flo – front loop only
rnd – round
sc – single crochet
sl st – slip stitch
sp(s) – space(s)
st(s) – stitch(es)
Stsc – stacked single crochet
Gauge
5 sts and 9 rows = 4″ by 4″ Worked in the granny stitch.
How to Crochet A Gauge Swatch
Working a gauge swatch will let you know if you will have the correct sizing for this pattern. It will also help you practice the stitches used in this project and improve your stitch work for a flawless look.
Are you struggling to match the gauge? Check out the blog post on What is Crochet Gauge and How To Fix It
Construction
We will start by working the ribbing in rows from the bottom, then switch to crocheting the body in the round. After completing the colorwork section, we’ll continue with the stitch pattern until the desired length is reached. The piece is then divided into front and back panels and seamed at the shoulders. A simple ribbing is added around the neckline, and finally, we will make the sleeves and attach them to the body.
Adding fall pieces to your wardrobe is always a fabulous idea! The Granny Square Cardigan and the Sparrow Sweater are perfect for adding a hint of gorgeous texture and style to your closet!
Special Stitches
Stacked Single Crochet (Stsc): Do NOT chain, insert hook into next stitch, yo, pull up a loop, yo and pull through both loops, insert hook in the vertical bar below, yo, pull up a loop, yo and pull through both loops on the hook.
Pattern Notes
- Using a stitch marker at the beginning of the row or round is recomended.
- The instructions and stitch counts are given for the smallest size, with the larger sizes in brackets ( ).
- Before you dive into your project, take a moment to identify the stitch and row counts that match the size you’re making. By highlighting or marking them, you’ll save time and effort later on. Trust us, this small step will make a big difference in your knitting or crochet journey!
- When doing colorwork, always carry your yarn on the wrong side of the work.
Subscribe & Like
Video Tutorial for the Easiest Crochet Bag Ever!
Relax & Crochet
Upgrade to the Printable PDF
Beautifully formatted to print and relax while crocheting. The paid pattern includes:
The Ad-Free PDF can be purchased on Etsy or Ravelry.
Click the box below to unlock this exclusive subscriber content for free. Add your email and create a password. If you are having trouble, reset your password or login to the Grow Portal.
I’m thrilled to share this amazing crochet pattern with you! Please don’t copy, paste, or distribute this pattern. Prefer an ad-free experience? Purchase a digital PDF file for a small fee from one of my online stores. I appreciate your support and readership. You are why I can keep doing what I love and sharing it with others. Thank you from the bottom of my heart.
Written Crochet Pattern Instructions
Join The Kindest Community
Join our vibrant community of crafters on Facebook today. Whether you enjoy crafting with others or simply have burning questions, we’ve got you covered – join us now!
Body Colorwork
Rnd 1 (WS):
Working in the flo for this row: With Color A Stsc in first, 2 dc in same st, *skip 2 sts, 3 dc in next; repeat from * around, skip the last 2 sts, join with Color B and turn. | 144 (156, 168, 180, 204) (216, 228, 240, 252) sl sts
Rnd 2 (RS):
With Color B Stsc in first space, 2 dc in same space, *with Color A 3 dc in next space, with Color B 3 dc in next space; repeat from * until the last space of the rnd, with Color A 3 dc in last space, join and turn.
Rnd 3:
With Color B, Stsc in first, 2 dc in same space, 3 dc in remaining spaces around, join and turn.
Rnd 4:
With Color A, Stsc in first space, 2 dc in same space, *with Color B 3 dc in next space, with Color A 3 dc in next space; repeat until the last space of rnd, with Color B 3 dc in last space, join and turn. Fasten off color A.
Rnd 5:
Repeat Rnd 3.
Rnd 6:
With Color B, Stsc in first space, 2 dc in same space, *with Color C 3 dc in next space, with Color B 3 dc in next space; repeat until the last space of rnd, with Color C 3 dc in last space, join and turn. Fasten off Color B.
Rnd 7:
With Color C, Stsc in first, 2 dc in same space, 3 dc in remaining spaces around, join and turn.
Rnd 8:
With Color C, Stsc in first space, 2 dc in same space, *with Color A 3 dc in next space, with Color C 3 dc in next space; repeat until the last space of the rnd, with Color A 3 dc in last space, join and turn. Fasten off Color A.
Rnd 9:
Repeat Rnd 7.
Rnd 10:
With Color D, Stsc in first space, 2 dc in same space, *with Color C 3 dc in next space, with Color D 3 dc in next space; repeat until last space of the rnd, with Color C 3 dc in last space, join and turn. Fasten off Color C.
Rnd 11:
With Color D, Stsc in first, 2 dc in same space, 3 dc in remaining spaces around, join and turn.
Rnd 12:
With Color A, Stsc in first space, 2 dc in same space, *with Color D 3 dc in next space, with Color A 3 dc in next space; repeat until the last space of the rnd, with Color D 3 dc in last space, join and turn. Fasten off color A.
Rnd 13:
Repeat Rnd 11.
Rnd 14:
With Color E, Stsc in first space, 2 dc in same space, *with Color D 3 dc in next space, with Color E 3 dc in next space; repeat until the last space of the rnd, with Color D 3 dc in last space, join and turn. Fasten off Color D.
Rnd 15:
With Color E, Stsc in first, 2 dc in same space, 3 dc in remaining spaces around, join and turn.
Rnd 16:
With Color E, Stsc in first space, 2 dc in same space, *with Color A 3 dc in next space, with Color E 3 dc in next space; repeat until the last space of the rnd, with Color A 3 dc in last space, join and turn.
Rnd 17:
Repeat Rnd 15.
Rnd 18:
With Color A, Stsc in first space, 2 dc in same space, *with Color E 3 dc in next space, with Color A 3 dc in next space; repeat until the last space of the rnd, with Color E 3 dc in last space, join and turn.
Rnd 19:
With Color A, Stsc in first, 2 dc in same space, 3 dc in remaining spaces around, join and turn.
Repeats:
Repeat Rnd 19 five more times or until desired length from the underarm, ending on a right side rnd.
Customization Tip:
This is where we can take advantage of customizing the length of this sweater. Crochet fewer rows for a shorter sweater, or more for a longer sweater. You could even crochet enough rows to make this a dress!
Style
For an everyday, casual look, pair your Shades of Diamonds Sweater with high-waisted jeans and white sneakers or slip-ons. For a trendy look, wear a collared shirt underneath with the collar popping out. Combine the sweater with leggings or joggers for a cozy and comfortable outfit. Adding coordinating accessories is one of my favorite ways to add personal flair to my outfits, too. The Granny Stitch Clutch or the Easy Granny Stitch Bag would look fabulous with this pullover!
Front Section
Row 1 (WS):
Stsc in first, 2 dc in first space, *3 dc in next 22 (24, 26, 30, 32) (34, 36, 40, 42) spaces space between the granny st groups, dc in next space, turn. | 70 (76, 82, 94, 100) (106, 112, 124, 130) sts; 23 (25, 27, 30, 33) (35, 37, 41, 43) granny groups + 1 st
Row 2:
Stsc in first, 2 dc in first space, *3 dc in next space between the granny st groups; repeat until the last 3 sts of the row, skip 2 sts, dc in last, turn.
Sizing Tip
Want a crop top sweater? Simply work fewer rounds after the colorwork before splitting for the panels. Or create a sweater dress by crocheting more rounds. Remember, both of these options will change the total yardage. (Speaking of crochet dresses, the Classic Granny Stitch Dress and the Summer Granny Top or Dress are fun and flattering designs!)
First Front Panel
Row 1:
Stsc in first, 2 dc in first space, 3 dc in next 10 (11, 12, 14, 15) (16, 17, 19, 20) spaces, dc in next space, turn. | 34 (37, 40, 46, 49) (52, 55, 61, 64) sts; 11 (12, 13, 15, 16) (17, 18, 20, 21) granny groups + 1 sts
Row 2:
Stsc in first, skip the next space and *3 dc in next space between the granny st groups; repeat until the last 3 sts of the row, skip 2 sts, dc in last, turn.
Row 3:
Stsc in first, 2 dc in first space, *3 dc in next space between the granny st groups; repeat until the last 4 sts of the row, skip 3 sts, dc in last, turn.
Rows 4 – 13 (13, 13, 13, 15) (15, 17, 17, 17):
Repeat Rows 2-3. | 16 (19, 22, 28, 28) (31, 31, 37, 40) sts
Non-Decreasing Repeats:
Repeat in pattern (instructions below) for 2 (3, 4, 5, 4) (5, 4, 5, 5) more rows:
Stsc in first, 2 dc in first space, *3 dc in next space between the granny st groups; repeat until the last 3 sts of the row, skip 2 sts, dc in last, turn.
There are 15 (16, 17, 18, 19) (20, 21, 22, 22) total rows for the first panel. Fasten off leaving a tail to seam at the shoulders later.
Second Front Panel
Row 1 (WS):
Join yarn to the next space space left of the First Front Panel. Stsc and 2 dc in the space, *3 dc in next space between the granny st groups; repeat until the last 3 sts of the row, skip 2 sts, dc in last, turn. | 35 (38, 41, 47, 50) (53, 56, 62, 65) sts; 11 (12, 13, 15, 16) (17, 18, 20, 21) granny groups + 2 sts
Row 2 (RS):
Stsc in first, 2 dc in first space, *3 dc in next space between the granny st groups; repeat until the last 4 sts of the row, skip 3 sts, dc in last, turn.
Row 3:
Stsc in first, skip the next space and *3 dc in next space between the granny st groups; repeat until the last 3 sts of the row, skip 2 sts, dc in last, turn.
Rows 4 – 14 (14, 14, 14, 16) (16, 18, 18, 18):
Repeat Rows 2-3, ending on a Row 2. | 16 (19, 22, 28, 28) (31, 31, 37, 40) sts
Non-Decreasing Repeats:
Repeat in pattern (instructions below) for 1 (2, 3, 4, 3) (4, 3, 4, 4) more rows:
Stsc in first, 2 dc in first space, *3 dc in next space between the granny st groups; repeat until the last 3 sts of the row, skip 2 sts, dc in last, turn.
There are 15 (16, 17, 18, 19) (20, 21, 22, 22) total rows for the first panel. Fasten off leaving a tail to seam at the shoulders later.
Back Panel
Row 1:
Join yarn to the space next to the Second Panel row. Stsc and 2 dc in the space, *3 dc in next 22 (24, 26, 30, 32) (34, 36, 40, 43) spaces, dc in next space, turn. | 70 (76, 82, 94, 100) (106, 112, 124, 130) sts; 23 (25, 27, 31, 33) (35, 37, 41, 43) granny groups + 1 sts
Row 2:
Stsc in first, 2 dc in first space, *3 dc in next space between the granny st groups; repeat until the last 3 sts of the row, skip 2 sts, dc in last, turn.
Repeats:
Repeat Row 2 until there are 17 (18, 19, 20, 21) (22, 23, 24, 24) total rows for the back panel. Fasten off.
Seaming the Shoulders
Pin the top of the front panels evenly to the back panel. With your yarn needle, use the tail ends to seam across at each shoulder.
Neck Ribbing
Setup Rnd:
Attach the yarn to the bottom center of the ‘V’ on the neckline. Sl st around placing 2 sl sts per row, and 1 st st per st on the back neck.
Row 1:
Ch 5, sc in the 2nd ch from hook and across, sl st 2 sts on the edge of the neckline, turn. | 4 sts
Row 2:
Ch 1 (does not count as a stitch here and throughout), skip the 2 sl sts, working in the blo, sc in each st across, turn. | 4 sts
Row 3:
Ch 1, sc in the 2nd ch from hook and across, sl st 2 sts on the edge of the neckline, turn. | 4 sts
Repeats:
Repeat Rows 2-4 around the neckline.
Once the neckline is worked, the fabric will overlap where we started and finished. Fasten off, leaving a tail, and with your yarn needle, tack one side over the other.
Cuff Ribbing
The ribbing will be worked in rows, then joined and worked in the round. Start with Color A.
Row 1:
Ch 5, sc in the 2nd ch from hook and across, turn. | 4 sts
Row 2:
Ch 1 (does not count as a stitch here and throughout), working in the blo, sc in each st across, turn. | 4 sts
Repeats:
Repeat Row 2 until there are 54 (60, 66, 72, 72) (78, 78, 84, 84) total rows of ribbing.
Joining:
Slip Stitch Row 1 to the current Row by working through the blo of the current row and the blo loop from the first row.
Trim:
Working along the edge of the ribbing, ch 1, sl st 1 st per edge, join and turn. | 54 (60, 66, 72, 72) (78, 78, 84, 84) sts
Sleeves (Make 2)
These will be worked in the round.
Rnd 1 (WS):
Working in the flo for this row: With Color A, Stsc in first, 2 dc in same st, *skip 2 sts, 3 dc in next; repeat from * around, skip the last 2 sts, join with Color B and turn. | 54 (60, 66, 72, 72) (72, 72, 72, 72) sts
Rnds 2-19:
Repeat Rnds 2-19 from the Body Colorwork Section.
Tip: In the following Rnds of the sleeves, work more or fewer Rnds to adjust the sleeve length.
For Sizes XS – 1X:
Rnds 20-37:
With Color A, Stsc in first, 2 dc in same space, 3 dc in remaining spaces around, join and turn. After Rnd 37, fasten off leaving a long tail to seam to body. Go to Seaming & Finishing.
For Sizes 2X – 5X:
For the remaining sizes, we will be increasing the sleeves.
How to Increase:
Increase Rnd 1:
Increases are best worked under the arm as follows, work 4 dc in the first space, continue in the granny stitch pattern around.
Increase Rnd 2:
Work in the granny stitch until you reach the 4 dc group, 3 dc in center space between the 4 dc sts.
Rnds 22-27:
Stsc in first, 2 dc in same space, 3 dc in remaining spaces around, join and turn.
Rnd 28:
Increase Rnd 1 from previous instructions.
Rnd 29:
Increase Rnd 2 from previous instructions. | 78 sts
Rnds 30-37:
Stsc in first, 2 dc in same space, 3 dc in remaining spaces around, join and turn. After Rnd 37, fasten off leaving a long tail to seam to body. Go to Seaming & Finishing.
For Sizes 4X – 5X:
Rnd 20:
Increase Rnd 1 from previous instructions.
Rnd 21:
Increase Rnd 2 from previous instructions. | 75 sts
Rnds 22-23:
Stsc in first, 2 dc in same space, 3 dc in remaining spaces around, join and turn.
Rnds 24-35:
Repeat Rows 20-23. | 84 sts
Rnds 36-37:
Stsc in first, 2 dc in same space, 3 dc in remaining spaces around, join and turn. After Rnd 37, fasten off leaving a long tail to seam to body. Go to Seaming & Finishing.
Seaming & Finishing
To attach the sleeve, first use stitch markers or sewing pins to secure the top of the sleeve opening to the armhole of the body. Then, sew the sleeve in place using a yarn needle and the tail end of your yarn.
Subscribe to my youtube channel
Weave in any ends, block the garment if needed, and enjoy!
Celebrate the joy of wearing your new handmade sweater! There’s nothing quite like the cozy comfort and unique style of a piece crafted with love. As you enjoy the warmth and beauty of your creation, why not consider starting a new project?
Whether you want to experiment with different colors or try out a new pattern, the possibilities are endless. Dive into your next crochet adventure and create another stunning sweater to add to your collection. If you want a challenge, try one of my colorwork designs like the Pine Sweater or the Fawning Over You Sweater.
If you want to make a Mommy and Me set for the little one in your life, check out the Macchiato Sweater (adult and child sizes are available) or the Heatherly Vest (there are 19 sizes included in this simple wearable)!
Cheers, and happy crocheting!
Well That Was Fun! What’s Next?
📌 PIN THIS POST – Don’t lose this project; save it to your Pinterest crochet board so you can quickly come back to it again.
💌 SHARE – Share your yarn choice, in-progress, or finished projects on Facebook or Instagram and use the hashtag #brianakdesigns
🥂 JOIN – Join the kindest crafters in the Briana K Designs Community Group on Facebook. We love yarny friends!
🔗 RAVELRY LINK -Link and share your project on Ravelry. Having inspirational photos can help crafters.