Toasty Wheat Crochet Sweater Pattern

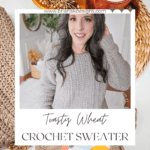
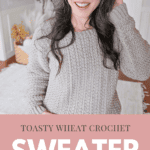
The Toasty Wheat Crochet Sweater is a must-have addition to your fall wardrobe! Crafted with a stunning texture and luxurious drape, this cozy design is perfect for all body types, ensuring everyone can enjoy its warmth and style. This sweater is crocheted cuff-to-cuff, so it only needs two seams to finish. The delicate puff Wheat Stitches add delightful texture to the sweater, enhancing its visual appeal without overwhelming the overall design. Check out the matching Snowy Puff Crochet Hat Pattern, Snowdrift Slipper Socks, and Winter Wheat Sweater Scarf!

Disclosure: This post contains affiliate links. Please read my disclosure for more info.
Whether you’re curling up by the fire or heading out with friends, this versatile sweater is sure to become your go-to garment. With easy-to-follow instructions and a video tutorial, you’ll love creating a piece that showcases your unique flair while keeping you snug and chic. If you love simple and timeless looks for the fall, the Autumn Wheat Sweater and The Dove Pullover are perfect to add to your wardrobe! Love the wheat stitch look, but want something for warmer weather? Try the Braided Wheat Easy Summer Top!
The Wheat Stitch
Ever since I released the Autumn Wheat Collection, this one was instantly on my hooks. I call it the wheat stitch and my library of patterns using this stitch is quickly growing with more to come.
The combination of the single crochet rows in the back loops only, and the modified puff stitch, just go perfectly together.
If you would like to get more of this stitch on your hooks, check out the Braided Wheat Crochet Blanket Pattern or the Easy Twisted Wheat Crochet Ear Warmer Pattern.
Crochet Supplies
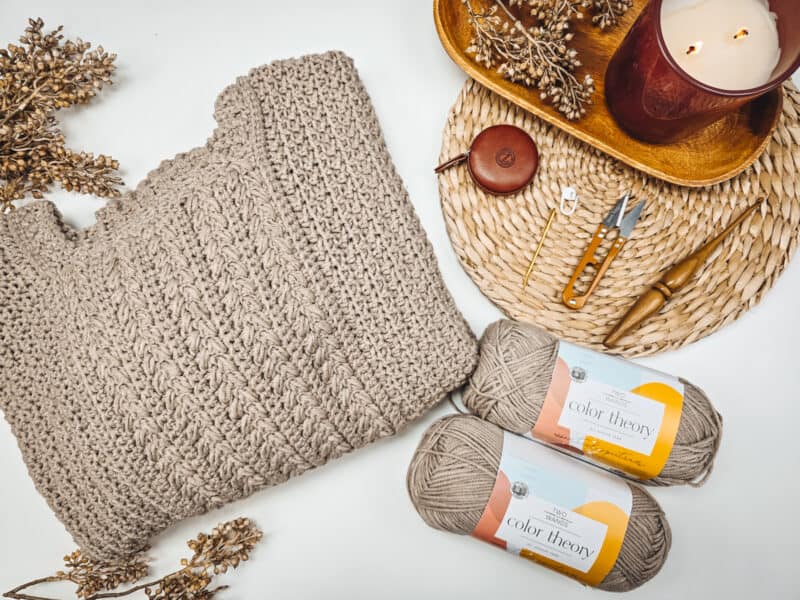
Yarn
Lion Brand Color Theory
100% Acrylic, 246yds/100g, Colorway Shown: Bone
Weight: 4 Worsted
Yarn Quantities
1150 (1190, 1250, 1400, 1500) (1700, 1900, 2150, 2375) yds
6 (6, 6, 7, 7) (8, 9, 10, 11) balls
Yarn Substitutions
Brava Worsted
100% Premium Acrylic, 218yds/100g
Mighty Stitch
80% Acrylic/20% Superwash Wool 208yds/100g
Swish DK
100% Fine Superwash Merino Wool 110yds/50g
Heatherly Sport
80% Acrylic, 20% Merino Wool, 328yds/100g
Please note, other weights can work as WeCrochet Upcycle varies per ball and tends to be on the thinner side, just check gauge.
Remember always to check the gauge and drape when substituting yarns.
Crochet Hook
Size US H (5.0mm) Crochet Hook or hook to obtain gauge.
Notions
Scissors
Yarn Needle
Removable Stitch Markers
Skill Level
Advanced Beginner

What you’ll love about this pattern.
🩶 2 Easy Seams – This crochet sweater is crocheted flat from cuff to cuff, then seamed under the arms.,
🩶 Simple Stitch Repeat – The texture of this bag is made with simple crochet stitches in a simple repeat, so it’s perfect for an evening of Netflix and Crochet!
🩶 Customizable – Change the length of the sweater to be longer or shorter.
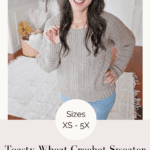
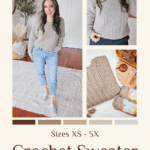
Sizes
XS (S, M, L, 1X) (2X, 3X, 4X, 5X)
To fit chest: 32 (34, 38, 42, 46) (50, 54, 58, 62)
Actual measurements are in schematic.
This garment is meant to be worn with a 3-5 inch positive ease.
Abbreviations
blo – back loop only
ch – chain
dc – double crochet
flo – front loop only
hdc – half double crochet
hdc2tog – half double crochet two together
RS = right side
sc – single crochet
sl st – slip stitch
st(s) – stitch(es)
WS – wrong side
Gauge
17 sts and 11 rows = 4″ by 4″ in half double crochet worked alternating the flo and blo, blocked.
How to Crochet A Gauge Swatch
Working a gauge swatch will let you know if you will have the correct sizing for this pattern. It will also help you practice the stitches used in this project and improve your stitch work for a flawless look.
Are you struggling to match the gauge? Check out the blog post on What is Crochet Gauge and How To Fix It
Construction
The Toasty Wheat Sweater is crocheted flat, from cuff to cuff. We will start with the ribbing for one cuff, work the sleeve and increase, then crochet the first section of the body, followed by the front & back sections to make room for the neck, the second part of the body, then the second sleeve while decreasing, and then the final cuff. Then, we’ll add the seams – one under each arm and down the sides.
Looking for more simple designs with two-seam construction? The Sparrow Sweater has an open stitch pattern, perfect for layering. The Finch Cardigan features a flattering V-neckline, adding a touch of elegance to your everyday wardrobe.
Special Stitches
Established Stitch Pattern (esp): This stitch pattern consists of flo hdc sts, and blo hdc sts. Each row will alternate between the flo and blo across. The st being worked will always be opposite of the st from the row below.
Puff Stitch: Yarn over and insert your hook into the stitch/space. Yarn over again and pull up a long loop. Yarn over and insert your hook into the same stitch/space. Yarn over again and pull up a long loop. (5 loops on the hook). Yarn over and pull through the first 4 loops, yarn over and pull through remaining loops.
Pattern Notes
- The yarn suggested in this pattern can vary in thickness depending on the color. It’s very important to keep checking gauge to make sure the sizing is correct.
- A ch 1 at the beginning of a row is not counted as a stitch.
- Using a stitch marker at the beginning of each row is recommended.
- The instructions and stitch counts are given for the smallest size, with the larger sizes in parentheses ( ).
- Before you dive into your project, take a moment to identify the stitch and row counts that match the size you’re making. By highlighting or marking them, you’ll save time and effort later on. Trust us, this small step will make a big difference in your crochet journey!
- When brackets are used, [….] repeat the instructions inside the brackets as indicated.
Subscribe & Like
Video Tutorial for the Toasty Wheat Crochet Sweater Part 1
Relax & Crochet
Upgrade to the Printable PDF
Beautifully formatted to print and relax while crocheting. The paid pattern includes:
The Ad-Free PDF can be purchased on Etsy or Ravelry.
Click the box below to unlock this exclusive subscriber content for free. Add your email and create a password. If you are having trouble, reset your password or login to the Grow Portal.
I’m thrilled to share this amazing crochet pattern with you! Please don’t copy, paste, or distribute this pattern. Prefer an ad-free experience? Purchase a digital PDF file for a small fee from one of my online stores. I appreciate your support and readership. You are why I can keep doing what I love and sharing it with others. Thank you from the bottom of my heart.
Written Crochet Pattern Instructions
Join The Kindest Community
Join our vibrant community of crafters on Facebook today. Whether you enjoy crafting with others or simply have burning questions, we’ve got you covered – join us now!
First Sleeve – Increasing
Row 1:
Ch 1, flo hdc in each st across, turn. | 32, (34, 34, 36, 36) (38, 38, 40, 40) sts
Row 2 (increasing row):
Ch 1, (the hdc sts will be in the established stitch pattern (esp) for the remainder of the pattern unless indicated otherwise), hdc 2 in the first st, hdc in esp in each st across until the last st, hdc 2 in the last stitch, turn. | 34, (36, 36, 38, 38) (40, 40, 42, 42) sts
How to work a Non-Increasing Row:
Ch 1, hdc in esp in each st across, turn.
Repeats:
XS: Repeat increasing row on every 2nd row 15 times, then continue to work non-increasing rows until a total of 46 sleeve rows. | 64 sts
S: Repeat increasing row on every 2nd row 16 times, then continue to work non-increasing rows until a total of 46 sleeve rows. | 68 sts
M: Repeat increasing row on every 2nd row 18 times, then continue to work non-increasing rows until a total of 46 sleeve rows. | 72 sts
L: Repeat increasing row on every 2nd row 19 times, then continue to work non-increasing rows until a total of 46 sleeve rows. | 76 sts
1X: Repeat increasing row on every 2nd row 21 times, then continue to work non-increasing rows until a total of 46 sleeve rows. | 80 sts
2X: Repeat increasing row every row 4 times, then repeat increasing row every 2 rows 18 times, then continue to work non-increasing rows until a total of 46 sleeve rows. | 84 sts
3X: Repeat increasing row every row 10 times, then repeat increasing row every 2 rows 16 times, for a total of 46 sleeve rows. | 92 sts
4X: Repeat increasing row every row 12 times, then repeat increasing row every 2 rows 15 times, for a total of 46 sleeve rows. | 96 sts
5X: Repeat increasing row every row 16 times, then repeat increasing row every 2 rows 13 times, for a total of 46 sleeve rows. | 100 sts
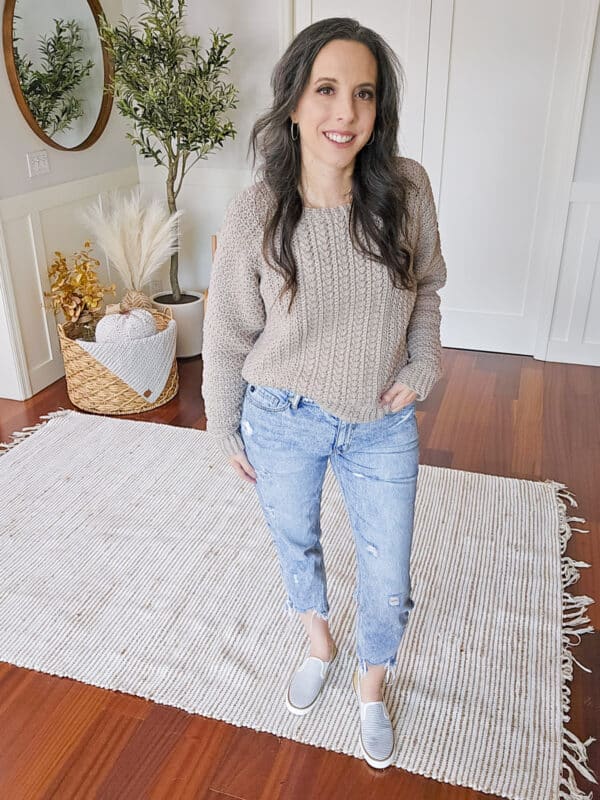
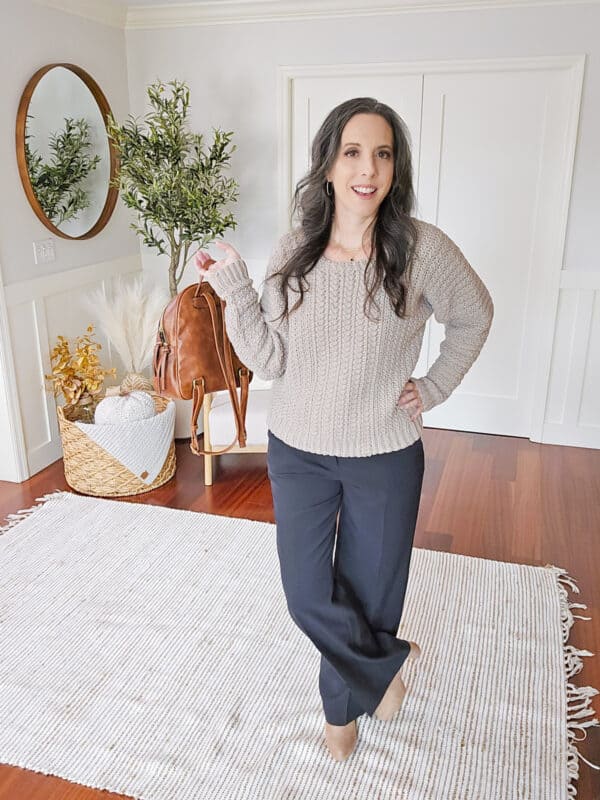
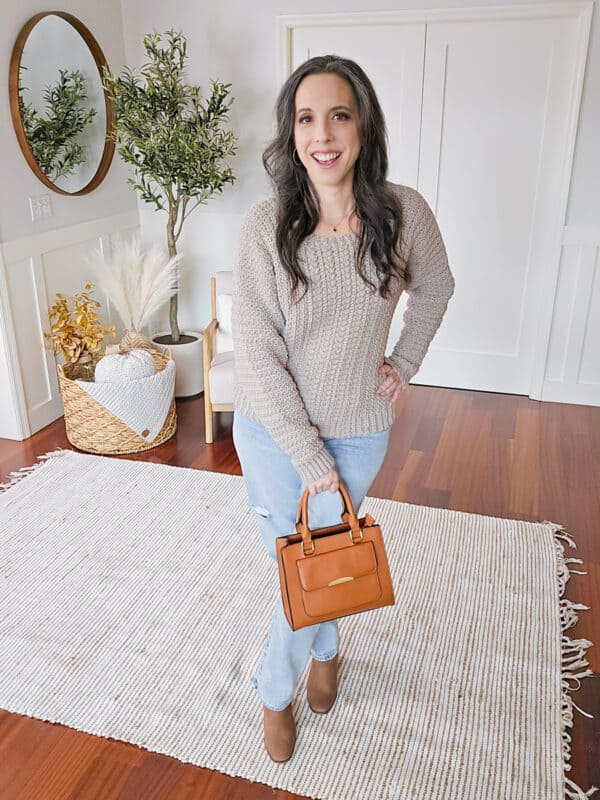
Style
This type of sweater can be dressed up with a nice pair of pants and heels (or cute flats or boots). But it can also be casual with a pair of jeans and boots (or even sneakers). This is a diverse garment to have in your wardrobe. Add a handmade accessory like the Suzette Shawl or the Summer House Bag for more personal flair!
First Body Section
Note: Beg ch determines the length of sweater, to alter length work more or fewer chs in an even number.
Quick Tip: Want to more or less room in the bust? Add or remove rows in the First Body Section. Keep a note to do the same in the Second Body Section.
Attach 2nd ball of yarn to the opposite side of the row from the working yarn, ch 52, fasten off.
Row 1:
Ch 53, sc in 2nd ch from hook, sc in next 9 chs, hdc in next 42 chs, hdc in esp in the next 64 (68, 72, 76, 80) (84, 92, 96, 100) sleeve sts, hdc in next 42 chs, sc in last 10 chs, turn. | 168 (172, 176, 180, 184) (188, 196, 200, 204) sts
Tip: You can use a stitch marker to mark the ribbing stitches so it’s easy to see when those should start and stop.
Reminder: Hdc sts will go back to the established stitch pattern unless indicated otherwise.
Rows 2- 16 (18, 20, 22, 24) (28, 30, 32, 34):
Ch 1, blo sc in first 10 sts, hdc in esp in each st across until 10 sts rem, blo sc in last 10 sts, turn.
Next 2 Rows: Ch 1, blo sc in each st across, turn.
Video Tutorial for the Toasty Wheat Crochet Sweater Part 2
Back Section
Row 1:
Ch 1, blo sc in first 10 sts, [skip the next st, sc in next, work a puff st into the skipped st] work across until there are 72 (74, 76, 78, 80) (82, 86, 88, 90) sts in the row, leave the rest of the sts unworked, turn. | 72 (74, 76, 78, 80) (82, 86, 88, 90) sts.
Row 2:
Ch 1, [skip the next st, sc in next, work a puff st into the skipped st] work until the last 10 sts, blo sc in last 10 sts, turn.
Row 3:
Ch 1, blo sc in each st across, turn. Row 4: Ch 1, blo sc in each st across, turn.
Rows 5-18:
Repeat Rows 1-4 three more times, then repeat Rows 1-2 one more time.
Fasten off.
Front Section
Skip 24 sts from the last st worked in Row 1 of the Back Section, join with a sl st.
Row 1:
Ch 1, [skip the next st, sc in next, work a puff st into the skipped st] work until the last 10 sts, blo sc in last 10 sts, turn. | 72 (74, 76, 78, 80) (82, 86, 88, 90) sts
Row 2:
Ch 1, blo sc in first 10 sts, [skip the next st, sc in next, work a puff st into the skipped st] work across, turn.
Row 3:
Ch 1, blo sc in each st across, turn.
Row 4:
Ch 1, blo sc in each st across, turn
Rows 5-18:
Repeat Rows 1-4 three more times, then repeat Rows 1-2 one more time.
Do not fasten off.
Second Body Section
Setup: Ch 24, fasten off the chain. These chains will be worked into on the next row in order to work along the side of the neck.
Row 1:
With RS facing, attach yarn to last st on Back Section, ch 1, blo sc in each st across including the ch sts, turn. | 168 (172, 176, 180, 184) (188, 196, 200, 204) sts
Row 2:
Ch 1, blo sc in each st across, turn.
Reminder: Hdc sts will go back to the established stitch pattern unless indicated otherwise.
Next 16 (18, 20, 22, 24) (28, 30, 32, 34) Rows:
Ch 1, blo sc in first 10 sts, hdc in esp in each st across until last 10 sts, blo sc in last 10 sts, turn.
Fasten off.
Sizing Tips
- Want this sweater to be less form-fitting? Go up a size from your bust size to add more ease. This will create more of an oversized sweater with wiggle room.
- If you would like a cropped sweater, simply chain fewer sts to the left and the right of the arm.
- You can even create a dress length by chaining more stitches. A simple belt would top off this look.
- Be sure to match the same amount of stitches to the left and the right of the arm.
Second Sleeve – Decreasing
Row 1:
Sk 52 sts, join to the next st with a sl st, ch 1, hdc in the esp in next 64 (68, 72, 76, 80) (84, 92, 96, 100) sts, leaving rem sts unworked, turn. | 64 (68, 72, 76, 80) (84, 92, 96, 100) sts
How to work a decreasing row:
Ch 1, hdc2tog, hdc in esp until the last 2 sts, hdc2tog, turn. | 62 (66, 70, 74, 78) (82, 90, 94, 98) sts
How to work a non-decreasing row:
Ch 1, hdc in esp in each st across, turn.
Repeats:
XS: Work 13 non-decreasing rows, then work a decreasing row, repeat decreasing row on every 2nd row 15 times, then continue to work non-decreasing rows until a total of 46 sleeve rows. | 32 sts
S: Work 11 non-decreasing rows, then work a decreasing row, repeat decreasing row on every 2nd row 16 times, then continue to work non-decreasing rows until a total of 46 sleeve rows. | 34 sts
M: Work 7 non-decreasing rows, then work a decreasing row, repeat decreasing row on every 2nd row 18 times, then continue to work non-decreasing rows until a total of 46 sleeve rows. | 34 sts
L: Work 8 non-decreasing rows, then work a decreasing row, repeat decreasing row on every 2nd row 19 times, then continue to work non-decreasing rows until a total of 46 sleeve rows. | 36 sts
1X: Work 1 non-decreasing row, then repeat decreasing row on every 2nd row 21 times, then continue to work non-decreasing rows until a total of 46 sleeve rows. | 36 sts
2X: Work 3 non-decreasing rows, then work a decreasing row, repeat decreasing row on every 2nd row 18 times, then repeat decreasing row every row 4 times, then continue to work non-decreasing rows until a total of 46 sleeve rows. | 38 sts
3X: Repeat decreasing row on every 2nd row 16 times, then repeat decreasing row every row 11 times, then continue to work non-decreasing rows until a total of 46 sleeve rows. | 38 sts
4X: Repeat decreasing row on every 2nd row 15 times, then repeat decreasing row every row 13 times, then continue to work non-decreasing rows until a total of 46 sleeve rows. | 40 sts
5X: Repeat decreasing row on every 2nd row 13 times, then repeat decreasing row every row 17 times, then continue to work non-decreasing rows until a total of 46 sleeve rows. | 40 sts
Second Cuff
Row 1:
Ch 11, sc in the 2nd ch from the hook and in each st across, sl st into the flo of the next 2 sleeve sts, turn. | (10 sts)
Row 2:
Skip the 2 sl sts, blo sc in each st across, turn.
Row 3:
Ch 1 (does not count as a st), blo sc in each st across, sl st into the flo of the next 2 sleeve sts, turn.
Rows 4 – 32, (34, 34, 36, 36) (38, 38, 40, 40):
Repeat Rows 2-3 until all sts across the sleeve edge have been worked, fasten off and weave in ends.
Neck Ribbing
Row 1:
Join with sl st in side of Neck, ch 6, sc in the 2nd ch from hook and in each ch across back towards neckline, sl st in next 2 sts of Neck, turn. | (5 sts)
Row 2:
Sk 2 sl sts, blo sc 5, turn.
Row 3:
Ch 1, blo sc 5, sl st in next 2 sts (1 stitch per edge row around the neckline), turn.
Next Rows:
Rep Rows 2-3 for ribbing around Neck.
Join last row to beginning row by slip stitching through blo of first and last row at the same time.
Fasten off.
Seaming
Wash and block. Fold sweater in half with RS facing out and WS together, align Sleeves and Body.
With yarn needle and preferred seaming method, sew side seams beginning at bottom hem working up to Sleeves, then sew across Sleeves in one continuous seam. Repeat the seam on other side.
Finishing
Subscribe to my youtube channel
Weave in any ends and block again if necessary. Wear and enjoy!
Crocheted sweaters make the perfect gifts for loved ones, blending thoughtful craftsmanship with unique style. Whether you’re creating a cozy piece for a friend or a stunning garment for yourself, wearables like this sweater showcase your creativity and skill.
With endless possibilities for customization and a variety of textures and colors, each project is a heartfelt expression of your artistic flair. Need inspiration for your next project? Check out the Classic Granny Dress (and coordinating Granny Rectangle Bag) and the Macchiato Sweater (also available in kids’ sizes)!
Cheers, and happy crocheting!

Well That Was Fun! What’s Next?
📌 PIN THIS POST – Don’t lose this project; save it to your Pinterest crochet board so you can quickly come back to it again.
💌 SHARE – Share your yarn choice, in-progress, or finished projects on Facebook or Instagram and use the hashtag #brianakdesigns
🥂 JOIN – Join the kindest crafters in the Briana K Designs Community Group on Facebook. We love yarny friends!
🔗 RAVELRY LINK -Link and share your project on Ravelry. Having inspirational photos can help crafters.