Before I jump right into the Quilted Lattice Crochet Hat, today, I’m going to tell you a personal story with a good ending. Also, I want to put a disclaimer on this portion, however, because it could be a trigger for some who have experienced workplace harassment.
If you’re going to skip on down to the pattern, feel free, and it won’t hurt my feelings at all. I’m going to place another ‘Please PIN ON Pinterest’ bar, just like the one above, where the pattern portion starts.
Disclosure: This post contains affiliate links. Please read my disclosure for more info.
Want an Ad-Free PDF Download of this pattern?
This pattern is available in my shops:
If you love to knit, also check out the Quilted Lattice Knit Hat Pattern.
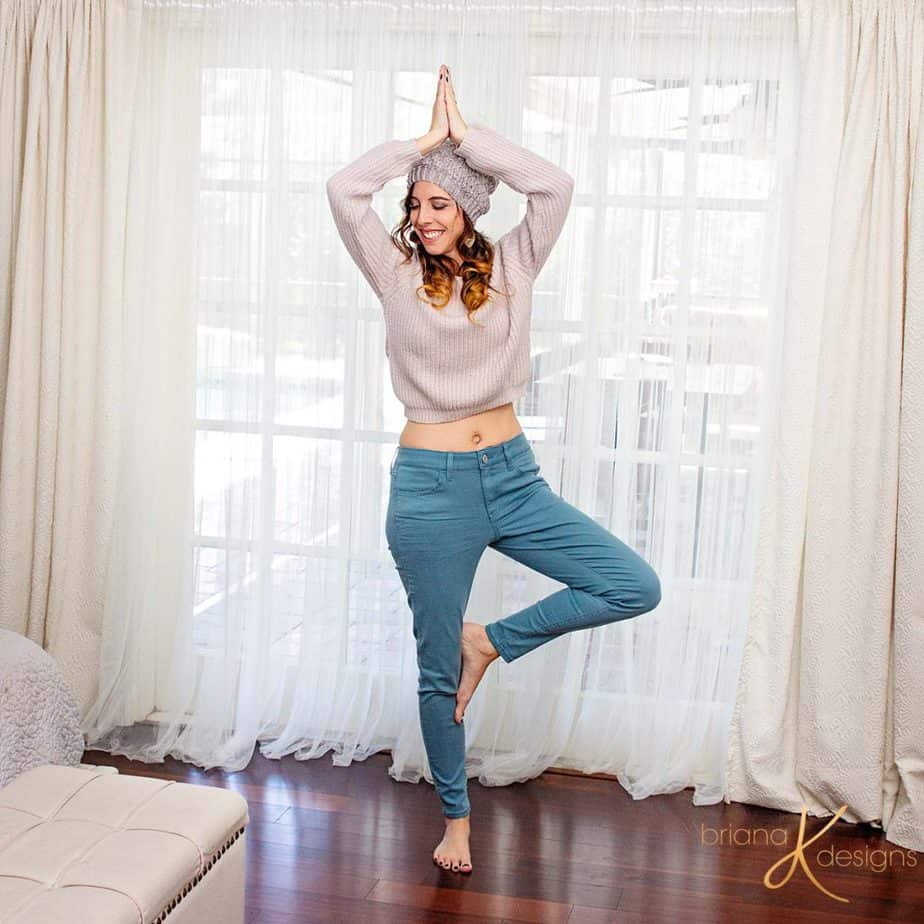
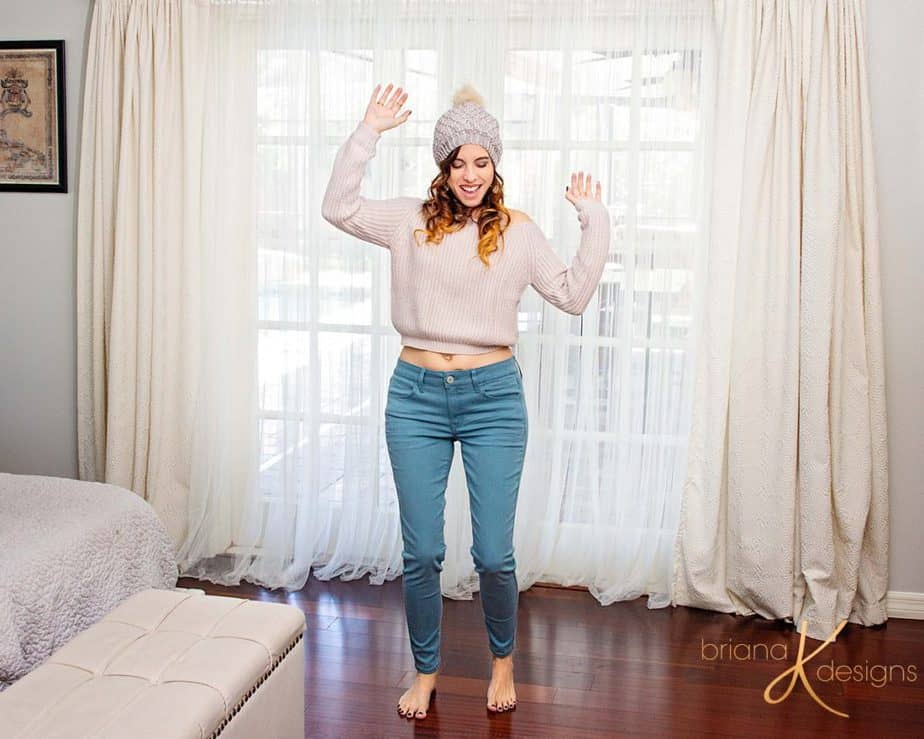
This hat design was so fun to stretch my creative side. And when it came time to take the pattern photos, I spent the morning prepping. Believe it or not, it doesn’t always feel natural to be in front of a camera for me.
But the beautiful thing about technology is, I can be my photographer and snap images in my little world, alone. So when I was feeling a little stiff, I did one of my favorite things and blasted music. A dance party for one? Yes, please.

And let me tell you I have fun just giggling and dancing by myself. I’m going to recommend this to you. It’s life-changing and so essential to keep things light. Think of it as therapy.
Even though I wasn’t sure if any of the images would be good, the point was to take a moment to be in my skin.
And then came the time to transfer the photos into the computer and see if one or two out of a couple hundred might work. At least that’s what it feels like. So many out-takes lol. I was feeling pretty good about accomplishing a task, and then I had a negative trigger.
I hoped someday the things from my past would fade away, but then something small will bring them rocketing back. This one was a mild trigger, but sometimes the mild ones can bring up nasty old scars. This trigger made me question if I should publish these images.
It was my mid-drift. And it’s not that I didn’t think I looked okay, it’s a shame of being immodest. An unfounded, hurtful, cruel humiliation placed on women. This word immodest will make me cringe until I die. I’ve never once heard a man be called immodest, even if he was shirtless.

The memory that hit me was from 2001. I was a senior in High School and working in a business office most afternoons. The only other woman in the office was a front desk secretary, and the men held power. One, in particular, always gave me a hard time. I never understood his motives, but years later, I have my theories.
On this particular day, I came to the office in a very dull, generic, button-up top and black pants office wear. This man stopped me right after entering the door with a disapproving look on his face and said, ‘Raise your arms.’

I was dumbfounded and confused. I slowly raised my arms as he stared at my body. As my elbows met shoulder height, he shook his head, “It’s too short. I can almost see your belly. You shouldn’t be dressed like that.’
I didn’t respond right away, and I felt the heat of shame coming to my face. I did a double check on my ‘mistake’. Had I chosen the wrong outfit? Was I projecting something I didn’t intend? But my belly wasn’t showing; it was sitting at the top of my pants. I pointed this out. But it wasn’t good enough. He simply said, ‘A girl like you shouldn’t dress that way, if you moved your hands higher your mid-drift would show, it’s not modest.’

I felt dirty. I felt ashamed. A girl like me? I was a virgin, and I had only kissed one boy, one. And I felt pretty guilty about that all the time. The adult me would have screamed at that moment. A woman can express herself, and her body, in whatever way she wants. But in this powerless teenage moment, I was questioning all the ‘mistakes’ I had ever made, according to men.
I thought I had chosen the right professional outfit. As I sat at my computer, I felt mixed emotions. I did not believe my outfit was inappropriate in the least. I sat silent, holding back tears, wondering when I would escape this shaming misogyny that seemed to find me every single day I breathed.
‘And then I knew the answer. I even whispered it.
I vowed to be my own boss.’
I was going to become the protector of myself. That moment was only the beginning of a very difficult journey. But as I look at these images that caused all these emotions and feelings to come flooding back; I realized I needed to once again push away the negative programming that was done. There was nothing wrong with these images. Nothing.
Yes, as I was dancing free, my mid-drift is showing, my shoulders are showing, and so is my spirit. And it’s all pretty damn sweet, so who cares. I care less about what others think of my body.
I’ve gotten more and more comfortable in my skin. I’m learning to brush off the suppression and judgment of others. I’m learning how to heal myself as the triggers happen. And to not hide, but be bold enough to be my boss.
And as a boss, I’m here to tell you, be you. Dance like no one is watching.


Check out some of my other crochet hat patterns!
Frost Swirl Infinity Crochet Hat Pattern
Create A Cozy Beanie With This Easy Crochet Pattern!
Ehdc Between Stitches Free Crochet Beanie Hat Pattern
Crochet Hat Pine Free Pattern Cozy & Warm Gorgeous Colorwork
Fair Isle Crochet Hat Free Pattern
Infinity Crochet Cable Swirl Hat Pattern
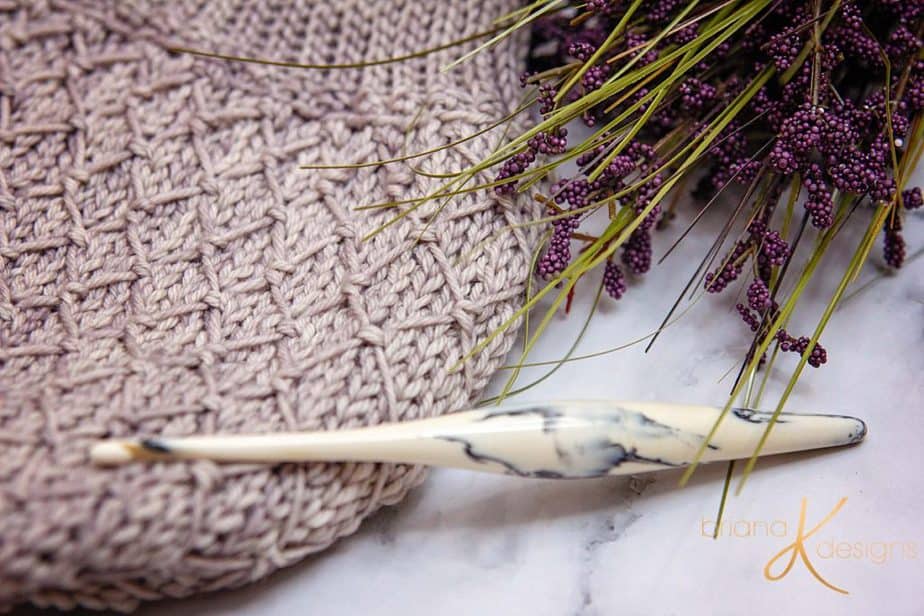
Quilted Lattice Crochet Hat Supplies
• Crochet Hook 5 mm (H), I highly recommend Furls Hook (affiliate link) or a Tulip Rose Crochet Hook (link below). I love both of these.
• Yarn Needle
• Scissors
• Fur Pompom (tutorial on blog)
Yarn:
• Malabrigo Rios in colorway Pearl
Yarn will need to be worked from two balls as one is carried along the front.
Yardage:
• Approx. 300 Yards [ meters] if crocheting back as well.
If gauge is met, other yarns of the same weight can be substituted:
• WeCrochet Swish Bulky
• Cascade Yarns 220 Superwash
Gauge:
• 20 sts and 30 rows = 4” (10 cm)
in sc in blo
Measurements:
• Adult size, brim stretches to
fit 19-23″ heads
Abbreviations:
• blo – back loop only
• ch – chain
• sl st – slip stitch
• RS – Right Side
• st(s) – stitch(es)
• WS – Wrong Side
• yo – yarn over
Skill Level:
•Advanced Beginner
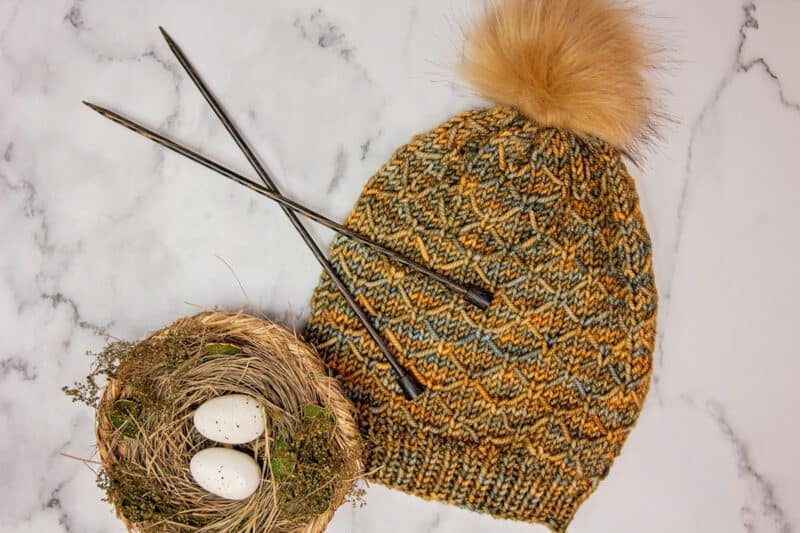
Notes for the Quilted Lattice Crochet Hat
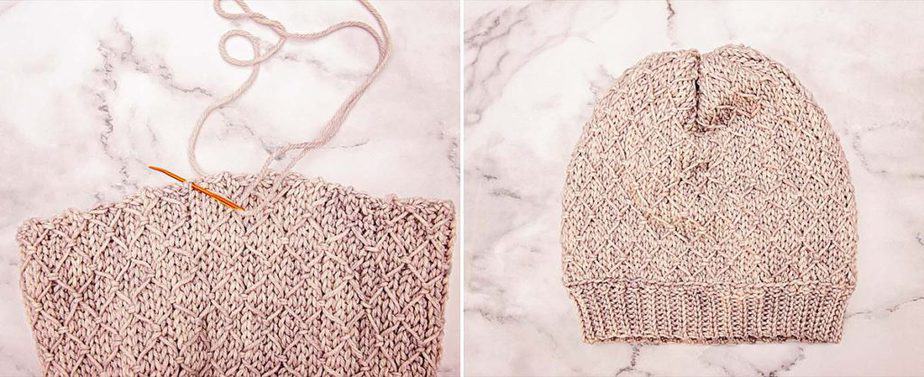
This hat is inspired by a wonderful knit stitch called the Quilted Lattice Stitch, found in Barbara Walker’s famous book, A Treasury of Knitting. It’s a beautiful book full of incredible inspiration. In recent years crocheters have desired to mimic many of these stitches. I hope I have done this stitch justice by doing it in my own crochet way.
-The Quilted Lattice Hat is working in rows and then joined. Once the end is gathered, place a pompom at the top of the hat. A brim will be crocheted on the other end.
-This hat can be worked in one or two colors. Either way, yarn will need to be split into two balls. It’s your choice which look you prefer.
-The chain 1 at the beginning of the row does not count as a stitch.
-The slip stitches are worked in the back loops only.
-Tip: at the end of each row where the second yarn is carried, to ensure tension is loose, giving the edges a tug can help.
Quilted Lattice Crochet Hat Video

Body of Quilted Lattice Hat
| Row | Description | Stitch Count |
| 1 (RS) | Ch 38, working in blo: sl st in the second chain from the hook while also catching the second strand of yarn on the front. For the rest of this row the second strand of yarn will be carried loosely on the front of work, *sl st 5, sl st in next while also catching the second strand of yarn; repeat * across, turn. | 37 |
| 2-3 | Ch 1, working in blo: sl st in each stitch across, turn. | 37 |
| 4 (WS) | Ch 1, working in blo: sl st in first while also catching the second strand of yarn that will now be carried on the back of work for this row (wrong side of work is facing, second yarn will be carried along the right side of work not facing). Sl st 2, *place hook into next stitch while also slipping under the carried yarn from three rows below and catching the carried yarn, sl st 5; repeat * until last 3 sts, sl st 2, in last sts place hook into next stitch and catching the carried yarn, turn. | 37 |
| 5-6 | Ch 1, working in blo: sl st in each stitch across, turn. | 37 |
| 7 | Ch 1, working in blo and carrying second yarn on the front of work: place the hook under the strand carried three rows below, while also laying the carried yarn over the hook to catch it, and then sl st in the blo of first st, *sl st 5, place the hook under the strand carried three rows below, while also laying the carried yarn over the hook to catch it, and then sl st in the blo of next st; repeat * across, turn. | 37 |
Repeats
Repeat Rows 2-7 until the length of your hat reaches desired head circumference (22 total repeats).
Once repeats are finished, loosely slip stitch 72 stitches across one edge of the fabric.
Hat Brim
| Row | Description | Stitch Count |
| 1 | Chain 6, slip stitch in 2nd chain from hook and across. Working in blo: slip stitch in 2 stitches on brim, turn. | 5 |
| 2 | Skip the two slip stitches on brim, in blo, slip stitch 5, turn. | 5 |
| 3 | Ch 1, in blo, slip stitch 5, slip stitch in 2 stitches on brim, turn. | 5 |
| 4-72 | Repeat rows 2-3 along the edge of brim. |
Finishing:
Fasten off yarn leaving a long tail for seaming. The sides will be joined by working through the front and back loops respectively on each side.
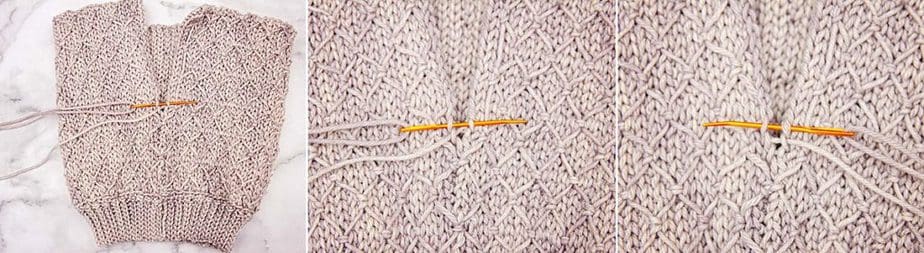
When the needle comes to the center of one of the un-worked strands sitting on your work from the last repeat row, place needle under strand and create a mock-stitch to join the design. Work this method all the way up the hat to the top.
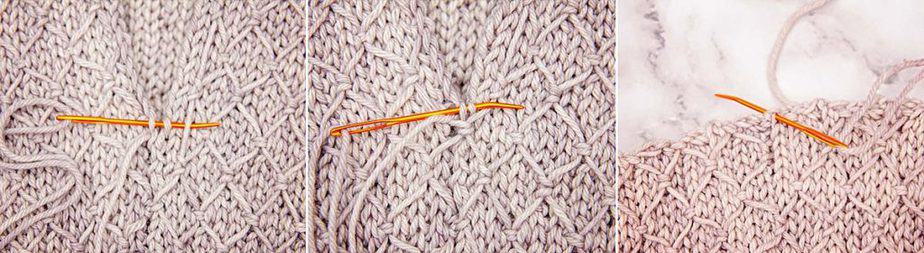
For the top of the hat, loop your yarn around the end of the hat about every few rows. Pull yarn tight to close hat; weave in ends. Stitch pompom to top if desired.
Pompom Video Tutorial
Well, That Was Fun! What’s Next?